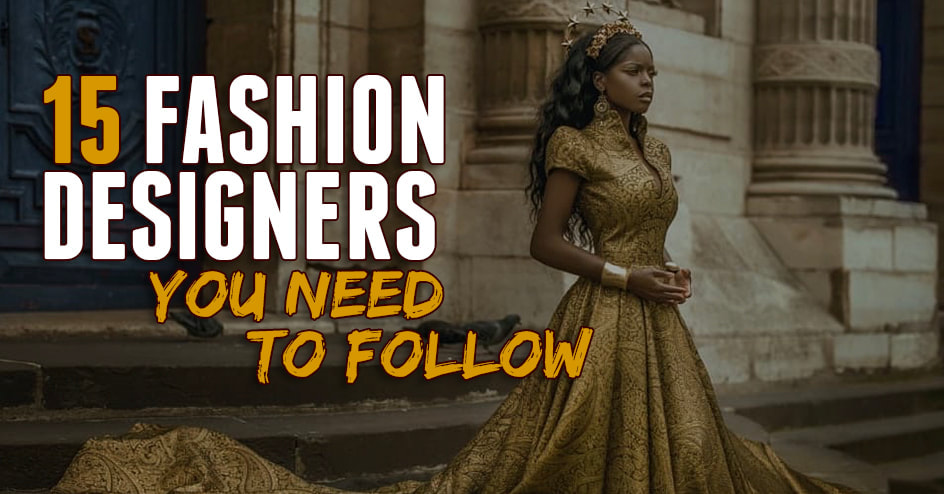
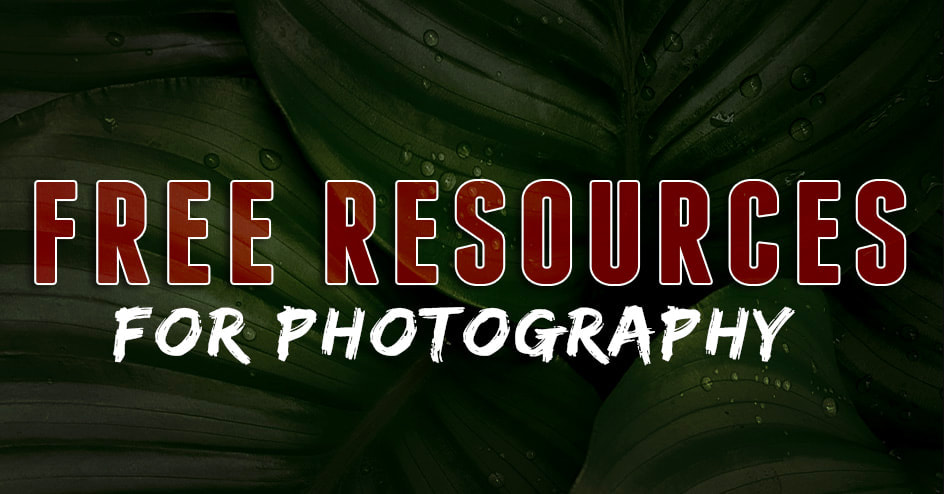
Most Popular Articles


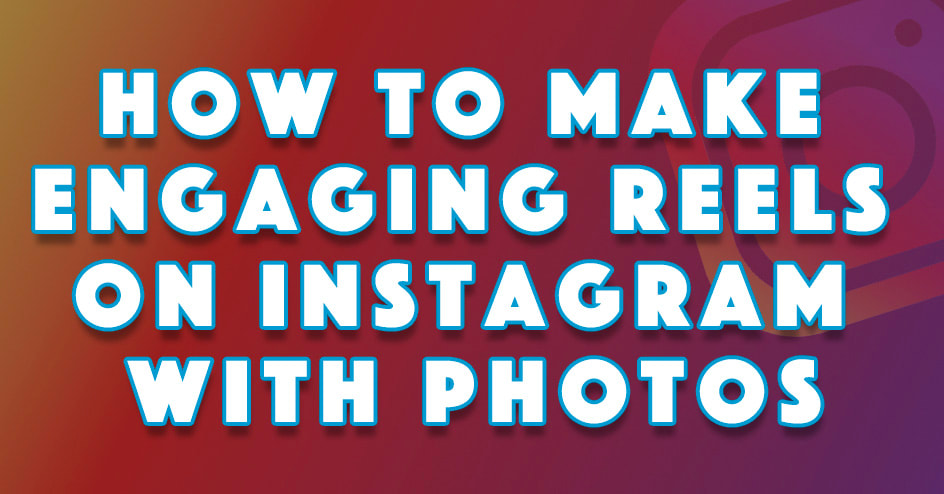 How to make engaging Reels on instagram with still photosThis will be a quick and easy step by step tutorial on how to make an engaging reel on Instagram from your mobile phone just like the example below, perfect for any photographer, artist, or creator who wants to show off their work on Instagram. No getting on camera required. We've all seen them, flipping through reels on instagram and BOOM, an epic 10 second slideshow of beautiful photos with quick and unique transitions synced to the beat of whatever hip new song is trending that week. And if you're like me you think to yourself "how do they sync the photos to the music!?" Well I'm about to tell you. If you haven't used Reels on instagram and you're a creator you are missing out on the biggest source of new traffic there is on Instagram. Period. The unfortunate truth for photographers is that still photos don't even get half the engagement as video. Instagram's algorithm is built that way. They saw the huge success with TikTok and have decided to do the same thing. So think of Reels as the TikTok of Instagram and where all the attention is. If you want new followers, Reels is the best way to get in front of users who aren't already following you. 1. Download CapCutBefore we start you'll need these 2 free mobile apps. (Assuming you already have Instagram) and 13 photos you'd like to use. First app you'll need is CapCut. This is the App you'll use to create your video & no this article is not sponsored. 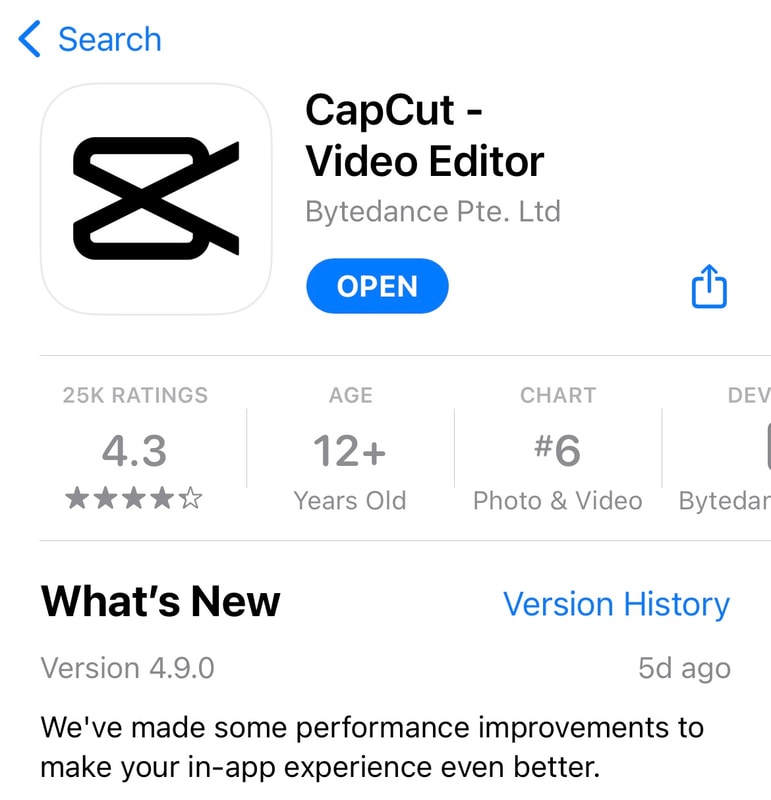 2. Download RepostRepost is an App you'll use to save my video from instagram. Once the video is saved on your phone you can extract the music in CapCut.  3. Save the song on InstagramNow that you have those apps we can get started. First step is saving the audio on Instagram so it's easy to find later when we upload our Reel on Instagram. You always want to make sure you use the audio via instagram because it links that song to your video when you upload it and the algorithm will show your video to more people rather than uploading as original audio. I'll explain. For this specific video we will be using the audio Hipinozze by Counterparty. 1. Type Hipinozze in your search bar on Instagram and tap "See All Results" 2. Under the search bar you will then see "Top" "Accounts" "audio" "Tags" and "Places" You want to click "Audio" 3. Tap "Counterparty" 4. Tap "Save Audio" You'll see why we did this later. 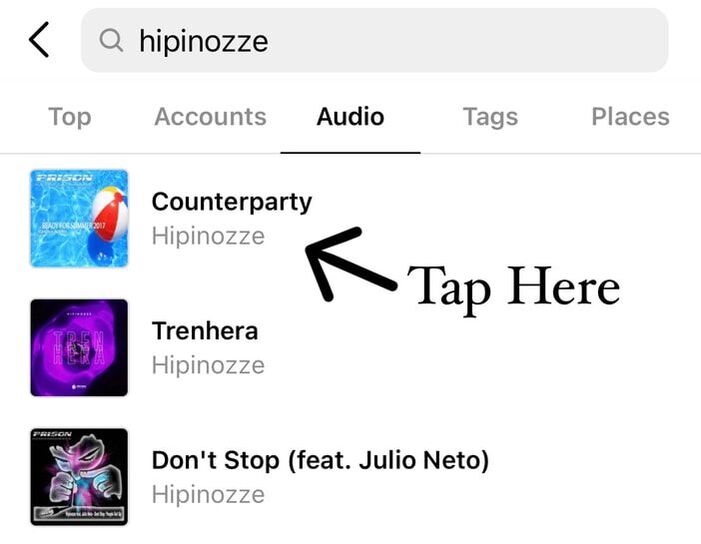 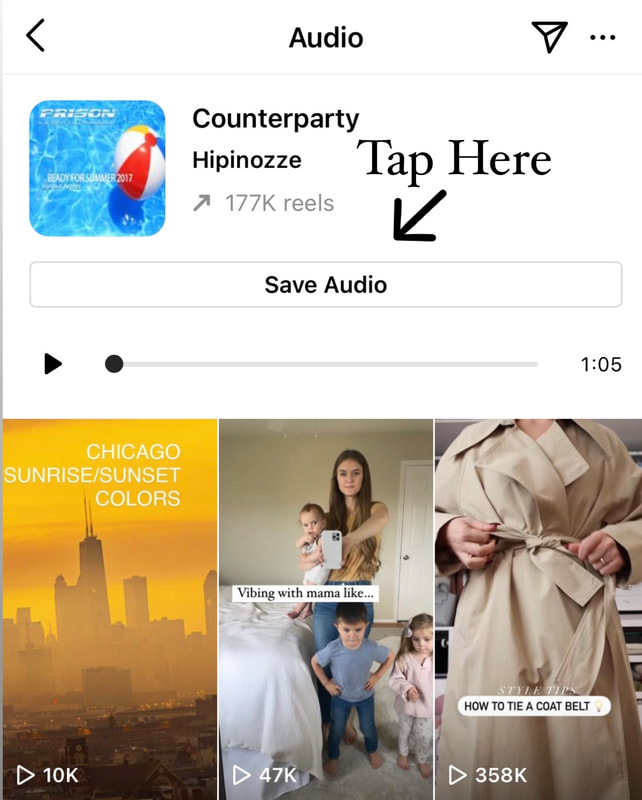 4. Save the videoNow that the song is saved for later you have to save the video so you can open it in CapCut and extract the audio to help you sync your photos. To save a video (in this case we will use mine) 1. Open my Reel HERE 2. Tap the 3 dots in the top right hand corner. 3. Tap "Copy Link" 4. Open the Repost App I had you download 5. The App should open that link automatically. Tap the video. 6. Tap the square and arrow in the top right corner. 7. Tap "Save Video" 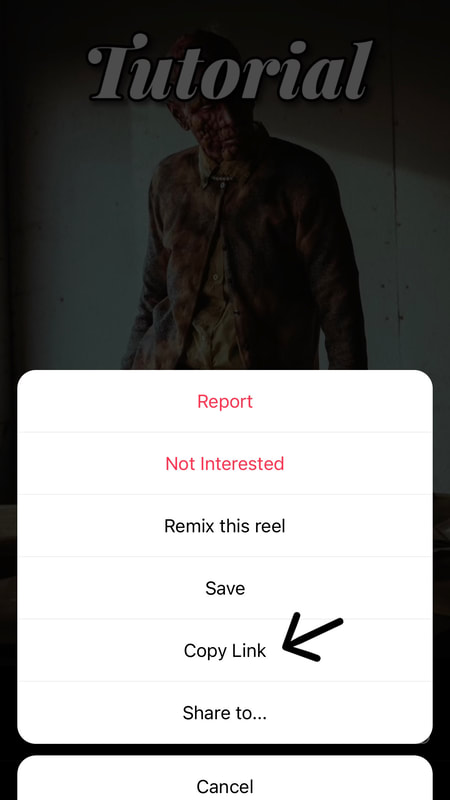 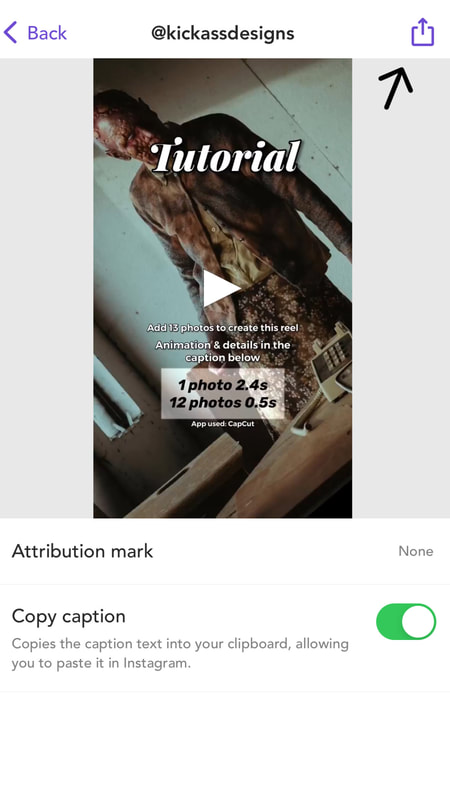 5. Open CapCutFinally we can start creating. 1. Open the CapCut app. 2. Tap "New Project" 3. You'll see "Videos" "Photos" and "Live Photos" Tap "Photos" 4. Select the 13 photos you'd like to use and then tap "Add" 5. Tap "add audio" 6. Tap "Extracted" 7. Select the video you just saved from Instagram using Repost. Should be 9 seconds. 8. Tap "Import Sound Only" & Just like that you have your 13 photos & audio all ready to go. 6. Set the length of each photoNow that we have the photos and audio we need to set the length of time each photo is shown so it syncs with the beat of the music. Luckily for you I've already figured out the timing to make this very simple. Tap the first photo and in the left hand corner you'll see how many seconds it's pre set too. I want to say the preset is 3 seconds. Tap and hold the right handle of the photo and drag to the left until you see 2.4s then tap the 12 other photos and do the same till each photo is 0.5s The last photo should line up perfectly with the end of the song. First photo 2.4s 12 other photos 0.5s 7. Add the animationGreat news! You're almost done! Now that all the photos are synced to the music it's time to add animation to each photo. To add animation: 1. Tap the photo 2. Tap "Animation" 3. Tap "Combo" 4. Tap the corresponding animation I detail below. 5. Make sure the "Duration" is all the way up and you're good to go. Below I will detail what "animation" you should choose for each photo to make it super easy. 1st Photo - Combo - Sway in 2nd, 3rd, 4th, 9th and 13th Photos - Combo - Wobble 5th, 7th and 11th Photos - Combo - Pendulum 2 6th, 8th, 10th and 12th Combo - Pendulum 1 8. Change the format to 9:16This part is totally up to you. If you want your photos full screen you'll need to change the format to 9:16 by tapping "Format" and then tapping "9:16" then tap each photo and using both fingers push your fingers apart and expand the photo to full screen and adjust all pics to the size you’d like. And Just like that you're all done! Now you can export your video as 1080p x 30fps. 9. Upload your video to Instagram as a ReelNow that your video is done and ready to post, open Instagram: 1. Tap the plus sign as you normally would to post. 2. Tap "Reel" 3. Select the video you just made. 4. Tap "Add" 5. Tap "Audio" 6. Tap "Saved" (this is where you'll find the audio I had you save on step one) 7. Tap "Counterparty" 8. Tap "Done" 9. Tap "Preview" 10. Tap the music icon at the top 11. Under Audio Controls you'll see camera audio at zero and Effects is at 100. 12. Under effects you can tap "edit" to line up the song perfectly but you shouldn't have to. Then tap the video. 13. Tap the "Aa" in the top right corner if you'd like to add any text over your video. If not just tap "Next". 14. Tap "Cover" to choose the cover image. 15. Make sure Also Share to Feed is selected. 16. Tap "Crop Profile Image" to choose how it will look on your page. 17. Add the Location 18. Write an engaging caption and throw in 3-5 corresponding hashtags. 19. SHARE and that's it!! You did it! Yay! Say hi on Instagram and let me know if this article helped :) If so I can make more with other songs. Find more Free Resources and tips here. Enjoy your new reel 🔥 
0 Comments
 How to grow your following with Facebook Groups Facebook Groups has to be one of the most overlooked and under valued free ways to multiply your following and double your business among photographers and content creators. As soon as I started using Facebook groups to show off my work my following on Facebook & Instagram tripled and so did my business. In this article I will give you actionable steps on how to grow your Instagram following as well as your Facebook following using Facebook groups. Of course there are countless great ways to grow your following using YouTube, TikTok, and Pinterest but I will just be discussing Facebook groups in this article. How to Triple your website traffic with Pinterest Do followers really matter? Before I explain how to get more followers on Instagram and Facebook you first need to understand why you want followers in the first place. I know to myself and many of you reading this it may seem like a no brainer if your trying to build a brand. But you would be shocked if I told you how many photographers and creators don't even use Facebook or Instagram. Maybe you've tried the social media game and you never saw results so you deleted your account. Well I'm hear to tell you, if your work is good, and you're consistent you should be getting new clients via social media. No question. If you aren't using Facebook to grow your brand YOU ARE LEAVING MONEY ON THE TABLE. Let's look beyond the superficial reason we all want a large following on social media shall we? and instead look at the practical reasons we want more followers and how they correlate with our business. With every new follower comes more opportunity and more potential. I'll explain. 1. Every follower is a possible client. Maybe not today, maybe not a week from now but at some point they will convert. I've had new clients contact me on Instagram and say "I've been following your work for 8 months and I have to work with you! I've been waiting for the right time and I'm finally ready to hire you" Even though that client (like many of my clients) followed me for months they rarely engaged with my posts. This is important to note because it shows me that people are always watching. Don't be discouraged if you're not getting alot of engagement. As long as your consistently posting quality content and not posting drama I promise you someone is planning on booking you as we speak. 2. Followers = free advertising. Think about it, a certain percentage of your followers will always share your content. That's FREE ADVERTISING! It's like having your own little sales team out there constantly promoting you and your work for free! It's really simple, the more followers you have the larger your "sales team" will be. So why wouldn't you want to grow your following? People buy from those they know, like, and trust. Word of mouth will always be the best form of advertising. 3. Brands want creators with a large following. If you're wanting to work with brands the hard truth is they wont even look at your work these days if you don't have a following. Big brands today look at following first and then quality of work. Sadly if it's between you and another content creator of equal skill the one with the larger following will always get the job. I mean it makes sense from a marketing stand point. As a brand I want to go with the photographer with the biggest following because that means my products will be seen by the most people. And that means more sales. 4. Free Stuff. Who doesn't like free stuff? I'm what is considered a "micro influencer." Someone with 5,000 to 40,000 followers and over the years I've leveraged my following for free massages, studio rentals, discounts on hotels, free coffee, free sun glasses, free jewelry, free float tank therapy, free acupuncture, free liqueur, free laser treatment, and the list goes on. Even if you only have 4,000 followers you can leverage your following for free stuff as long as you have good engagement. Fact is influencer marketing is the future of advertising. Brands know they can pay you far less than they would on traditional adverting and still get more value. It's a win win for everyone. How to use Facebook groups. Now that you hopefully understand the value in building a following on social media and why it's important, let's talk about how you do it using Facebook groups. It's actually very simple. This works best for photographers and content creators. I will use myself as an example and tell you exactly what I do. Every time you post a new photo or photos on Facebook like you should be doing from your personal page (That's important) I want you to share that post in every Facebook group you can find that is related in any way to that post. For example: If I posted a really stunning photo of a humming bird I would then search Facebook groups for any group that is not only related to photography, but also birds, hummingbirds, wildlife, or location specific. For example, when I shared my humming bird photos to the Facebook groups: Oregon City Chit Chat (a local group), Photoshop and Lightroom, Northwest Creative Collective, The Hummingbird Whisperer, Birds, PNW Photographers, Fstoppers, Hummingbirds Anonymous, and Birding Oregon. Example shown below. 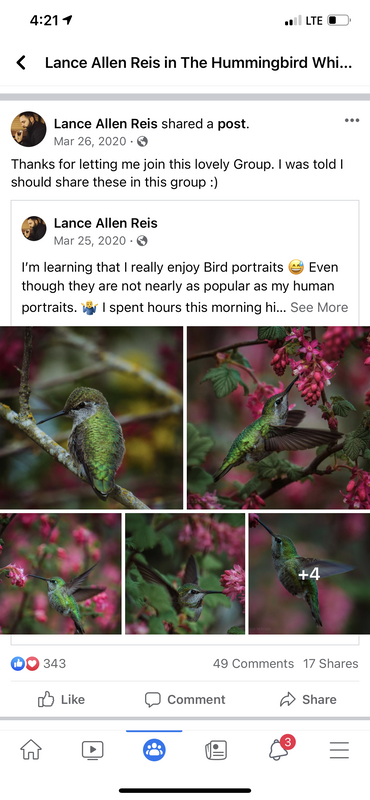 As you can see just in the group alone my post got 343 likes, 49 comments, and 17 shares. and that's not counting the engagement from the group members who clicked the post and engaged with it directly from my page. I know those aren't crazy numbers but this is a small example of how a post can lead to many new followers on Facebook and Instagram. What you don't see in that screenshot is the link I posted to my Instagram on the original post. And that's how I convert Facebook followers to Instagram followers. Before I move on to another example there are a few important things to note: 1st. Make sure your account is public. You can't share your post in groups if your account is private. I'll save the details for a future post but I can assure you without question a post on your personal page will always get far more engagement than if you post on your business page. If you take anything from this article it's this: You will be far more successful putting all your effort into growing your personal page instead of a business page. Free engagement on a business page is absolutely awful and not worth your time. The goal after all is to get the most eyes on your work as possible so MAKE YOUR ACCOUNT PUBLIC. 2nd. Read and follow the rules of the group. Every group is different. Rules to lookout for are as follows: Rule #1 Some groups don't allow you to share a post in the group from your page. They might require you to post straight into the group. No biggie, just make sure and check if they have a limit on how many photos you can post at one time. Some only allow 1-4 in one post. Rule #2 Some groups don't allow links. So if you share a post from your personal page and you linked to your Instagram they may delete the post. For groups that don't allow links just say something like "@kickassdesigns on insta" in the caption. It is your job to read and follow the rules of each group! 3rd. Don't waste your time with groups that have little to no engagement. As shown below when searching for a relevant group to join only join groups that have 40K members and up. So out of the options below when I searched birding I would only join "Birds" and "Hummingbird Anonymous". After joining a group and being approved immediately check the engagement of the group. If there is alot of posts but no one is engaging with the posts leave the group and don't bother. 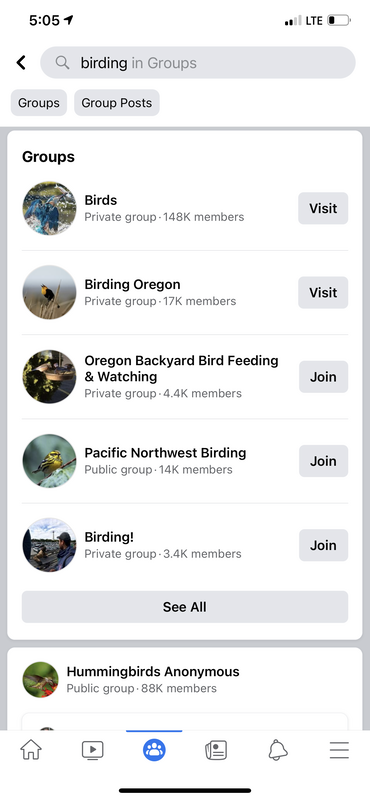 With all that in mind here's an example of how a post can go viral when a post is shared in the right facebook groups. The below post did good on my personal page but only hovered around 500 likes, 150 comments, and 300 shares until I shared it in the following groups: Oregon City Chit Chat (a local group), Photoshop and Lightroom, Northwest Creative Collective, PNW Photographers, Fstoppers, Art of Portrait Photography, Crisp nights & Halloween frights, I love Halloween, Extreme Halloween, Autumn fall and Halloween, This is Halloween, Cosplay, Spooky weird and cool, Amazing Cosplayers, Bette Midler Fans, Cosplayer Nation, and Mommy Needs a Vodka. I really want you to think outside of the box. Notice how I didn't just share the below post in a cosplay group and a photography group and call it good. The key is joining and sharing in any group that's relevant. So What's relevant to my Hocus Pocus photos? Cosplay, Halloween, Autumn, Spooky, Photography, Portraits, Fall, Family, kids, Etc. So I searched all those key words in Facebook groups and joined all the ones I found that had good engagement. Needless to say that post alone got me countless new followers on Facebook and many converted to Instagram. 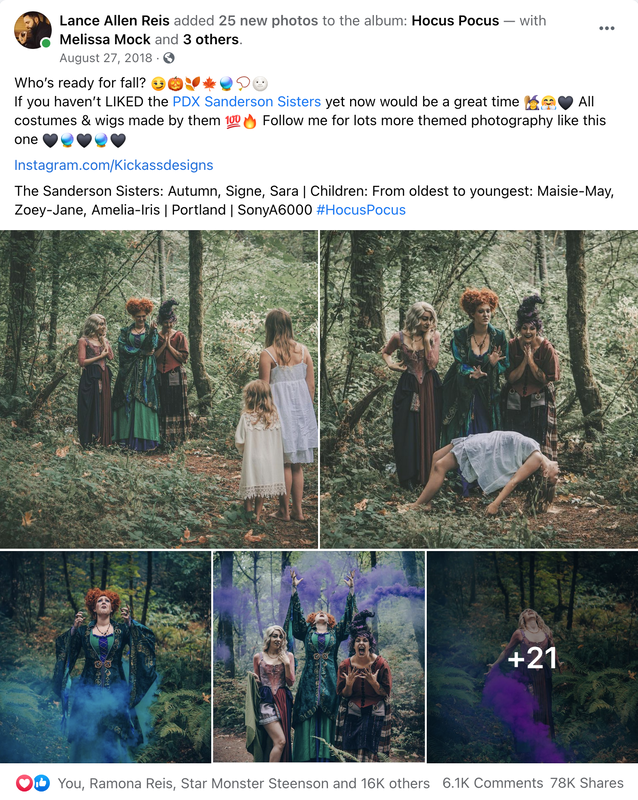 I have gone semi viral a few times thanks to this method and I promise you can too if your work is good and you follow the steps above. Another example: Let's say you're a landscape photographer and you shot a stunning photo of Mount Hood. Keywords I might search for in facebook groups are: Landscapes, PNW, Oregon, Photography, Hiking, Explore, Travel, Mountains, still life, nature, adventure, vagabond, Etc. Another reason to share in Facebook groups, you never know who's in them looking for exactly what you have to offer. I shared a Photoshoot I did of a kid as Joker with batman in a group and the owner of Boredpanda saw it and wrote an article about the shoot and shared it to their massive audience which led to another article written by a Canadian news channel CTV and my local news. My last tip: To keep your post showing up in the feed reply to every comment. But leave at least 45 minutes between each reply. and when you hit reply, type your comment and then click cancel, you'll then see a message that says "you're no longer replying to blank if you continue what you write will appear as a comment on your post." then click continue and post the comment. Facebook views this as a new comment each time and thus repopulates your post in the feed each time. ;) I hope this article has helped. I'd love to hear from you in the comments below. More information on how to grow your Instagram Following HERE. 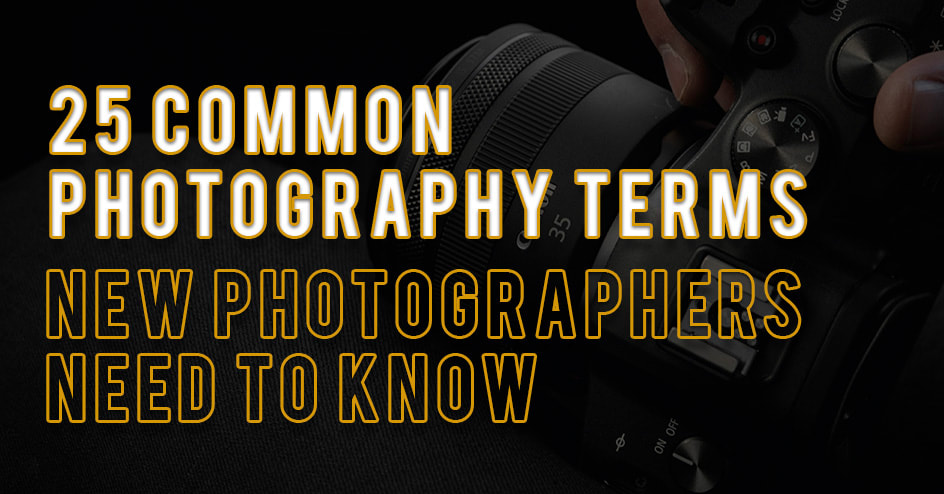 25 Common Photography Terms New Photographers Need to Know If you're anything like me, the first thing you'll do as a new photographer is watch countless YouTube videos to learn how to take that perfect shot, and although that's great, you'll hear words like “shutter speed,” “aperture,” and “ISO” thrown around and it can get really confusing really fast. If you have ever found yourself feeling confused among your fellow photographers you have come to the right place. Today I will be defining all the most common photography terms that you need to know before you can grab your camera and head out to capture some kickass photos. Now before you get overwhelmed just remember rules are meant to be broken and you can absolutely still be a great and successful photographer without knowing all of these terms. Hell, I didn't know half of these terms for the first 3 years of my photography journey. 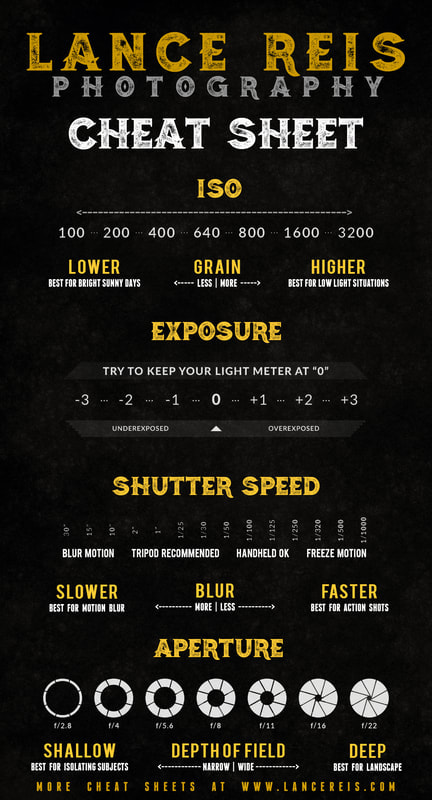 1. Aperture or f-stop Considered one of the three pillars of photography—shutter speed and ISO being the other two—aperture refers to the opening in a lens through which light enters the camera. Meaning, if you want to capture a brighter photo, you will have to increase the aperture. And if you are aiming for a picture with less amount of light, you can use a smaller aperture. Aperture not only affects the amount of light in the photos, but it also controls the depth of field (we will discuss this in detail later). While a wide aperture gives you a blurred background and shallow focus, smaller apertures work well for sharper images. Additionally, an aperture is measured in “f-stop” or “f-number”—the letter “f” appears before the number. The small numbers represent a wider aperture, and the large numbers represent smaller apertures. So, f/2.8 will give you brighter photos and a blurrier background than f/11. For example f/2.8 is shown below.  Photo by Lance Reis 2. Aspect Ratio Simply put, the aspect ratio is the relationship between your image’s width and height. This is how aspect ratios are written: x:y (‘x’ stands for the width and ‘y’ for the height). While the aspect ratio might not seem important, it can immensely impact your photographs. If you change the aspect ratio, it will affect your subject’s position in relation to the sides of the frame. Most of the cameras can capture images in 1:1, 3:2, 4:3, and 16:9 aspect ratio. While 1:1 is perfect for capturing square photos that you can post on social media platforms like Instagram, 16:9 is commonly used to capture videos. Pro Tip: Don't use a 1:1 crop on Instagram, instead crop your photos to 5:4 for Instagram. Perfect for vertical portraits. This will take up the most space on your Instagram viewers feed and thus will standout more. :) More on How to grow your Instagram following HERE 3. BokehBokeh refers to those out-of-focus orbs of light in the background of an image with a subject in the foreground. Like the image below. That is called the bokeh effect, which is also the most used in camera effect in portrait photography. Bokeh comes from a Japanese word meaning “blur.” This blurred background shifts the focus of the viewers towards the subject—the background blur results from the shallow depth of field, which is created using a wide aperture. 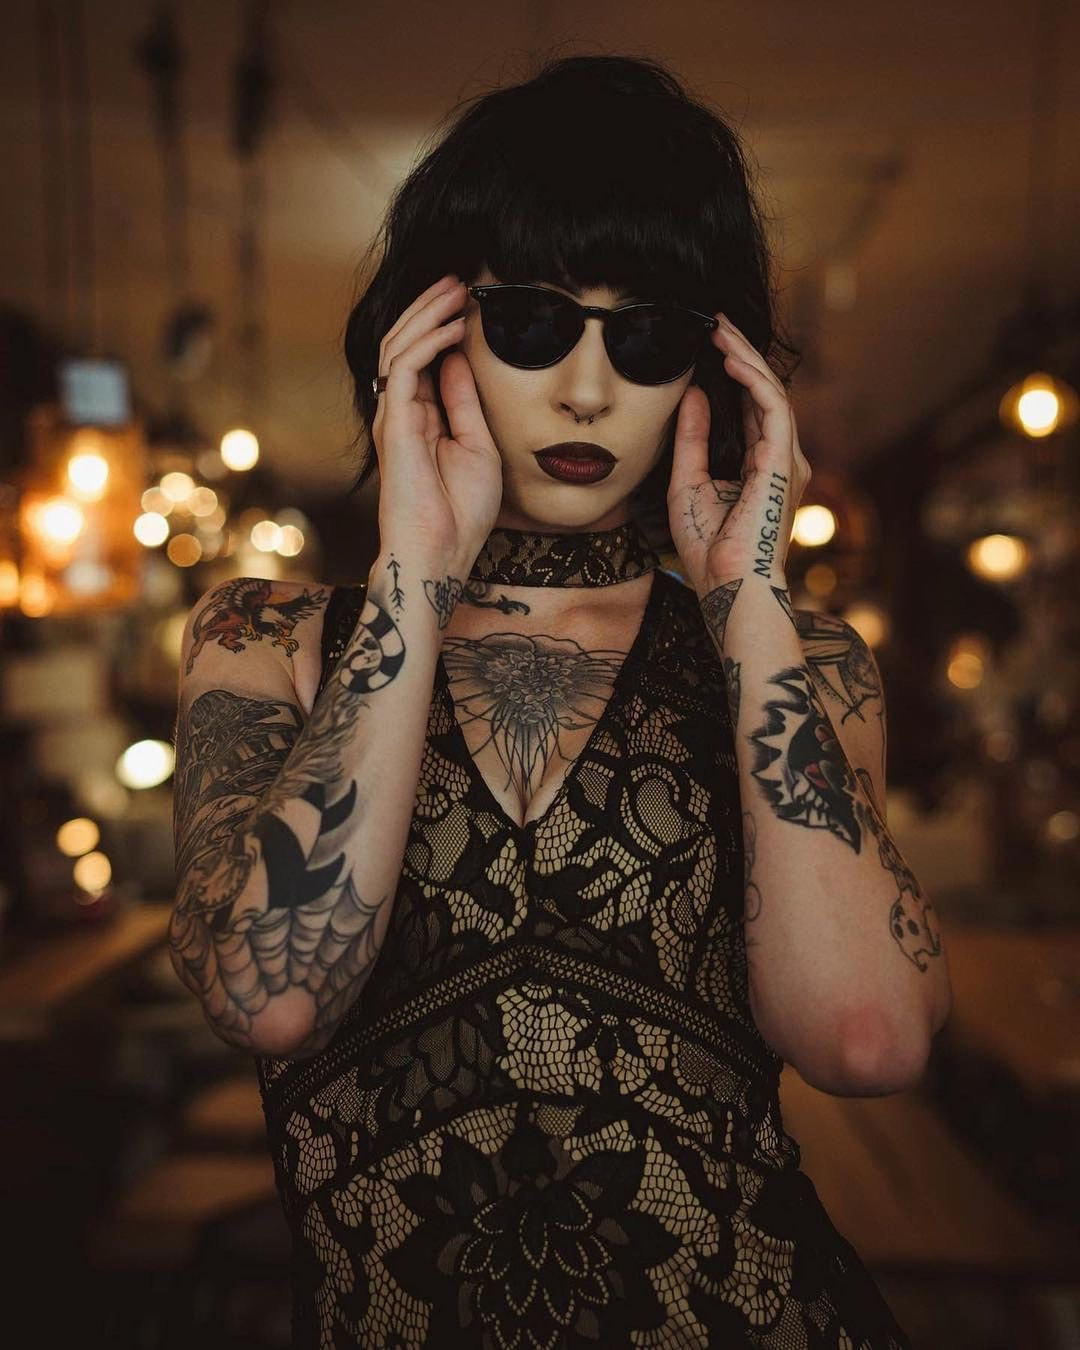 Photo by Lance Reis 4. Burst Mode or Machine gunningYou might be aware of this feature as it is present in iPhones too. Burst mode or "machine gunning" as it is known around my condo is a camera function where you can capture a series of photos in quick succession. All you need to do is hold the shutter button down, and the camera will shoot continuously until it can’t process images anymore. If you've ever used this feature you'll understand the name. This function is useful when you are trying to capture a fast-moving subject or short-lived candid moments. Photographers who cover sports events or wildlife commonly use this setting to get the perfect shot. This is how I achieved the below image. 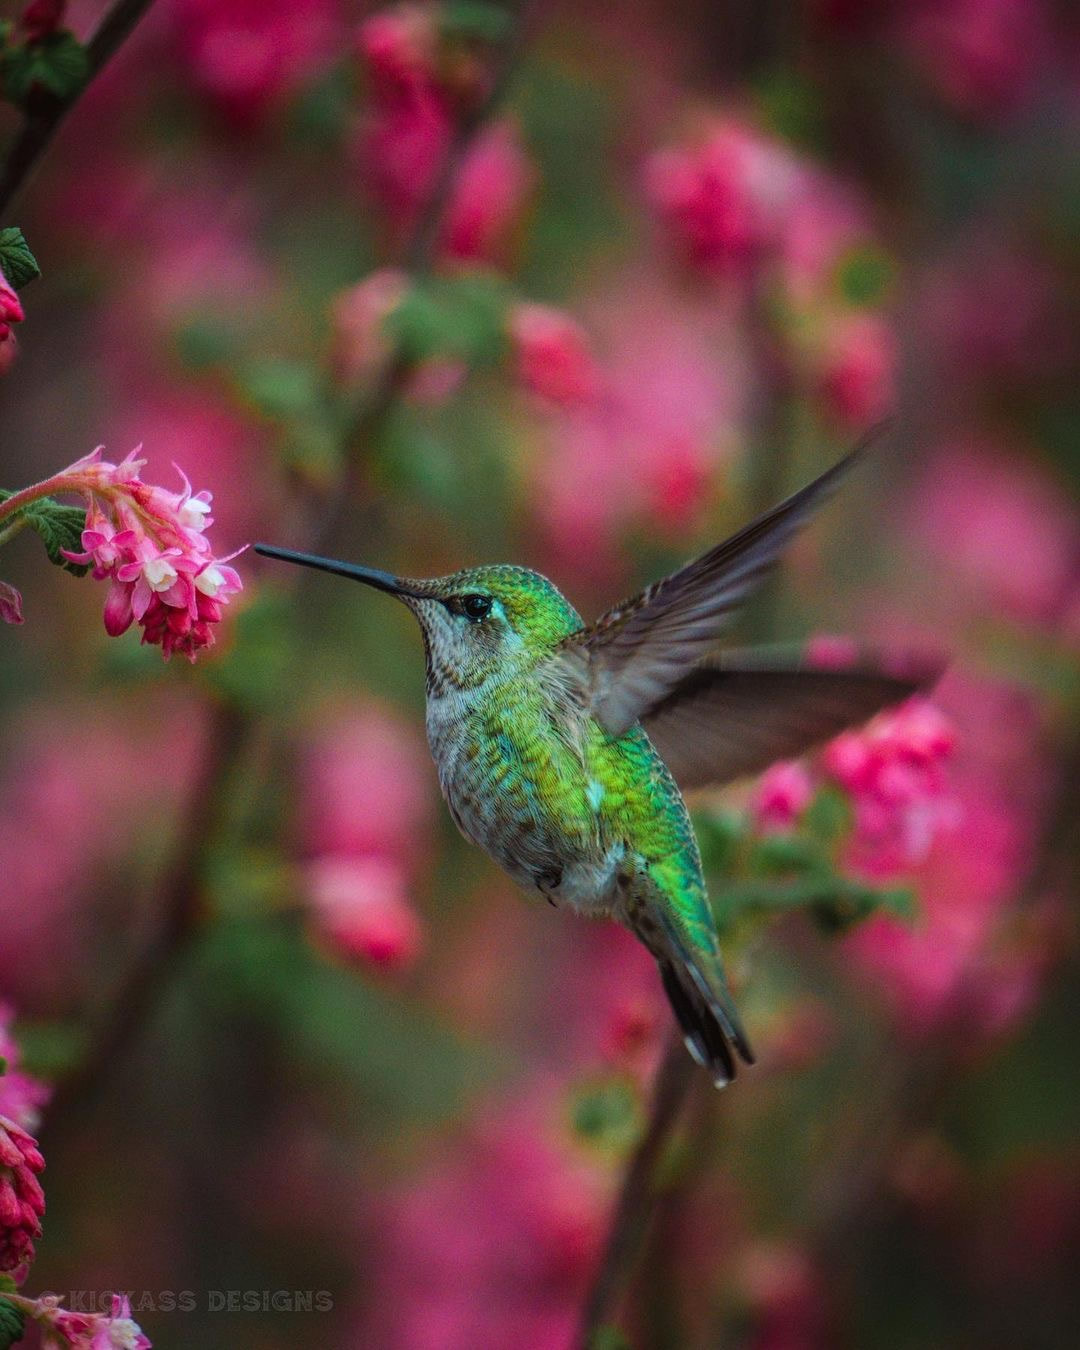 Photo by Lance Reis 5. Depth of Field (DoF)Depth of Field is the range of distance that appears sharp or the area in the image that is in focus. While the shallow depth of field is best for portrait photography, where we do not want the background to be in focus, landscapes look better with a larger depth of field as the entire scene is in focus. Like the image below. But remember that the transition from in-focus to out-of-focus is gradual. 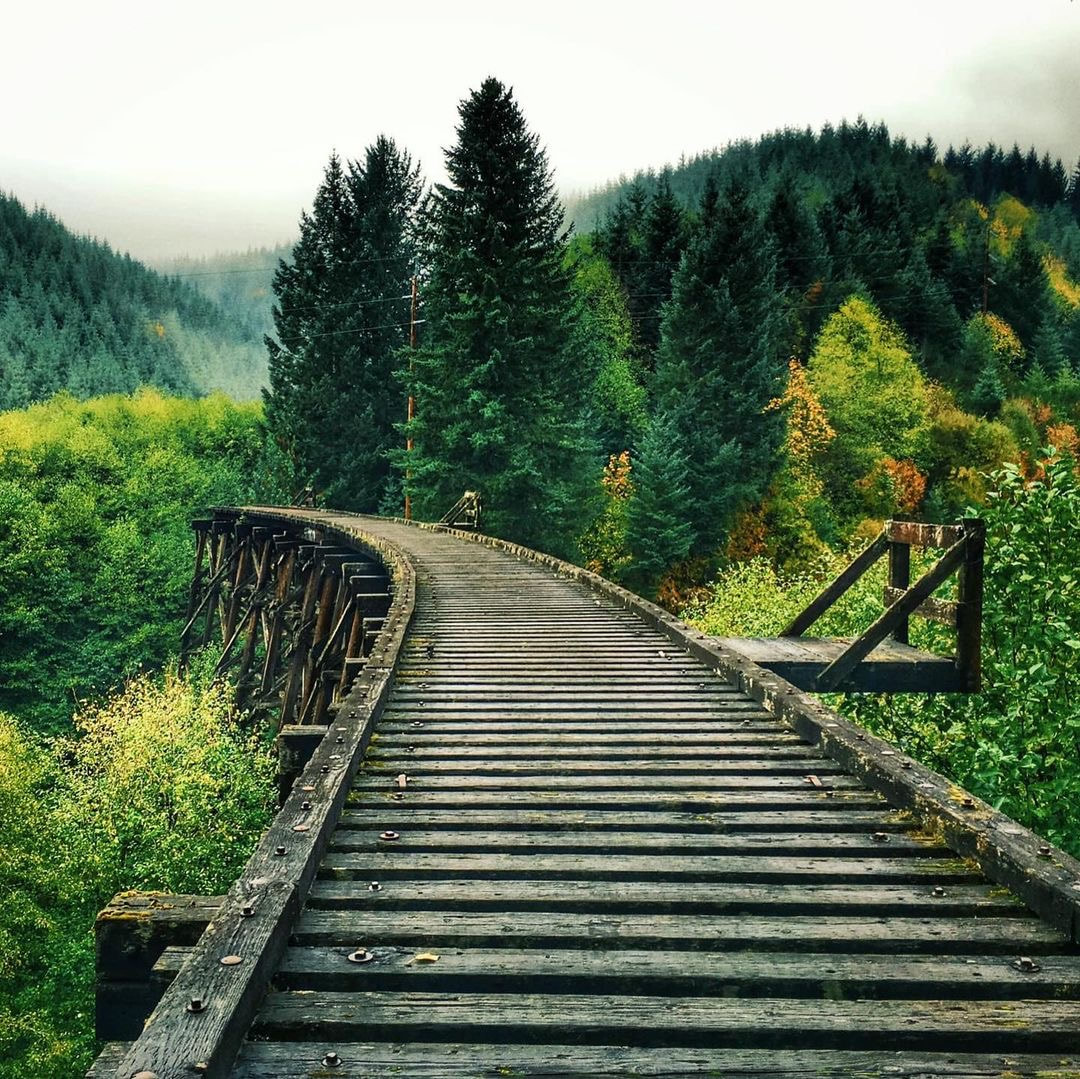 Photo by Lance Reis 6. Digital Vs. Optical ZoomDigital and optical zooms are the two primary ways of zooming in photography. Optical zoom requires changing the camera’s lens to get a closer view of the far-away object. Digital zoom, on the other hand, leverages magnification technology that enlarges a specific area of the image. In optical zoom, the focal length increases; thus, the apparent proximity of the image changes. In other words, the lens moves away from the image sensor, enlarging the desired section of the image. Whereas digital zoom enlarges the pixels and crops out the rest of the image, thereby magnifying the subject. 7. ExposureExposure refers to the overall brightness and darkness in your photograph. The three elements that determine the exposure value are ISO, aperture, and shutter speed. An image can either be overexposed (usually due to harsh sun and natural light) or underexposed. (Usually due to low light situations.) A picture is overexposed when its highlighted area is unreadable or washed out, and it is underexposed when the information in the shadows is missing—the concept is pretty much the same. 8. Exposure CompensationEvery modern camera and cell phone can automatically control the exposure settings. When in a low-lighting area, the camera increases the brightness on its own, and vice versa, so you get a decent picture. However, cameras can be a little aggressive while doing this, which results in an overexposed or underexposed image. This is where exposure compensation comes into play. This means the photographer takes control and overrides the camera’s automatic settings. It is for this reason why I always shoot in manual mode. I prefer to manually maneuver the brightness to achieve my desired result.  9. File FormatIn digital photography, pictures are stored as digital files. The three main types of files are TIFF, JPEG, and RAW. The choice of file format can impact the quality of your image. Besides, the file format should be decided based on the kind of post-processing you require. I recommended always shooting in RAW as this will give you the most control over your photos when editing. 10. Focal Length The focal length can be defined as the distance between the optical center of the camera’s lens and its sensor. The camera lens mentions the information about its focal length. As a photographer you need to know the focal length as it determines how much space in front of you can be captured. Example: A 15-30mm lens is considered a wide angle lens and will be able to capture more of what's in front of you. Great for tight spaces like indoor photography. On the flip side a 85-100mm + lens will capture far less of whats in front of you and far better for outdoor shooting.  Photos by Lance Reis 11. Prime A prime lens has a fixed focal length, such as 30mm, 50mm, or 85mm. This is different from a zoom lens, which can move between different focal lengths such as a 50-200mm. A prime lens will always be more expensive but that's because in most cases a prime lens will produce a sharper image than a zoom lens. 12. Flash Sync Flash sync is used to synchronize your flash and the shutter release to illuminate the subject at a specific time. Usually, the flash fires at the beginning of the photo but with flash sync, you can manipulate that and adjust it to whenever you want the flash to fire. 13. Hot ShoeA hot-shoe, or an accessory shoe, is simply a metal bracket on the top of your DSLR where you can connect external devices, such as off-camera flash units, a mic, or a bigger screen . A hot shoe is only found on advanced compact digital cameras and Digital Single Lens Reflex cameras. 14. ISOUsing ISO, International Organization for Standardization, you can adjust the brightness and darkness of your images. The higher your ISO, the brighter your pictures will be. That said, if you increase the ISO, it will have some other consequences on your image—too high ISO can result in a grainy image. Therefore, I advise you only to use ISO to brighten your images when you cannot do so using shutter speed or aperture.  Photo by Lance Reis 15. Long ExposureLong exposure photography leverages the low shutter speeds to capture unique-looking images. When the shutter speed is decreased, the moving elements in the image are artistically blurred to create a fascinating picture. The path that the moving elements take becomes visible in long exposure photography— Anything producing light will leave a trail, and waterfalls appear magically smoother like the image below.  Photos by Lance Reis 16. ManualIn the “auto” mode, your camera adjusts all the settings, and all you have to do is press the button to capture the image. But in manual mode, you get full control of all the settings on your camera— for example you can modify the ISO, shutter speed, and aperture. Don't be intimidated by this. Learning how to shoot in manual mode from the get go will set you up for success and give you a leg up on your competition. 17. Full-frame / crop sensor There are two types of cameras: full-frame and crop sensor. The sensor of a full-frame camera is equivalent to a 35mm film camera. A simple way to determine whether a DSLR camera is full-frame is by using the same 50mm lens on both a film camera and on the DSLR. Look through the viewfinder: does the focal length appear the same through both cameras? If so, the DSLR is full-frame. Best camera for beginners on a budget. A crop sensor is smaller than a full-frame, which means that the sensor is actually cropping the edges of the frame. The same 50mm lens on a crop sensor will show a more zoomed in version of the same scene. This means that wide-angle lenses will be slightly less wide when used on a crop sensor camera as opposed to a full-frame. Because full-frame cameras have larger sensors, they often perform better in low-light conditions. On the other hand, crop sensor cameras are often less bulky and less expensive than their larger counterparts. 18. NoiseContrary to what a commoner would think, noise refers to a veil of grains in the photograph that obscures the details in a picture. It is similar to the noise or a “hiss” sound in audio recordings even when there is no background noise in the empty room. Though there is some noise in every image, pictures with higher ISO speeds have a considerable amount of noise or grain. To much noise or grain can destroy a photo but try adding a little bit in post for a more grungy look. 19. RAW RAW is a digital image file that you store either on your camera or memory card. It is the file type that is entirely unprocessed and uncompressed. RAW images have a higher quality which makes them ideal for editing. But RAW files are very large, require special software to open, and take up a lot of space on your hard drive. As I said above, I always shoot in RAW because it gives me far more control editing the shadows and highlights in post. 20. Shutter SpeedShutter speed is the amount of time the camera’s shutter opens and exposes light onto its sensor. So, when your shutter speed is slow, your camera is spending more time taking the picture, which results in the motion blur effect as I pictured above. Alternatively, if you increase the shutter speed, you can freeze motion as pictured below. Shutter speed is measured in fractions of a second—¼ would mean a quarter of a second.  Photo by Lance Reis 21. Shutter Release The shutter release is simply the button of the camera that you press to take a picture. When the button is pressed, the camera’s shutter opens to capture the image and then closes. 22. Mirrorless A mirrorless camera is a type of camera that works without a reflex mirror. Unlike traditional cameras Light passes through the lens directly to the digital sensor, which then displays your image on the camera’s LCD screen, allowing you to adjust settings and preview your image before its shot. Benefits of going mirrorless include: More compact and lightweight, Electronic viewfinder (EVF), Image stabilization, Silent, and a Higher shooting speed. 23. Time Lapse Time-lapse photography refers to a sequence of photos captured over some time. The images are later compressed into a video and allow us to see the beautiful changing of the scene faster. For best results, the camera is mounted on a tripod so that it can remain undisturbed for a longer period. 24. Electronic Viewfinder (EVF) When the light passes through the lens of a mirrorless camera, it appears directly onto the image sensor, offering a live view which then displays on the rear LCD screen. This image preview allows you to adjust settings like exposure, brightness, saturation, and contrast before snapping your photo. 25. White BalanceWhite balance is used to balance the color temperature in the image so that it does not appear unrealistic. In the process, an opposite color is added to the image to make it look natural. With the correct white balance, the white areas of your image will appear white rather than looking blue or orange. I however prefer a warm tone to my images so I adjust my white balance to be warmer in camera with that in mind. As shown in the image below. How you want your tones is totally up to you. Once you have thoroughly learned these terms, you will not feel lost when someone uses them and as soon as you put them into practice you will be well on your way to becoming a professional photographer!  Photo by Lance Reis 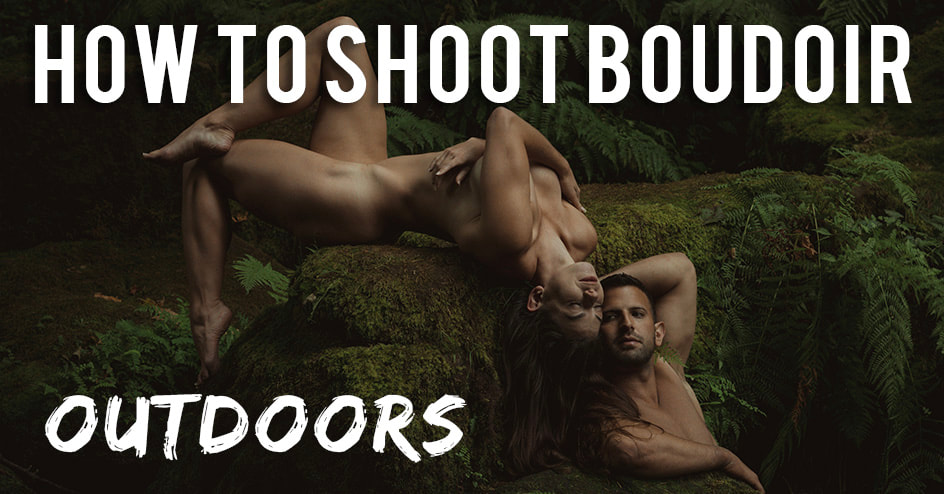 A majority of my female clients hire me for my outdoor boudoir photography so I thought I would give you guys some tips on shooting nude in nature without a flash or reflector. These tips will mainly be focused on photography but I plan on writing another article on how to prepare for an outdoor boudoir photo shoot for clients & models. In this article I'll discuss 6 outdoor boudoir photography tips on using natural light, choosing a location, evaluating the location, timing, making your clients comfortable, and what to bring. 6 Tips for Boudoir Photography, Outdoors. 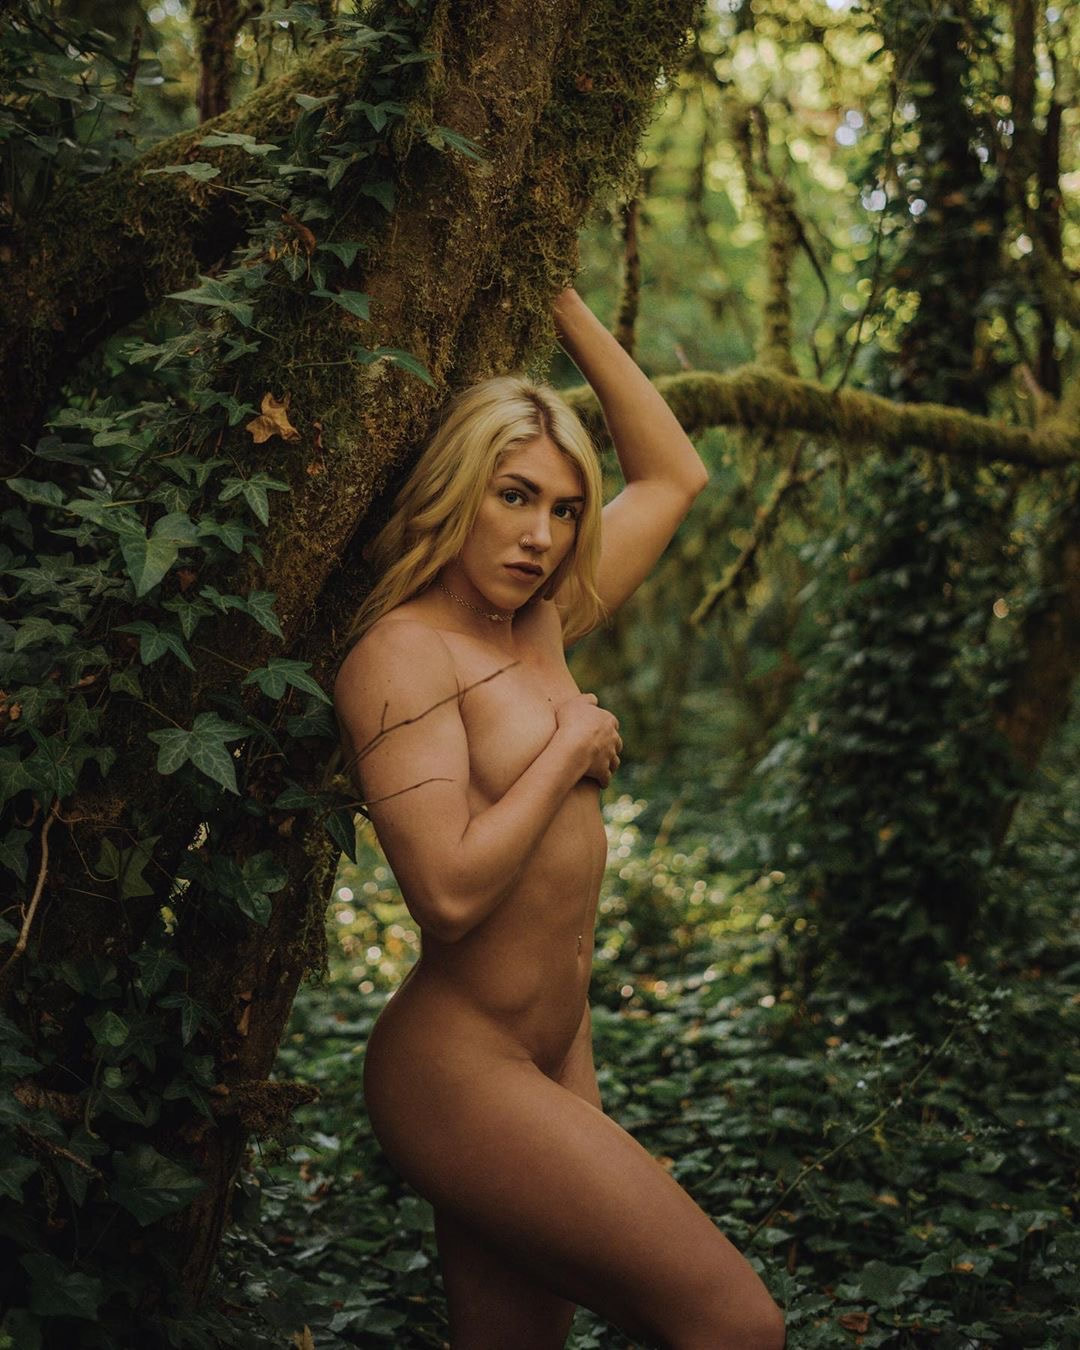 Model: @tonedandtiny on IG Tip #1 Location Okay so you know you're shooting outside but where? You will want a beautiful location to use as a backdrop. For outdoor boudoir I consider the location as the 2nd subject. It's just as important as the posing of your subject. I will admit I am spoiled living in the Pacific North West as we have the greenest most lush forests in America, waterfalls, rivers, beaches, and mountains but no mater where you're located I promise you have nature somewhere near by. Look for a location that will also be secluded. Find my tips on Location Scouting HERE 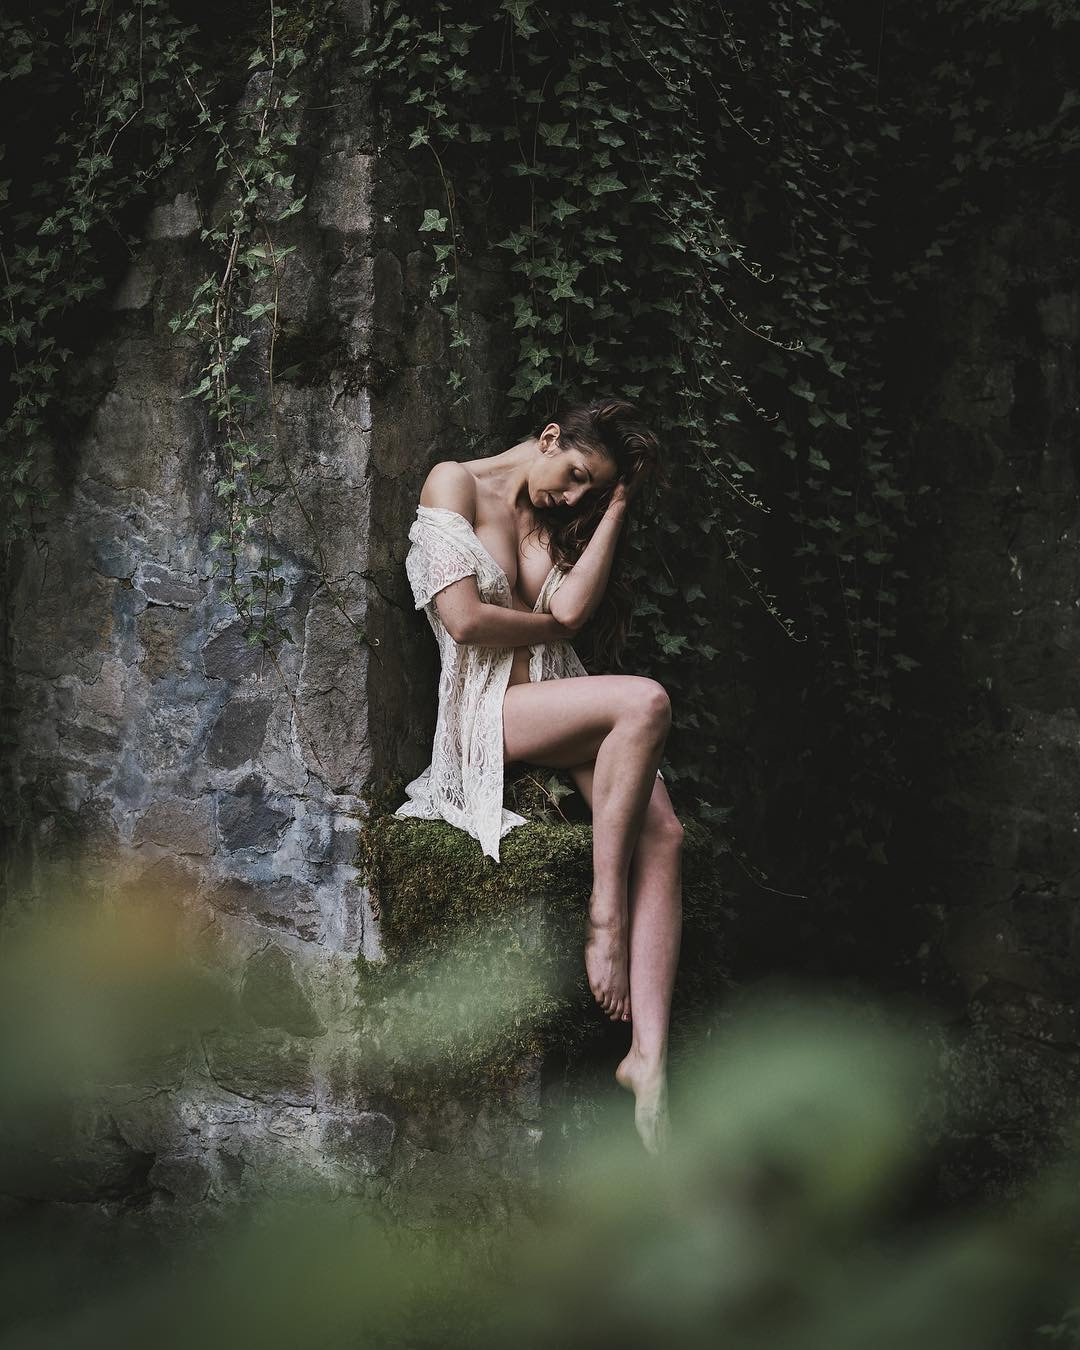 Model: @shawnna.lee on IG Model: @shawnna.lee on IG Tip #2 Evaluate the Location Now that you've decided on a location do your best to evaluate and prepare. It's always a good idea to visit the area before meeting a client there. Be aware of any obstacles or poison Ivy. Be aware of the weather and temperature. A desert location, mountain location, or beach location will all have different weather and temps. Is your subject posing in water? How cold is the water? Could be a hot day but the water might be freezing. Prepare for that. What will the lighting be like at the time of day you're shooting? This will make a huge difference. Where will the sun be rising, where will the sun be setting. I use an app called PhotoPills to know ahead of time the direction of the sun at a specific location. 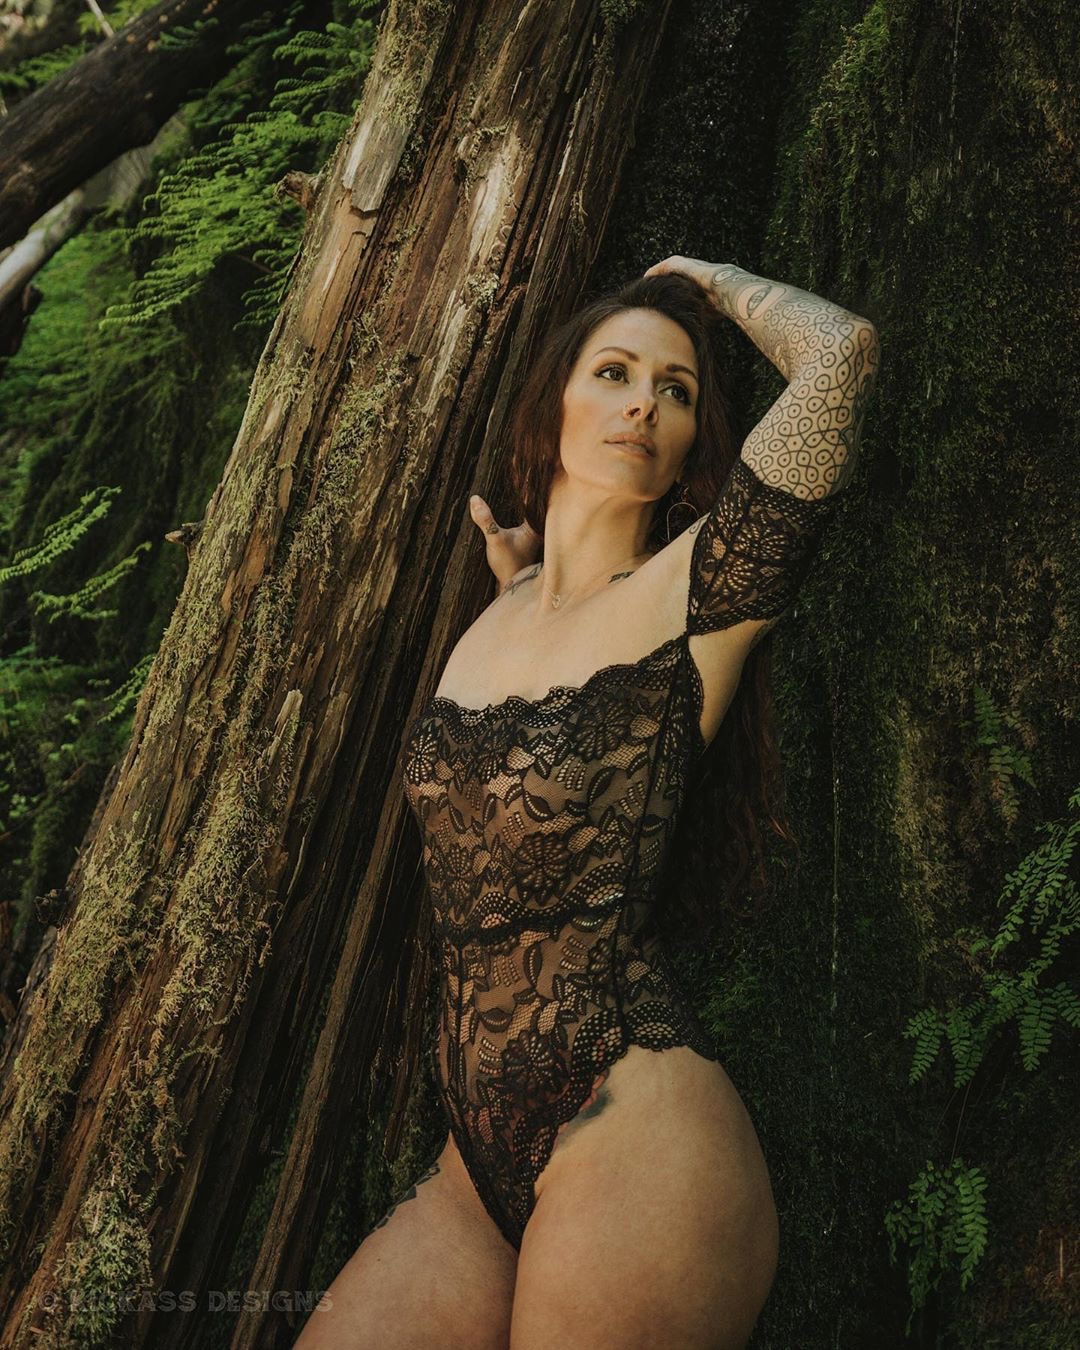 Model: @becka.888 on IG How popular is the location? Know the up and down times. Maybe you're shooting at or near a popular landmark or in a national park. For an intimate shoot like this you will want somewhere as secluded as possible. If it's a popular trail sometimes off trail is best. How long is the hike from the car to destination? You should always know this and prepare accordingly and make sure your client knows what to expect. Of course the closer to the car the better in most cases. Be aware of parking fees and road conditions. Will the parking require a parking pass? Check out more Free Resources HERE Is the location on private property? This is a big one I run into all the time. When it comes to trespassing I can't tell you it's a good idea. That being said I do it all the time. However my caveat is this: I would never trespass on property that is currently occupied. That's just dangerous and extremely rude. But if I come across somewhere that's clearly abandoned I'll usually take my chances. Just don't forget it is against the law and I've been caught trespassing more than once. It's never fun. Any chance you get to ask for permission you should. 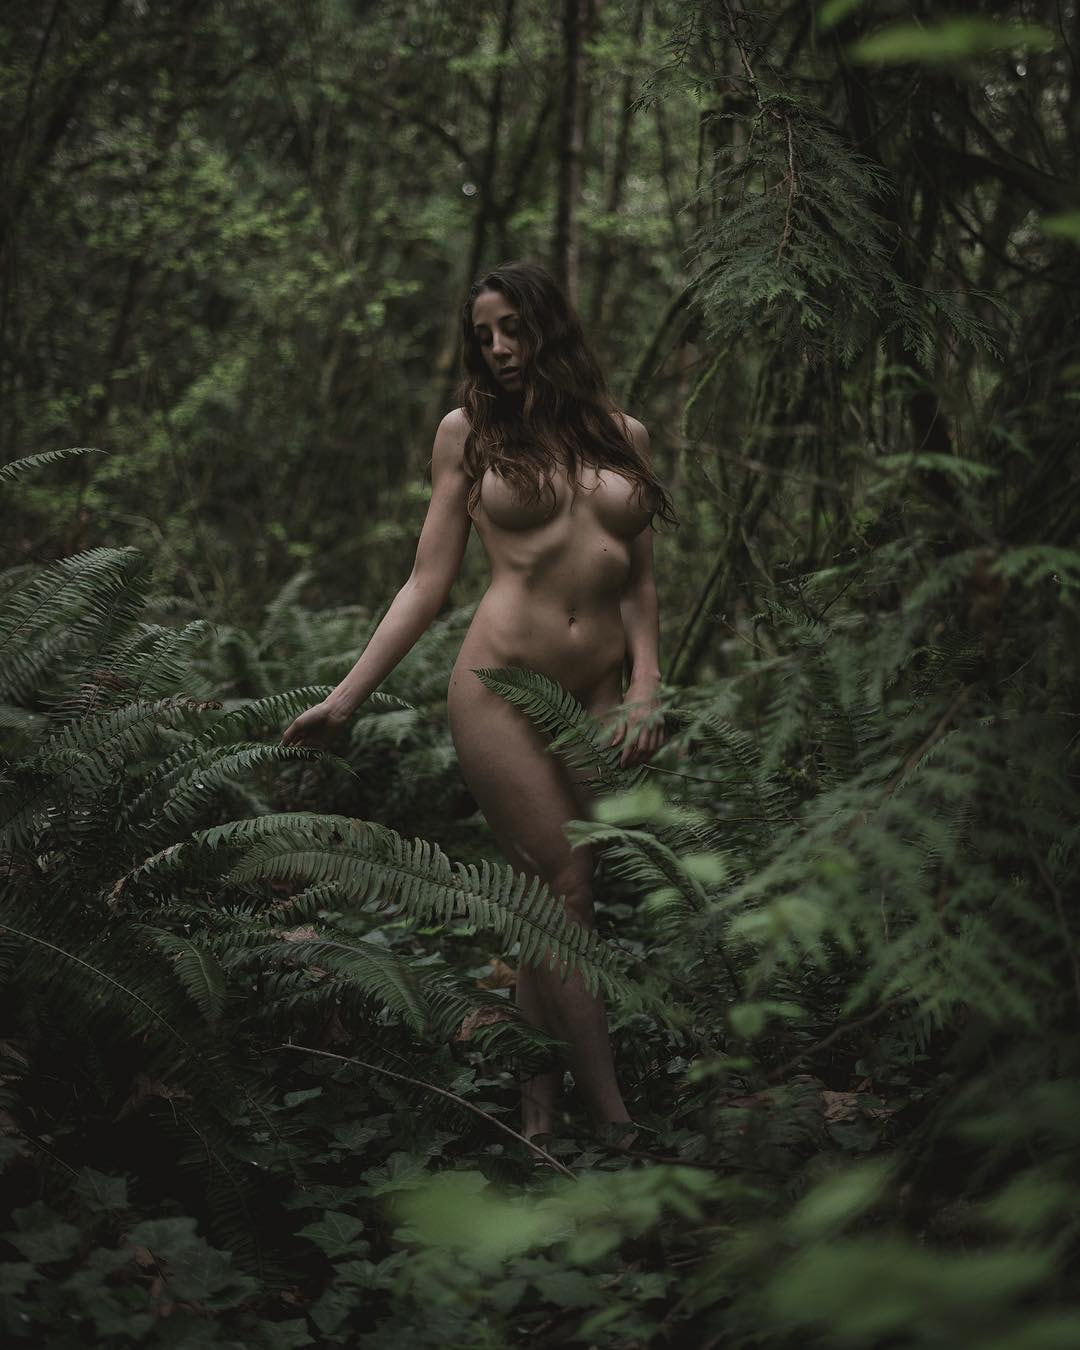 Model: @shawnna.lee on IG Tip #3 Timing is everything In most cases sunset wont be an option as most trails will be too busy at that time so know when sunrise is and try to be at the location and ready to shoot around an hour after sunrise if in the forest. If out in the open be there at sunrise. GPS the location from you and your client to location so everyone knows when to get up with enough time to get ready and drive to location. Sometimes a location will be an hour and 30 out so you will both have to get up by 3 or 4 AM to make it in time. Sure it sucks but it's worth it. Offer to buy your client coffee if you carpool. If shooting in the forest know how thick the canopy is. This will make a massive difference in how much lighting you'll have. If the canopy is too thick it may be too dark without a flash. More tips on shooting in low light without a flash HERE 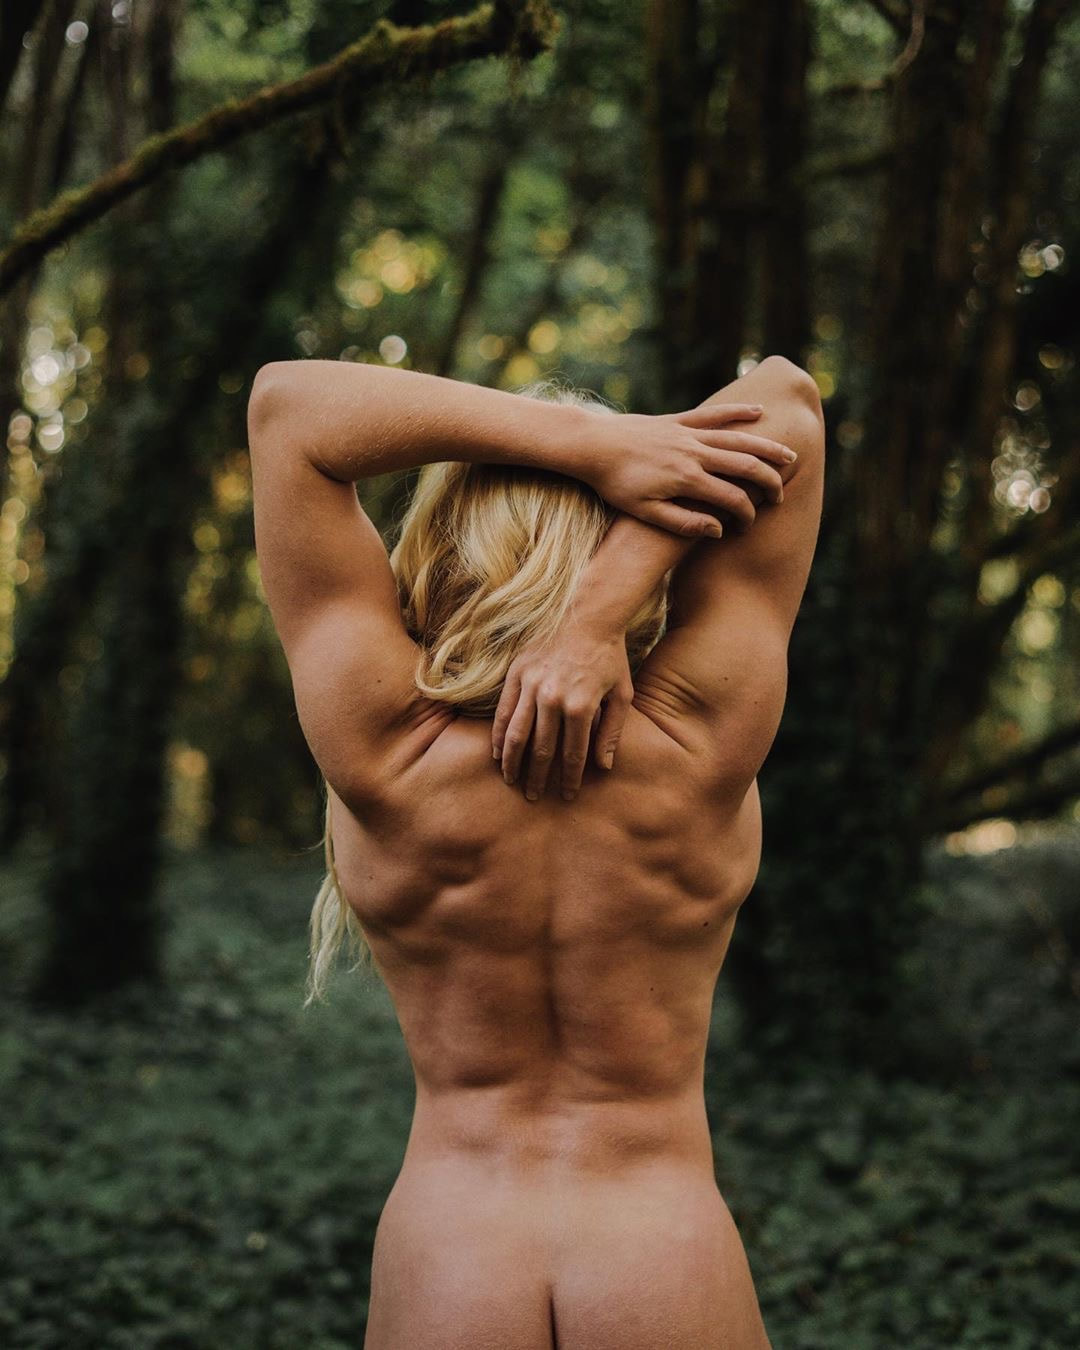 Model: @tonedandtiny on IG Tip #4 Make your client comfortable This one is the most important, you need to not only make sure your subject is comfortable temperature wise but also being completely naked or semi naked in front of the camera. If you act inappropriate or creepy your subject won’t be comfortable and it will show in your photos and more importantly it makes you an awful photographer and even worse human being. Always be professional and accommodating. Your client is putting all their trust in you, don't let them down. If a client expresses to you that bringing someone with them would make them more comfortable your answer should ALWAYS BE YES.  Tip #5 What to Bring: Make sure you bring all your standard gear. Make sure your client brings sandals or shoes they can slip on and off with ease. Offer to bring a warm robe or blanket for your client if they don't have one. A warm robe or blanket is a must because you'll want something they can slip on and off really fast in case anyone walks by. Just because your client is okay being nude or semi nude in front of people doesn't mean passerby's want to see that. It's just best to respect everyone. Bring bug spray, if you're in nature there will be bugs without a doubt. I even carry a lighter incase my client or I get a tick. Water and snacks are also good to have on hand. Find out if your client is wanting to shoot nude or in lingerie before the shoot. This way you can make sure they know if wearing lingerie (in the forest) it should be a bright color like white, pink, or red. This way they will stand out and you'll get alot more contrast between them and the greenery. The forest tends to be dark so dark colors can get lost in the background. 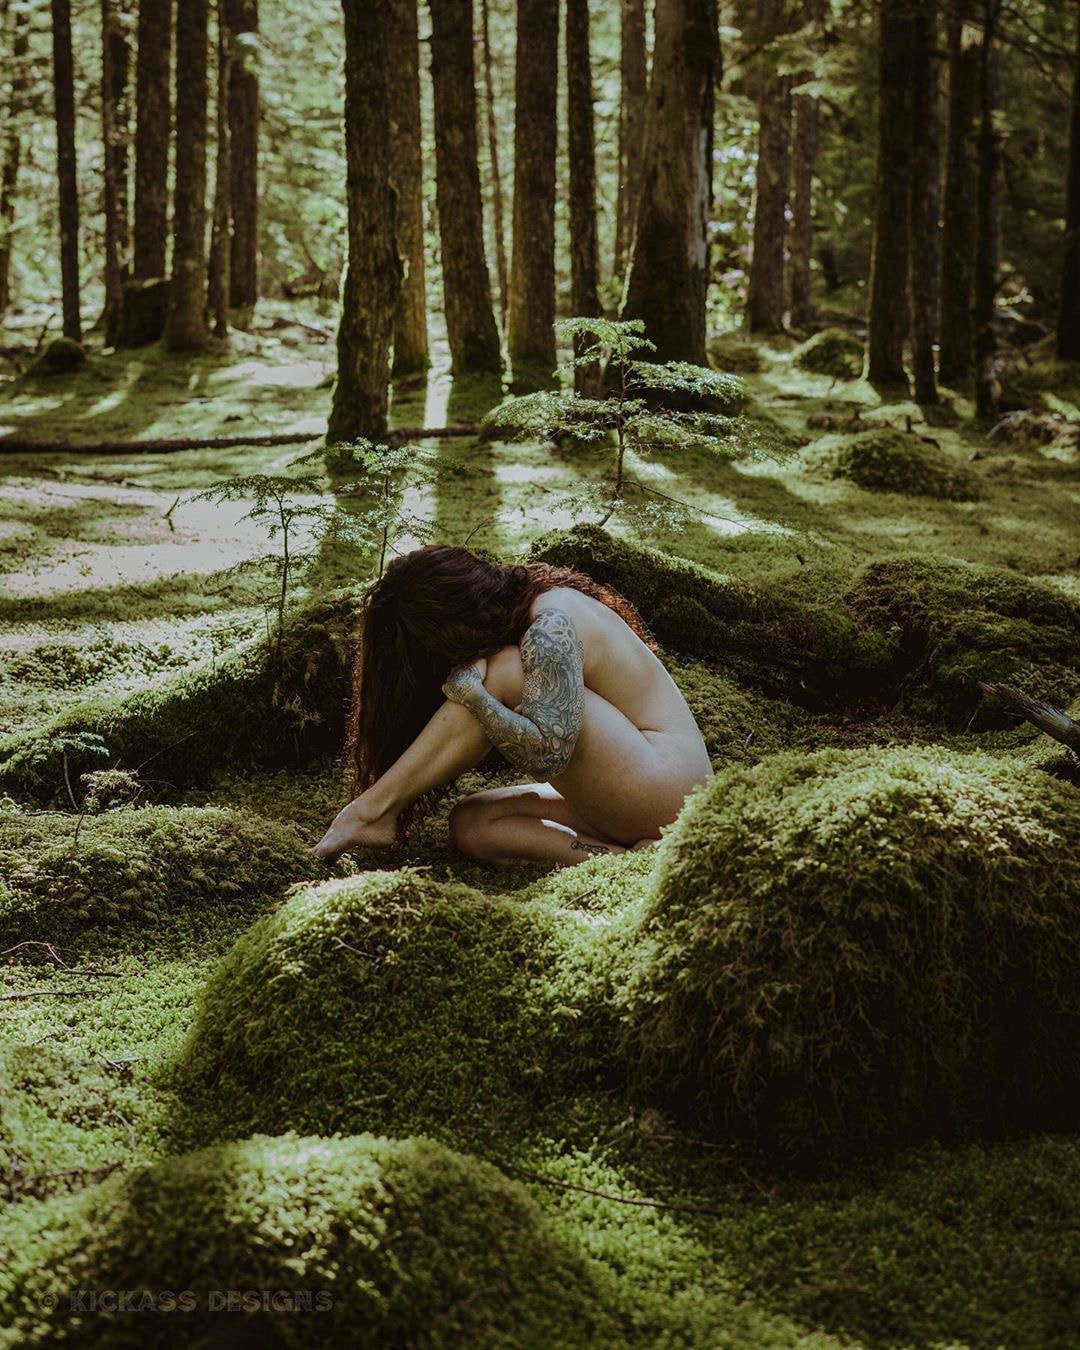 Model: @becka.888 on IG Tip #6 Know your lighting Odds are whether you are out in the open or shooting in the forest your lighting will be all overhead lighting unless you have a flash. I don't use a flash or reflector for my outdoor photography. You'll need to direct your subject so that the light is hitting all the right places. With overhead lighting it’s easy to get unflattering harsh shadows. Use the shadows to your advantage. If the light is coming from above and you're getting harsh shadows make sure you position your subjects face and body up towards the light. I'll show you some examples of how I pose my subjects for this very occasion below. For more tips on using natural light click HERE In closing: Just make sure your client knows what to expect beforehand so there's no surprises. Make sure your client knows anytime you're shooting in nature with little to no clothes bug bites and rashes are always a risk but you will do everything in your power to avoid them. Check out the Free Resources tab for more free photography tips and connect with me on Instagram HERE 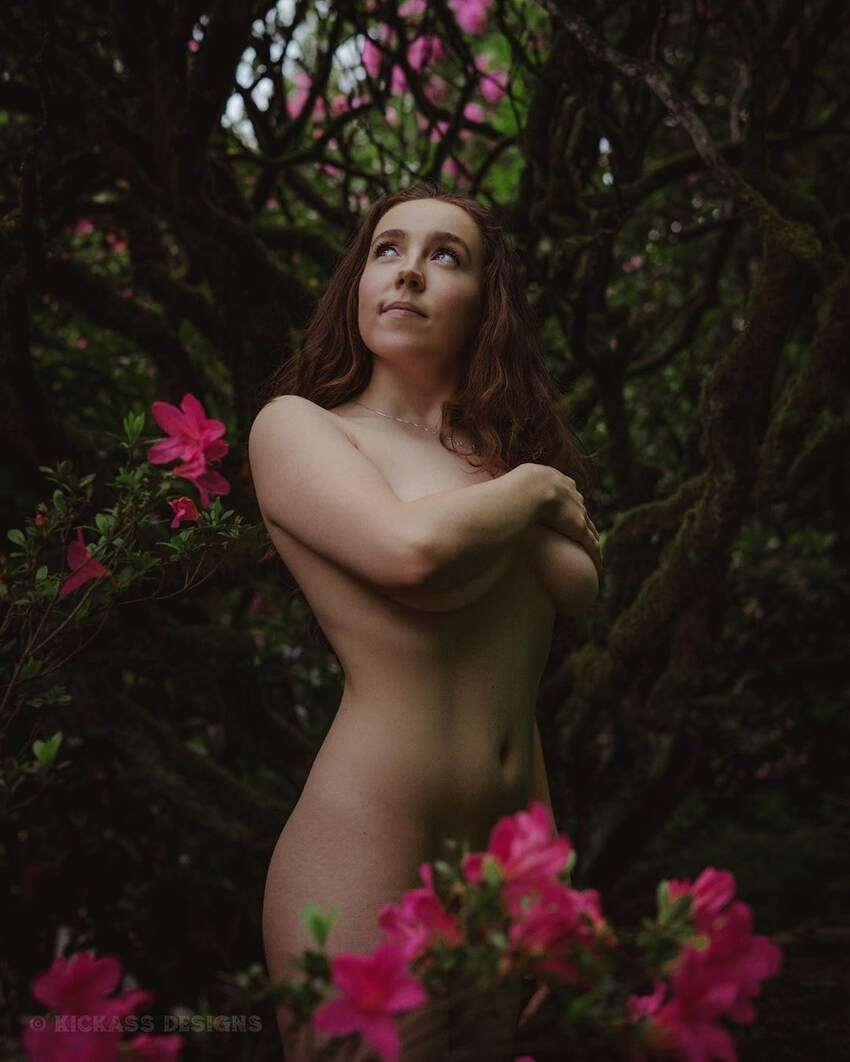 Model: @xsavannahparkerx on IG Model: @xsavannahparkerx on IG 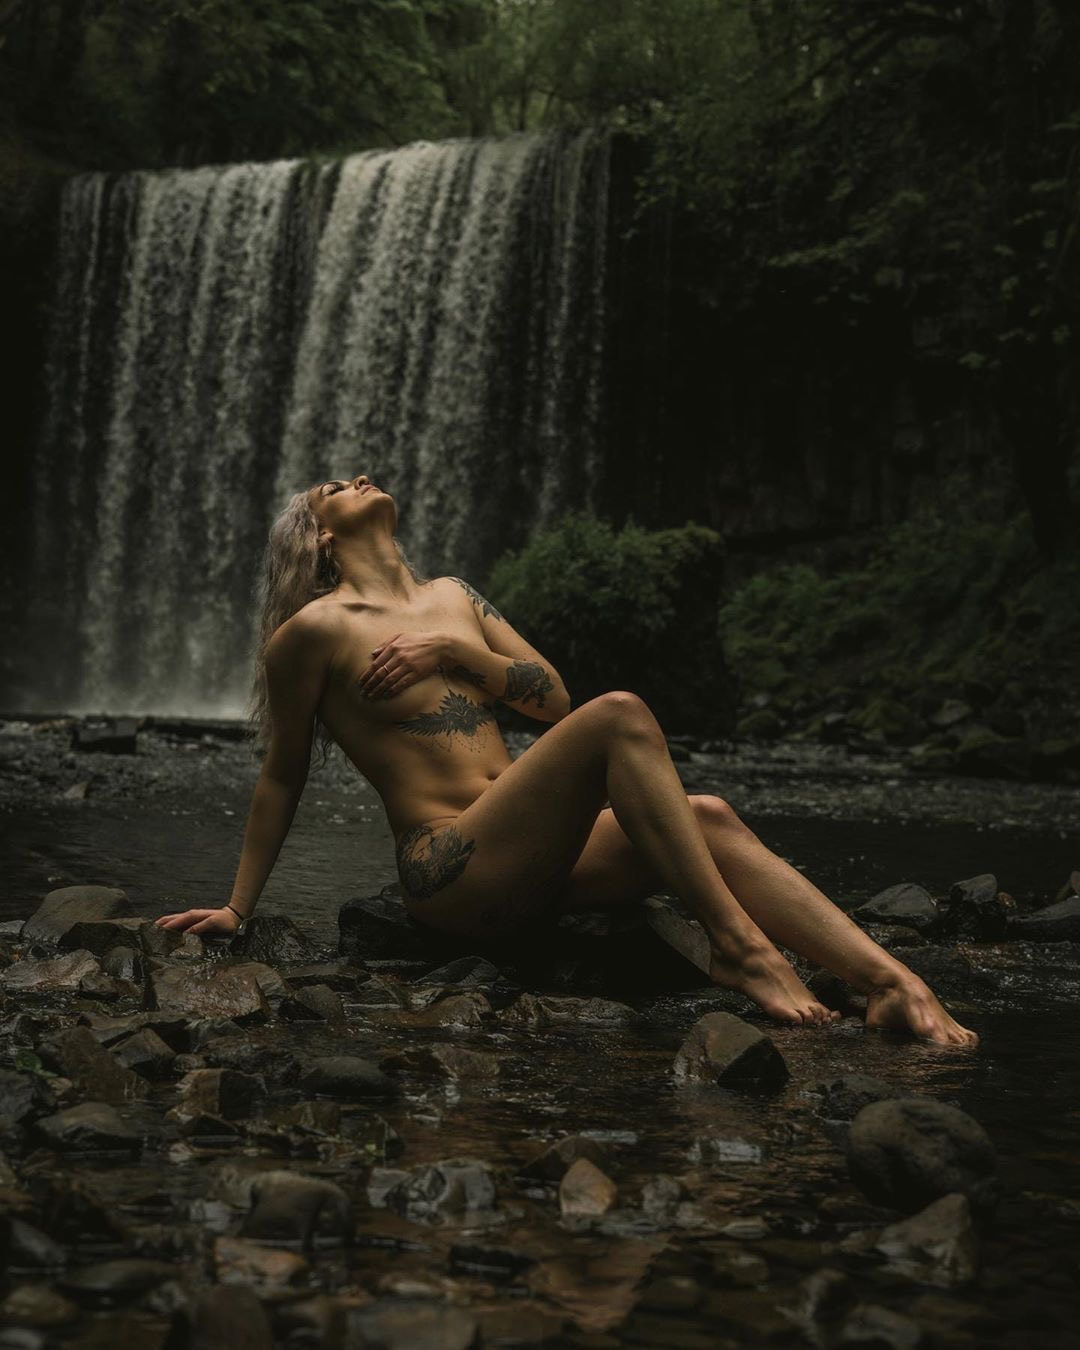 Model: @jaydapdx on IG 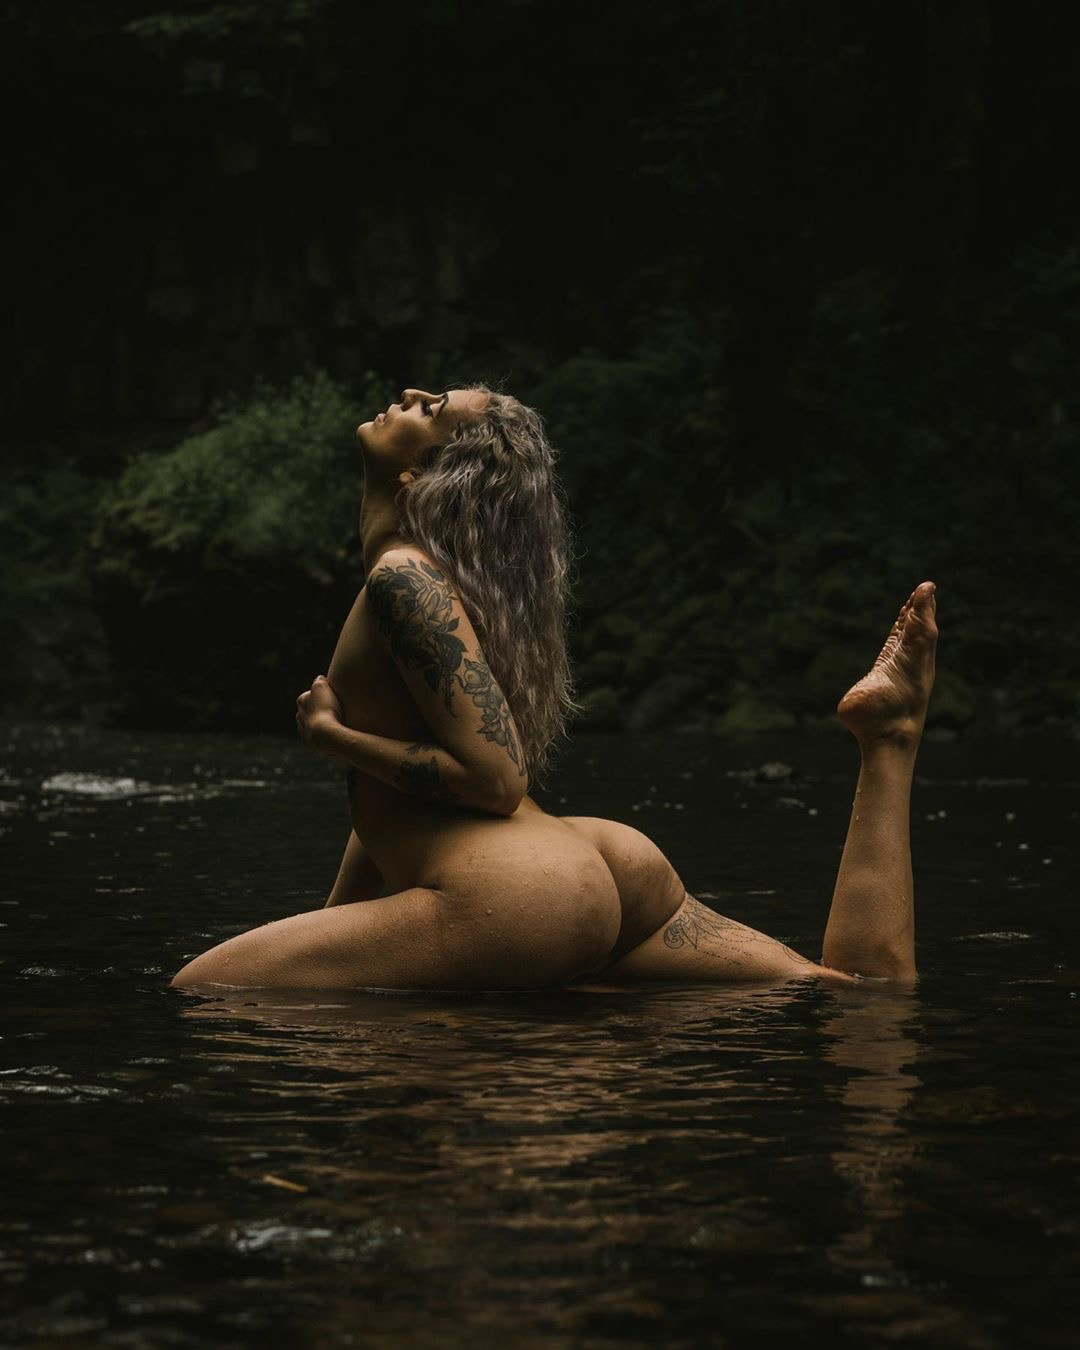 Model: @jaydapdx on IG 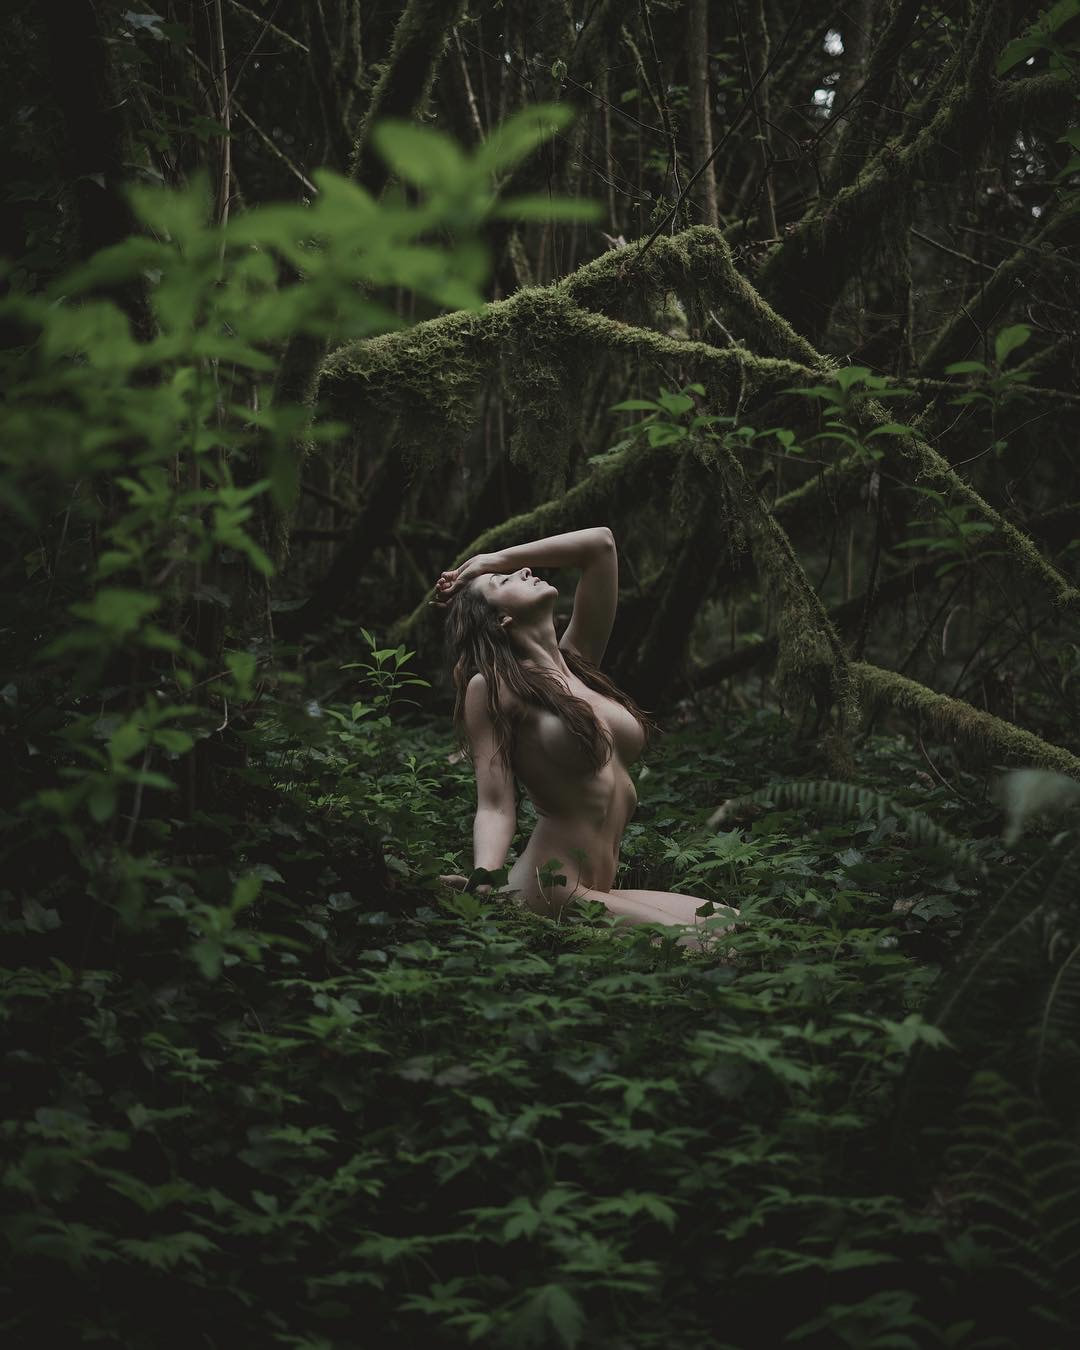 Model: @shawnna.lee on IG 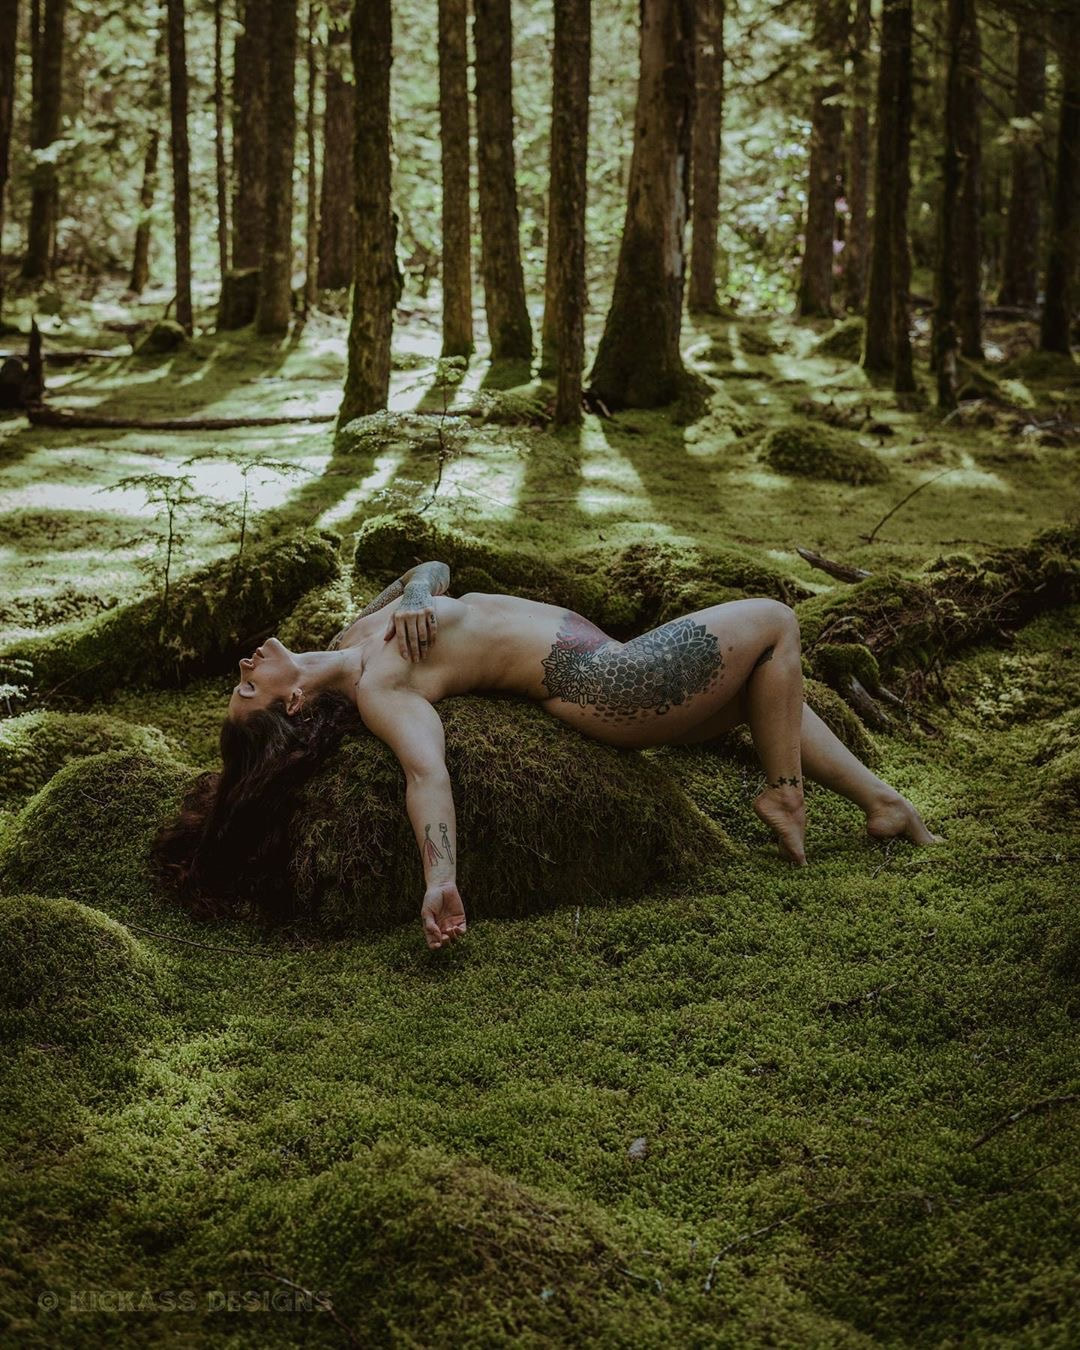 Model: @becka.888 on IG 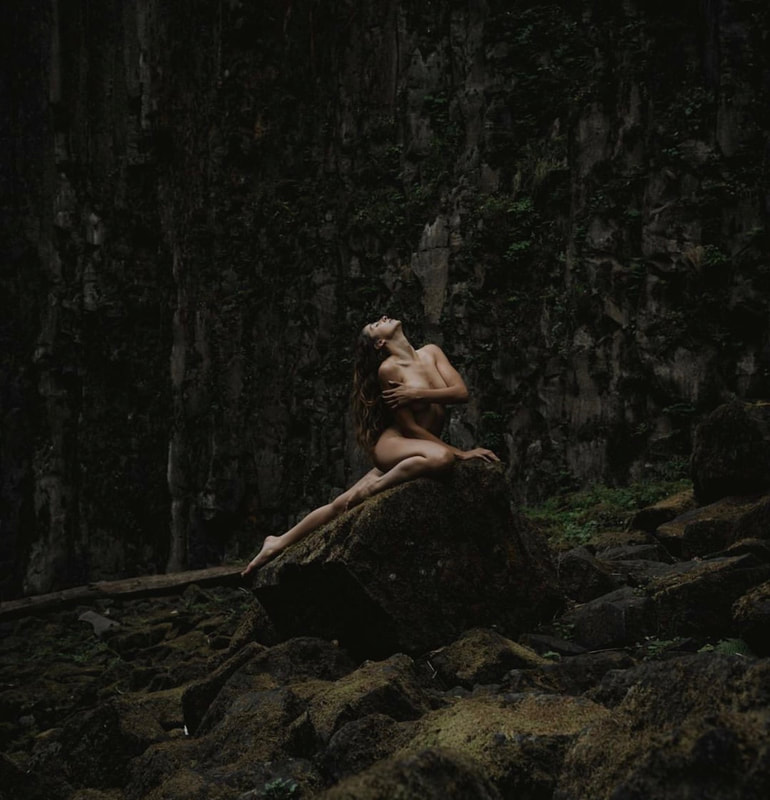 Model: @shawnna.lee on IG 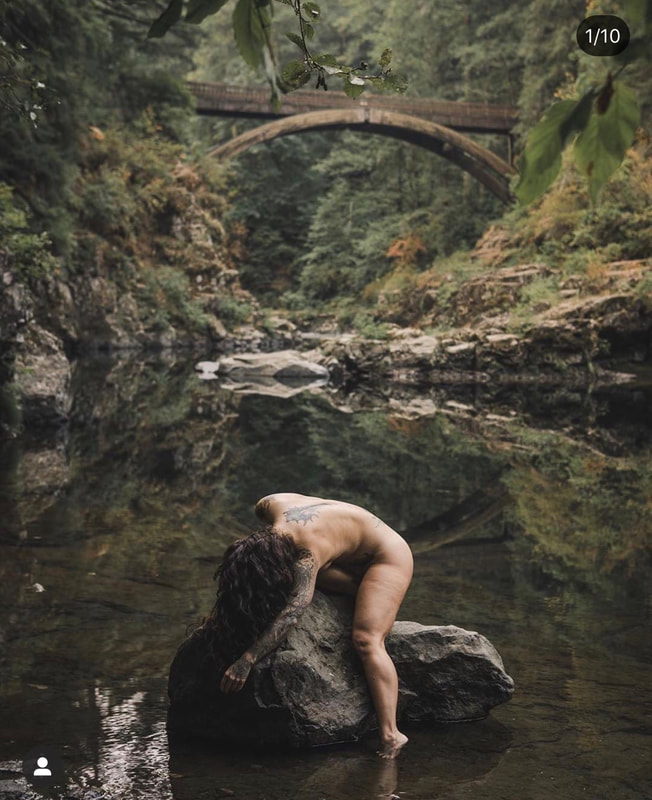 Model: @becka.888 on IG 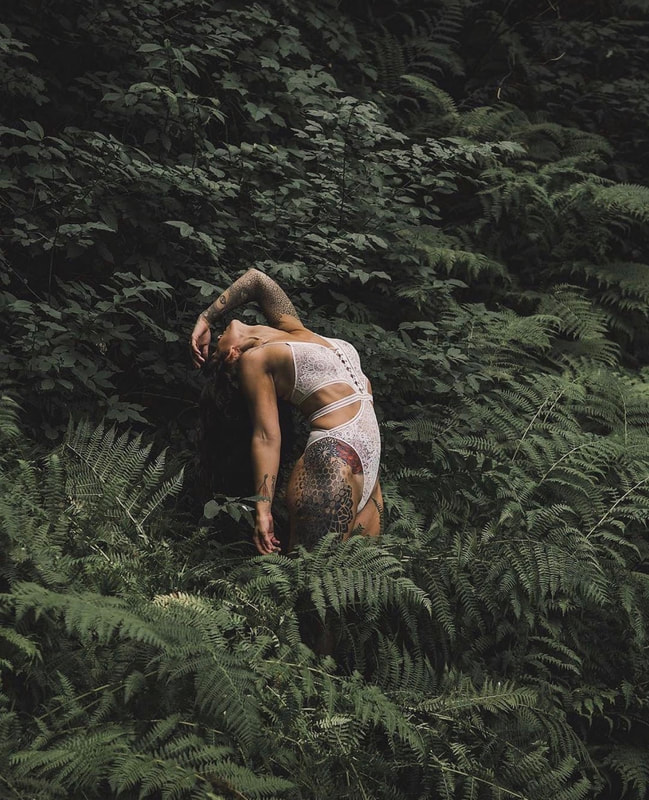 Model: @becka.888 on IG   If you're a portrait photographer like myself you know the importance of captivating eyes. We really want to make our clients eyes pop. Bring out the colors and details. There are many ways to do it but this is the process I use in Adobe Photoshop and it takes less than a minute. I hope this help. Just remember, Dodge, burn, sponge, sharpen. Find more Photography Tips HERE and connect with me on Instagram HERE. Step 1: Dodge Tool Select the Dodge Tool. Set the Range to highlights & the exposure to 20% Dodge the entire iris. Step 2: Burn Tool Select the Burn tool. Set the range to shadows & the exposure to 15%. Burn the entire Iris. Step 3: Sponge Tool Select the sponge Tool. Set the mode to saturate & the flow to 10% Saturate the entire iris. Step 4: Sharpen Tool Select the sharpen Tool. Set the mode to normal & the strength to 25% Sharpen the entire iris. 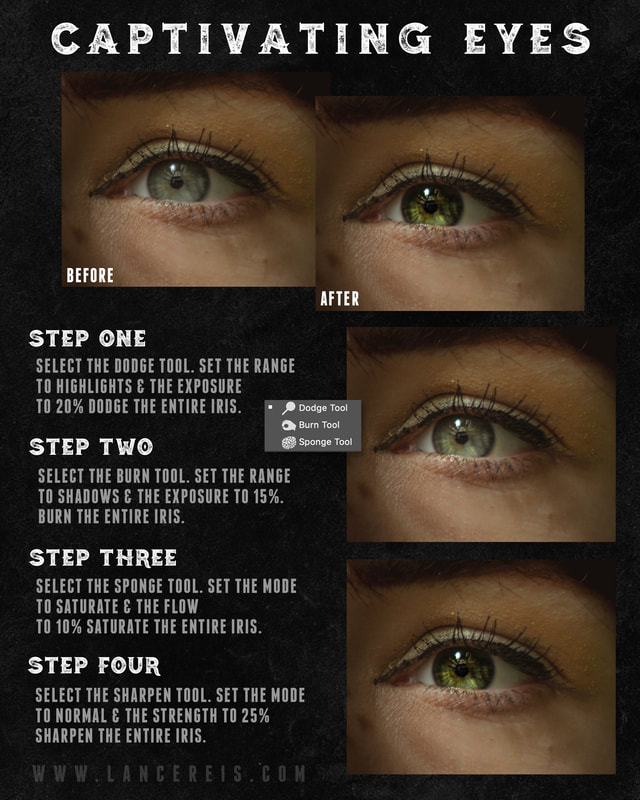 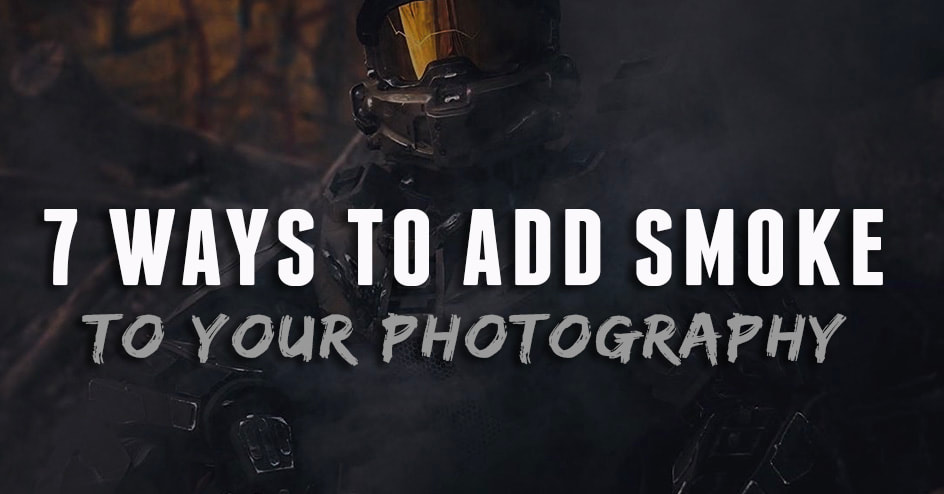 As a photographer you know that smoke and fog can add a dramatic or even cinematic element to any photo but did you know there are numerous ways to add smoke or fog to your photos? In this article I will break down the various ways you can add smoke to your photography to get a more cinematic vibe. Most importantly keep in mind you should always have water and a mini fire extinguisher close by when using smoke. Safety is number one and never leave a trace. If you use a smoke grenade outside make sure to let it cool off and take it with you to throw away. Also keep in mind smoke pointed directly at the ground can stain the ground. All the photos in this article were taken by me. If this article was useful make sure to connect with me on Instagram HERE and find more free resources for photography HERE  Model: @carmacosplay on IG 1. Smoke Grenades What you need: Smoke Grenades from Enola Gaye® Advantages: User friendly, thick smoke, multiple colors to choose from, no power required. Disadvantages: Strong odor, can stain the ground and clothing, gets expensive, outdoors only. Why save the best for last when I can start with the best? Smoke grenades are my favorite on the list because they don’t require power, have multiple color options and outputs of smoke to choose from. You can get a short small burst of smoke or a long thick steady stream of smoke. They do however spark at first so you do have to be careful where you use these and always have some water around just in case. I wouldn’t use one in a dry field. Also if you’re buying a lot of them it can get expensive but as far as smoke grenades go there is no better brand, infact Enola Gaye® is offering a 15% discount if you use my coupon at checkout! How cool is that!? Just use the coupon KICKASS15 at checkout. 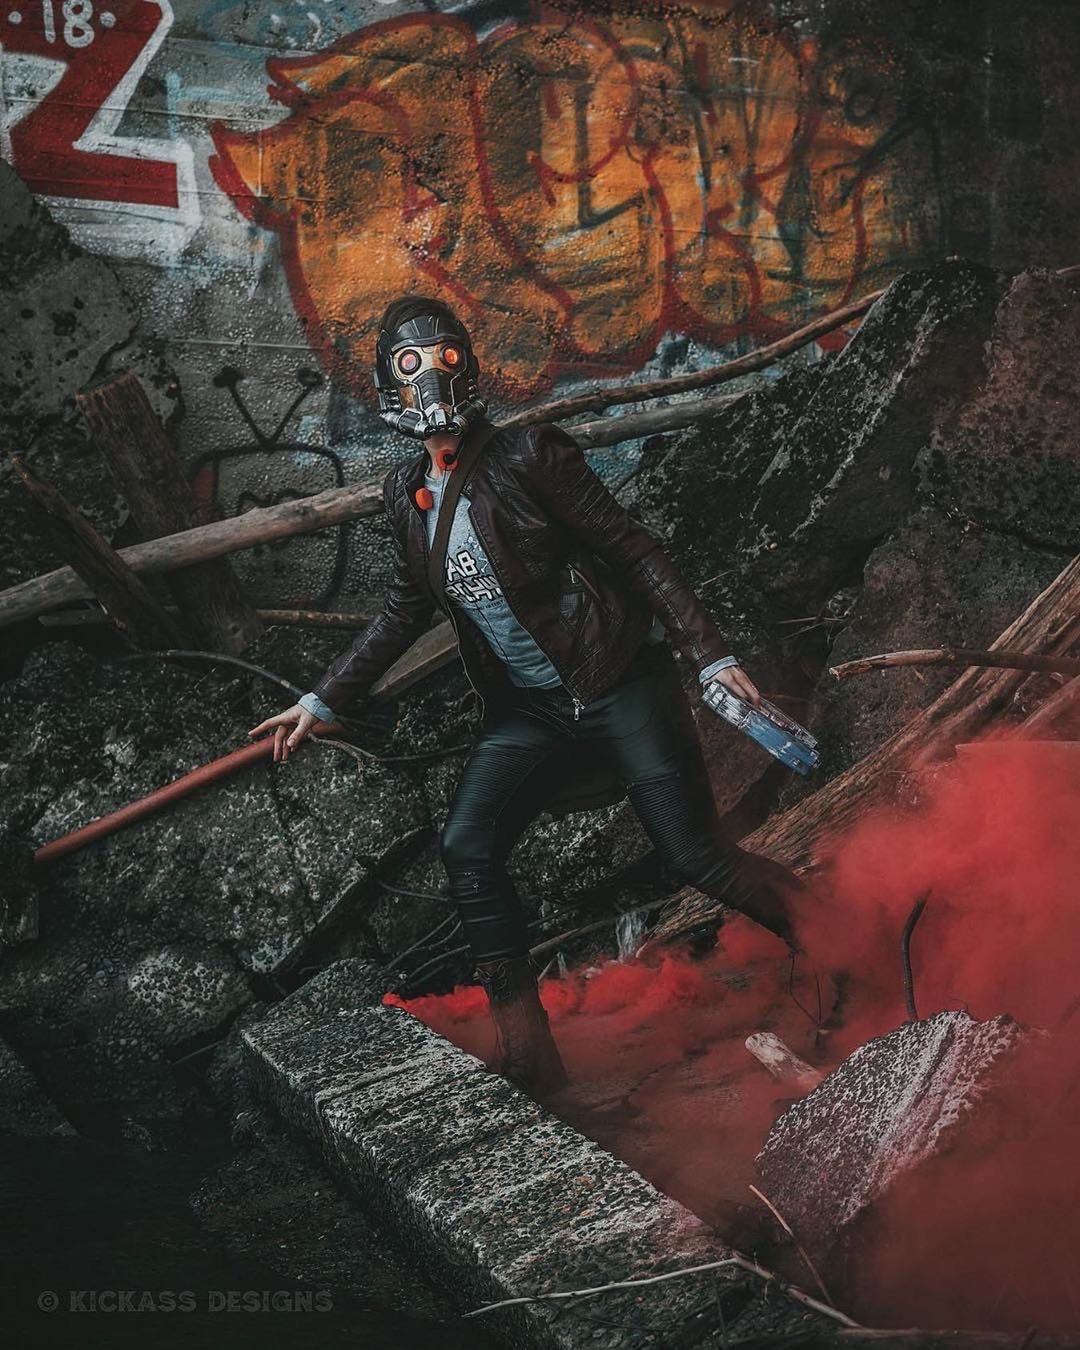 Model: @bukkitbrown on IG 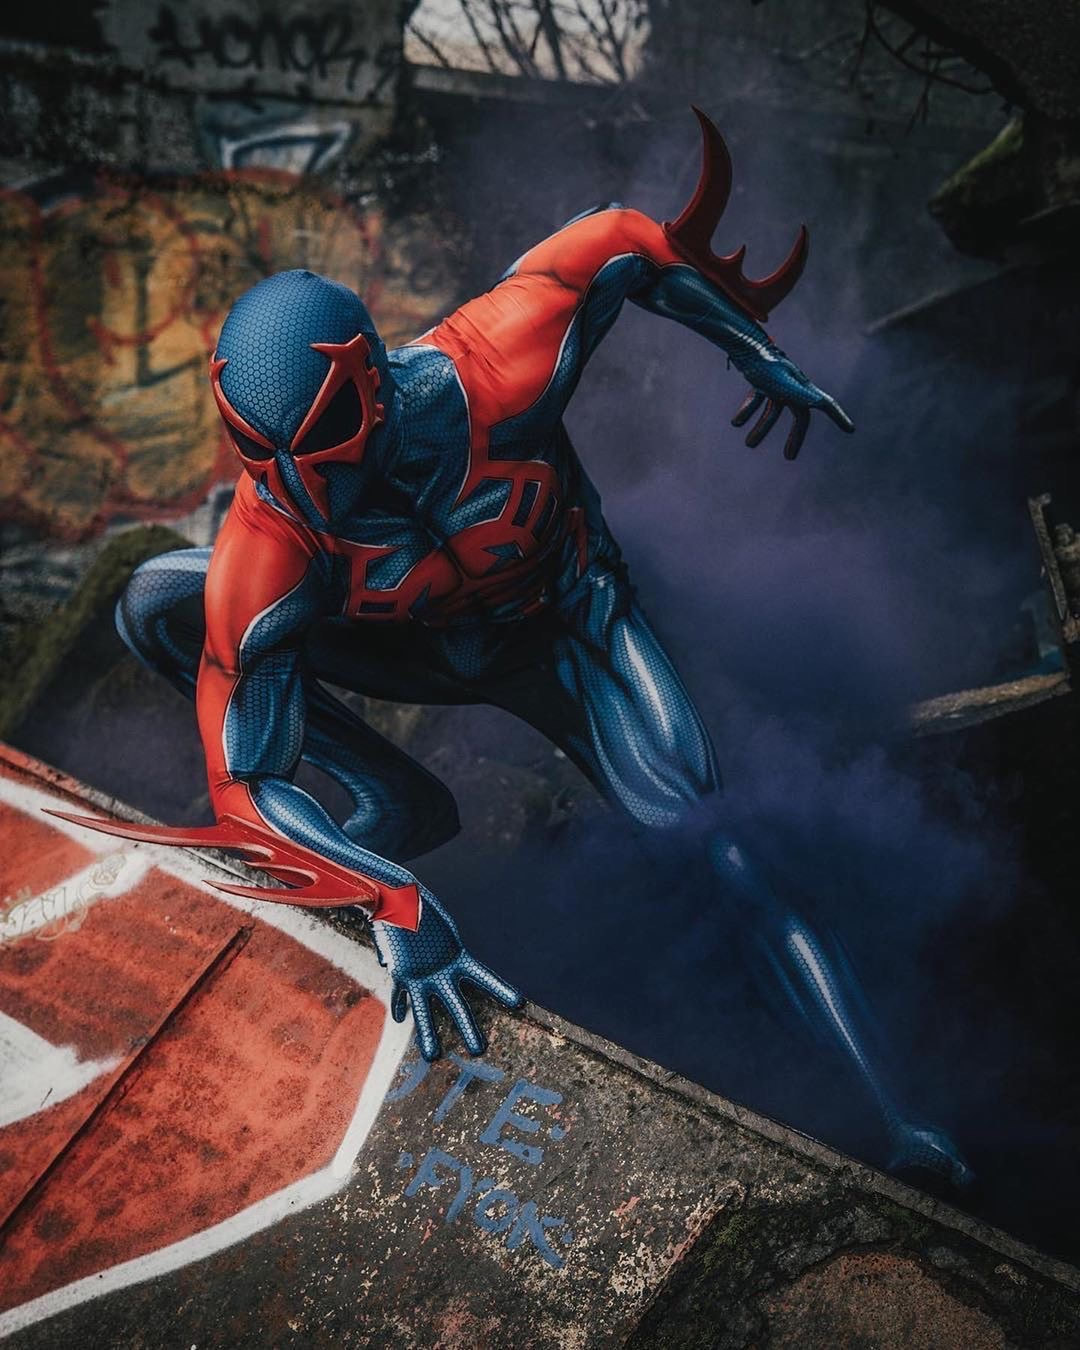 Model: @hoptownspidey on IG 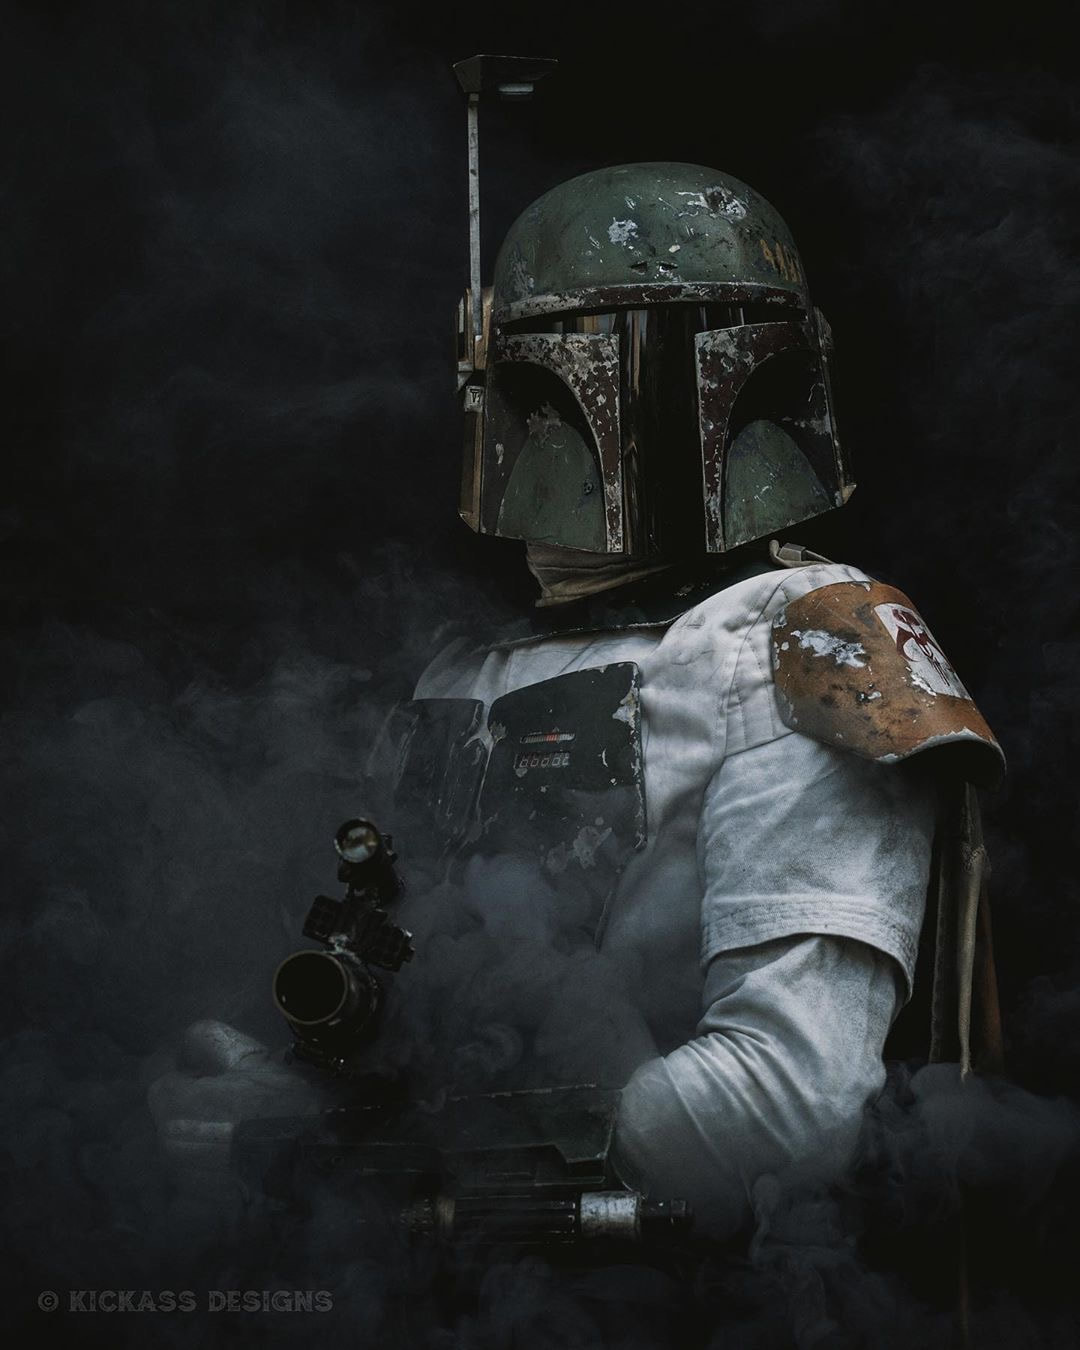 Model: @leftcoastavenger on IG 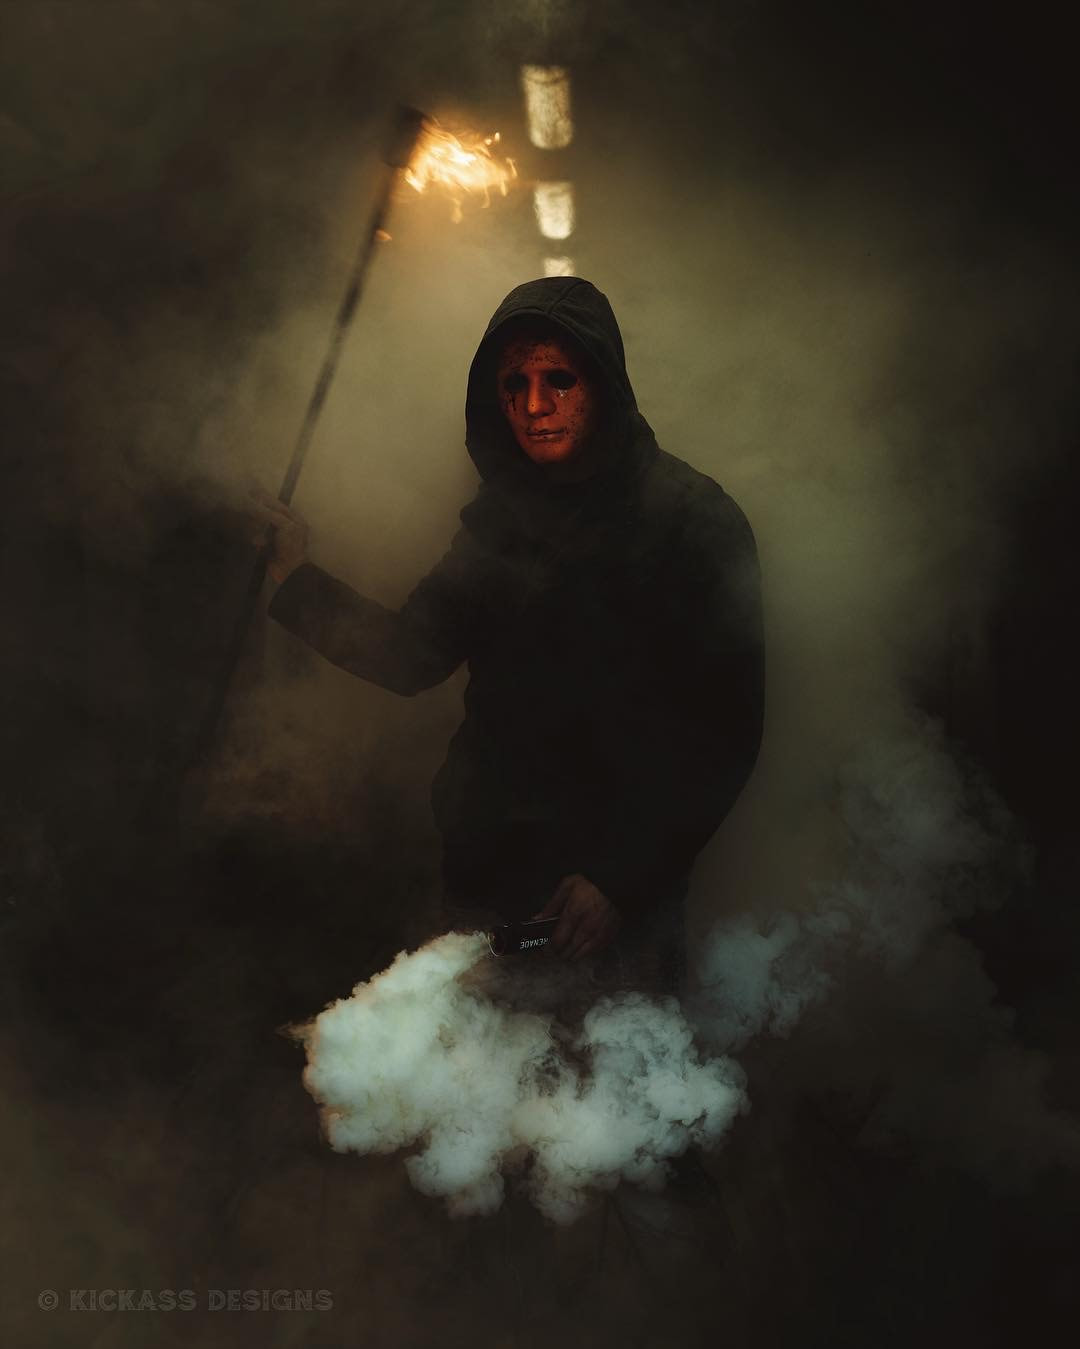 Model @jake.trenda on IG  Model: @goblin_teeth on IG 2. Fog Machine What you need: Fog Machine, Fog Fluid, Generator for outdoor use. Advantages: User friendly, safe, thick smoke, no strong unpleasant odor, doesn't stain, inexpensive. Disadvantages: Needs power, only comes in one color. I love using a fog machine because it produces lots of thick smoke for an extended period of time however the biggest drawback is when using it outside where you don’t have a power source to plug it into you will need a mobile generator, something light weight enough to carry and yet powerful enough to power the fog machine. The fog machine itself and fog fluid aren’t that expensive but if you need a generator that will run you a couple hundred bucks.  Model: @goblin_teeth on IG   3. Dry Ice What you need: Dry Ice & Water Advantages: User friendly, no power required, can be used indoors and outdoors with water. Disadvantages: Won't work without water, stays low to the ground, hard to store. Dry ice is really fun to shoot with for a really cool creepy effect as it stays low to the ground unlike a fog machine or smoke grenade as you can see below. However most people can’t just store dry ice so you need to buy it not only the day of the shoot but right before because a block of dry ice will dissipate within a few hours unless stored in the right container. Nobody is going to carry around a massive container of water so in order to use it outdoors you will need a puddle of water or low creek. Dry ice can burn your hands so always wear gloves when handling it. The only places I have found who sell dry ice are Fred Meyer and a few Baskin Robbins but not all of them.  Model: @starbar_1 on IG  Model: @mythic.allure  Model: @taelorfx on IG  Model: @starbar_1 on IG 4. Atmosphere Aerosol What you need: A can of Atmosphere Aerosol Advantages: Safe, user friendly, no power required, can be used indoors and outdoors, no odor, mobile. Disadvantages: Gets expensive, low volume of smoke Atmosphere Aerosol is my got to for toy photography and will linger in the air for minutes and creates a dreamy effect if you have some nice sunlight coming in from a window. Back lighting is required though to see haze or fog. Position and amount of light will determine the look of the fog or haze. I dig this stuff, it's easy to carry with you, non toxic, and a bottle of spray will last you a while. Pro tip: Use a light wand to add a pop of color to the smoke. 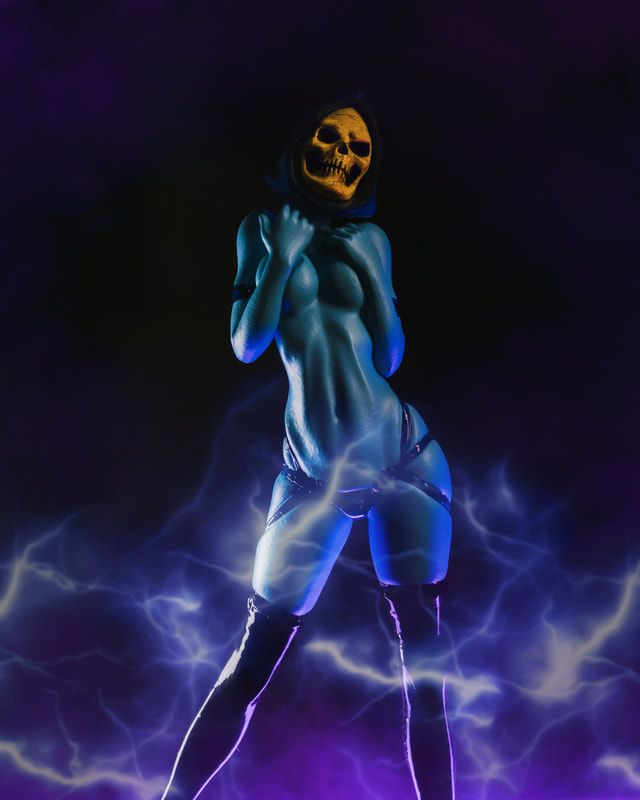   5. Smoke Cakes What you need: Smoke Cakes and Lighter. Advantages: No power required, easy to take on the go, small, cheap. Disadvantages: Low volume of smoke, fire hazard, not the best quality. Smoke cakes will be your cheapest option but also the most unreliable. They don’t put out the most smoke and don’t last long but if you’re on a budget these can work. They aren’t super easy to control so a little practice goes along way. I do like the multiple color options though. 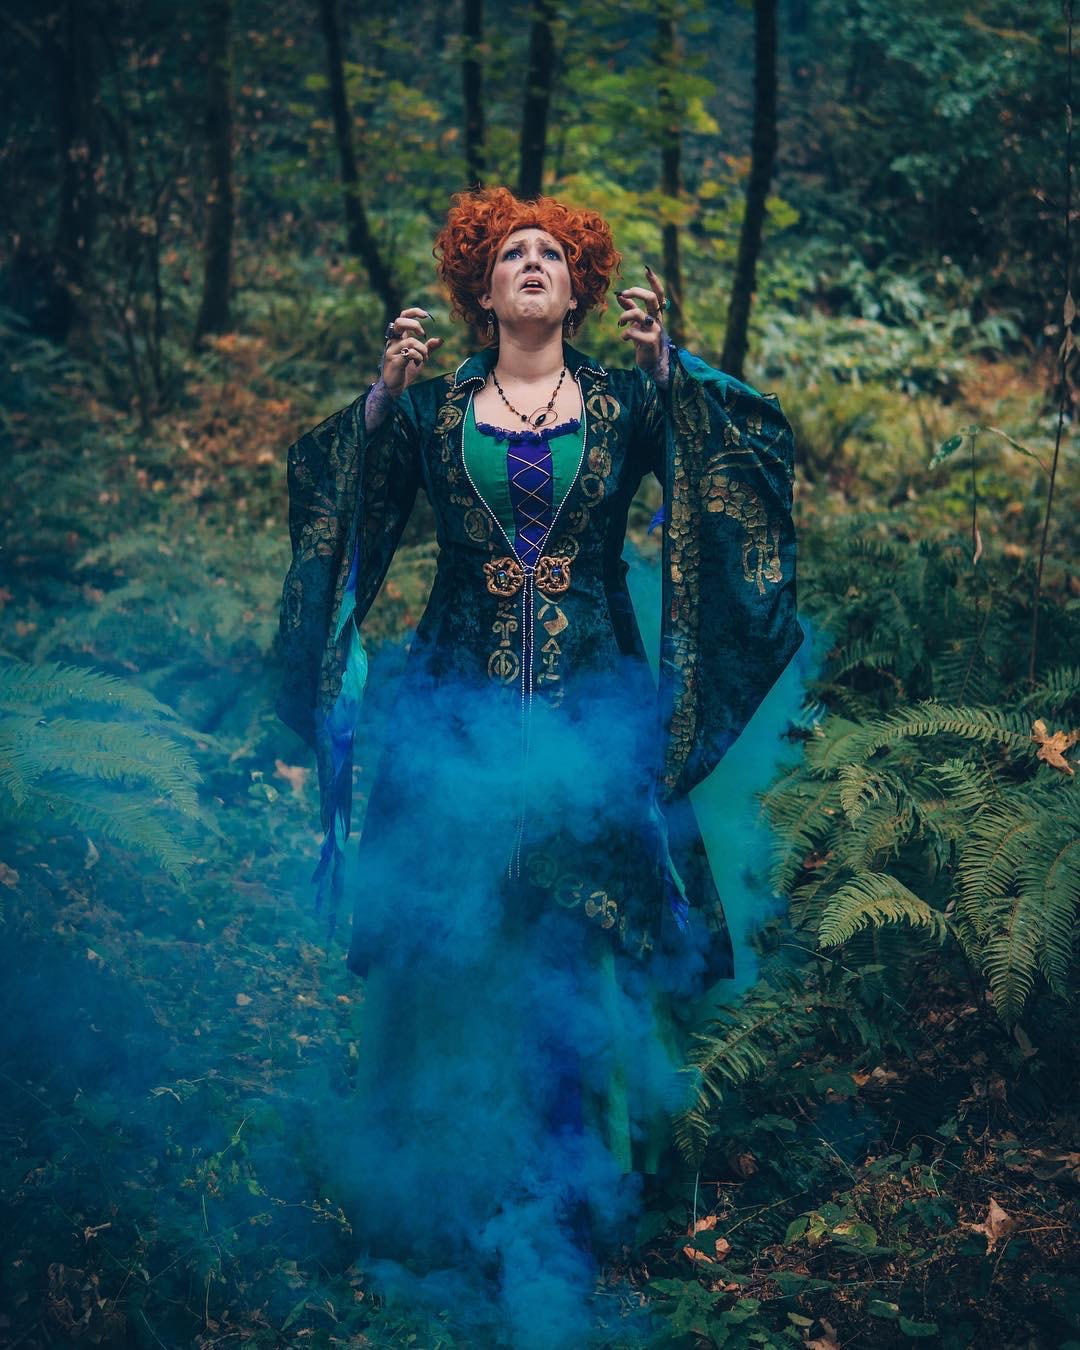 Model: @pdxsandersonsisters on IG 6. Propane Insect Fogger What you need: a Propane Insect Fogger Advantages: No power required, cheap, mobile, decent volume of smoke. Disadvantages: Gas powered, depending on brand can be noisy. Insect foggers are a great mobile alternative to fog machines. They are powered by butane gas cans which you can easily find at any supermarket. I shouldn’t have to say this but I will, make sure you use fog liquid not pesticide. Also where the smoke comes out of gets very hot so be careful when handling the fogger. 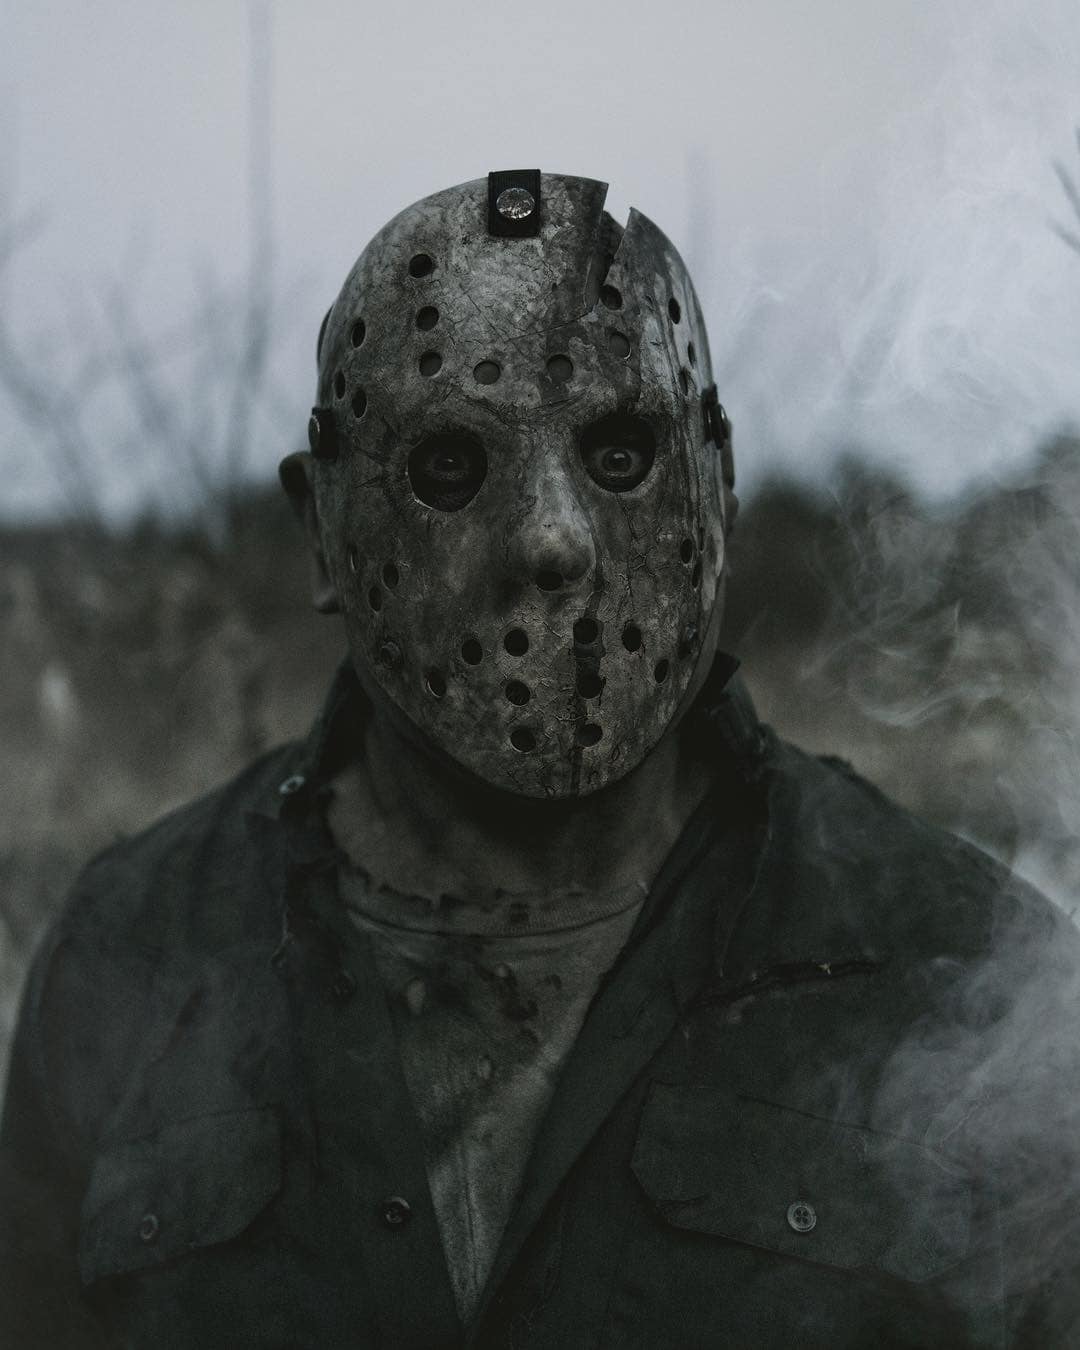 Model: @dan.c.kyle on IG 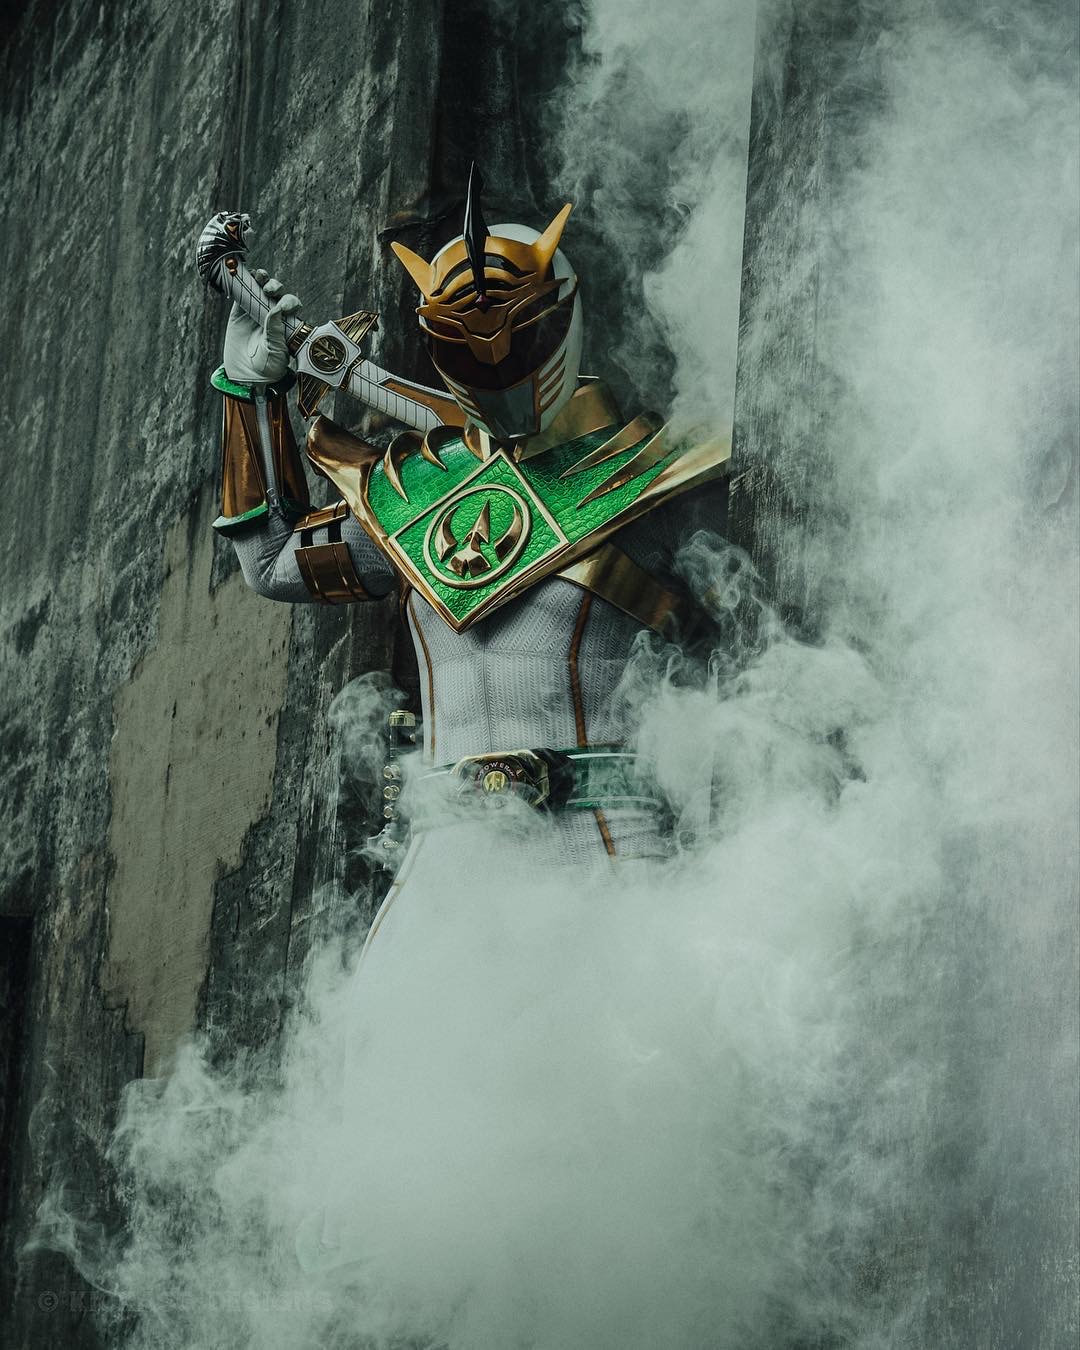 Model: @hoptownspidey on IG 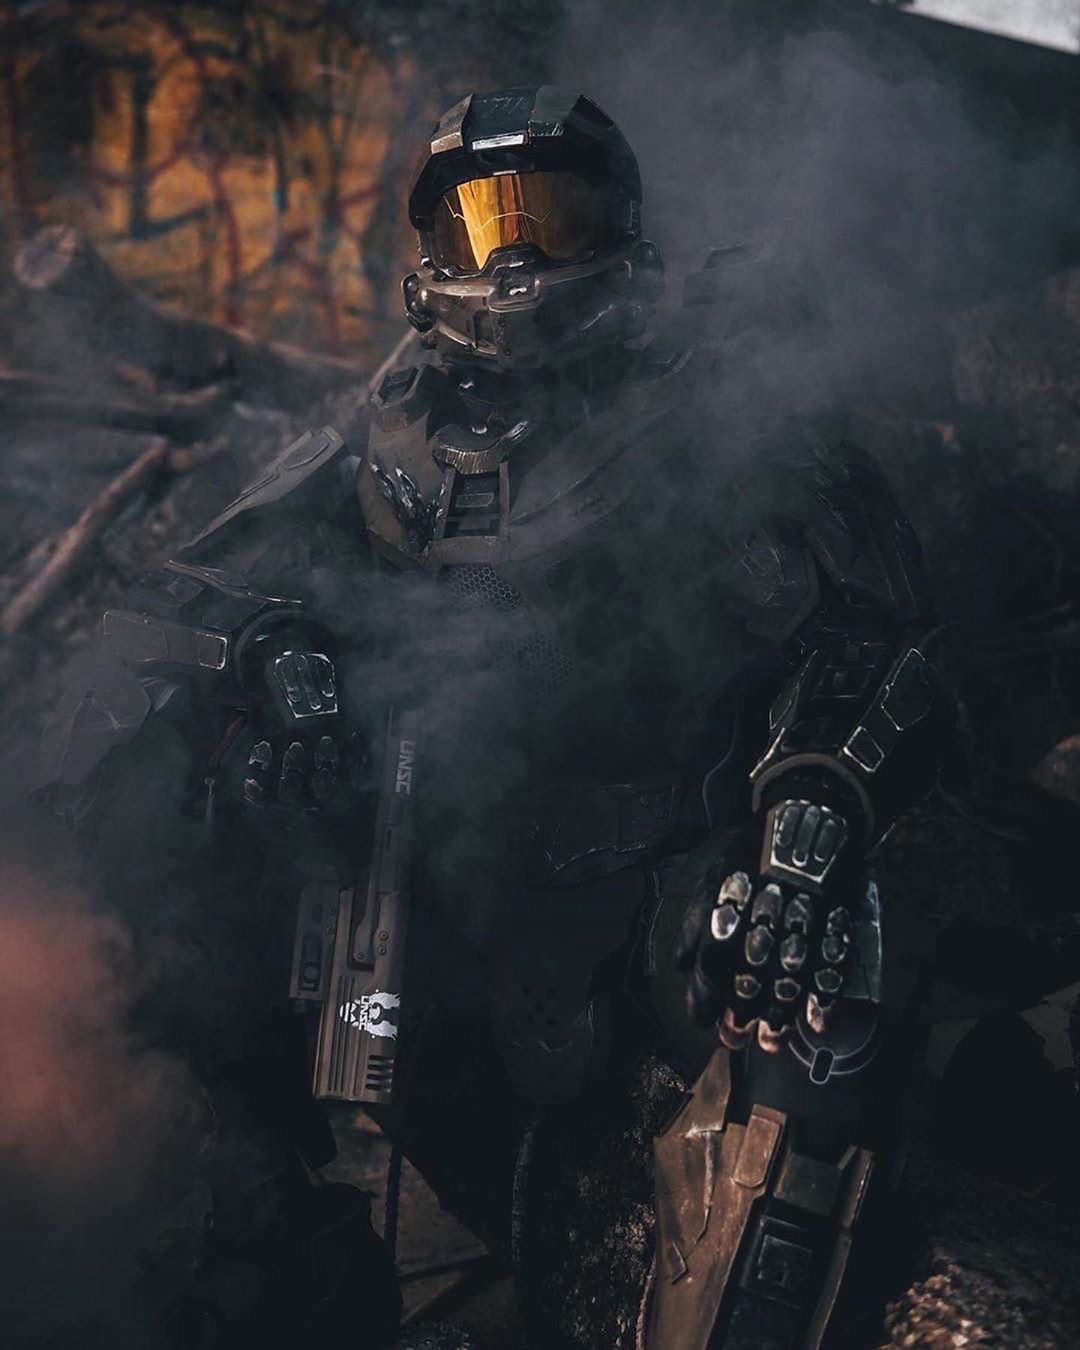 Model: @gliderx64 on IG 7. Photoshop What you need: Adobe Photoshop or another photo editing app Advantages: Complete control of how the smoke will look, nothing to cary or burn. Disadvantages: Takes skill and alot of time to add in post. Can’t get your hands on anything mentioned above? Well you’re still in luck because there’s always Photoshop. Photoshop is a great alternative if you can’t get real smoke, it just takes some time and skill. My favorite thing to do is combine the two, so I use the smoke during the shoot and add a little bit in Photoshop if I need to in Post. It’s not as hard as you think, all you really need is a good photo of smoke on a black background to overlay your image with. Freepik has many. If you need help I will show you how in the video below.  Model: @codename_batman on IG 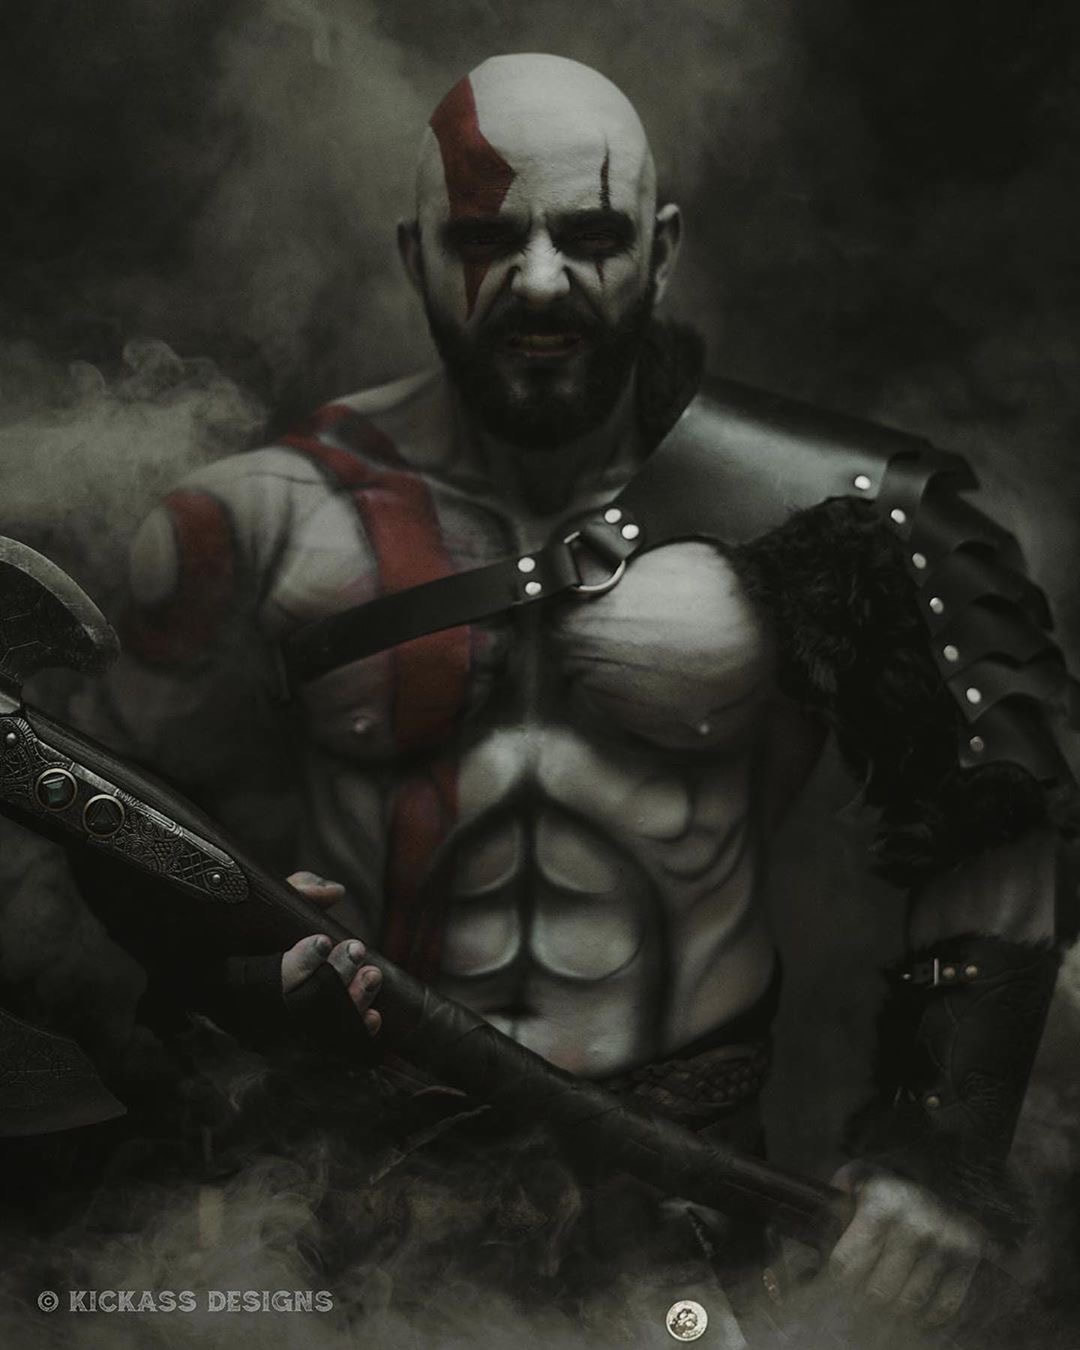 Model: @thepdxviking on IG  Model: @mythic.allure on IG  With all of us stuck at home practicing social distancing there is no better time than now to improve our skills as photographers and get inspired. In this article I will share some of my favorite free resources I use to improve my skills not only as a photographer but as a business owner. In this article I recommend videos, podcasts, books, websites and more. All free resources to help you improve your photography and business and maybe even get inspired. Videos Let's start with the best. My favorite photographer/videographer has to be Peter McKinnon and considering he has 4.5 million subscribers on youtube it's safe to say I'm not the only one. His videos are not only informative but funny and entertaining, plus his videos are full of movie quality cinematography. He's just that good. I follow him for inspiration and general knowledge on portraits, landscape, product photography, and video.  @petermckinnon on IG Evan Ranft is another great photographer with great video tutorials. I follow him for inspiration and general knowledge on Portraits and Street Photography. He's one of my favorite street photographers out of Atlanta, GA. His color grading is top notch and has a cinematic Neo-noir feeling to his work  @evanranft on IG Sorelle Amore is the Queen of self portraits. Her outgoing bubbly personality, amazing accent, beautiful locations, and skills in front and behind the camera always make for a great video. Sorelle is a must follow for photographers and models alike. Because she only takes photos of her self she has great insight on posing as well as photography. She's also constantly traveling to beautiful places so add her channel to your list of location scouting tools.  @sorelleamore on IG These next 2 guys I follow for 3 reasons. Portraits, Travel, and Cars. Chris Hau and Alen Palander have some of the best portrait photography, car photography, and travel photography you will find. These 2 guys are extremely talented and offer free advice on their channels as well as stunning video. Get inspired by these 2.  @thechrishau on IG  @alenpalander on IG Sean Tucker is a legendary street photographer. Sean offers great information on his youtube channel on street photography, editing, and portraits. You wont want to miss his content.  @seantuck on IG Now this one is more of a marketing expert not so much photography. That being said everything I've learned about social media marketing I've learned from Gary Vaynerchuk. If you haven't heard of him you must be living under a rock because everyone I know follows him for marketing advice and day to day inspiration. I love his "I don't give a fuck what you think" attitude. 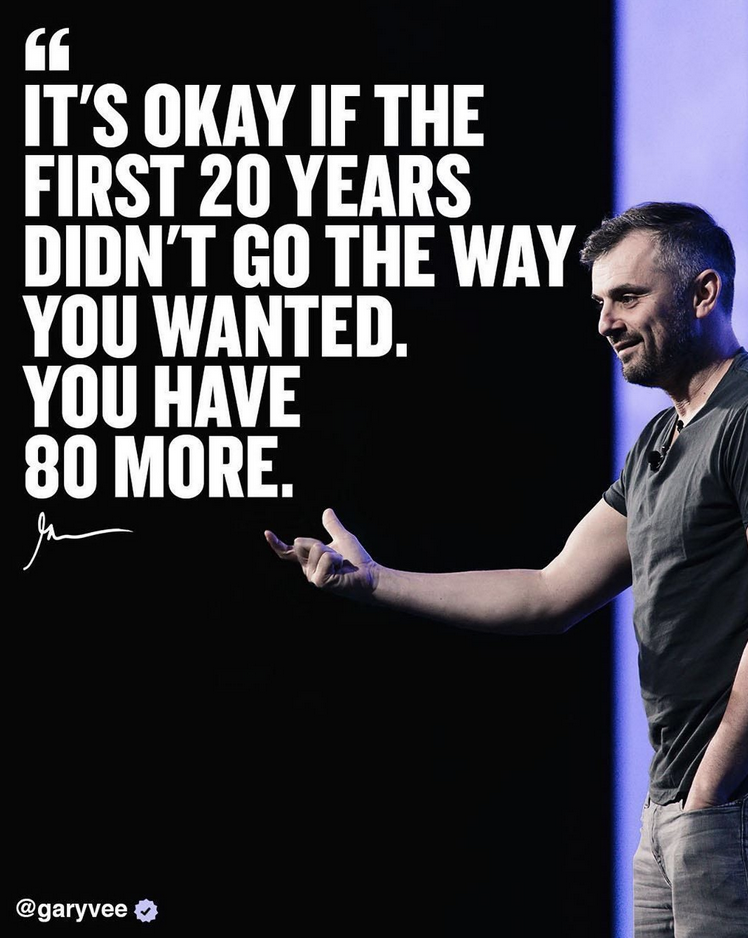 @garyvee on IG Podcasts The Beginner Photography Podcast is a free weekly podcast hosted by wedding photographer Raymond Hatfield who interviews professional photographers of all genres who share what they wish they knew when they got started so you can grow your photography skills faster! I don't shoot weddings often but still take something away from every episode. Don't let the name fool you, this is no podcast just for beginners. Even seasoned photographers can gain insight from this podcast. 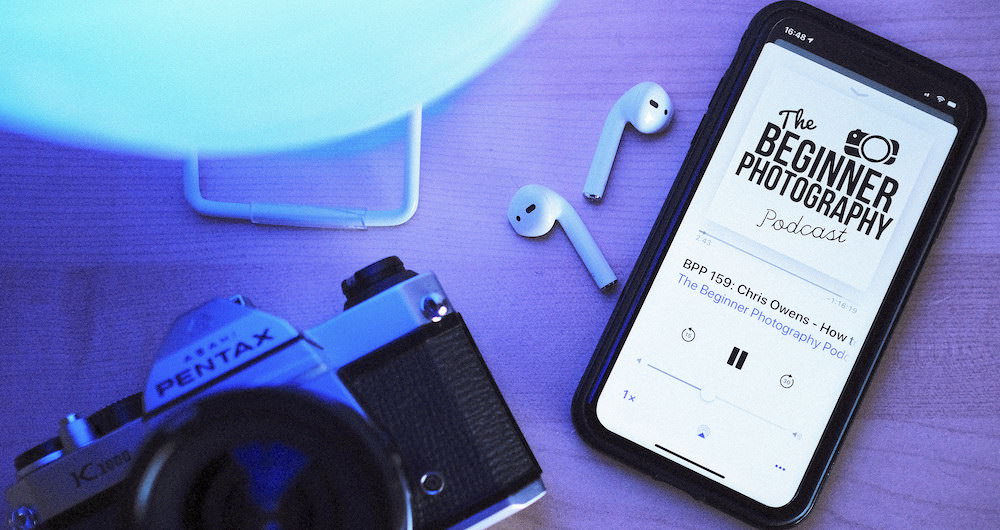 Level-up your photography with the Master Photography Podcast. No matter your needs or experience level, one of their shows on their network is going to feed your passion for photography and help you to master your craft. So much great information on their multiple shows.  Six Figure Photography is hosted by the award winning international wedding photographer Ben Hartley. Abundance comes from understanding your own self-worth and providing value to everyone you encounter. Six Figure Photography exists to inspire, empower & challenge photographers towards creating a life of abundance not just in profits, but in creativity and relationships. Ben does this through his weekly podcast, online training, and hands-on workshops. I've listened to almost everyone of his podcasts and learned something new with every episode.  Jenna Martin, from Billings, Montana hosts the podcast Creative Chaos. This podcast is perfect for the oddballs and misfits of the world trying to turn their creative passions into legitimate careers. They discuss everything about creative professions; both the artistic side AND the business side. You'll learn how to produce your very best work on a consistent basis, how to grow your social media following, how to create passive income streams, and how to streamline you're dream business. Also checkout their DD ("Deep Dive") episodes where their guests go far more in-depth into various artistic careers.  I listen to this one for marketing and daily inspiration not photography although the tips and tactics I learned from this podcast has improved my photography business. On his global top 100 iTunes podcast The GaryVee Audio Experience, you’ll hear episodes of Garys favorite series called the #AskGaryVee Show, a mix of his best highlights from his DAILYVEE documentary video series, keynote speeches on marketing and business, interviews, fireside chats, and any of his new and current thoughts that he records specifically for this audio experience!  Books Tools of Titans by Tim Ferriss $14.88 - Tactics, Routines, & Habits from Billionaires This book contains the tools, tactics, routines, and habits of billionaires, icons, and world-class performers you won’t find anywhere else. What makes the book different from most is a relentless focus on actionable details. This is reflected in the questions. For example: What do these people do in the first sixty minutes of each morning? What do their workout routines look like, and why? What books have they gifted most to other people? What are the biggest wastes of time for novices in their field? What supplements do they take on a daily basis? You get the idea. What most photographers don't understand is that you can learn life and business altering tactics from world-class performers in a range of industries outside our own.  #AskGaryVee by Gary Vaynerchuk $14.95 - Social Media Tactics Look, if you're a photographer trying to make money with photography you need this book. End of story. I own all of Gary Vees books and they are all great but this one has the most applicable information for you to consume and use right away. 95% of my clients come from Facebook and Instagram (without adds) and that's because I use the information I learned in this book to slay the social media game. #AskGaryVee features the most useful and interesting questions Gary has addressed on his popular Youtube channel. Gary presents practical, timely, and timeless advice on marketing, social media, entrepreneurship, and everything else you've been afraid to ask but are dying to know. Gary gives you the insights and information you need on everything from effectively using Twitter to launching a small business, hiring superstars to creating a personal brand, launching products effectively to staying healthy-and even buying wine. Buy this book, then buy his others.  For more book recommendations checkout my article 9 Books Every photographer needs to be more successful. Of course books aren't free but you can find these at the library to rent for free :) 15 Free Lightroom Presets Are you struggling to find a way to edit your photographs with a professional touch? Are you having a difficult time choosing between Adobe Photoshop and Lightroom to edit your photographs? In order to make it easier, PhotoWhoa is giving you various options to enhance your photographs. There is no need to choose between the two as they offer creative and professional presets for Lightroom and various actions for Photoshop. These presets are compatible with both Lightroom and Adobe Photoshop and are used by many photographers across the globe as they help to make the workflow easy while ensuring that the editing process is enjoyable as well. They are an excellent tool used by not only professional photographers but also amateur ones. In these, Lightroom presets offered by BeArt-Presets, various photo editing tools have been combined to create high-quality pictures. When it comes to adjusting the tone of photographs along with setting the appropriate exposure of a picture. These offer various combinations of editing features to create high-quality photographs that have a professional touch. Free (Royalty free) Images on Unsplash Unsplash is a platform powered by an amazing community that has gifted hundreds of thousands of their own photos to fuel creativity around the world. So sign up for free, or don’t. Either way, you’ve got access to over a million photos under the Unsplash license—which makes them free to do-whatever-you-want with. This site is great because the photos are so much better quality than boring standard stock photos. And they are all free to use however you like! :) Build a Free Website with Weebly When I built my first website I had no money so I did it for free with Weebly. With Weebly you get access to customizable webpage designs and useful tools to build your website and grow your photography business. Easily build a free website to help you get discovered and grow your customer base in style. It's never been easier to start your own website with no knowledge of webdesign. This is a great way to start that blog you've been talking about. Free Photoshop Alternative Gimp is a free, open-source alternative to Photoshop that's been around for many years, GIMP stands for GNU Image Manipulation Program. Today it's available in versions for Linux, Windows and Mac. GIMP offers a wide toolset, similar to Photoshop in many ways, and is a great option if you're looking for a no-cost image editor. The interface differs somewhat from Photoshop, but a version of GIMP is available that mimics Adobe's look and feel, making it easier to migrate over if you're ditching Photoshop. The full suite of tools is everything you're accustomed to, including painting tools, colour correction, cloning, selection, and enhancement. The team that oversees development has worked hard to ensure compatibility too, so you'll be able to work with all the popular file formats without any trouble at all. You'll also find a very capable file manager built in, along similar lines to Adobe's Bridge. Overall, this is a great option whether you've either got a limited budget, or want to move away from Photoshop for other reasons. Free Overlays & PNGS with DeviantArt DeviantArt is the world's largest online social community for artists and art enthusiasts, allowing people to connect through the creation and sharing of art. This site is great for any digital artists who use Photoshop alot. Need an object with a transparent background or an overlay of smoke, fire, magic, rain, snow, etc? You can find it all on DeviantArt for free.
The point is, we’ve never lived in a time where we have so many free resources at our fingertips to help us elevate our skills and business. I hope these resources helped and if you have anything to add please do so in the comments below.  In this article I cover shooting portraits in low light situations. I love shooting in the dark because it forces me to be creative and use the light I have available to me but also creates a lot of obstacles to overcome. Getting a sharp image completely in focus with little to no noise is difficult when shooting in low light with no flash but I hope with these tips it will be a little easier next time you go and shoot in the dark. Photographing in low light situations presents many obstacles but if you use the tips in this article you can easily overcome them with confidence on your next shoot. All the photos below were taken by me. Make sure to connect with me on Instagram HERE Let me know if this article helped in the comments below. Find a light source Let's start with your light source. Low light photography doesn’t mean no light photography, you will always need some source of light. The biggest mistake I see photographers make in low light situations is having their subject turn their back to the light source with nothing to light their face which is great if you want a fun silhouette but otherwise you will want your light source as close to your subject as possible. whether your light source is a street lamp, Hotel lamp, arcade, neon sign, or flame from a lighter position the light source either to one side of your subjects face or directly in front of them behind the camera so it lights their face.  Model: @kamyar_jahan on IG Neon Lights whether you're using neon bar lights or an arcade try placing your model to the side of the light and have them look towards the light or straight at the camera. Play around and notice how the light effects their face. Keep an eye on those harsh shadows. Make sure your subject is as close as possible to the light source. Adjust colors as needed in post. 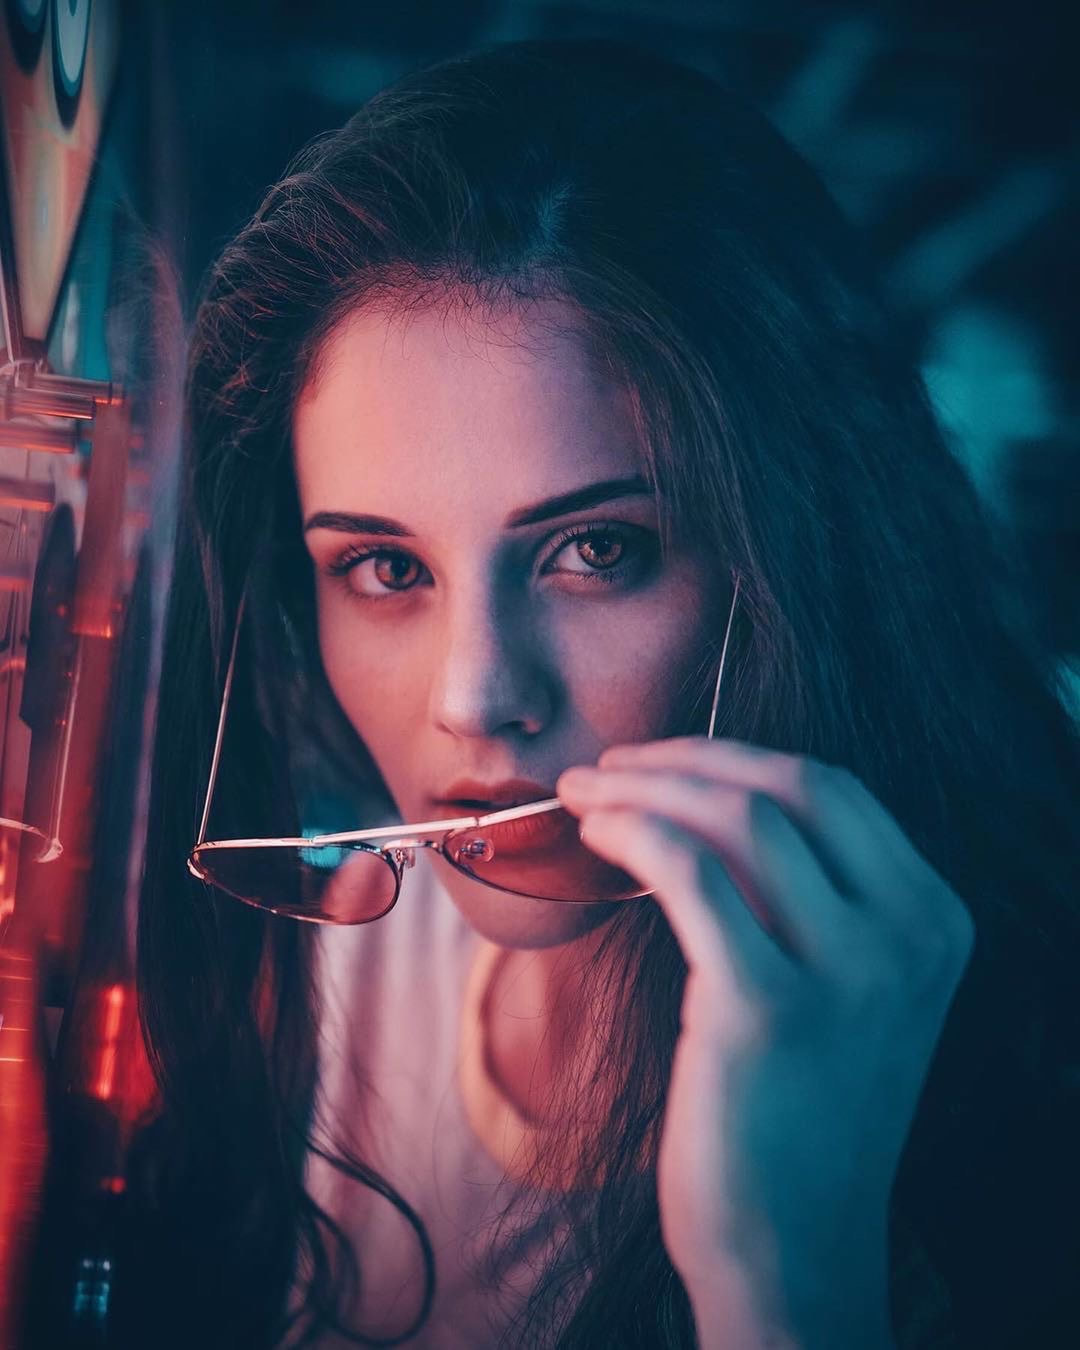 Model: @elloruthie_ on IG Model: @elloruthie_ on IG 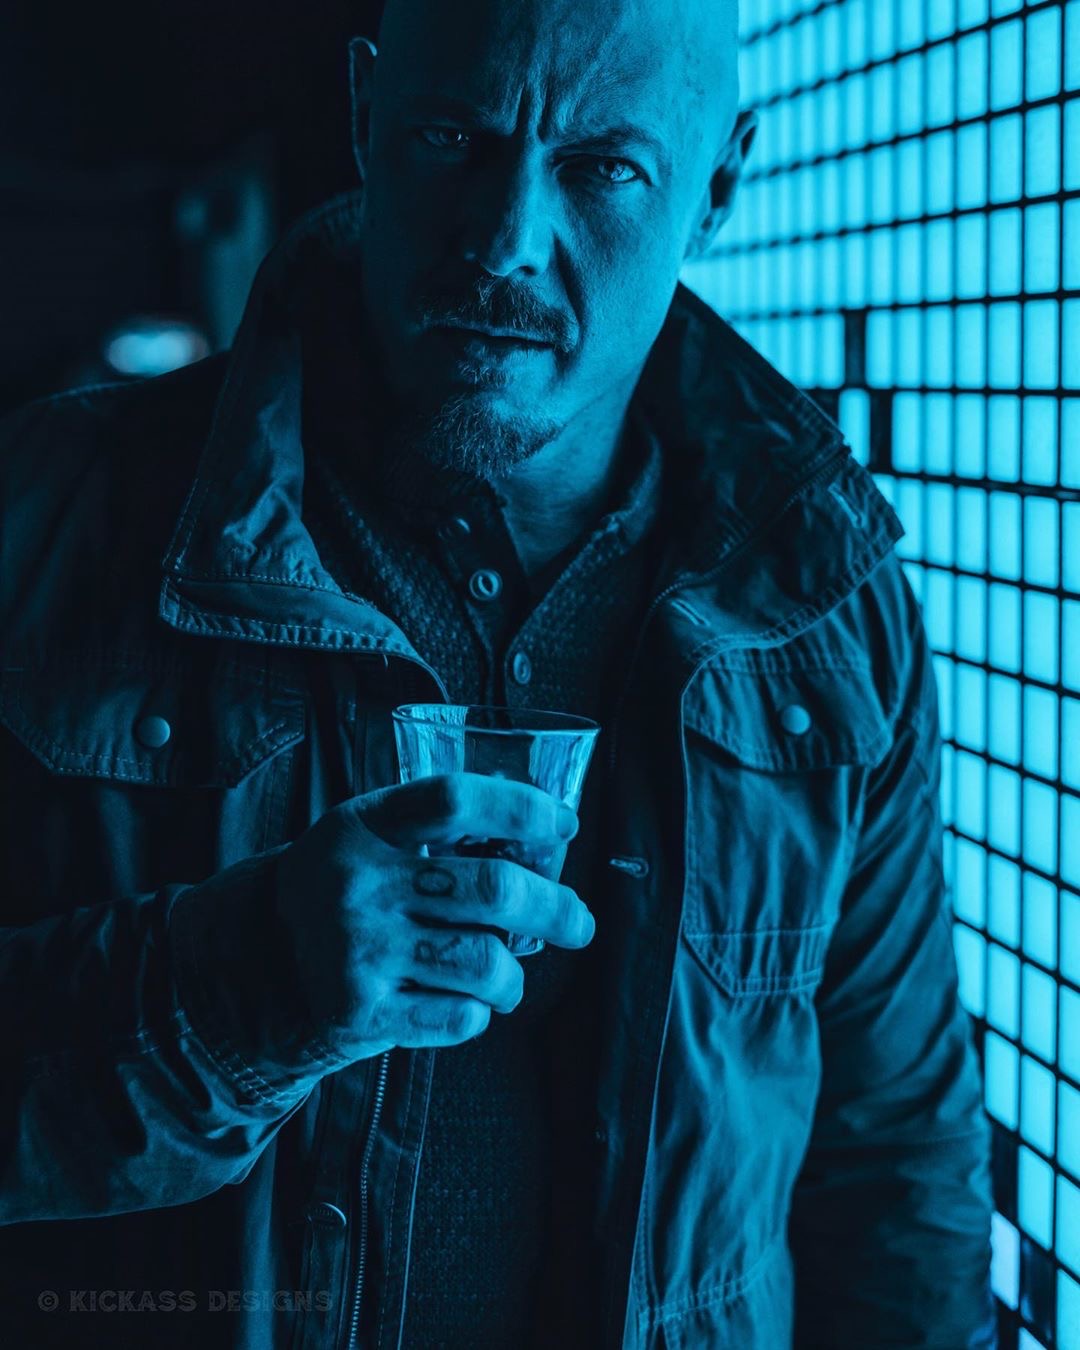 Model: @starttheworld on IG 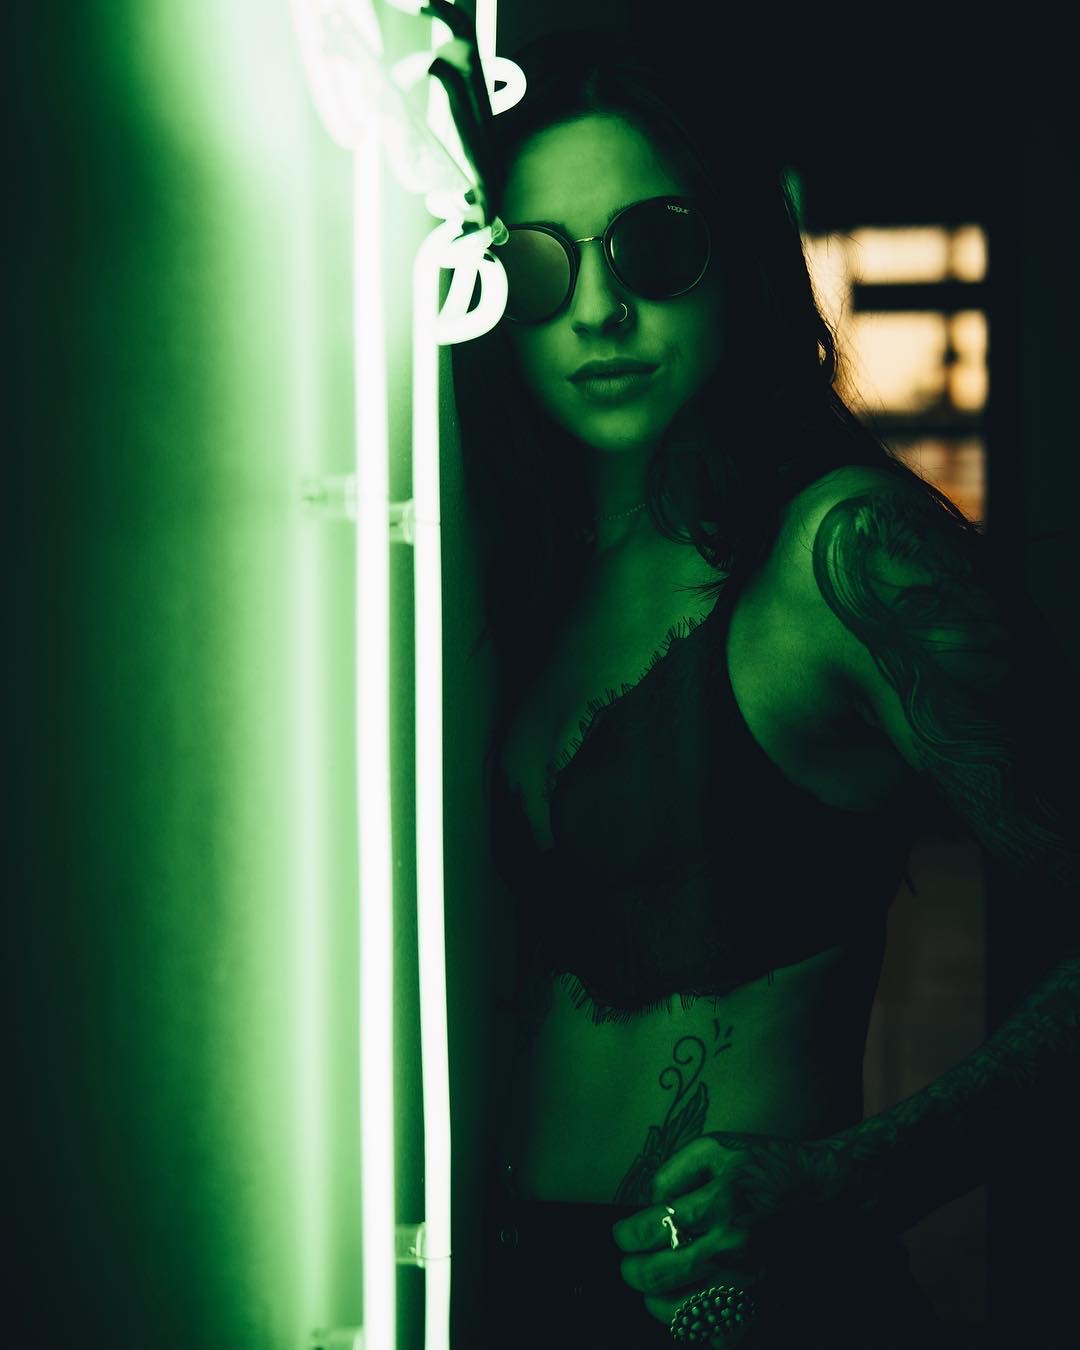 Model: @aliciangates on IG The key to shooting with neon is having your model as close to the neon as you can get. If you have the Neon behind them and nothing to light their face it will be too dark. For the example below I had my model stand as close as she could to the arcade screen because it was producing a good amount of light. Settings used were: 1/200Sec /// ISO 640 /// F3.2 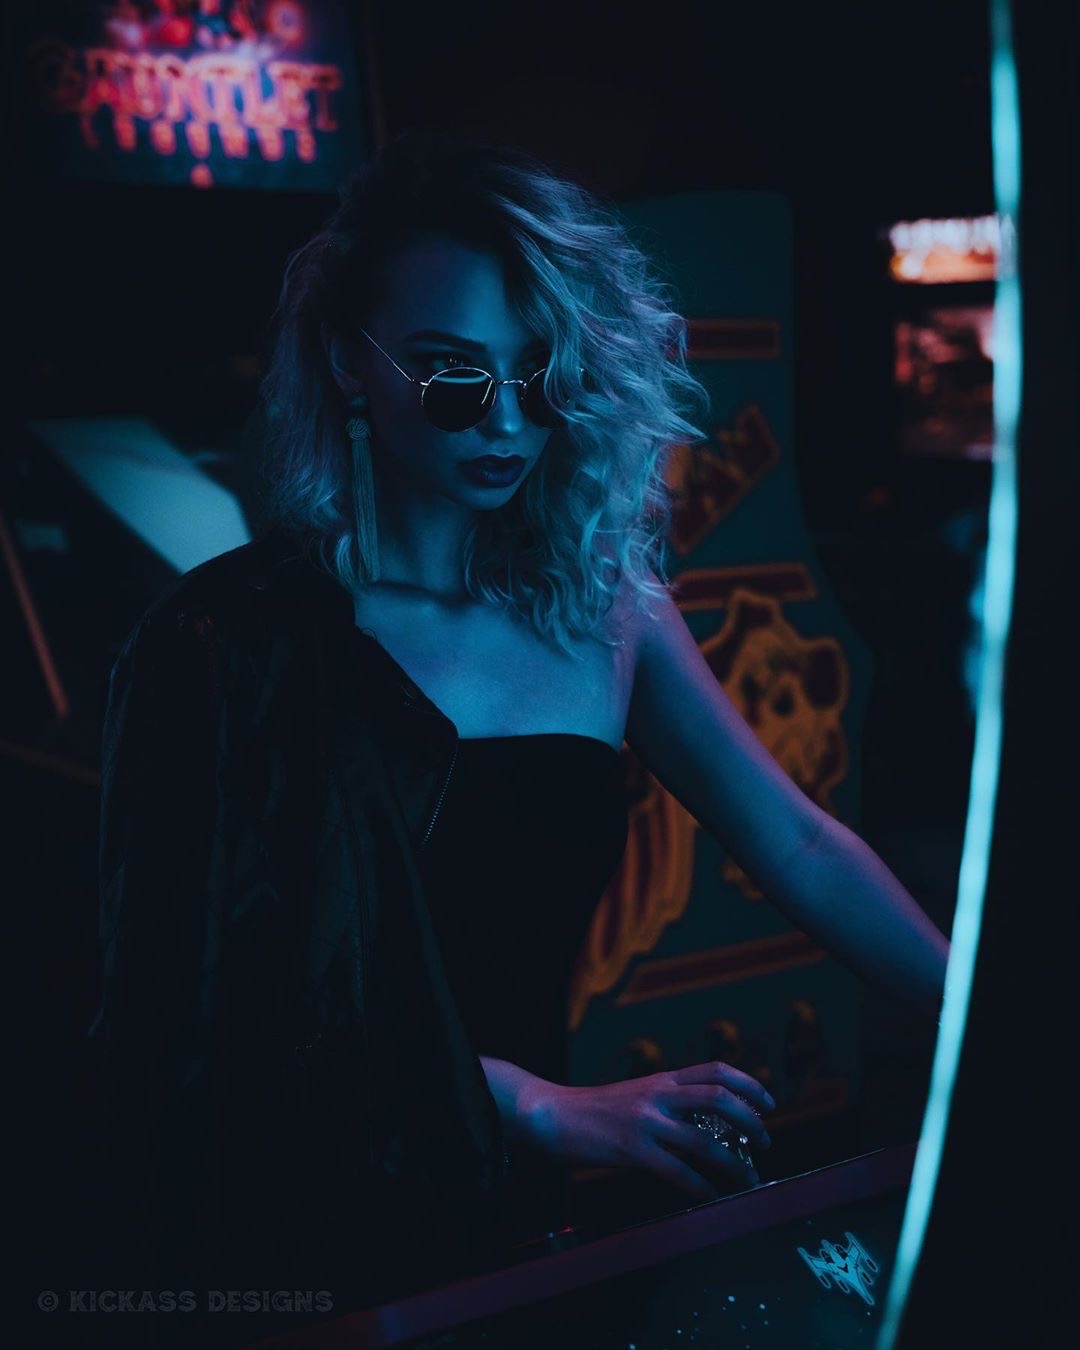 Model: @thehannahhawkins on IG  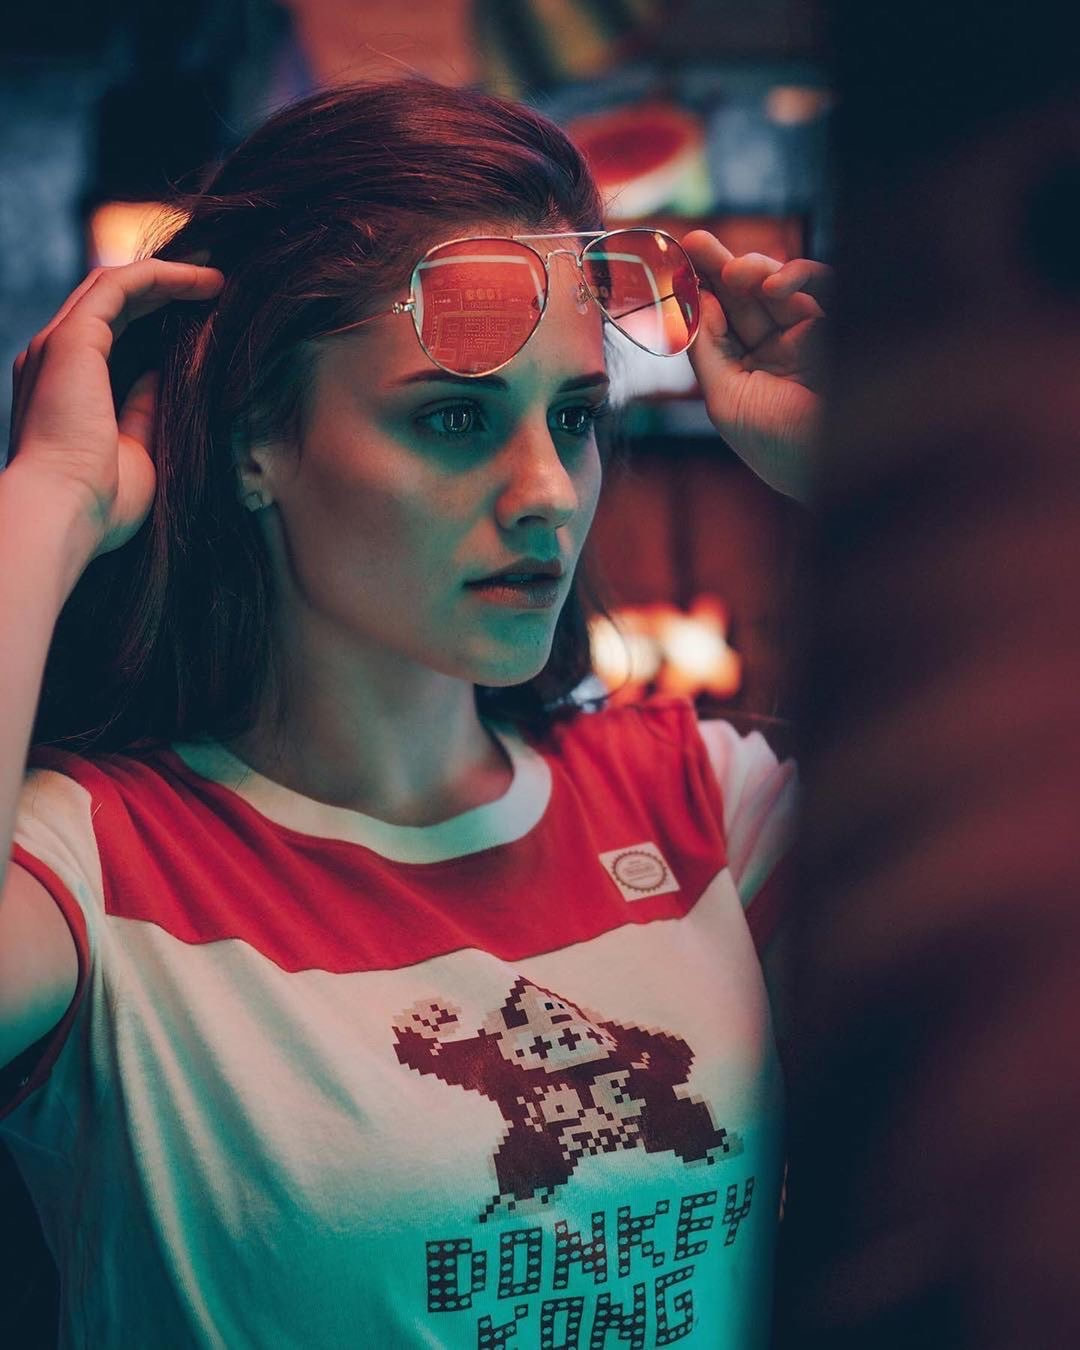 Model: @elloruthie_ on IG Use Sunglasses Mix it up. Sunglasses can make for some fun reflections with neon lights. 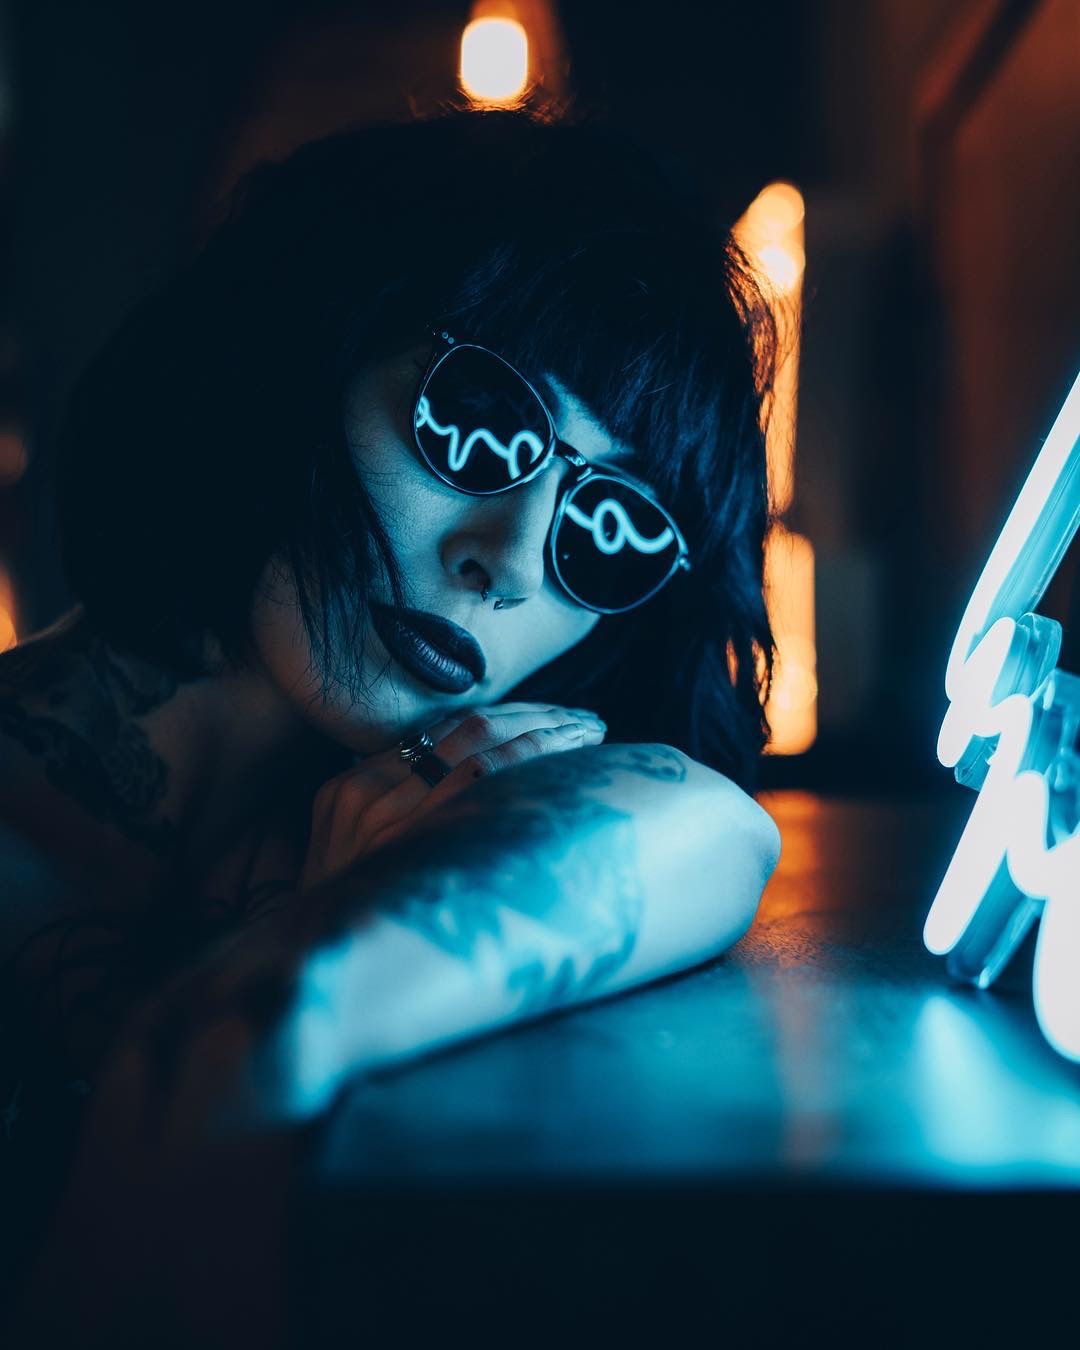 Model: @morbid_lady on IG 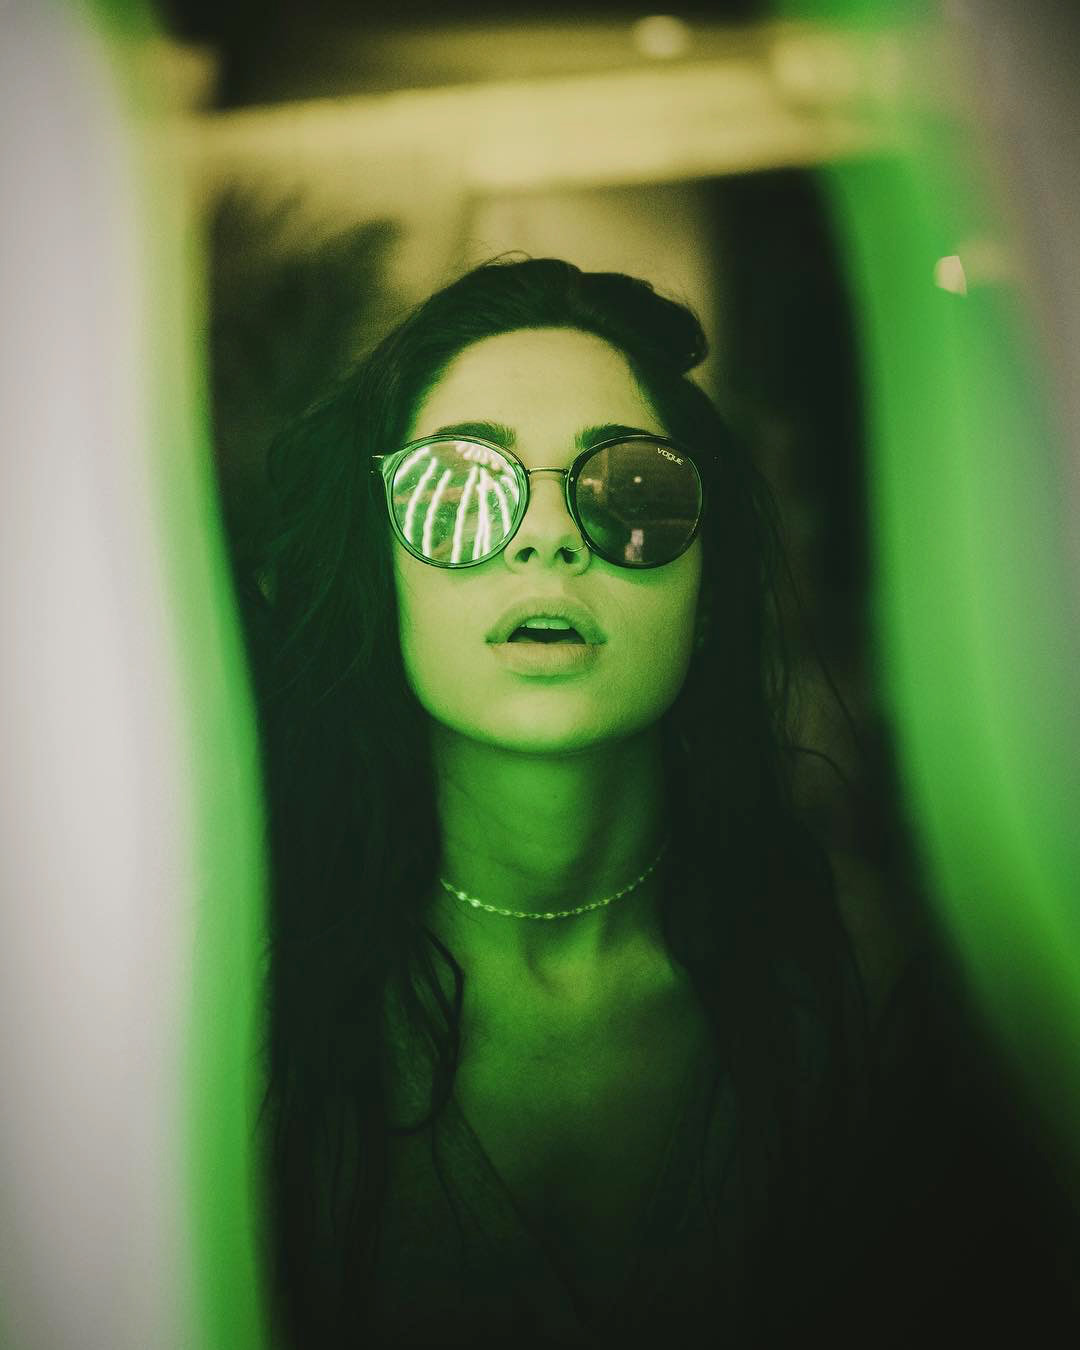 Model: @aliciangates on IG  City Lights If you're shooting in the city at night there are a few options you can use to light your subject. You can use a lighter or street lamp for dramatic lighting or a neon bar sign in a window as we did below.   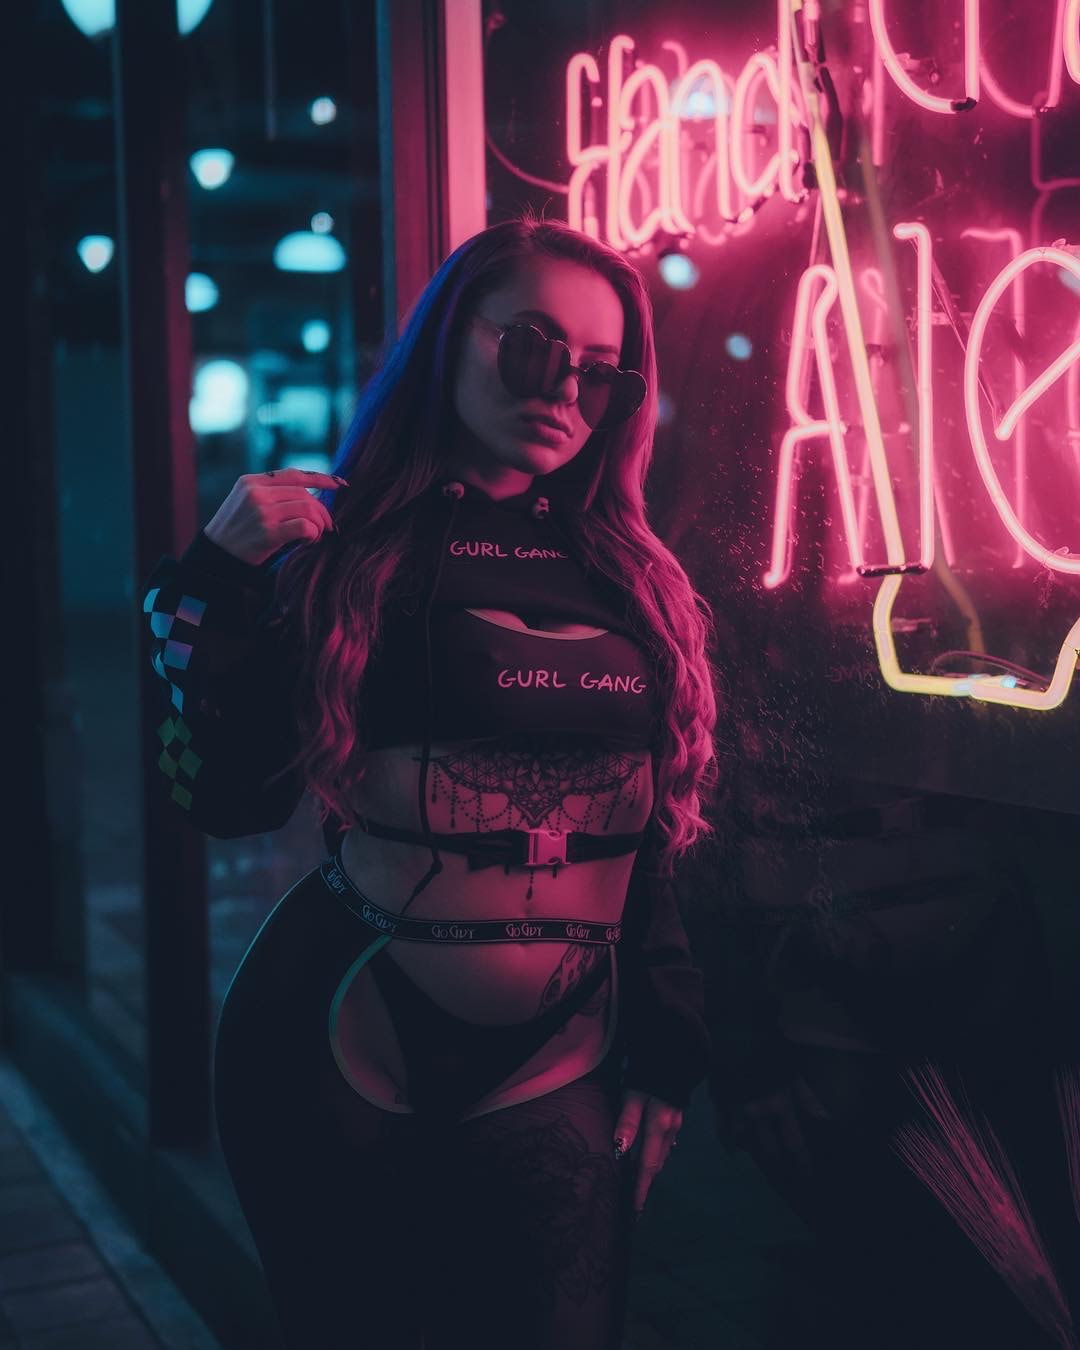 Model: @w33dhead on IG If there's a lamp, use it. The example below was shot in a hotel room at night using the standing lamp next to the sofa. If a lamp is all you have just point it towards the model and make sure it's as close as possible. Have your model look towards the light to reduce harsh shadows.  The Silhouette Try having the light source behind your subject with no light in the front to create a fun silhouette like we did below. 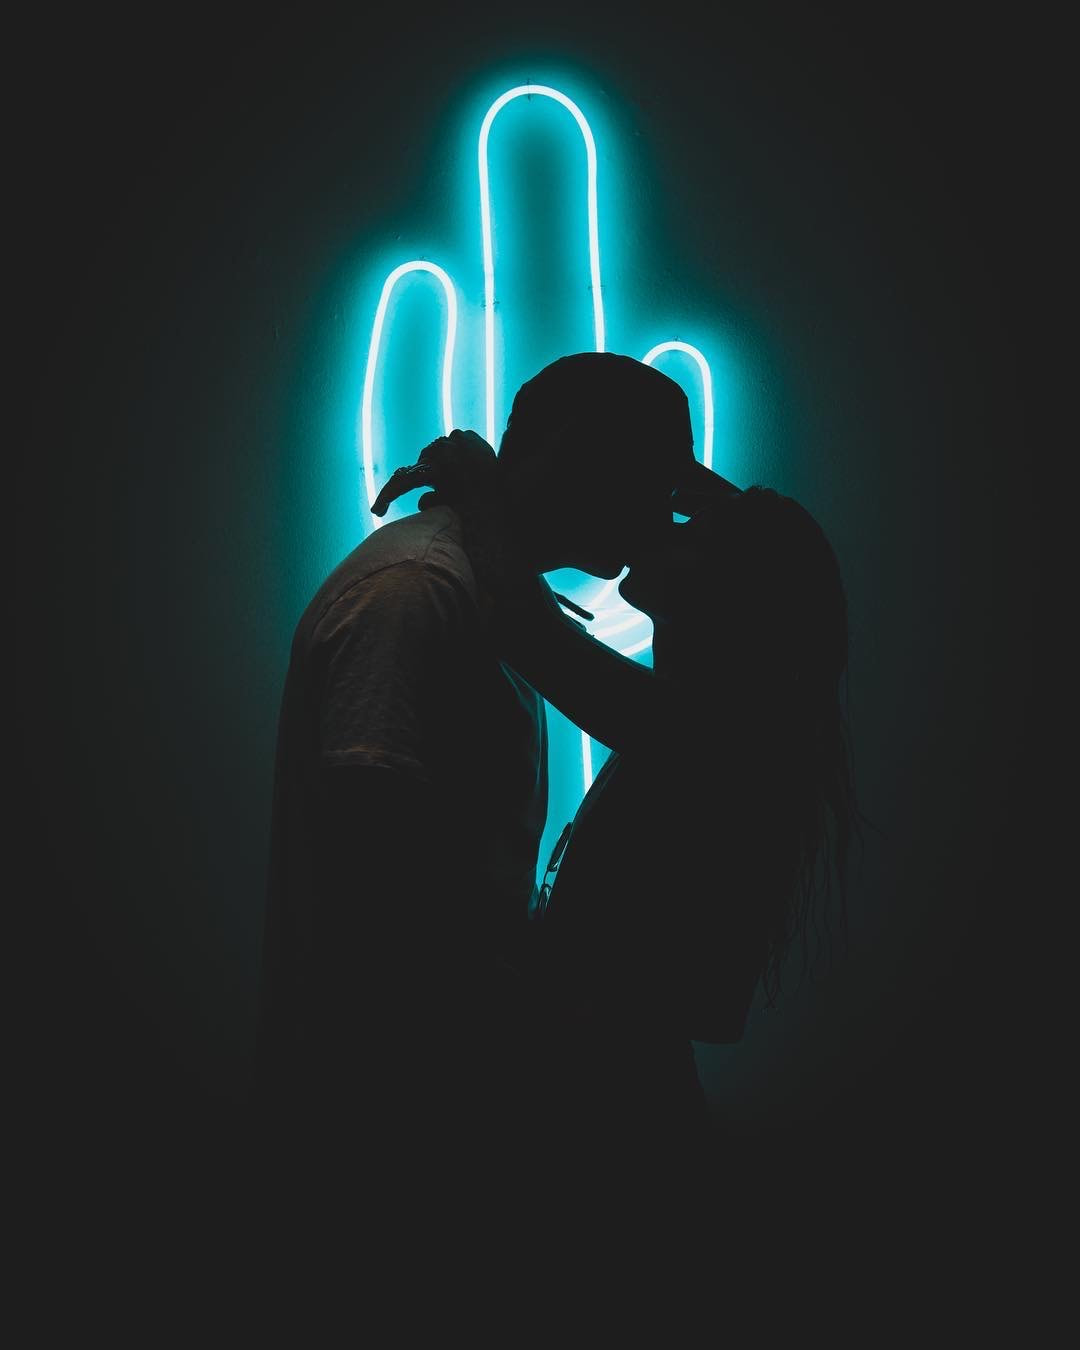 Model: @aliciangates on IG  Fun effects with a Prism On Amazon you can find a variety of glass and prisms to hold up to your lens when shooting with neon lights around. The reflections make for some fun effects as shown below but definitely takes practice. 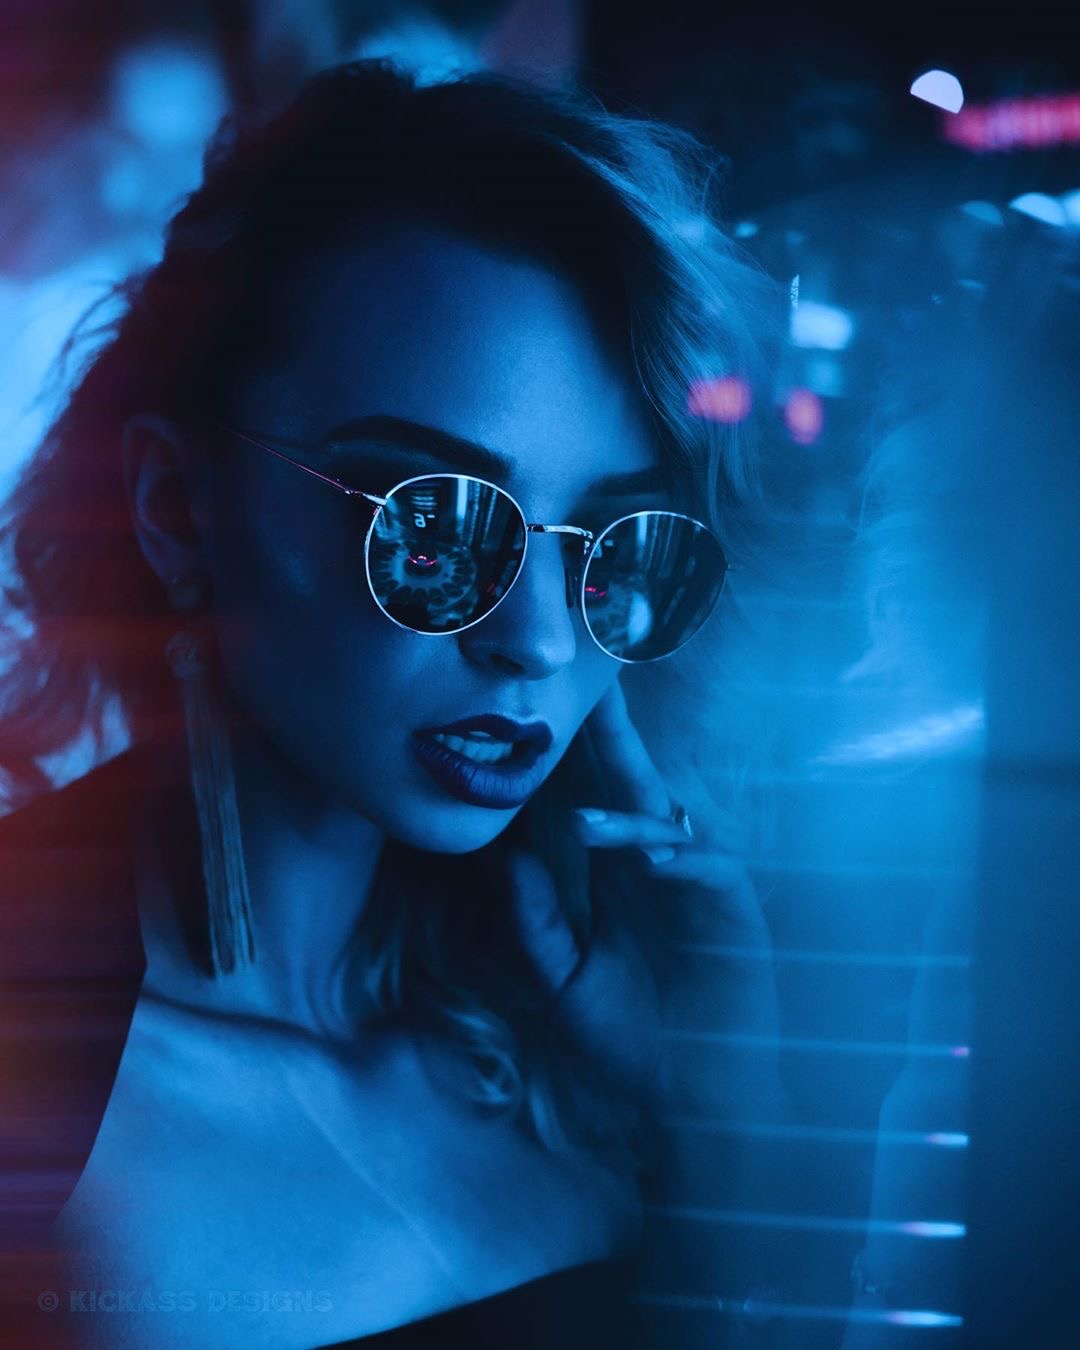 Model: @thehannahhawkins on IG 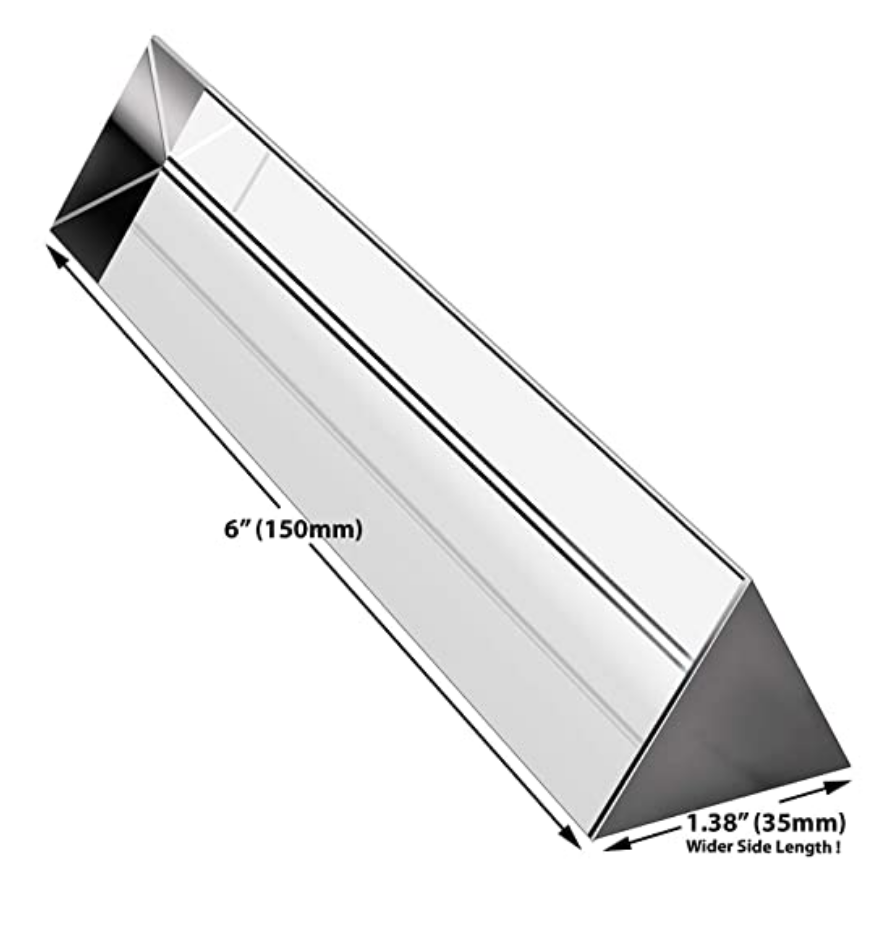 Shoot in RAW Why you should be shooting in RAW VS JPEG: I am blown away by the amount of photographers that don’t shoot in RAW or even know what it means. If you’re a professional photographer you are doing your self and your clients a massive disservice by shooting in JPEG. When shooting in a format like JPEG image information is compressed and lost. Because no information is compressed with RAW you’re able to produce higher quality images, as well as correct your shadows and highlights that would be unrecoverable if shot in the JPEG format. Recovering shadows is absolutely vital when shooting in low light. Cameras will vary but a trick you can use to pump up shadows dramatically without getting grain is keeping your ISO below 1,000. More on that below. On the flip side you have your brightness. Levels of brightness are the number of steps from black to white in an image. It’s very simple, the more you have, the smoother the transitions of tones in your photos will be. You want smooth transitions. For example JPEG records 256 levels of brightness, and RAW records between 4,096 to 16,384 levels! 😳 The effect this will have on your images is MASSIVE. Just remember shooting in RAW format lets you make more adjustments like exposure, blacks, fill light, recovery, detail, contrast, & brightness to your image in post (with a program like Adobe Lightroom) without a significant reduction of quality, because there’s more levels to work with that you don’t get when shooting in JPEG. Most importantly as Professionals we should be providing our clients with the highest quality possible. That means shooting in RAW. Understand ISO All you need to know about ISO is the Higher the number the more light your camera will bring in. But there's a caveat to ISO you need to know. The higher you go the more grain you will get. However grain isn't necessarily bad. Some photographers want that grainy look. That's their style. But if that's not the look you want it's best to keep your ISO lower than 1,000. That being said every camera is different and new cameras can go much higher with less grain than the older ones. For instance my SonyA7iii can shoot with ISO at 1,000 with no noise but my older SonyA6000 could only shoot at ISO 500 with no noise. It's best to play around with your camera in a dark location and find the sweet spot for your specific camera. Open the photos in light room and check the histogram to see what settings you used for each photo. Find the photo with the highest ISO but still has little to no grain. Remember that number and try your best to avoid going over it Last thing you want is to find out you just did a shoot for a client and all your photos are too grainy. 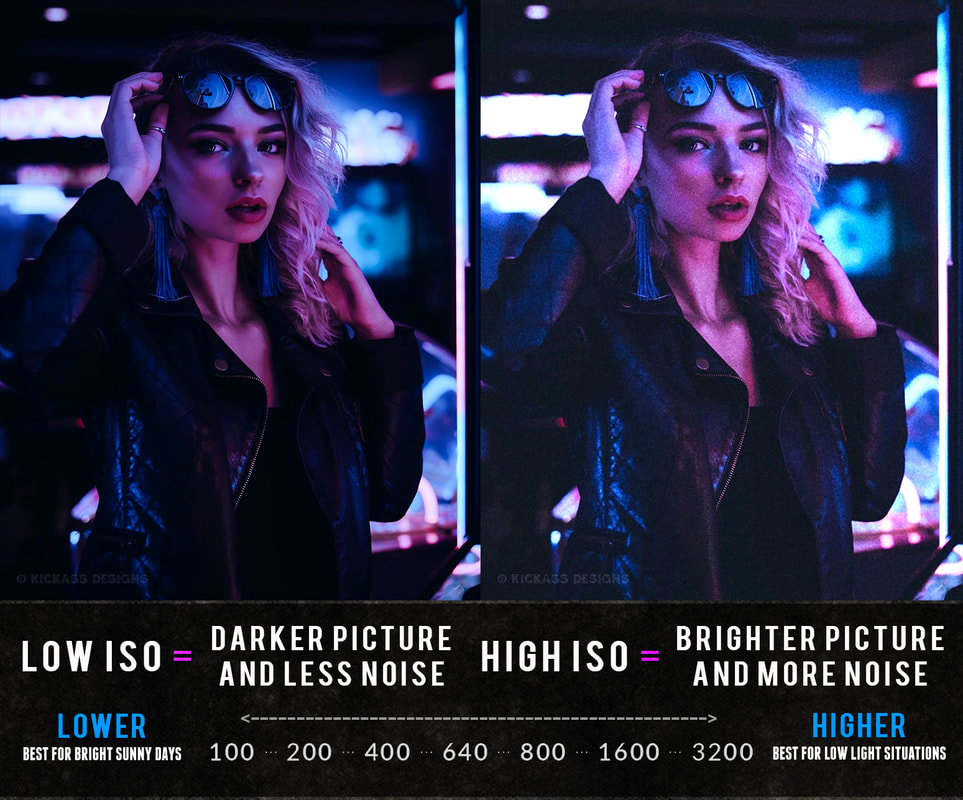 Keep your shutter speed low Without getting technical all you need to know is the lower your shutter speed the more light is let into the sensor and thus the brighter your image will be. The caveat for shutter speed is this: The lower you go the more sensitive your camera gets to movement and thus the blurrier your photo will be if any movement is involved. This means movement of the camera itself and the subject you're photographing. I highly suggest if you go under 1/100th of a second you use a tripod because anything below that and your camera will detect movement and the photo wont be sharp. Just remember your shutter speed effects brightness, darkness, and blur. A tripod is a MUST for slower shutter speeds. So is keeping your model perfectly still. Any movement from your camera or model under 1/100th of a second and your picture wont be sharp.  Use a Tripod As I mentioned above, when shooting in low light one option to bring in more light is slowing down your shutter speed. The lower you go the brighter your image will be but you'll need a tripod or flat surface to rest your camera on for a nice sharp image at lower shutter speeds. This is my go to Tripod. Also keep in mind any micro movements from your finger on the clicker as you take the shot may impact the sharpness. To avoid any micro movements when using a tripod I will set the camera to a 2 second delay or use a wireless remote. Keep your Aperture Low Aperture is a set of small blades that create a hole that determines how much light is let into the camera. The wider the hole the more light that comes in. The size of this hole is measured by F-stops. A large F-stop like F-22 means the hole is very small, and a low F-stop like F/2.8 means the hole is wide open. So the higher your F-stop the darker it will be and the lower your F-stop the brighter it will be but keep in mind brightness and darkness aren't the only thing that changes when you adjust your aperture. Aperture also controls depth of field. Depth of field determines how much of your photo is sharp and in focus and how much is blurry. A low F-stop like 2.8 is very narrow and will only focus on a specific part of the image while leaving everything else blurry. The closer you get to your subject with a small F-stop the more narrow the focus will be and thus the more blurry the background will be. A low F-stop is how you get that creamy background and beautiful bokeh effect with the lights in the background. Just keep in mind if you're shooting portraits it's extremely hard to get the eyes both in focus and everything sharp at a low F-stop like F/1.4 or 2.8. I find F/4.5 is best to get everything on your subject sharp and in focus if you're close to your subject. If you're about 6 feet away or more from the subject F/2.8 will work and bring in more light. If your photographing a beautiful landscape or group of people however you will want a large F-stop like F-11 or F-22 to make sure everything and everyone is in focus. Every lens is different and will determine how low you can go and how sharp an image looks at low aperture. My favorite lens in the Sony 85 MM 1.8 Prime 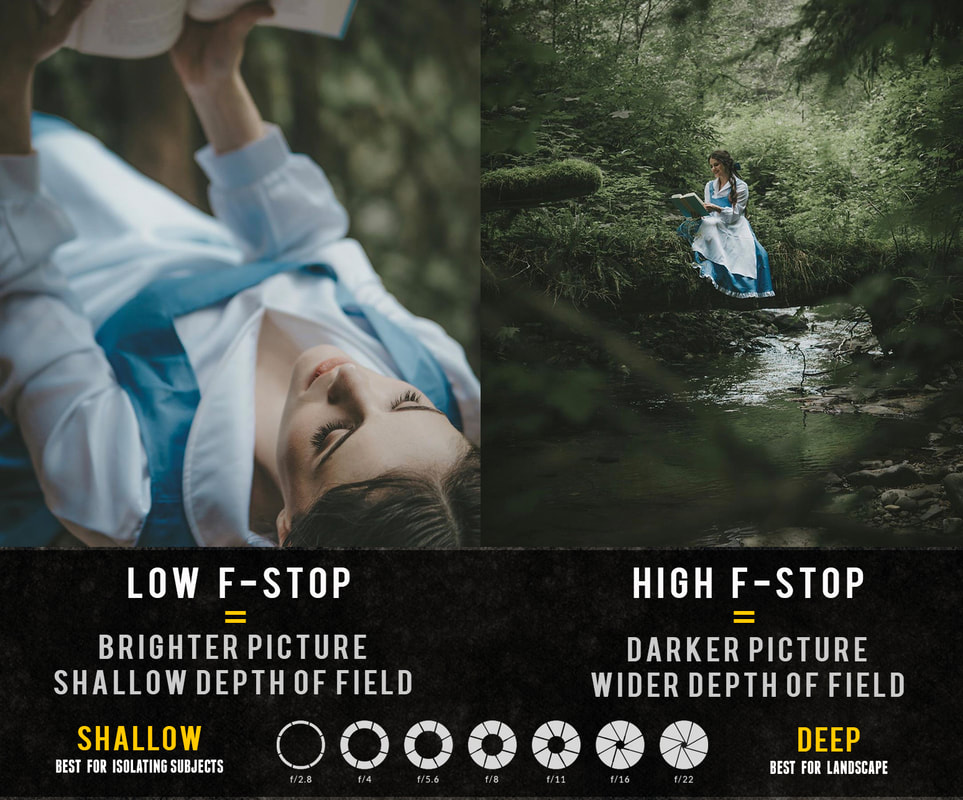 Get a Light Wand I know, I said no flash. But I don't count a small portable light wand as flash. I prefer not to carry around a bulky flash. You can bring in a wand to a bar with no problem. Now that we discussed using available light sources every now and then you'll be in a situation where you just don't have any light available. For emergency situations like these I like to have a light wand in my car just in case. It's about $80 on amazon, it's light, compact, easy to carry and use. The photos below were taken in a bar with zero light to use so I used the Portable Wand Handheld LED photography Light wand to light the models. 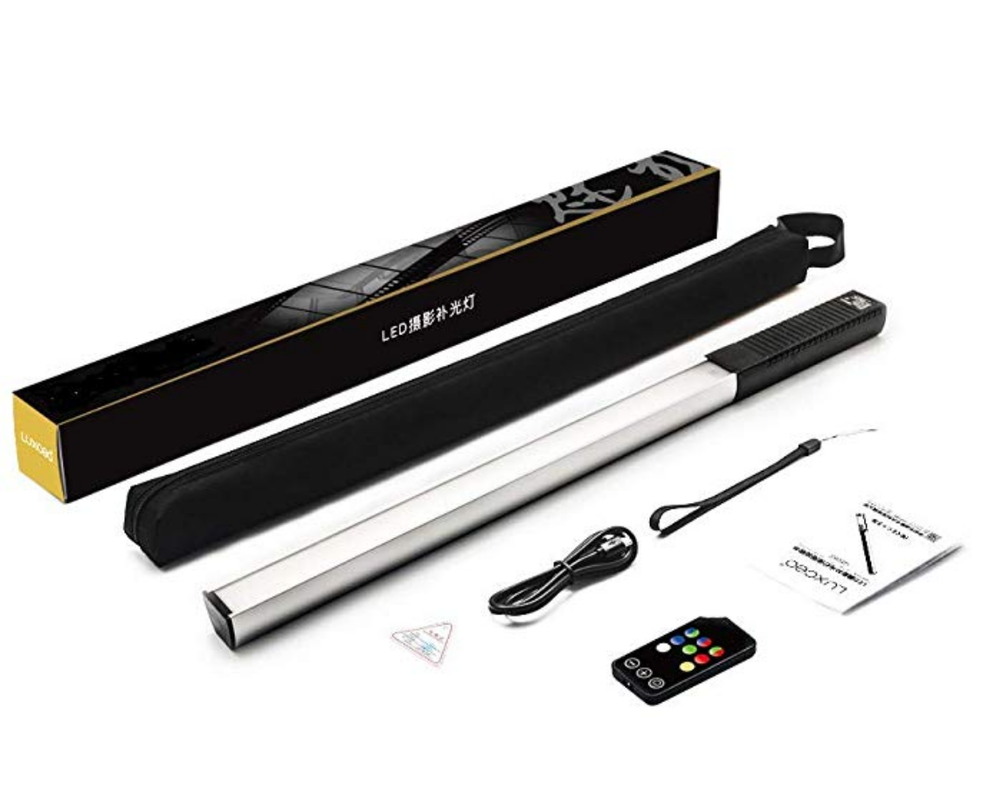  Models: @jacquelynnefaith & @ambernicotra on IG What I love about this wand is that it has multiple color options to choose from so you can match the color to the lighting behind the model when shooting with neon as seen below. My settings: 1/160 sec /// ISO 320 /// F2.2 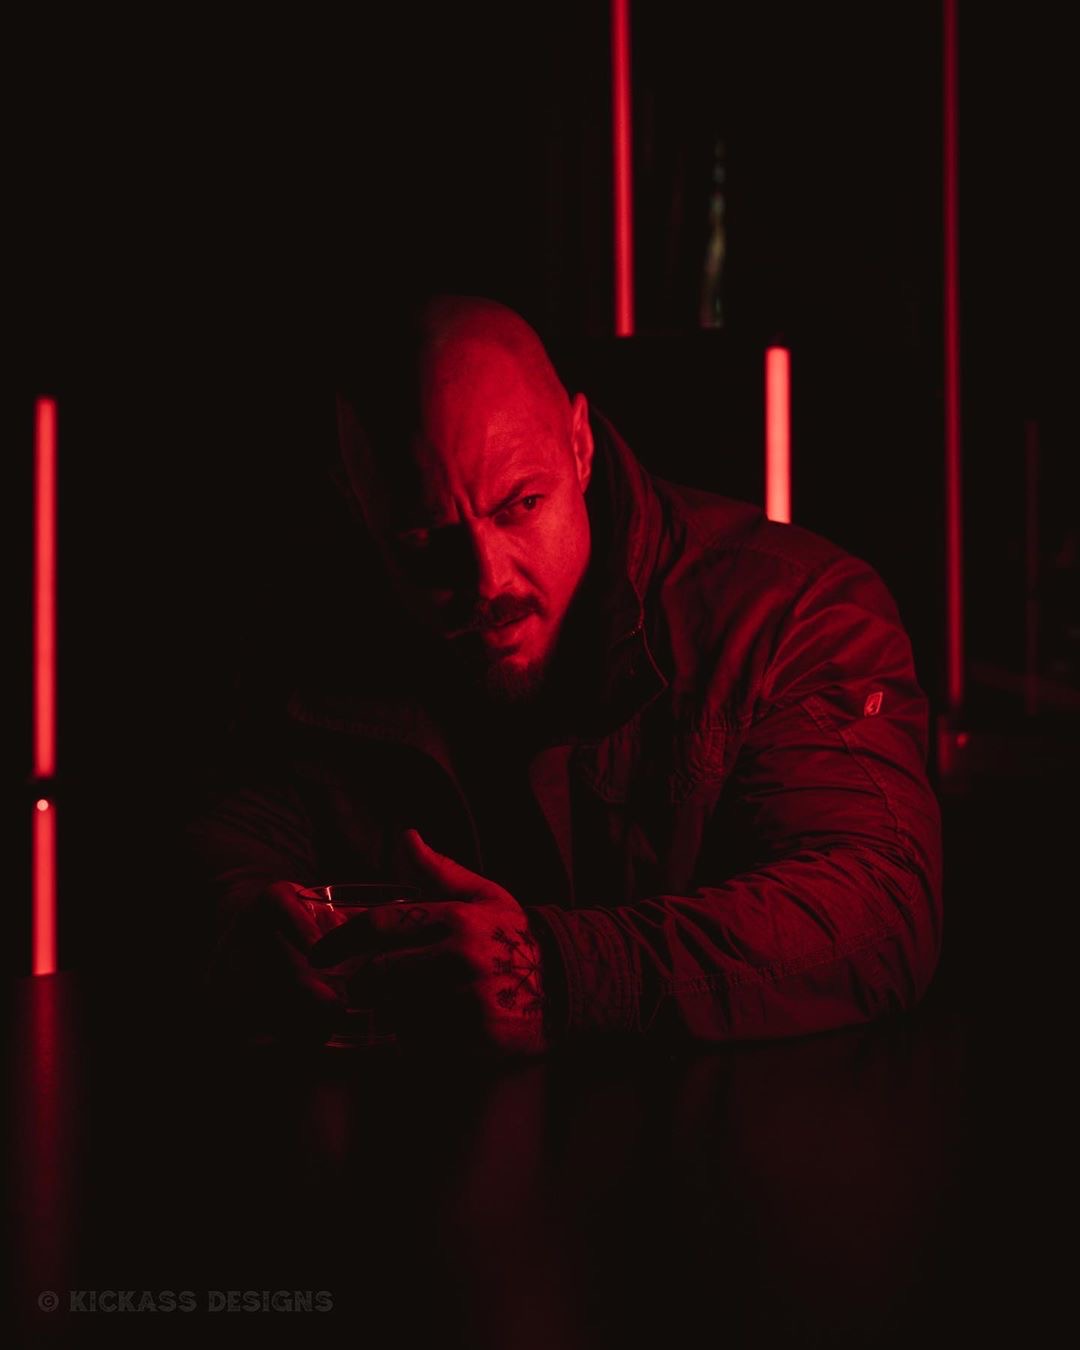 Model: @starttheworld on IG Photo Editing Software Purchase a photo editing software such as Adobe Lightroom. Photo editing software will allow you to edit your photos in post and really make those crucial adjustments to your highlights, shadows, exposure, saturation, and contrast.
In the end you just have to practice practice practice. Let me know any issues you're running into. I'm happy to help. 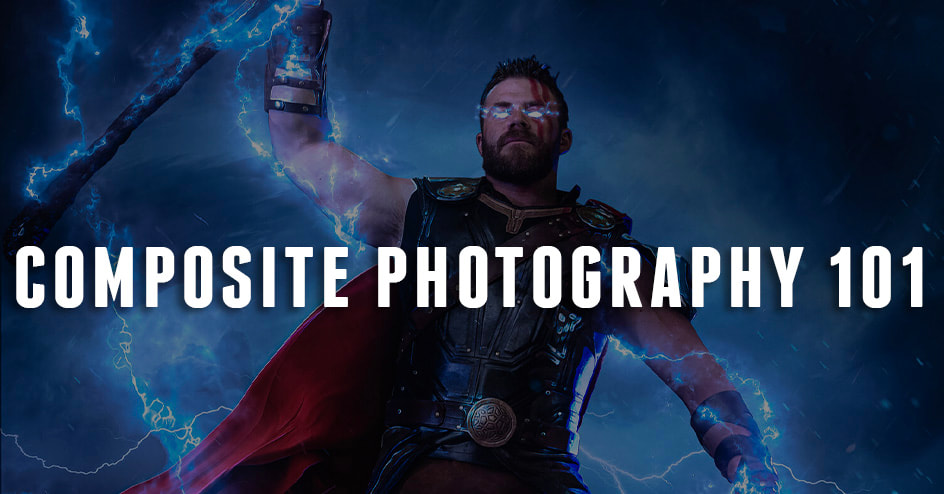 Digital Stylized photography, other wise known as Composite Photography is one of the most compelling and visually stunning forms of photography and digital art you'll ever see and a personal favorite of mine. A Digital Stylized photographer will create what's known as a composite image. These are made up of two or more photographs, which are combined to create one image. And while this definition makes compositing sound quick and easy, it's anything but, often times it requires several hours of photography and Photoshop work to complete a final piece. Believe it or not you've seen composite images in ads, on websites, in the news, even on your friend’s Instagram. As a Cosplay Photographer myself naturally I'm friends with other Cosplay photographers and I'm often envious of their composite skills. Photoshop is my weakness so I take more of a cinematic or editorial approach that requires less Photoshop but I look up to my fellow artists who can take out the background, put their subject anywhere and add effects like light, background, particles, explosions and other images. One of these talented artists is my friend Anthony with Soul Studios in Seattle. I'm constantly in awe of his work so I asked him if he'd like to be my guest author for today's article and he obliged. Below you will find some of his work and his take on Digital Stylized photography. We hope this inspires you. 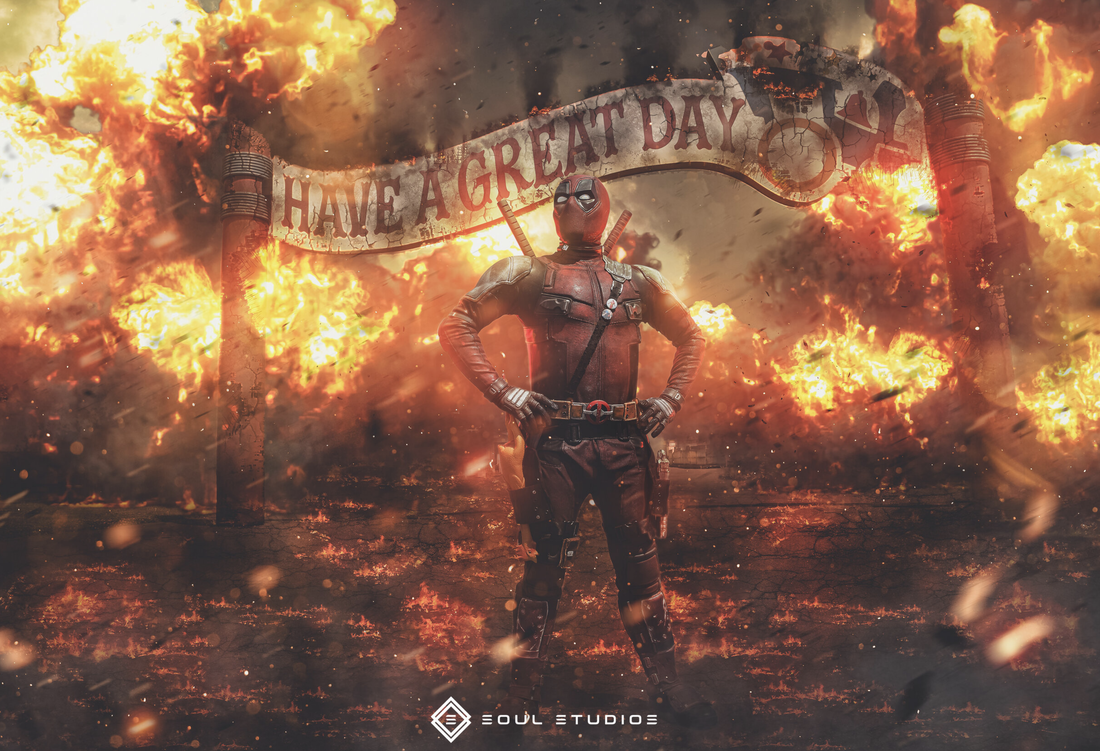 Photo by @gfxsoulstudios on IG Painting with Light Photography has been around for a long long time, but the way it has been done has shifted greatly since it began. Painting with light, that is what photography means, and these days photography is everywhere. With high resolution cameras at most people's fingertips with the technology of cell phones, everyone is a photographer. Instagram is a popular tool used for capturing and editing photos, and with today's influx of selfies, landscapes, and random cell phone photos, it has become increasingly difficult to stand out. What makes a photo unique? Is it the subject matter? The lighting? The costume? Or maybe the Photoshop effects? To be honest, it is all of the above. In this digital age, photography is as immersive as any other form of digital media. 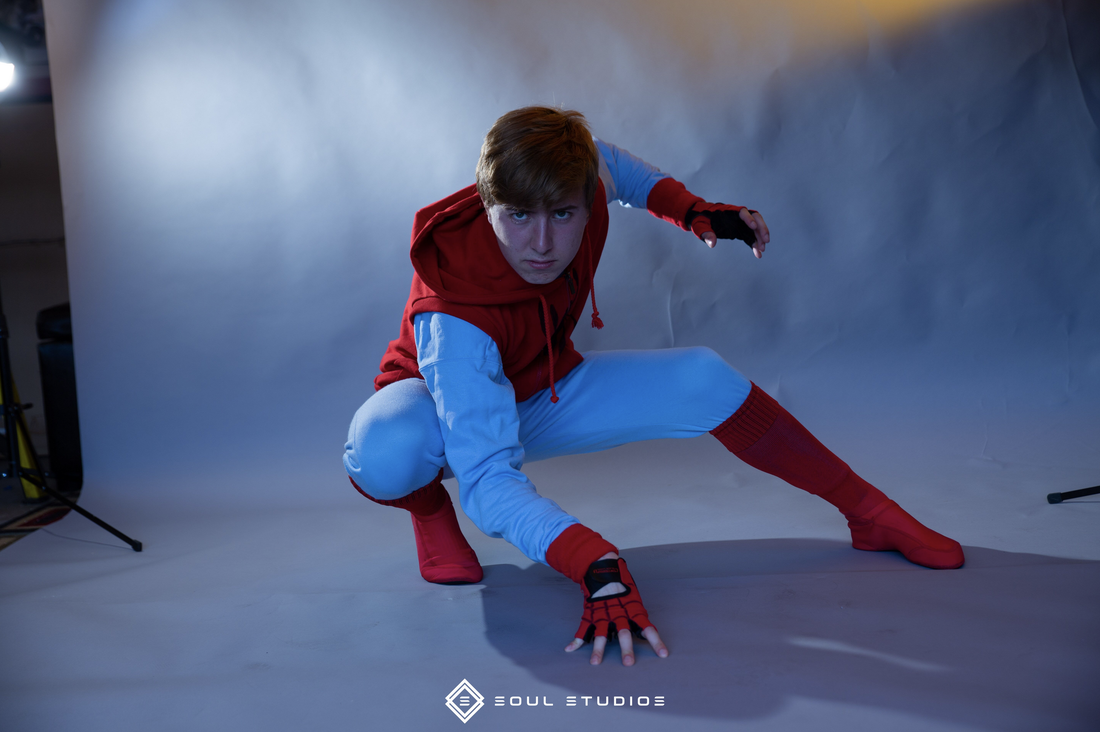  Photo by @gfxsoulstudios on IG Define your Style Finding the right balance of traditional photography vs. added digital effects is tough and one of the keys to making your photos stand out. Digital Stylized photography is something that can consist of any digital image. It does not have to be some crazy Photoshop composite to be a stylized photo, in fact I would say most are not. But effects can bring a photo to life and make a photo that one could see as dull stand out. There is not any one subject matter that is exclusive to this style of photography as any photo can be enhanced to a point. But there are subject matters that are made for this stylized approach to photography. One of the most important things to find in doing stylized photography is your style. A style that defines you and how you want your images to look. This is 100% up to you, whether it is a high contrast look with low saturation, or adding film grain to give it that gritty feel. Finding what fits you and makes you happy is the most important. For example, something I add to all of my images is particles and atmospherics. I want my viewers to feel like they are looking at a real image, something that was taken in camera. So I try my best to make my images as camera accurate as possible, with some added pop of course.   Photo by @gfxsoulstudios on IG Find your Process Finding your process is also important. While it is very easy to see someone else’s gear and lighting set-up and try to copy every aspect of that to a T. But does it work for you? Or are you just doing what you think is the best way? Who said it was the best? What works for you? You are the artist and this is your vision. I often fight off the urge to compare my images to that of the amazing digital artists that I admire, wishing my images could look like theirs, and feeling like my work is no good once I look at both. But there is something to always remember. While having inspiration is so important, do not let that inspiration turn into doubt. Looking at someone's amazing work should never hold you back from creating something.   Photo by @gfxsoulstudios on IG Be Creative You are probably wondering how someone creates a digitally stylized photo. Well that is where your creative mind comes in. When I am shooting, I often try and have what I want the end result to be in my own mind, striving to make the subject look as close to that as I can in camera. This has many elements to it. Is the pose right? How about the angle? Does the horizon line match up? What is glowing? Do I need to adjust my lights to match how the light is going to be hitting them? What color is the light? These are all things I think about when I am shooting my images. For example, if I know my subject is going to have an explosion behind them in my final image, I am going to want to put a orange light behind them to have that same glow of light that would come from the explosion. But that is my style of shooting, that is what works for me. And that works knowing my limits in my editing skills.  Break the Rules Can you still do digital stylized photography if you are not a Photoshop wizard? Of course you can. Get creative and ask yourself, how can this photo stand out more? Should you get low and shoot up to make it look more dynamic? Should you try and get them mid-air so there is action in the photo? Try new things and think outside of the box. Break the rules of photography and see what you can and can't do. It might not work, but that does not mean you have failed, that just means that you can try something else that might work. Whether you have the skill set to take your photo into Photoshop and add an epic explosion or someone holding a fireball. Or you love to do things in camera and you have your subject hold your flash to make them appear to be holding an energy ball. There is no right way to do photography. Be bold, be creative, and try new things.  This article was brought to you by my guest author, good friend and fellow photographer Anthony El with Soul Studios. Make sure to check out his amazing work and connect with him on Instagram HERE
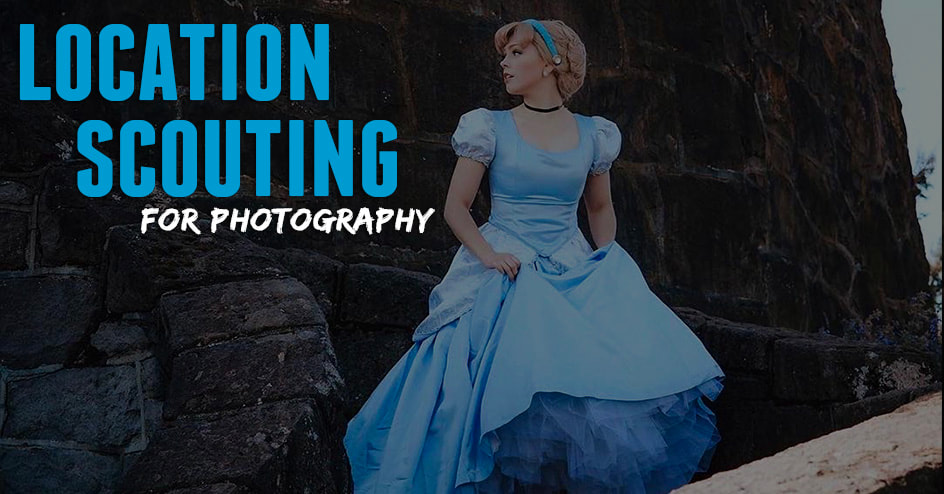 Location Scouting. One of the most undervalued aspects of photography. Whether you're a landscape photographer, wedding photographer, portrait photographer, or fashion photographer, the more locations you have at your disposal the more valuable you become. In fact I'm often told by my clients one of the reasons they hired me was because they love the locations I use. I Always try my best to find new and unique locations that most people don't know about. I have spent countless hours researching locations and driving around scouting locations. Because of this I'm not always quick to giveaway my favorite locations to anyone who asks. In this article I wont be giving away my locations but rather teaching you how you can find the perfect location for your next shoot all on your own. Connect with me on Instagram HERE and let me know the most helpful tip in the comments below.  Model: @roguesgalleryfitness on IG Location Scouting Tip 1: Just Drive Let's start with the best way to find a new location. Literally drive around and look with your eyes. As I'll mention below the problem with scouting online is you can't always be guaranteed a location will still be around or that it's in the same condition as in the photos you saw or if it's on private property or if there are obstacles to get there. For example if you need a field or even abandoned house for a shoot you probably want to try driving out in the country. That's where you'll find fields and abandoned dilapidated houses. You may have to drive down random roads with no destination in mind until you come across the perfect spot you're looking for. When you find one open Google maps. - Look for the blue dot indicating where you are. - Tap and hold next to the blue dot until a red pin appears. At the top of the App it will say "Dropped Pin." - At the bottom of the App click "Label" - Name the label something that you'll remember like "Abandoned 2 story house in Field" Then save. - You now have that secret spot Saved in google maps so you can GPS to it in the future. Check out what my google maps looks like after all the locations I've saved.
Now for your final step. After you've Pinned the location take a photo or 2 for reference when you forget in the future and trust me, you will. Open the photo in your Instagram story, add corresponding text to the photo as shown below. The text should match what you labeled it in google maps. For example I have a folder in my phone for abandoned places. So when I find an abandoned location that I'd love to come back to I'll pin it and label it something like "Apocalypse 1." I'll then take a photo and add corresponding text that says "Apocalypse 1." That way if I open my maps and can't remember what the pinned location was or I want to share location ideas with a client I can find it in my folder on my phone. Organization is king. You can use other apps to add text to a photo but Instagram is easy so I'll use it to add the text and save the photo but not post it. Then I'll save the photo to the corresponding folder on my phone. Boom! 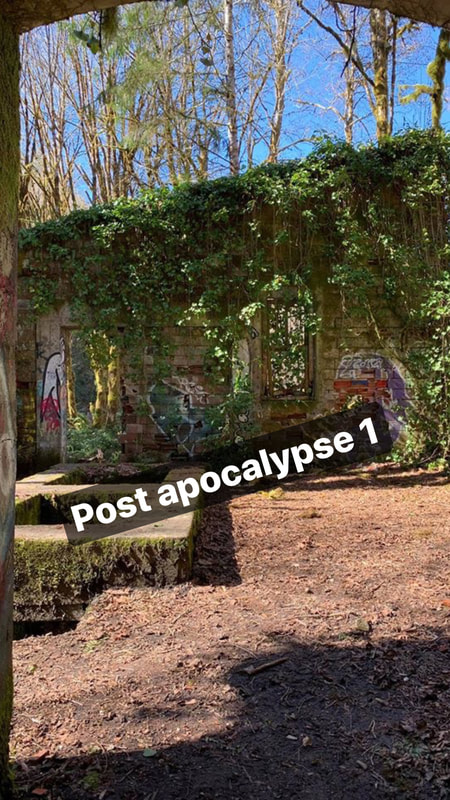 Location Scouting Tip 2: Instagram Instagram is a great tool to find locations. Just think about it. Everyone uses Instagram to post where they are and what they're doing so more often than not a photo will be tagged with the location. So get on Instagram and go to the search bar and click places. Let's say I need a coffee shop for my location or I just wanna explore the area to see if anything jumps out at me. Search the general area you're looking for like "Portland Oregon" Make sure you're under the places tab. Once you type in "Portland Oregon" it will come up as an option as well as popular locations in the area. This is the perfect place to explore nearby locations. When you click one, like "Oregon Zoo" it will take you to a feed of photos where people have tagged that location and you can get ideas of what you can expect. Let's say you click "Oregon Zoo" and it doesn't look like a good location. Go back and try the next location like "Portland Cars & Coffee" Do this until you see a location you like.  An even better option for searching Instagram and my go to is searching with tags instead of places. So You might search Oregon under the tags tab. Then you'll see a feed of photos anyone has posted with the #oregon. When you see a location that looks good click the photo and hopefully they tagged the location. If they tagged the location it shows at the top under their user name as shown below. Click the location that's tagged and it will take you to a feed of photos all tagged with that location as I mentioned above. This way you know they tagged the right location (Sometimes they don't) Once you have your general location you can start your research via google.  Location Scouting Tip 3: Evaluate the area Do your best to evaluate and prepare. Especially when shooting with a client. It's always a good idea to visit the area before meeting a client there. Be aware of any obstacles. Be aware of the weather and temperature. A desert location, mountain location, or beach location will all have different weather and temps. Is your subject posing in water? How cold is the water? Could be a hot day but the water might be freezing. Prepare for that. What will the lighting be like? This will make a huge difference. Where will the sun be rising, where will the sun be setting. I use an app called PhotoPills to know ahead of time the direction of the sun at a specific location. How popular is the location? Know the up and down times. Lets say you need a coffee shop or dinner. Find out when the slow times are so you can shoot without disrupting customers or getting people in your photo. Maybe you're shooting at a popular landmark. Unless you want a tone of people in the background behind your subject you might want to get there at sunrise. Is the location on private property? This is a big one I run into all the time. When it comes to trespassing I can't tell you it's a good idea. That being said I do it all the time. However my caveat is this: I would never trespass on property that is currently occupied. That's just dangerous and extremely rude. But if I come across somewhere that's clearly abandoned I'll usually take my chances. Just don't forget it is against the law and I've been caught trespassing more than once. It's never fun. Any chance you get to ask for permission you should.  Photo by @kickassdesigns on IG Location Scouting Tip 4: Flickr Much like Instagram, Flickr is a photo sharing app where photographer share beautiful photos from all around the world and more often than not they will share the exact location. Try searching an area your interested in and see what you find :) 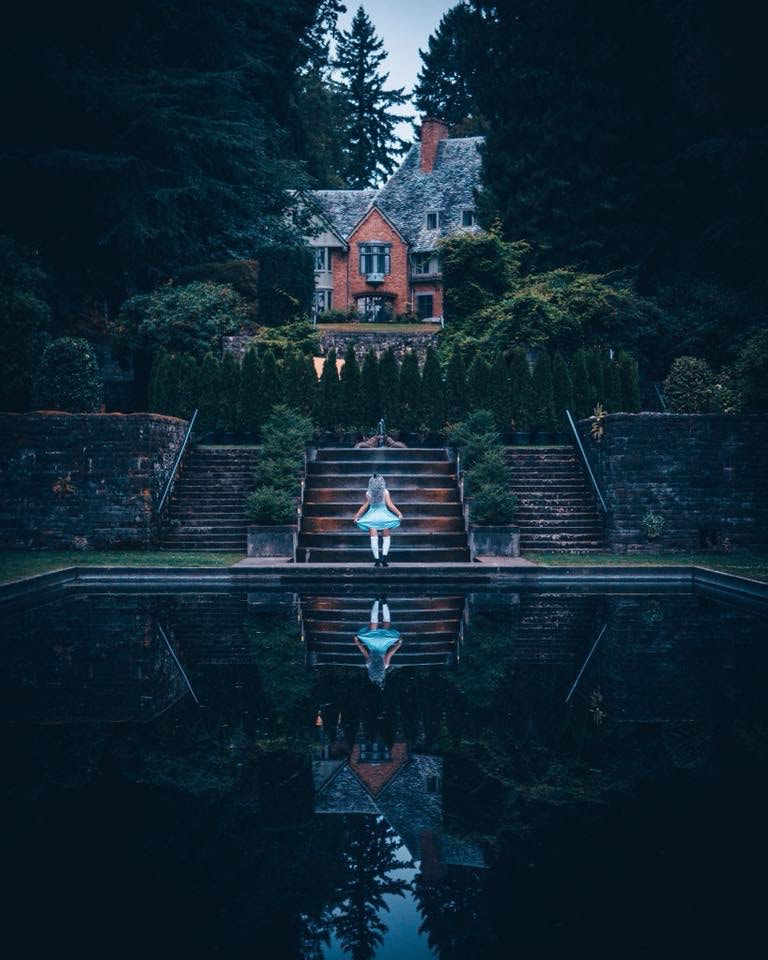 Photo by @kickassdesigns on IG Location Scouting Tip 5: Loaded Landscape Loaded Landscapes is one of my favorite tools when traveling. What they do is simple, they help photographers find the best locations to photograph, and provide helpful information that you can use to plan your own trips. I love that they constantly add more destinations. This site is made for Landscape photographers but is a huge tool for portrait photographers and lifestyle photographers. Just click the link and click the state your interested in. You're guaranteed to find something new :) 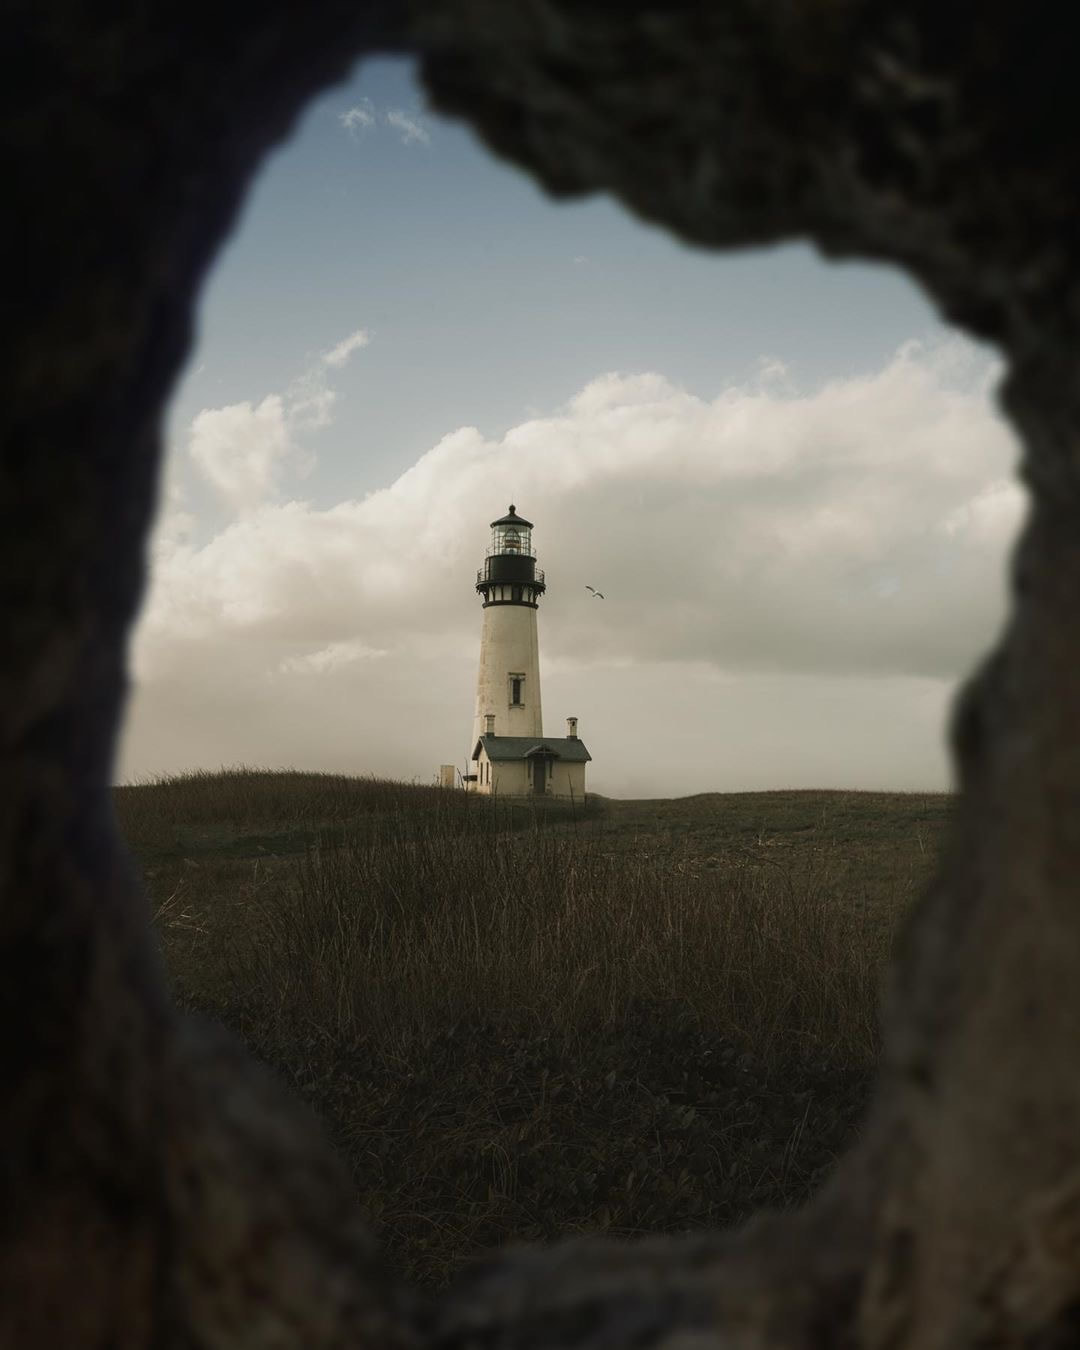 Photo by @kickassdesigns on IG Location Scouting Tip 6: ShotHotspot So, ShotHotspot is my favorite website for finding abandoned locations. They use sites like Flickr and Panoramio to build up an idea of which areas of the world are the best for photography. I use them to scout locations for photo shoots all the time, abandoned places, beautiful landscapes, and more. Urban exploration is huge right now but if you're exploring an abandoned location it's best not to go alone and if you do please be careful. 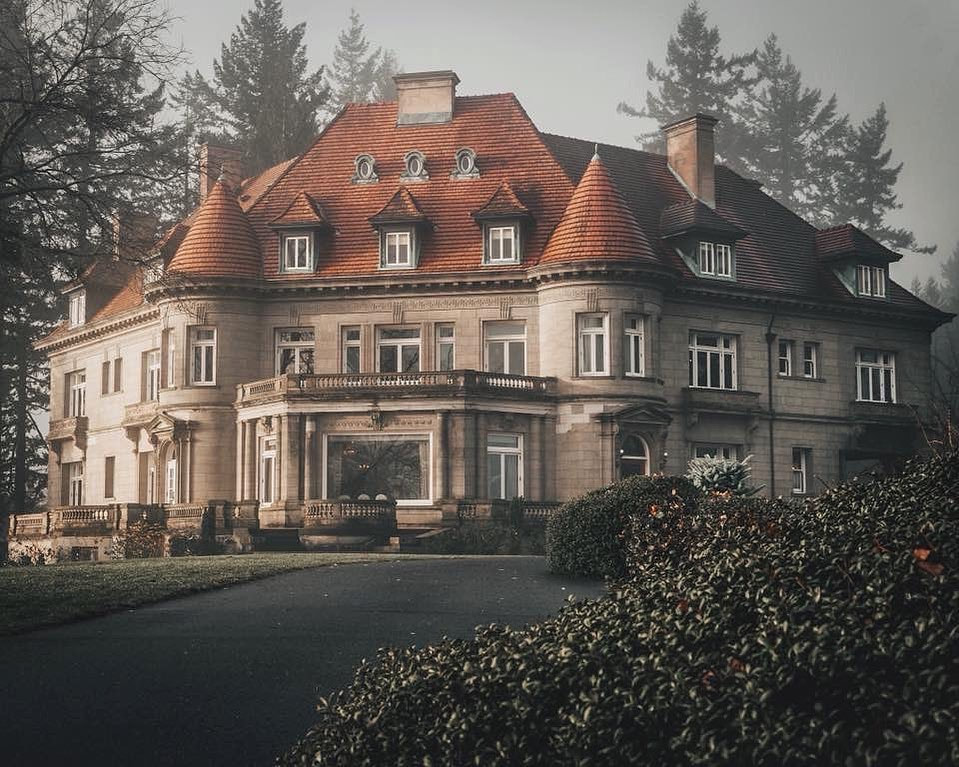 Photo by @kickassdesigns on IG Location Scouting Tip 7: Leave no Trace This is the most important tip of all. As photographers we all know how important it is to keep our favorite locations exactly the way we found them. It's imperative that we never leave anything behind and always respect the location.
 "I've booked my session and I'm excited for the shoot but have no idea what to wear." I hear this all the time. Whether this is your first shoot or your 5th, what you choose to wear to your photo session is just as important as the lighting, posing and location. Wardrobe may seem like a no brainer but If you show up under dressed or completely avoid the guidelines below you could take away from what could have been a great photo. The last thing you want is your clothing to be a distraction. 27 Posing Ideas for Women Who Aren't Models The tips below are specifically for portraits, lifestyle and head shots. If you’re doing a fashion shoot these won’t apply to you as fashion is more about wardrobe and less about the model. Just remember there is an exception to every rule. If you decide not to read on just make sure to read this: The most important tip I can give you is wear what makes you feel comfortable and confident. Let me know in the comments below if this article helped you or if there is anything I should add to this list. All photos below were taken by me except for the memes. Make sure to connect with me on Instagram HERE 1. Wear what makes you feel Awesome. As I mentioned above I will start with the most important tip of all. Wear what makes you feel confident because if you don’t feel confident it will always show on camera. Try your best to follow the rules below but at the end of the day what makes you feel comfortable and confident is the most important. I would rather you break the rules with an outfit that makes you feel amazing than the other way around.  Model: @kaleo_rav3 on IG 2. Avoid bright colors. Keep in mind that bright colors like orange, yellow, and red tend to make you look larger than you actually are and bright and fluorescent colors can be reflective and don’t photograph well. If you would like to wear lighter colors I would stick with pastels. Below is an example of great pastel colors to look for. These are great for dark locations like a forest. If the background will be dark than dark clothing should be avoided. This is why you should always discuss location with your photographer before choosing your outfit.  3. Avoid prints, patterns, and graphics. Again, unless you’re modeling for a brand or making a statement, patterns, prints, and graphics are to be avoided. We don’t want anything that’s going to distract from your beautiful face.  4. Bring options. Lots of options. It’s never a bad idea to bring more outfits than you need on the day of a shoot. Men: Bring different ties, different shirts, different suit jackets. For casual headshot sessions or actor headshot sessions, bring a basic soft tee and long sleeve shirt. Variety is king and hopefully your photographer offers multiple wardrobe changes. Your photographer should let you know how many outfits are included in your price and if they don’t make sure to ask.  5. Wear flattering clothes that fit well. I know this one seems obvious but you would be surprised. Wear clothes that fit you well and flatter your figure. If you’re going to shop for an outfit for the shoot don’t wait till the day of to try them on. Ladies: make sure to bring at least one dress to your session. I recommend dresses with a thicker material that will fight off wrinkles better than thin material.  Model: @jacquelynnefaith on IG 6. Choose clothes that cover your skin. Arms and legs have a larger surface area than your face which means when they are showing they can take away from the face, to avoid this I suggest long sleeve shirts, long pants, or a skirt that goes below the knee. If your self conscious about your arms and or legs this is the best way to help draw attention away from them and onto your face. obviously this one won’t apply to you if do you want to show off your arms or legs.  Model: @anisamarieyee on IG 7. Go with a narrow neck line. It’s been said that a wide neckline can thicken the neck in a photograph. I'm not sure this is true but to avoid this I suggest wearing clothes that come close to your neck such as a turtle neck or V-neck top because they slim you down and frame your face and tend to be the most flattering neck lines. However if you have really nice collarbones I would suggest a wide neckline.  Model: @kaylaraecannon on IG 8. Wear muted, Jewel, or Earth tones. I always suggest going with muted, jewel, or earth tones to my clients because they don’t draw attention. The more subtle the better however if wearing something really loud fits your personality better that’s okay too. Below are some examples of muted, jewel, and earth tones I'd look for when putting an outfit together.  Muted Tones  Jewel Tones  Earth Tones  Emo Tones 9. Keep to solid colors. As you can probably tell, our main objective when choosing what to wear is to pick clothes that don’t draw attention to itself. Choosing an outfit with solid colors is always a great choice because they’re not overbearing or distracting. I hate to beat a dead horse but I really want this to sink in. Yes black is okay as long as the location isn't dark. Keep in mind darker colors are more slimming than lighter colors.  Model: @waterfallkristy on IG 10. Choose your outfit first. This is specifically for family portraits so mom and dad it can be extremely helpful to choose what you want to wear first and then build the rest of the family’s wardrobe off of that. Make sure your outfits coordinate but don’t match.  11. Dress for location and season. When choosing an outfit keep in mind where you will be shooting and what the weather will be like as I said before it’s extremely important that you are comfortable so you wouldn’t want to wear a sleeveless in the dead of winter and you probably wouldn’t want to wear a turtleneck in the middle of summer. Dress for the season. If it’s cool and crisp out make sure to layer up. Pinterest is a great place to look for examples. 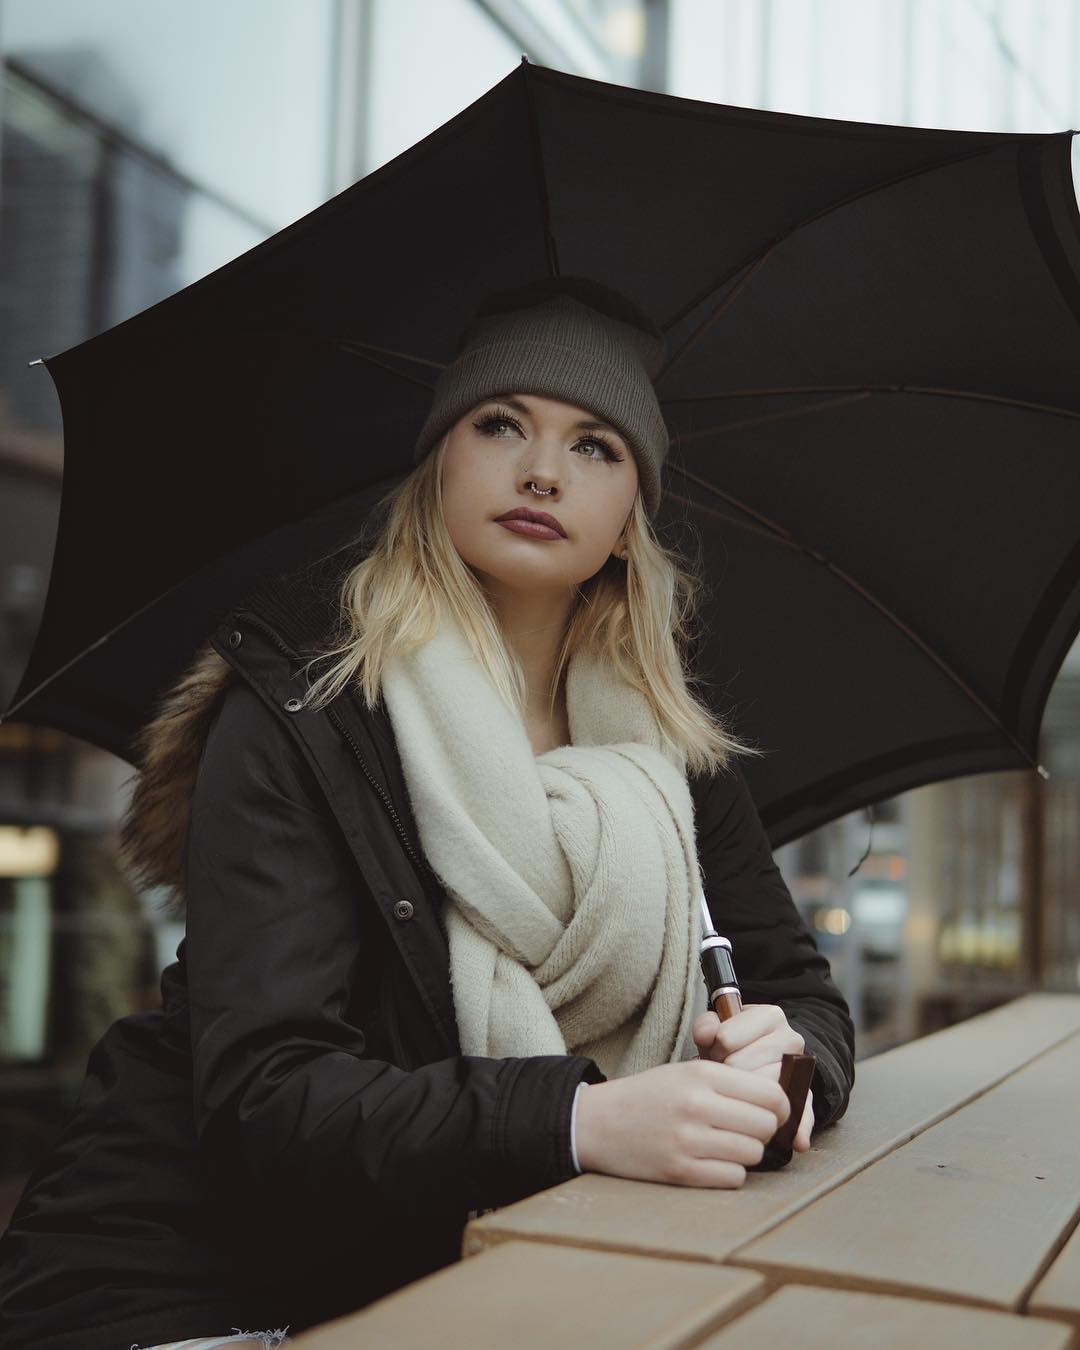 12. Have a clothing option with movement. This one’s really for the ladies. I recommend flowy dresses, skirts, or scarves. These are great for movement shots like dancing on the beach.  Model: @becka.888 on IG 13. Jewelry is fine. A beautiful necklace, set of earrings, bracelet or hat can go a long way as long as they aren't too distracting. And for the men a watch is always recommended. A nice hat works as well for an old 50's vibe. Hair, makeup, and so much more. It is perfectly normal to want a haircut right before a shoot you’re paying good money for. But try your best to have it done 2 weeks before the shoot. A fresh cut or fade generally looks better after a week or 2 has passed and you’ll know how to style it just right in case you changed your hairstyle. The day of your shoot is not the time to try a new hairstyle. Stick with a look that you know you like. Try to cover up any blemishes the best you can but keep your make up simple and minimalistic. You don’t want your photos to look like 90s glamour shots. A small amount of eyeliner, mascara, foundation, powder, concealer, blush, little eye shadow and subtle lip color goes along way. If you'd rather leave hair and makeup to a professional I work with an amazing Hair and Makeup Artist Renée J. Beauty who you can contact HERE 27 Posing Ideas for Men Who Aren't Models The last thing you want are dry chapped lips so bring lip gloss, lipstick or lip balm to keep those lips nice and soft. Typically I have my clients remove glasses for photos but if no one will recognize you without your glasses I recommend wearing them. However a little trick I like to do is having my clients remove the lenses from the frame because reflections in a lens can ruin a photo. This is an old Hollywood trick ;) Gentlemen, if you are going to show up freshly shaven make sure to use aftershave moisturizer to limit bumps and redness. If you have a beard keep beard dandruff under control by using a good beard oil before the shoot so your beard looks nice and healthy during the photo session. And Keep some Beard Balm or Styling Gel-Pomade on hand to keep those fly away hairs in check. Keep your nails clean and tidy, this will make a huge difference in photos if your hands are showing. Go with a neutral color that won’t clash with your outfit. Final thoughts. If you take anything away from this article just remember to keep it simple, stick to solid colors so your outfit isn’t the first thing that’s noticed. Flatter your shape, wear something that fits and shows your figure well. Keep it relaxed and natural, your clothing, make up, and hair should be natural and have your hair frame your features. If shooting with a group make sure to coordinate not match, plan your color palette and the vibe you’re going for. It’s best to view the outfits together before hand.
The 10 best websites for Cosplay Costumes & Props Don’t wear graphics or distracting patterns. Don’t dress too casual unless the session calls for it, typically a photo session is a special occasion, so wear your Sunday’s best. Coordinate your outfits a day or two before the shoot. It’s easy to think that wardrobe is a no brainer but you’ll be scrambling on the day of your shoot if you don’t coordinate your outfit and decide to wing it. certainly don’t wait until the day of your shoot to try a new outfit for the first time or style your hair and make up a new way for the first time. Most importantly be yourself. The guidelines above are just that, guidelines. Ultimately wearing what makes you feel comfortable and confident is the most important guideline of all. If all of this is too overwhelming and you would rather just let someone else take care of wardrobe for you I always suggest a stylist. And my go to stylist in the area is The Luggage Cart. Alix is the best Wardrobe Stylist I know. Contact her for a free consultation HERE  Photography For Beginners (Shutter Speed, Aperture/F-stops, and ISO) Perhaps the most important part of photography is exposure. And no I don't mean likes on Instagram or shares on facebook. We will talk about that kind of exposure in another article. I'm talking about how you expose your photos in camera before you ever click the button. It doesn't matter how good your camera is or how good the composition is if your exposure is off it can ruin a great photo. I would know because I've done it many times. Of course if you're shooting in RAW like you should be than you can recover a poorly exposed photo with software like Adobe Lightroom. But even Lightroom can only go so far. If your photo is too over exposed you can't save the highlights and if your photo is too underexposed you cant recover the shadows. It's best to expose your shot how you want it before you take the photo and to do so you'll need to know the 3 basic elements of exposure: Shutter, Aperture, and ISO. 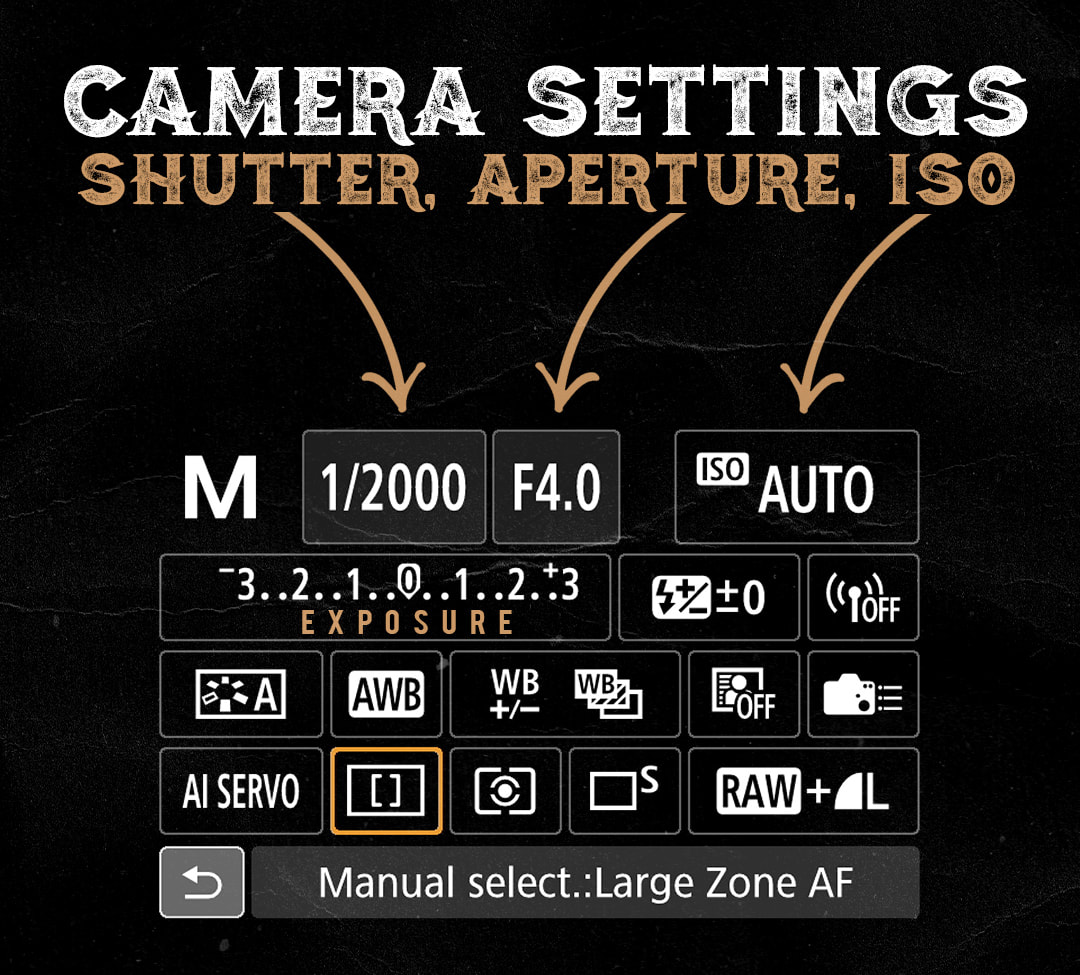 For the sake of time I'll assume you've located the shutter, aperture, and ISO buttons on your camera, if not, the photo above might help locating them in the menu however every camera is different. This article is specifically for shooting in manual mode. I know for a new photographer manual can seem scary but if you just learn these 3 elements of photography you'll elevate your game ten fold. Below is a cheat sheet to help you but I'll explain each one in depth below. 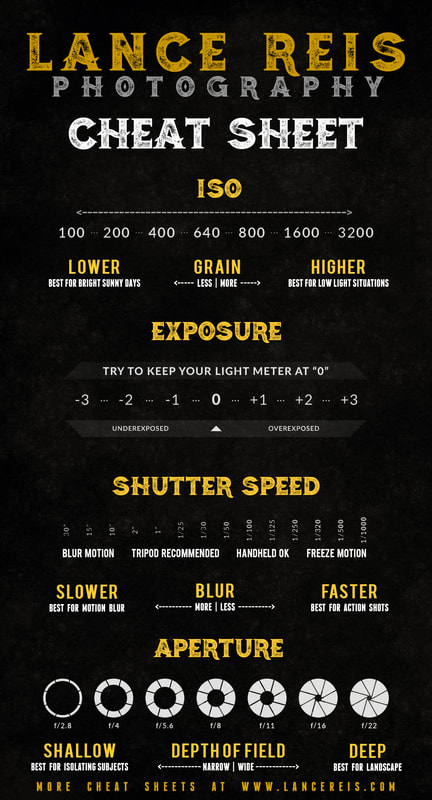 ISO I won't bore you with the mechanics of each element. My goal is to make this as short and easy to understand as possible. All you need to know about ISO is the Higher the number the more light your camera will bring in. But there's a caveat to ISO you need to know. The higher you go the more grain you will get. However grain isn't necessarily bad. Some photographers want that grainy look. That's their style. But if that's not the look you want it's best to keep your ISO lower than 1,000. That being said every camera is different and new cameras can go much higher with less grain than the older ones. For instance my SonyA7iii can shoot with ISO at 1,000 with no noise but my older SonyA6000 could only shoot at ISO 500 with no noise. It's best to play around with your camera in a dark location and find the sweet spot for your specific camera. Open the photos in light room and check the histogram to see what settings you used for each photo. Find the photo with the highest ISO but still has little to no grain. Remember that number and try your best to avoid going over it Last thing you want is to find out you just did a shoot for a client and all your photos are too grainy. 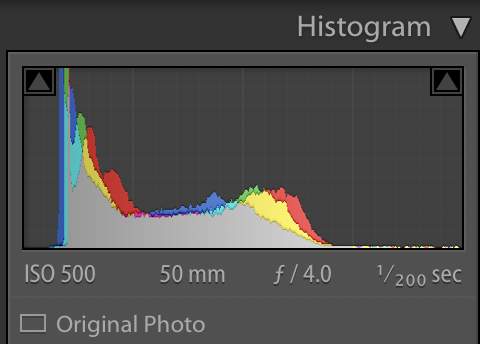  Aperture Aperture is a set of small blades that create a hole that determines how much light is let into the camera. The wider the hole the more light that comes in. The size of this hole is measured by F-stops. A large F-stop like F-22 means the hole is very small, and a low F-stop like F/2.8 means the hole is wide open. So the higher your F-stop the darker it will be and the lower your F-stop the brighter it will be however brightness and darkness aren't the only thing the changes when you adjust your aperture. Aperture also controls depth of field. Depth of field determines how much of your photo is sharp and in focus and how much is blurry. A low F-stop like 2.8 is very narrow and will only focus on a specific part of the image while leaving everything else blurry. The closer you get to your subject with a small F-stop the more narrow the focus will be and thus the more blurry the background will be. A low F-stop is how you get that creamy background and beautiful bokeh effect with the lights in the background. Just keep in mind if you're shooting portraits it's extremely hard to get the eyes both in focus and everything sharp at a low F-stop like F/1.4 or 2.8. I find F/4.5 is best to get everything on your subject sharp and in focus. If your photographing a beautiful landscape or group of people however you will want a large F-stop like F-11 or F-22 to make sure everything and everyone is in focus. Every lens is different and will determine how low you can go and how sharp an image looks at low aperture. My favorite lens in the Sony 85 MM 1.8 Prime  Shutter Speed Without getting technical all you need to know is the lower your shutter speed the more light is let into the sensor and thus the brighter your image will be. The caveat for shutter speed is this: The lower you go the more sensitive your camera gets to movement and thus the blurrier your photo will be if any movement is involved. This means movement of the camera itself and the subject you're photographing. I highly suggest if you go under 1/100th of a second you use a tripod because anything below that and your camera will detect movement and the photo wont be sharp. Just remember your shutter speed effects brightness, darkness, and blur. For example if you want to catch movement of a athlete or waterfall just as it is in real life with no blur you'd want to use a fast shutter speed like 1/500th of a second and up. If you want the creamy smooth blur effect on a waterfall or a light trail at night you'd want to use a slower shutter speed like 1,5, or 10 seconds. A tripod is a MUST for slower shutter speeds. This is my go to Tripod. 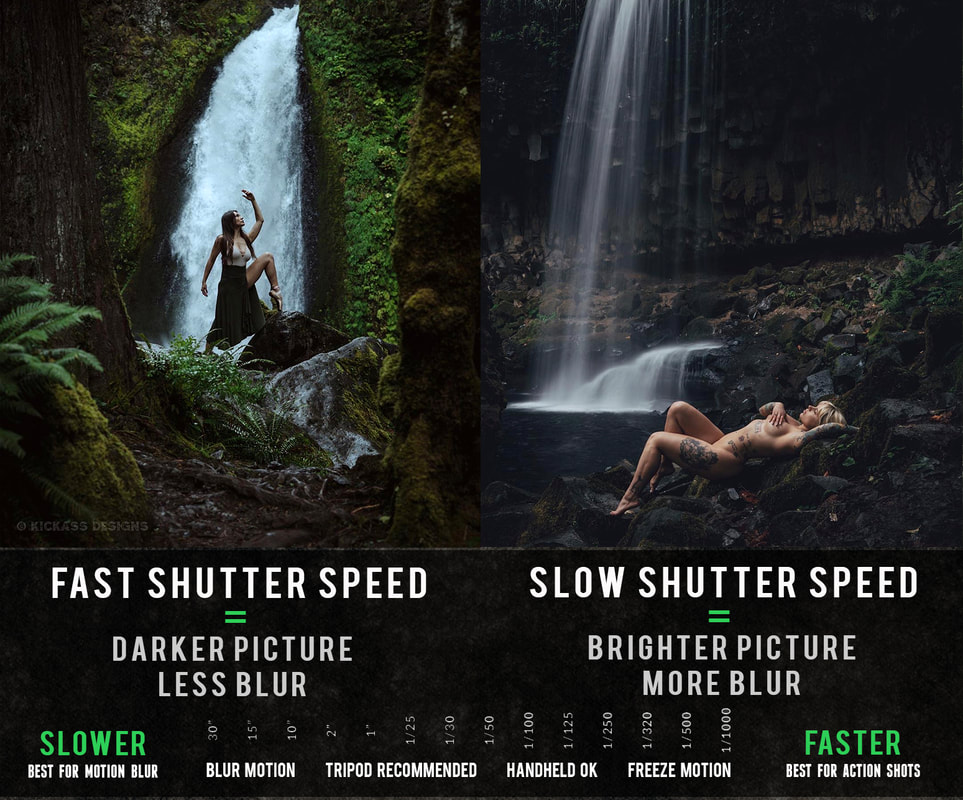 Now that you know how each of these elements effects your exposure it's important to remember each one plays off the other. If you change one you'll have to change the rest. Lets say you're photographing a sporting event. High action, lots of movement. You'll need to crank up your shutter speed so your subjects aren't blurry. Probably 1/1000 and up. However, by doing so that will make your images darker so to makeup for the shutter speed you'll have to bring up the ISO. Lets say you're photographing a beautiful landscape or group of people, you'll want a large F-stop so everything and everyone is in focus. That will however bring down the brightness so you'll have to bring up the ISO and slow down your shutter speed to something like 1/125 to makeup for it. It's a dance but the more you do it the easier it will get. Of course there are pre-set modes on every camera to make this easier but then you have less control. Practice is the only way you will truly master your camera so get out there and practice, practice, practice. Shoot in RAW The 4th Element I think every new photographer should know is the power of shooting in RAW instead of JPEG. RAW files are a format that captures all the image data from your camera. ... Because no information is compressed with RAW you're able to produce higher quality images, as well as correct problem images that would be unrecoverable if shot in the JPEG format. Of course you'll need a program like adobe Light room or Photoshop to edit the RAW file but you have so much more to work with. Shooting in RAW will elevate your photography tenfold. I hope these tips help. Let me know if they did in the comments below and make sure to connect with me on Instagram HERE
 Lets face it, professional models can take a lot of the burden off us as photographers by bringing their posing expertise to the table. But unfortunately we don't always have the benefit of shooting with a professional model. As a high caliber photographer it is important to have the ability to pose normal people with little to no experience in front of the camera. If posing for modeling is a challenge for you this list of 27 posing ideas along with photos for reference should help. Every photo below was taken by me. Posing Ideas for Men in 2022 While certain genres of photography get to work with models, most genres involve shooting normal people who will have varying degrees of comfort in front of the camera and natural posing ability. Posing was the hardest thing to learn for me personally and it is something I still work on every day. While I am jealous of photographers who have a natural ability to pose people on the fly, I unfortunately have found that I work best by having a list of go-to poses that I know work well for me and can fall back on if I need to. Until now I have kept that list to myself. If you are a model or photographer who struggles with posing I hope this list helps but just remember, posing is only half the battle. Models: The best posing in the world wont matter if your appearance is off. So, show up with 3 or 4 of your best outfits, get your hair cut and your beard trimmed if you have one. Looking your best will boost your confidence on the day of the photoshoot and it will show on camera. Pro Tip. Keep some Beard Balm or Styling Gel-Pomade on hand to keep those fly away hairs in check. | You May Also Like: 27 Posing Ideas for Women Make sure to bookmark this page so you can bring it up at any shoot and go down the list and nail every pose. You do that and you will be guaranteed to leave the shoot with tons of variety. Connect with me on Instagram HERE and let me know if this article helped in the comments below.  1. Both hands in pockets This pose works just as well with both hands in your subjects pants pockets but if they are wearing a jacket have them place both hands in their jacket pockets. Try full hands in or just thumbs showing. 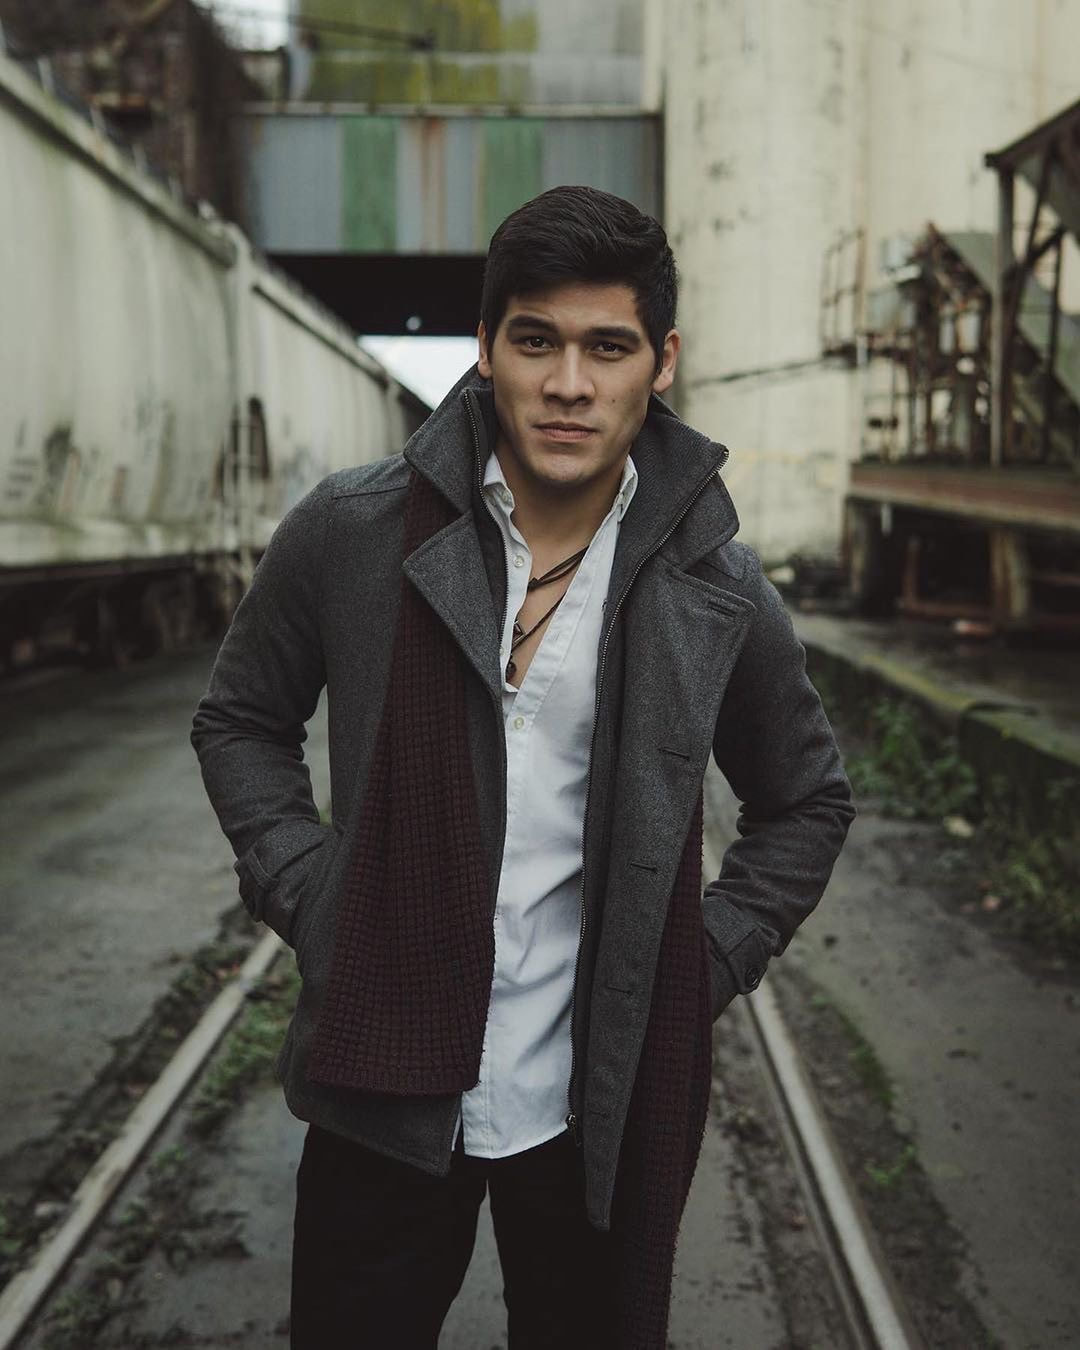 Model: @kaleo_rav3 on IG 2. The profile Pose/Side View Have your subject stand to the side so you can only see one side of their face. Ask your subject if they have a favorite side. Most people do. Make sure to try different angles and perspectives. | You May Also Like: Best Modeling Agencies in Portland 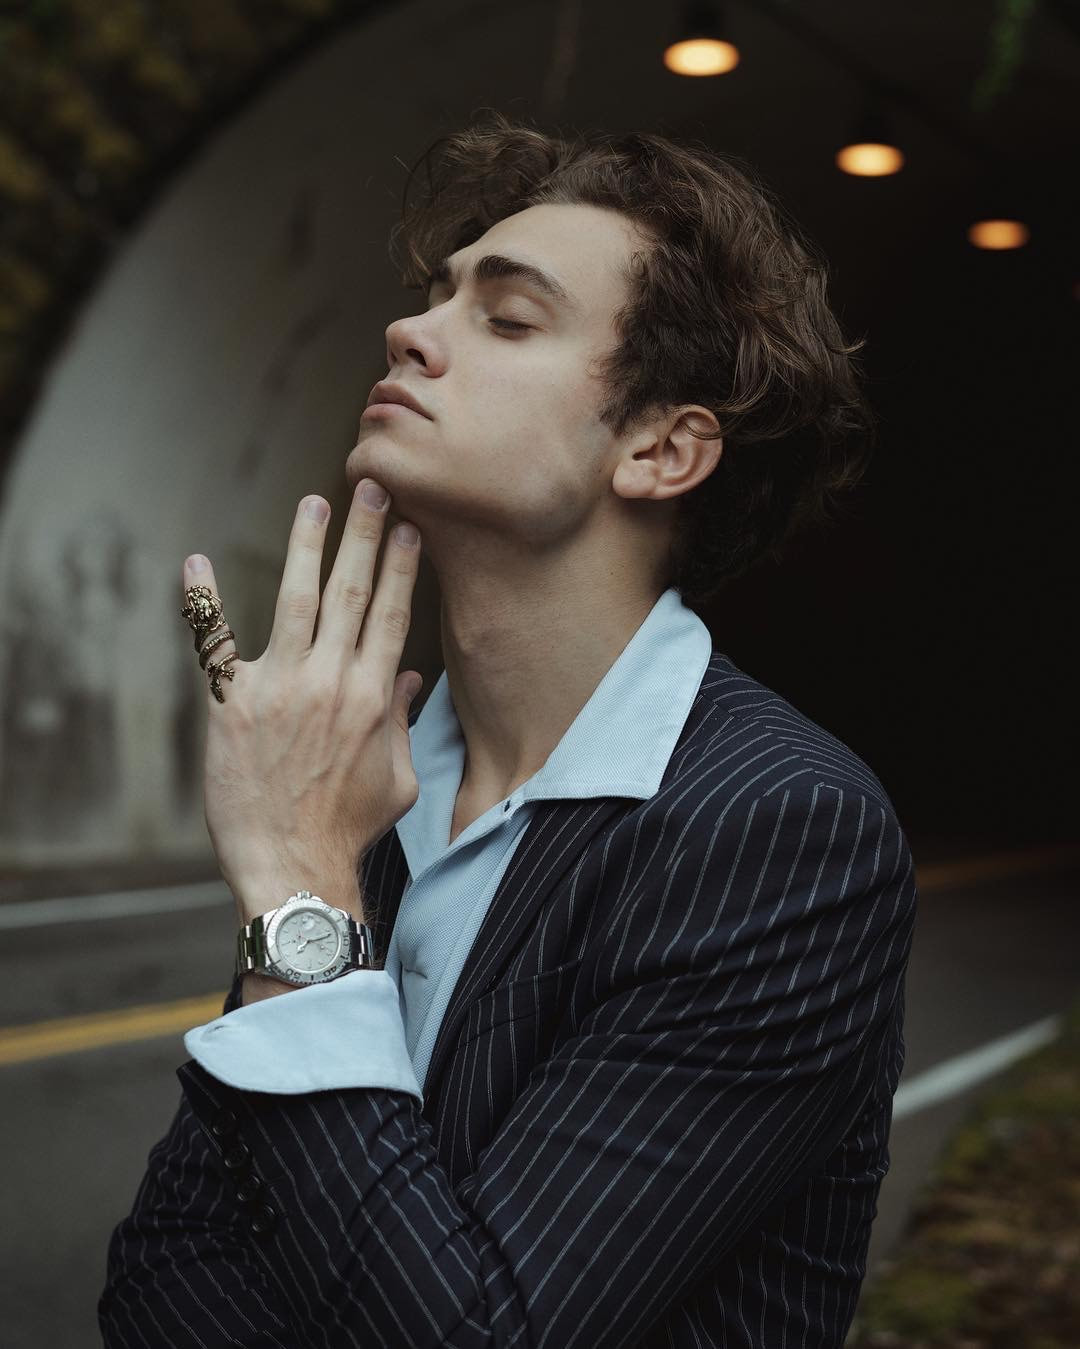 Model: @a_russian_guy on IG 3. Side Lean While Looking Away Have your subject lean against a wall with one shoulder against the wall. Have them look at the camera, up at the sky, turn their head and look down or off into the distance. Make sure they have good posture. Stand tall and straight. Add a prop like coffee for more of a lifestyle feel. 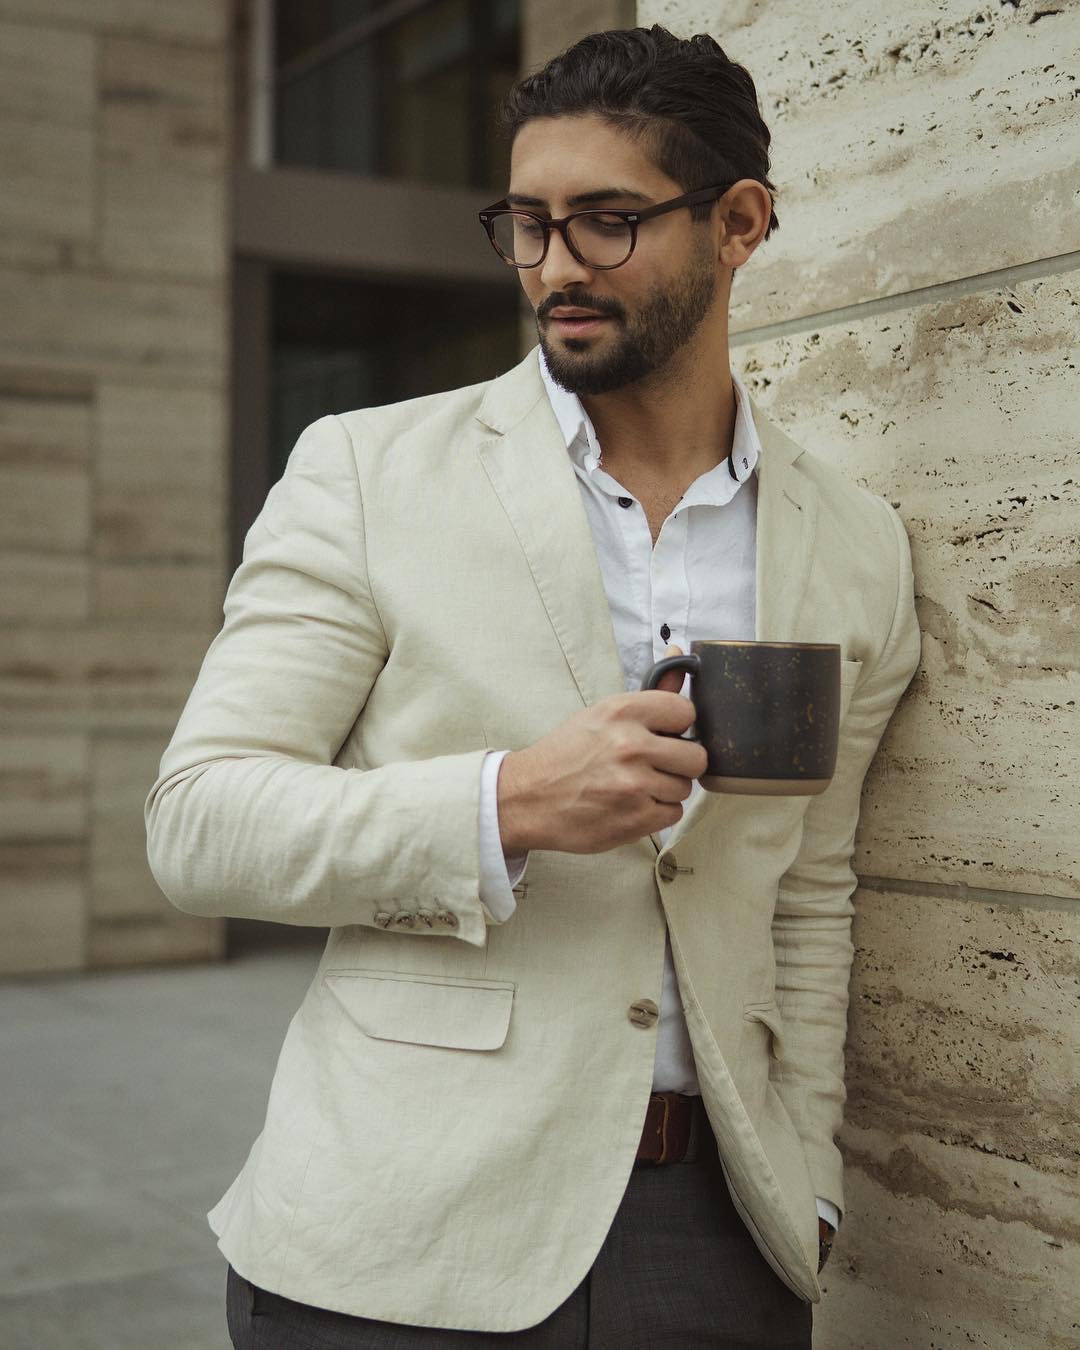 Model: @kamyar_jahan on IG 4. The Laugh Any time you can get your subject to genuinely smile or laugh take the shot. These candid moments are gold. Something I like to do for a laugh is ask my subject their favorite comedian and play that comedian on Spotify for a few minutes until they laugh. Or dad jokes, Really bad dad jokes often do the trick. | You May Also Like: Improve your photography with natural light 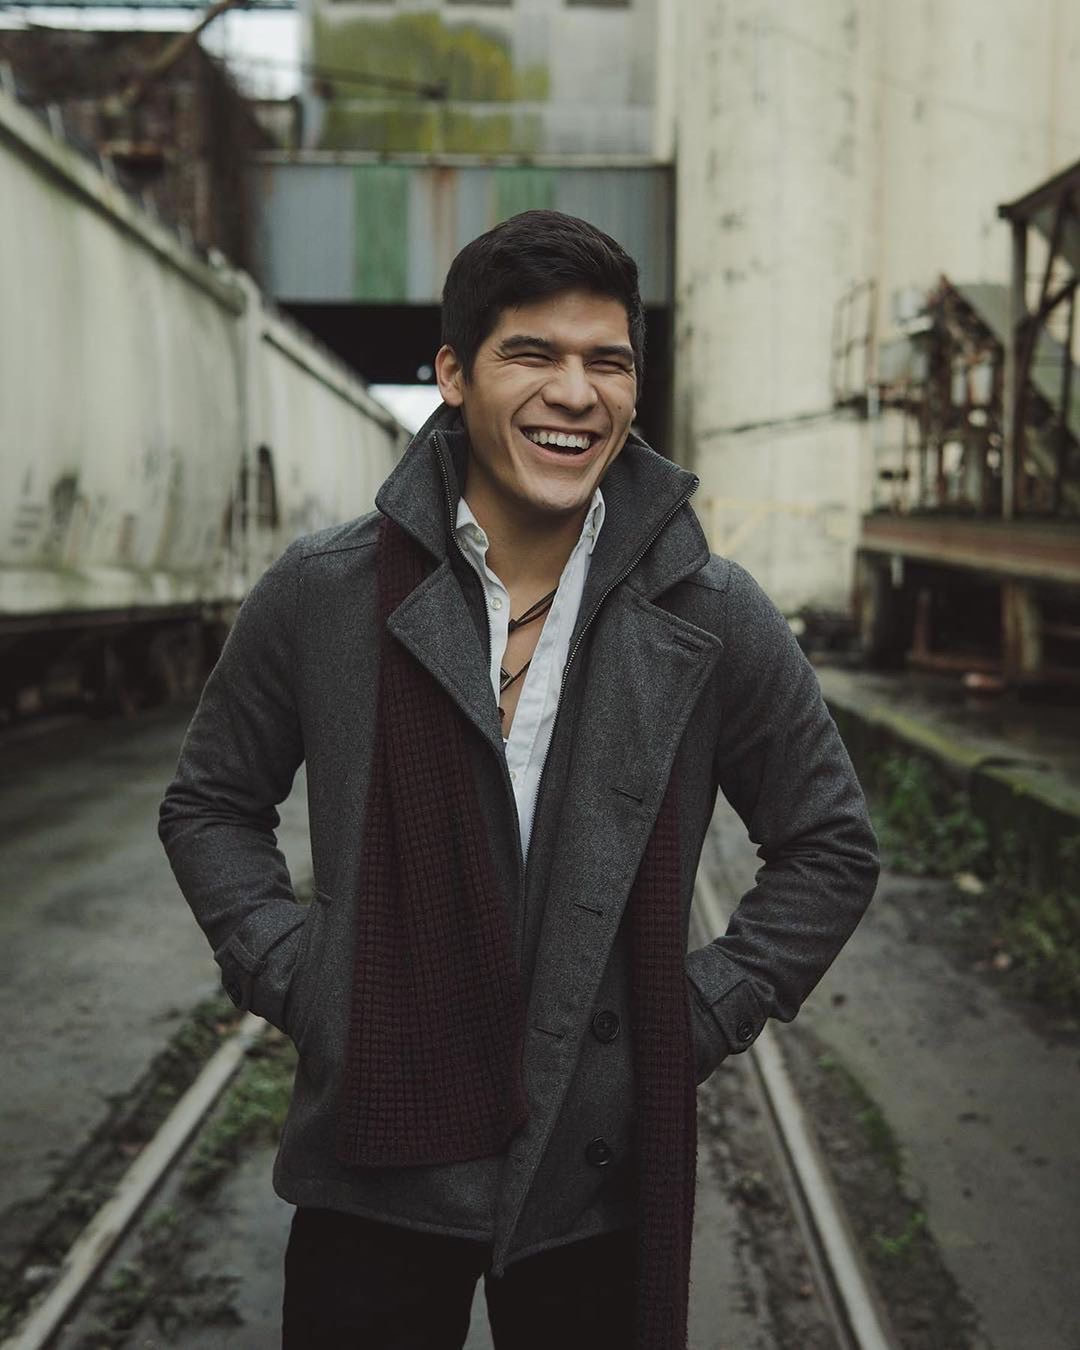 Model: @kaleo_rav3 on IG 5. Hand on Wrist This one only works if your subject is wearing a watch or bracelet. I usually tell my male subjects to wear a watch before hand. This gives them just one more thing to do with their hands. They will appreciate it. 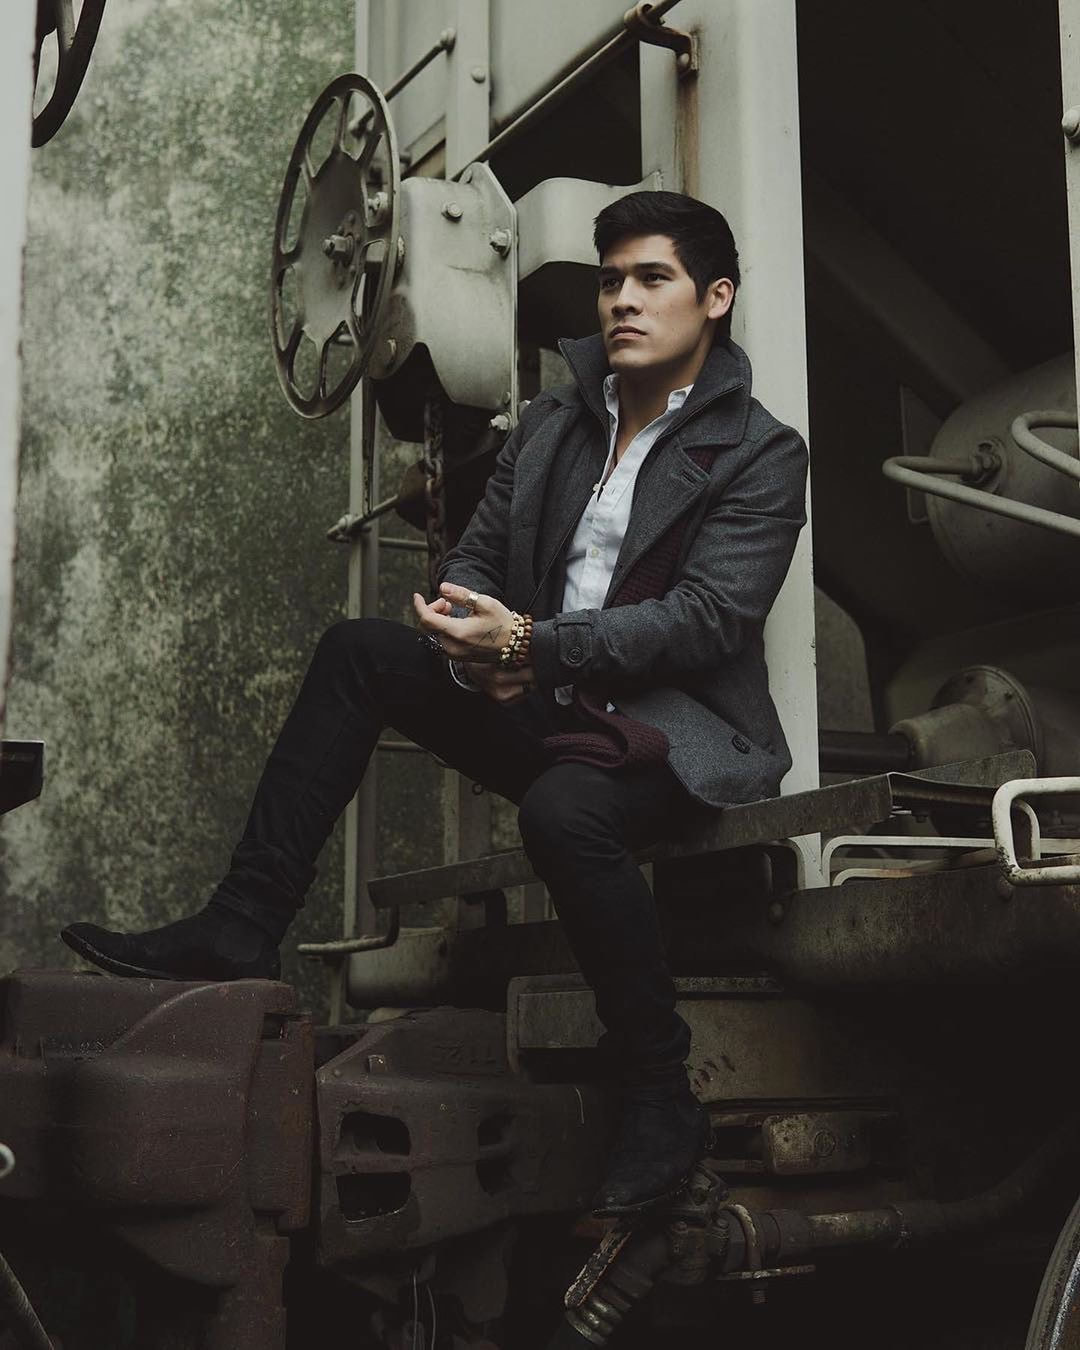 Model: @kaleo_rav3 on IG 6. Hand to Face Have your subject turn to the side, slightly turn their torso/head and rest their head into their hand. Loose fingers and not to much bend in the neck. 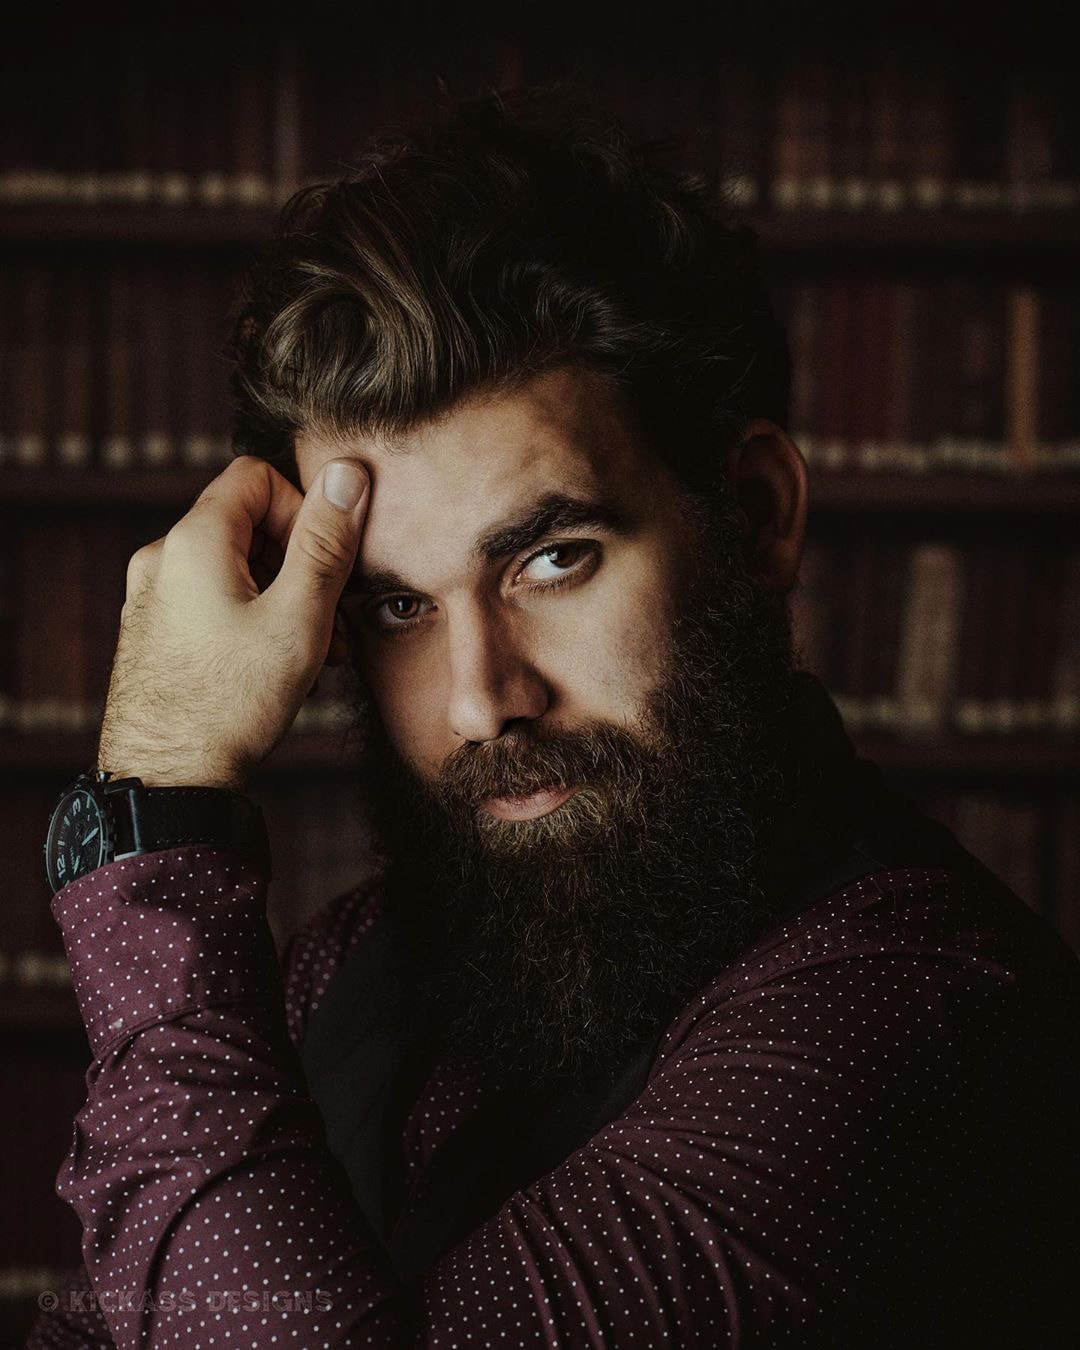 Model: @lifeofdylancruz on IG 7. The Scowl If your subject hasn't done a photo shoot before they most likely assume they should be smiling for every photo. But depending on how they plan on using the photos and what mood and message they are trying to achieve smiling may not be the right choice. Try a slight scowl to change things up. 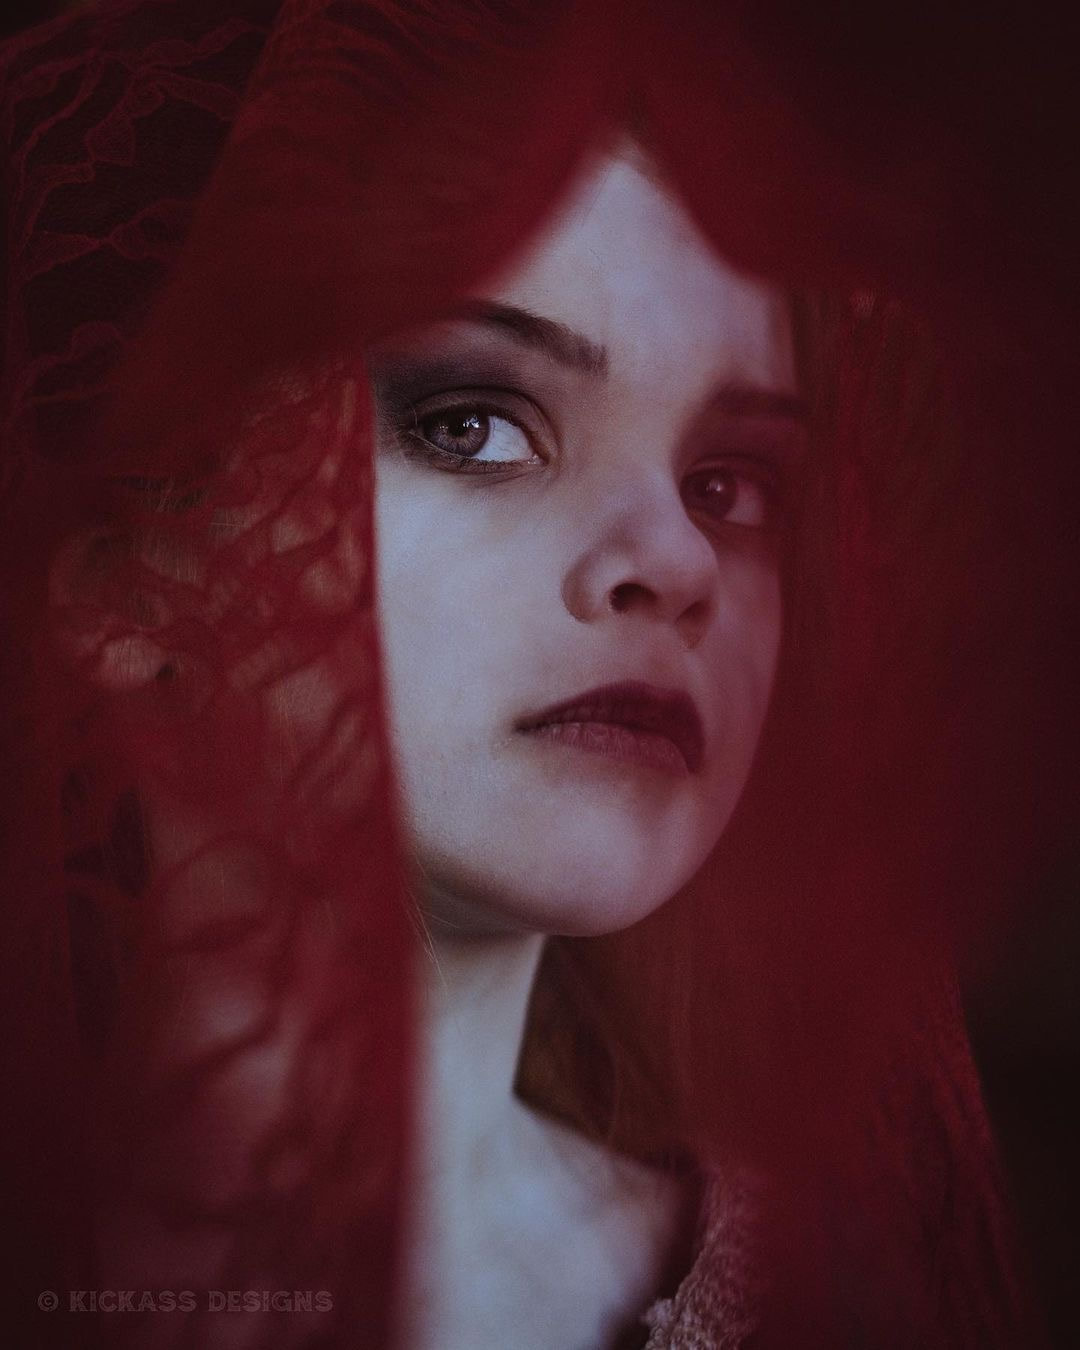 8. Over the Shoulder Have your subject stand or sit to the side and look over their shoulder either at the camera or slightly looking back over their shoulder. A more serious look works best for this pose.  Model: @kaleo_rav3 on IG 9. The Sleeve Pull This pose works great if your subject has on a long sleeve shirt or button up. Have them play with their sleeve by pulling it up. 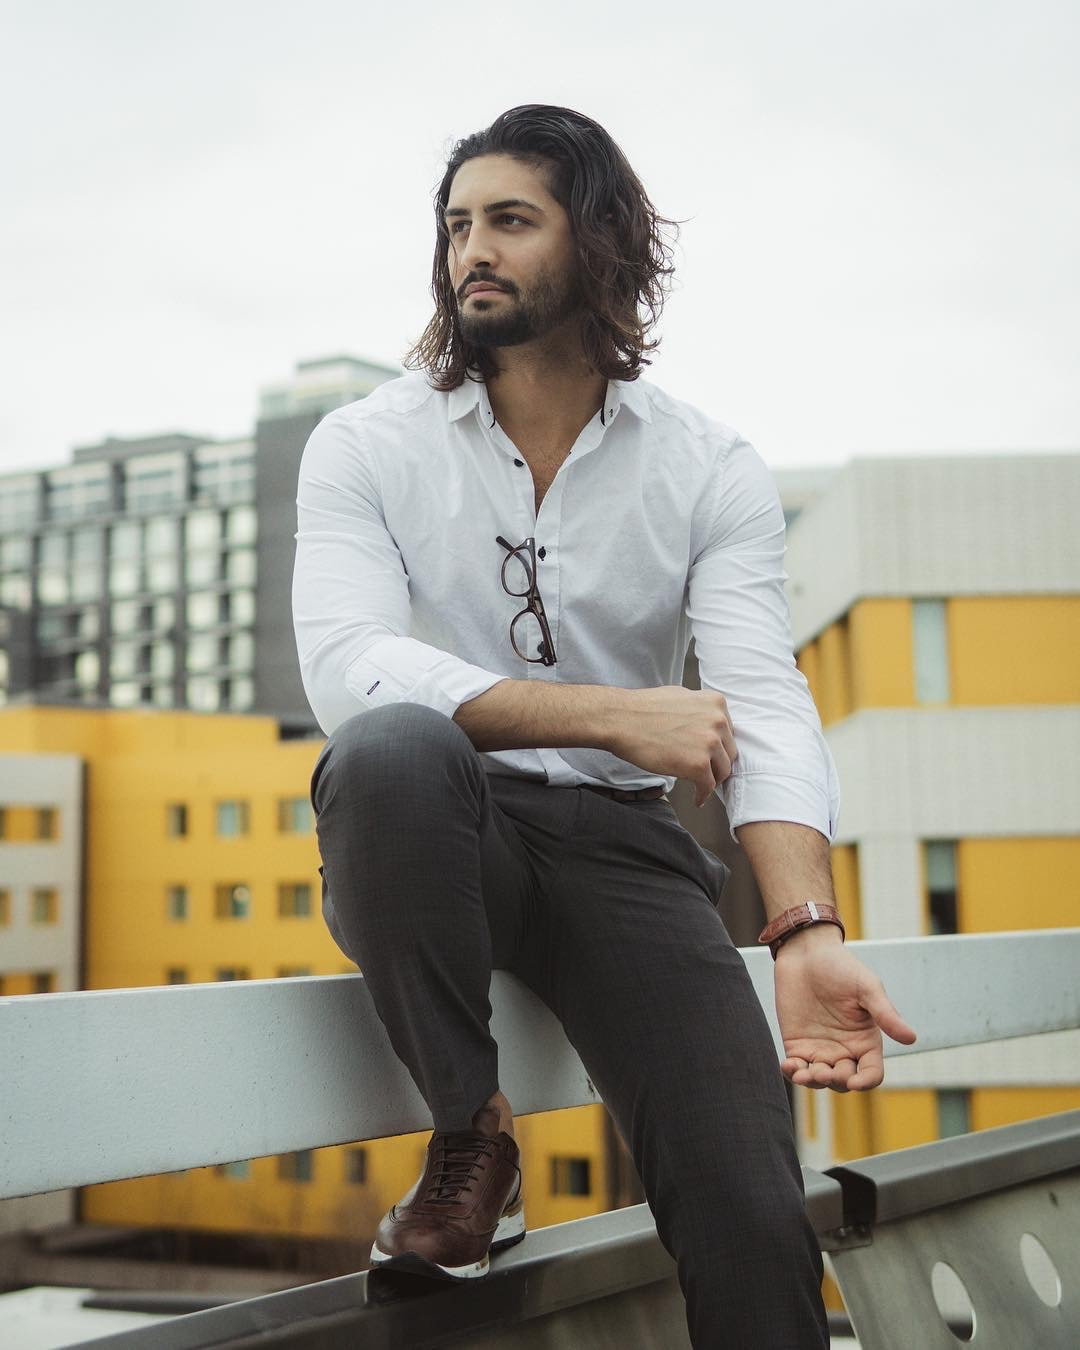 Model: @kamyar_jahan on IG 10. The Inside Pocket If your subject is wearing a blazer or jacket with an inside pocket have them go through the act of putting something in the inside pocket.   11. Play with Buttons If your subject is wearing a button up have then go through the act of buttoning and unbuttoning their shirt. Have them place one hand over the other as if they are about to unbutton their shirt.  Model: @kamyar_jahan on IG  Model: @a_russian_guy on IG 12. Fist in Hand This is a great pose for a more muscular subject who wants to show off those arms. Have them face the camera, stand tall and place a fist in one hand and flex.  Model: @billyd275th on IG 13. Hand to Chest Side View This is another great one for a subject who wants to show those arms. Have your subject stand tall, to the side, slightly turning their torso to the camera with one hand up by their chest, flexing the bicep, and looking into the camera or into the distance.  Model: @starttheworld on IG 14. Jacket Over One Shoulder If your subject has a jacket or blazer have them throw it over one shoulder.  Model: @a_russian_guy on IG  Model: @kamyar_jahan on IG 15. Hands on Waist Have your subject stand tall and place both hands on their hips or waist and flex those arms. Shoot from slightly below at an upward angle for a stronger look.  Model: @billyd275th on IG 16. Sit and Lean Have your subject sit and lean placing an elbow on the knee and hand to face.  Model: @a_russian_guy on IG 17. Hand to Neck Have your subject bring a hand to their neck just below the chin. Keep the hand loose. They aren't choking themselves.  Model: @a_russian_guy on IG 18. One Hand in Pocket Have your subject place just one hand in a pant pocket.  Model: @a_russian_guy on IG  Model: @a_russian_guy on IG 19. Props Depending on the mood and message your subject wants to convey a book is an easy prop to bring with you that can be used in multiple ways shown below. Again your subject will appreciate you giving them something to do with their hands.     20. Back to the Wall Have your subject put his back to the wall looking into the camera or off into the distance. Try different perspectives.  Model: @lifeofdylancruz on IG 21. Hand behind the Head Have your subject place one hand behind his head. Not too much bend in the neck.  Model: @lifeofdylancruz on IG 22. Cover half the Face Have your model cover half his face with one or both hands. This brings all the focus to one eye.  Model: @lifeofdylancruz on IG 23. Sit one leg Under Have your subject sit on the ground with one leg under the other. Resting one elbow on the knee and the forearm on the thigh.  Model: @bearded_ragnarok on IG 24. Hands Behind the Back Have your subject place both hands behind their back, hands in butt pockets.  25. Sitting Pose When having your subject sit on steps try different perspectives and have one foot higher than the other rather than both feet on the same step. 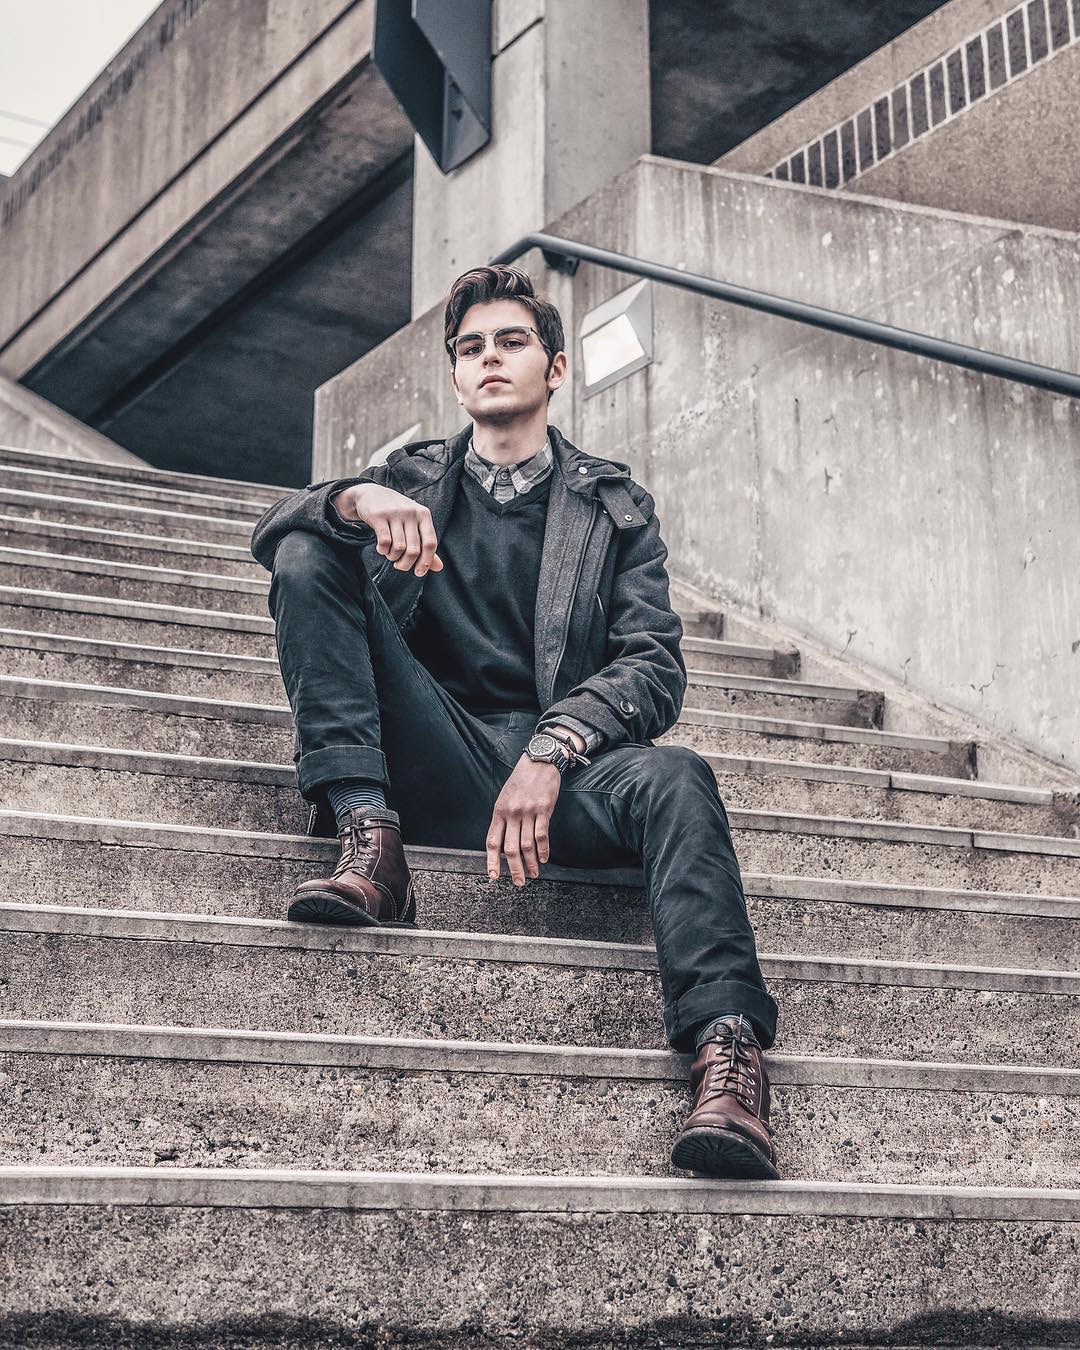 Model: @quinngilronan on IG 26. Candid Walking Pose Have your subject walk a straight line down the side walk. Make sure he is walking casually, naturally and not looking into the camera. Try shooting from the side and slightly up from a lower angle. 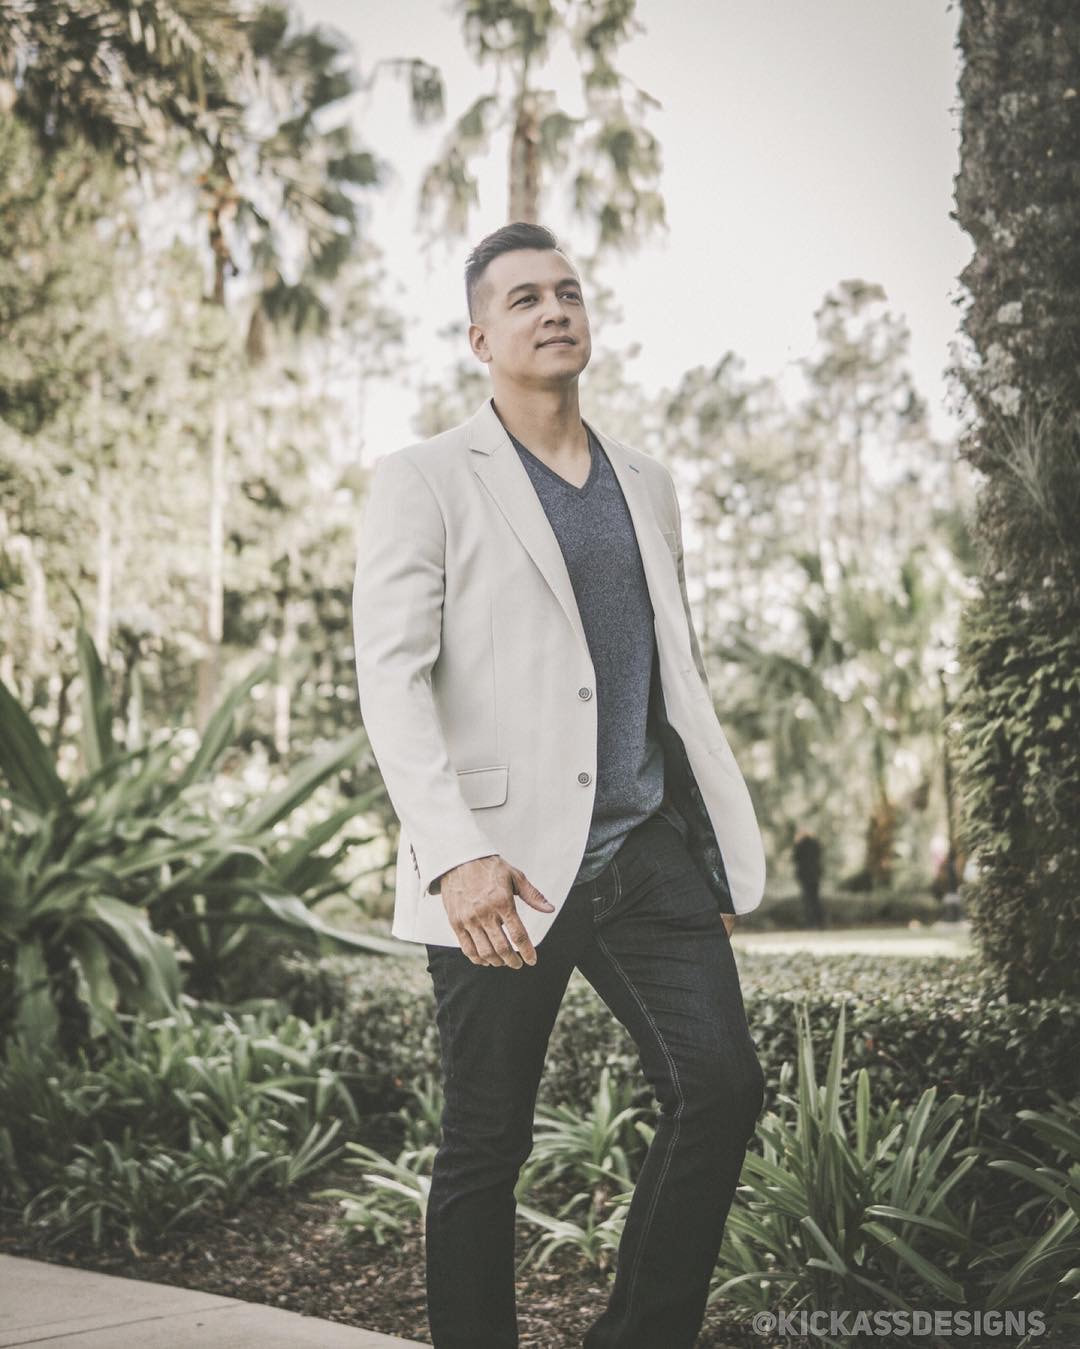 Model: @growwithtim on IG 27. One hand on Shoulder. Have your subject look into the camera while placing one hand on his shoulder. 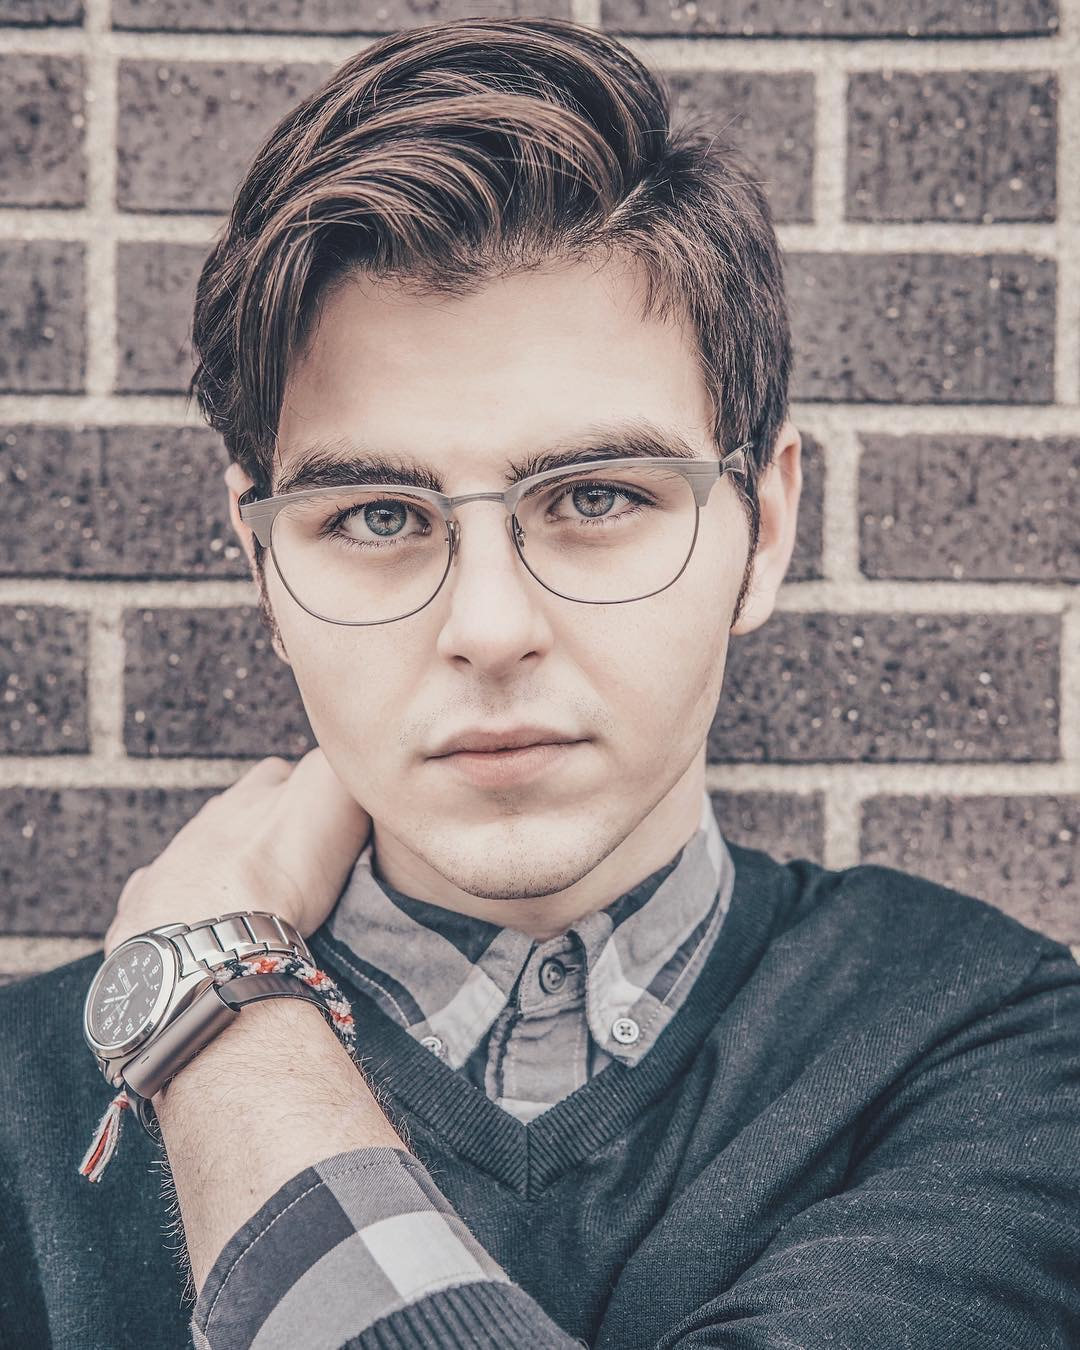 Model: @quinngilronan on IG 
Lighting is one of the most crucial aspects of photography. Good or bad lighting can make or break a shoot. However I believe there is a misconception in our industry that you're a better photographer if you own a great light setup and a studio. That's simply not true. 90% of my photos are done with natural light as in only using the light that is available to me. This could be the sun, fire, street lamp, arcade, or desk lamp in a hotel. No flash, no reflector, no diffuser. I will always prefer natural light and I get asked about lighting constantly so I thought I would share my tips on how you can improve your natural light photography skills.
27 Posing Ideas for Women Who Aren't Models Let's start with Studio lighting. This may seem counter-intuitive, but learning the fundamentals of studio lighting has vastly improved my natural light photography skills, specifically for portraiture. Knowing where to position the subject in relation to the light in order to achieve a specific result is key to making excellent portraits no matter what your light source may be. I'll start with 5 examples of the most common studio lighting set-ups and how you can re-create them using natural light and I'll follow that up with some great examples of how I use natural light for different moods and scenarios. All the photos below were taken by me. Make sure to connect with me on Instagram HERE. How to Improve your photography with natural light: 1. Split lighting
Light is 90 degrees in relation to your model to the side at face-level. One side of the face is highlighted and the other is in shadow, half and half, for a dramatic effect.
Outdoors: Position your model so the sun is directly hitting one side of the face. It should be a sunny day, not too cloudy, and the sun will need to be relatively low in the sky. Indoors: Using natural light coming through a window, make sure your model is positioned parallel to the window with bright, even light directly hitting one side of the face. Example: 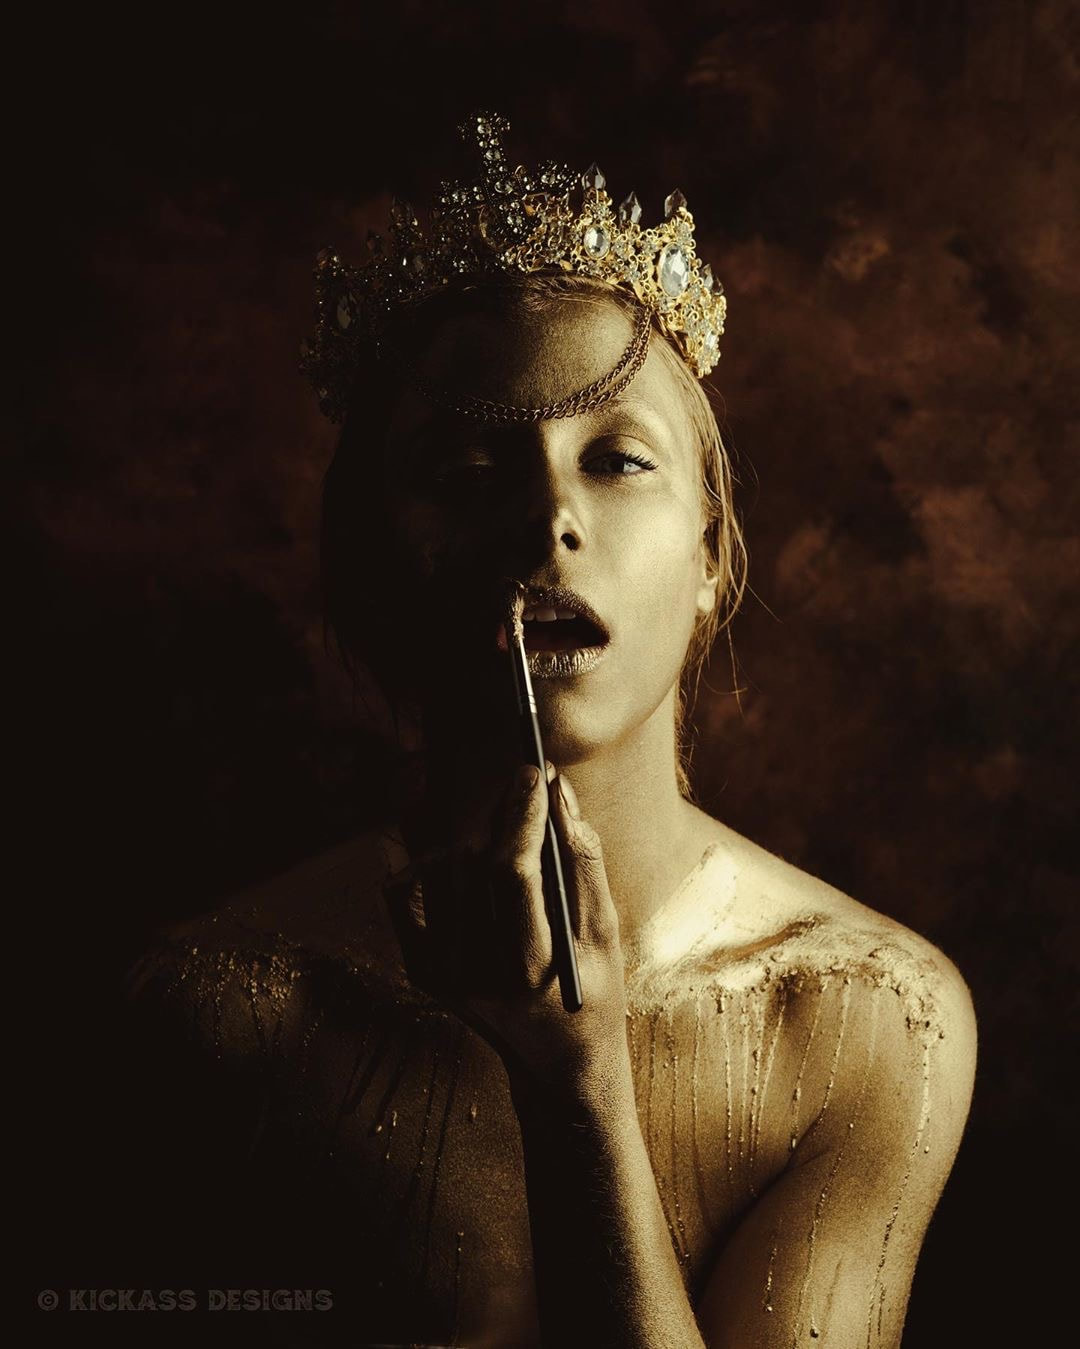
Model: @littylerouge on IG
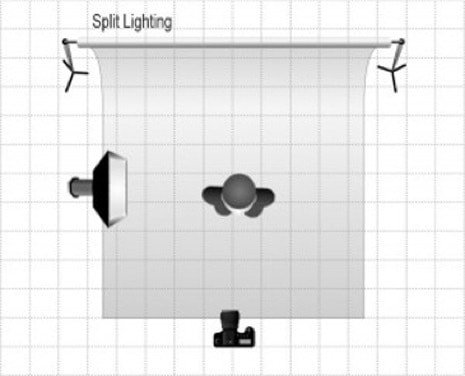
2. Rembrandt lighting
Light is 45 degrees in relation to your model slightly to the side coming down from an angle just above their head. One side of the face is highlighted with the other side in shadow, with the exception of a triangle-shaped highlight beneath the eye. This effect is a more dramatic version of loop lighting (see below) with the nose and cheek shadows merging.
Outdoors: Position your model so the sun is at a mid-to-high angle in the sky, with your model slightly facing towards the sun. For that dramatic and moody Rembrandt effect, a sunny or partially sunny day is best to create the deepest shadows. Indoors: Position your model to turn towards a window with bright, even lighting coming down just above the head. Example: 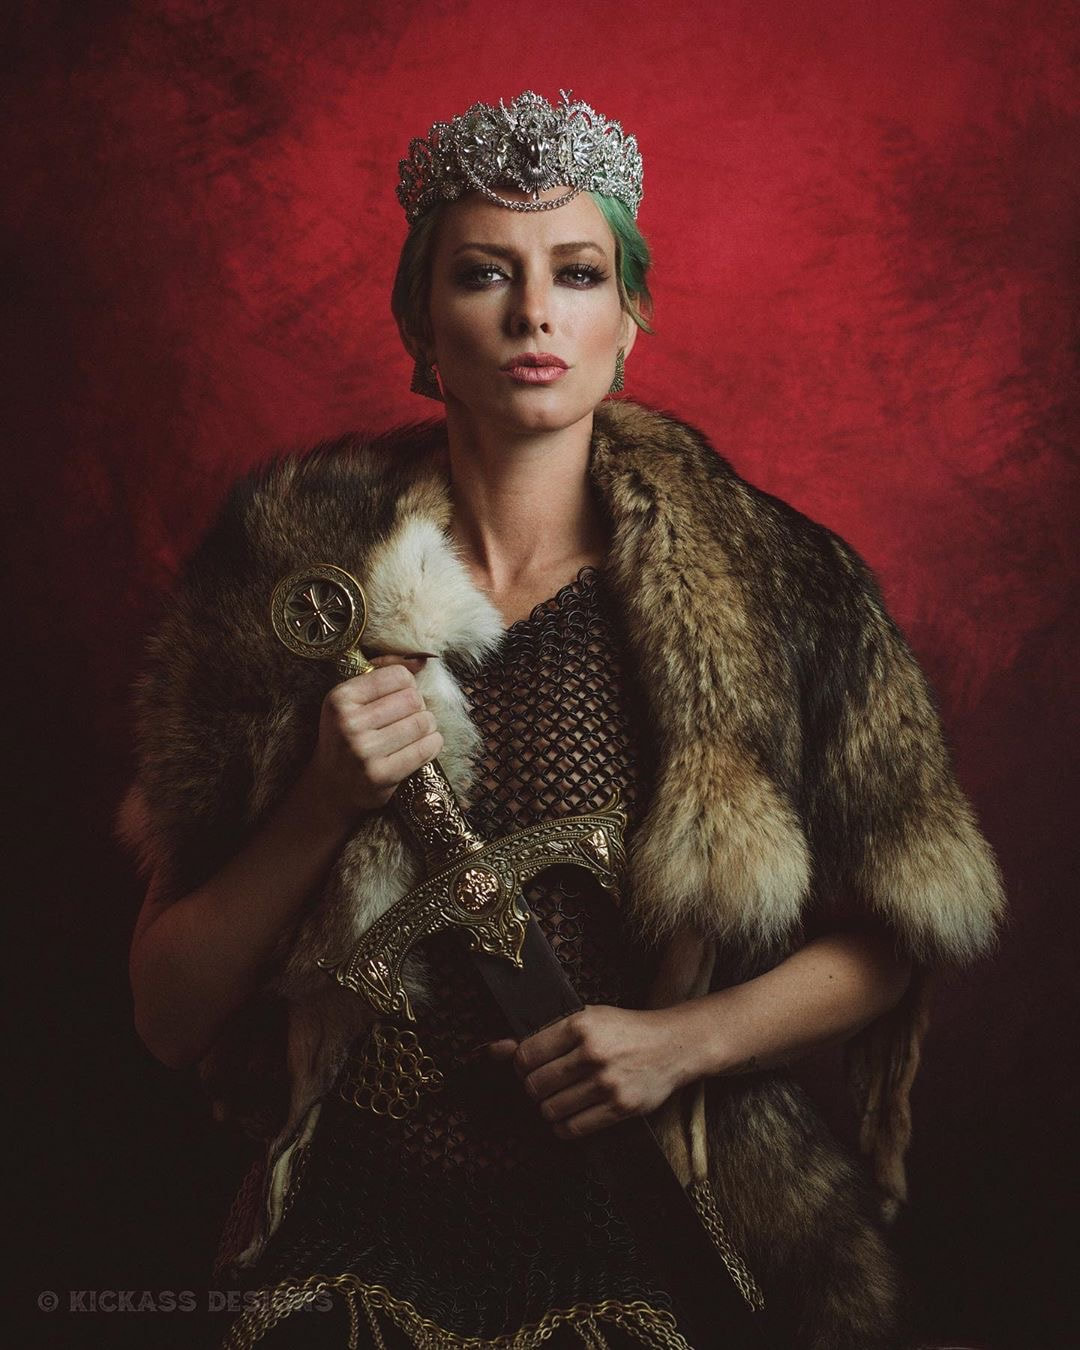
Model: @alyxandriamodel on IG
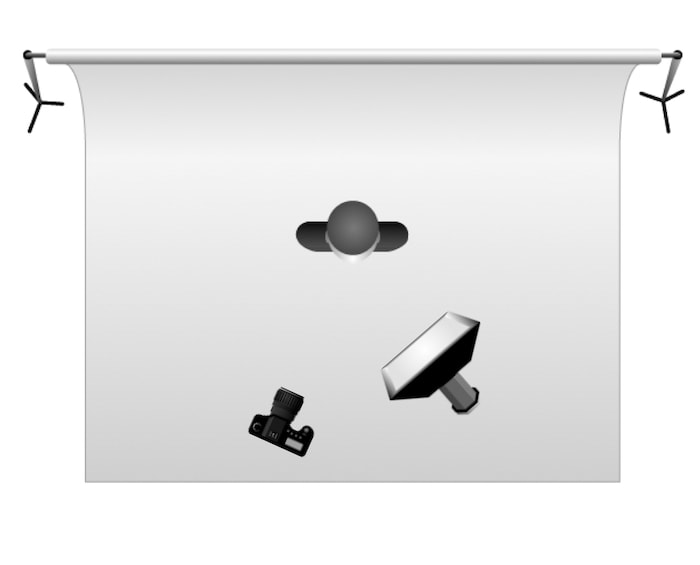
3. Butterfly lighting
Light is 0 degrees in relation to your model direct coming down from a high angle. A small butterfly shadow is created under the nose along with subtle shadows under the cheeks and chin for a very flattering effect.
Outdoors: Position your model so the sunlight is directly hitting the front of the face. The sun will need to be relatively high in the sky. You may want to have your model slightly tilt their head up towards the sun. A cloudy day will soften the shadows. Indoors: Position your model below and directly facing a window, ideally a high one, with light hitting the front of the face. You may need to get creative for example, covering/blocking the bottom portion of a large window so sunlight only shines down through the top to produce the right effect. Example: 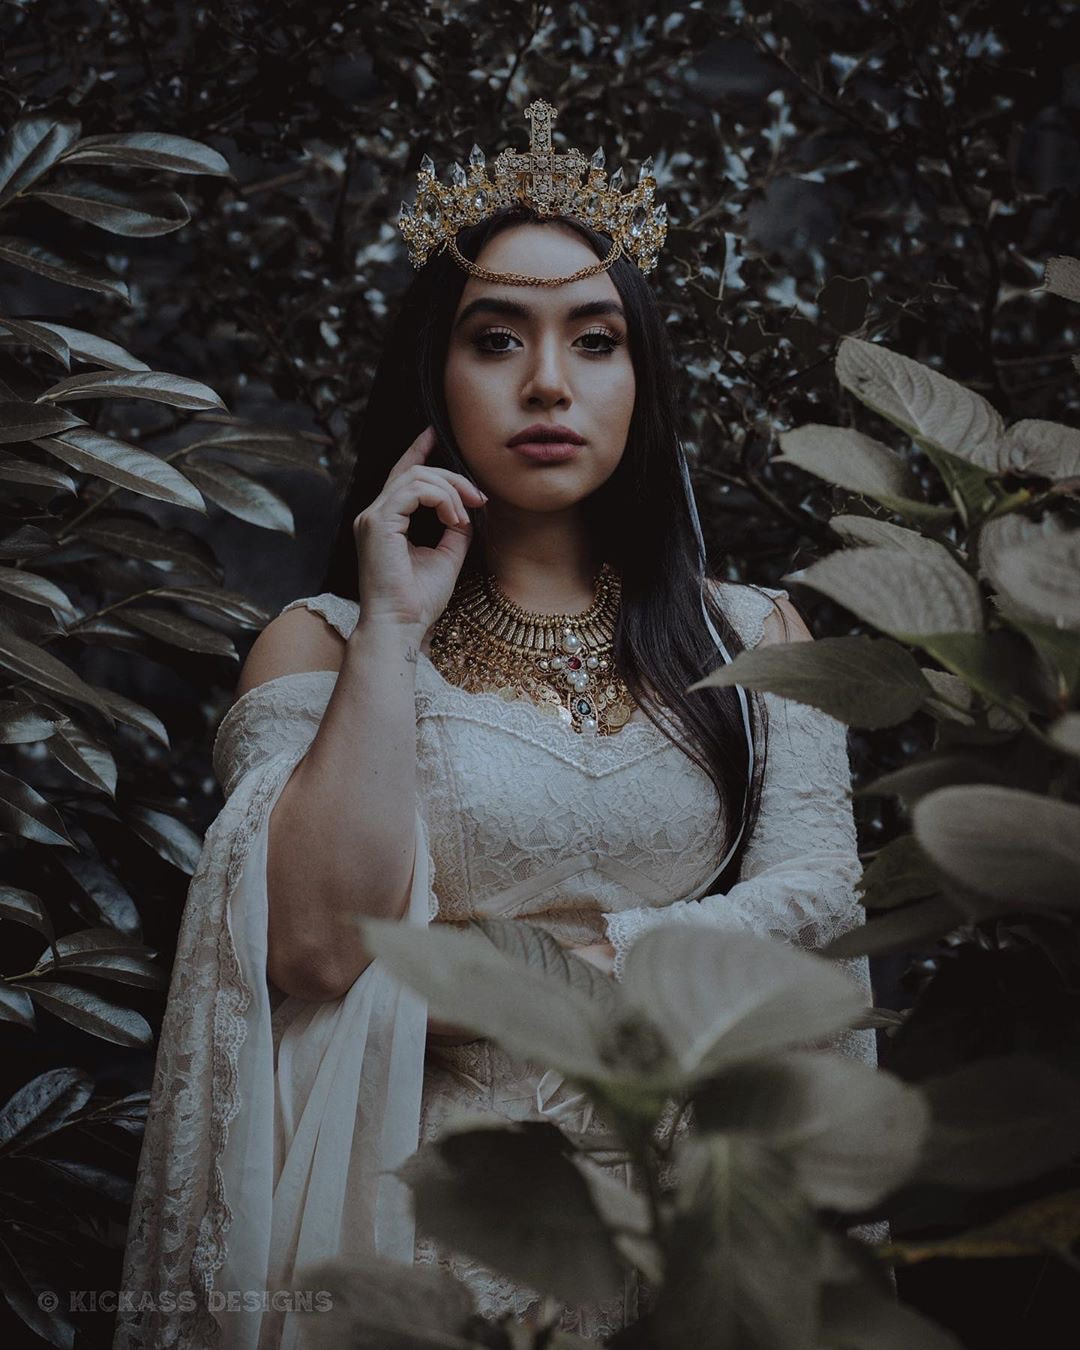
Model: @cristellin on IG
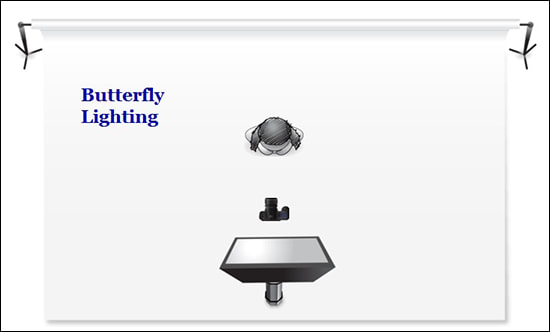
4. Flat lighting
Light is soft, even, and diffused. There are no/minimal shadows on the face.
Outdoors: Ideally, it will be a completely overcast, cloudy day so you can position your model anywhere in the environment. However, if it is a sunny day, put your model in a shaded area for example, under a tree or beneath a building overhang. Indoors: Use a window that does not receive direct sunlight for example, a north-facing window or use white curtains over the window to diffuse bright light before facing your model directly towards it. Additionally, turn the model away from the window altogether this way the hair is backlit while soft, ambient light evenly highlights the face. Example: 
Model: @alyxandriamodel on IG
5. Loop lighting
Light is 30 to 45 degrees in relation to your model slightly to the side coming down from an angle slightly above eye-level. A small loop shadow is created beneath and to the side of the nose along with a soft shadow on the cheek of that same side. However, these two shadows do NOT touch, otherwise that would be considered Rembrandt lighting (see above.)
Outdoors: Position your model so the sun is at a mid-to-high angle in the sky, with the model slightly facing towards the sun. Indoors: Have your model turn a bit towards a window with diffused light coming in right above eye-level. Example: 
Model: @nihlisticmuse2.0 on IG
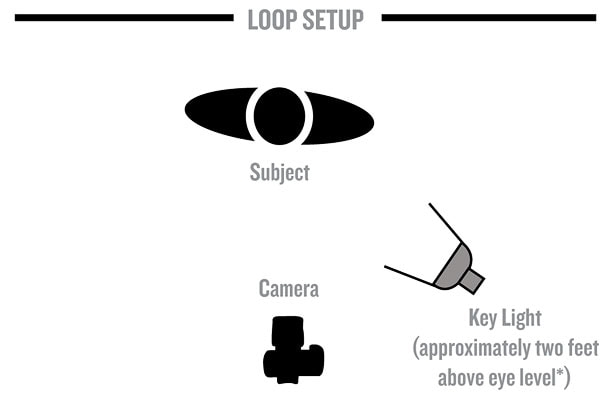
If you want to fill in shadows for a softer and less dramatic portrait a reflector can be a great asset when using only natural light. However a reflector takes up space and usually requires an assistant. Ever seen a senior portrait going on and the photographer will have a flash and someone holding a reflector. I just laugh every time I see it because it's just not necessary. You don't need all that to create a great photo.
Just remember when using natural light, you must continuously move, turn, and re-position your model to get the desired lighting effect. Never underestimate strong verbal communication skills. :) In addition, the infamous Golden Hours before sunrise and after sunset produce warm, rich light that can't quite be re-created in a studio. Experimenting during these times, particularly with backlighting, will also improve your skills and most likely produce beautiful photographs. That being said I rarely shoot at golden hour because it just feels over done to me but golden hour is still beautiful lighting.
Now that I've shown you examples of the most common studio lighting set-ups and how you can re-create them using natural light I'll show you some examples of how I use natural light for different moods and scenarios.
First scenario: Let's say you have no choice but to shoot at noon out in the open when the harsh sun is right over head. Try having your model look up to avoid any harsh shadows. I'll show 3 examples below. 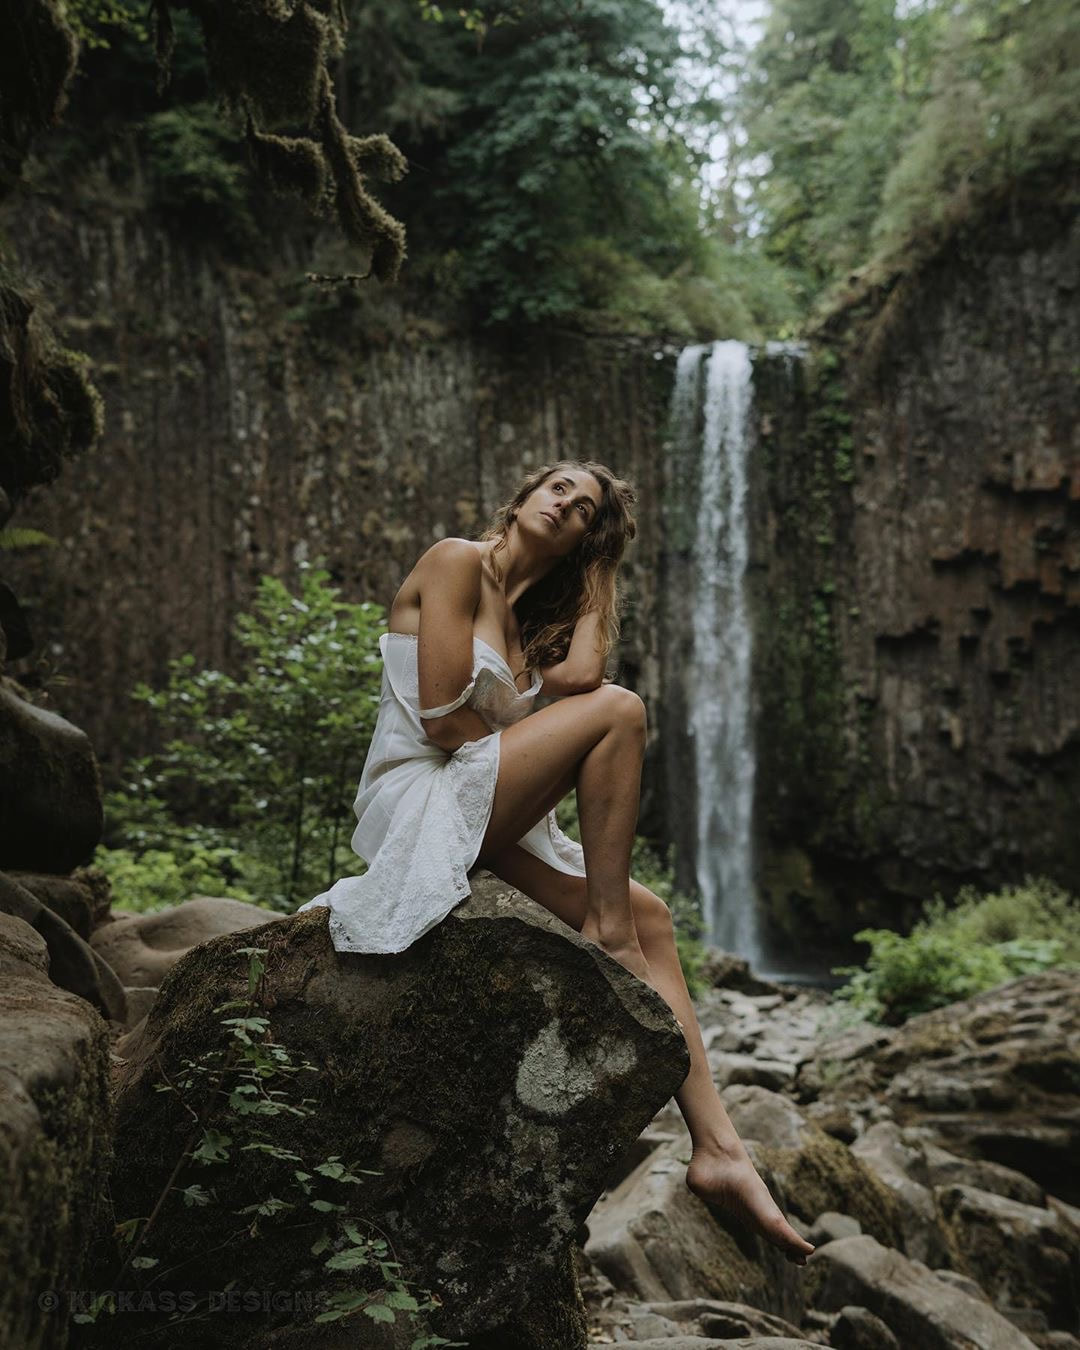
Model: @shawnna.lee on IG

Model: @becka.888 on IG
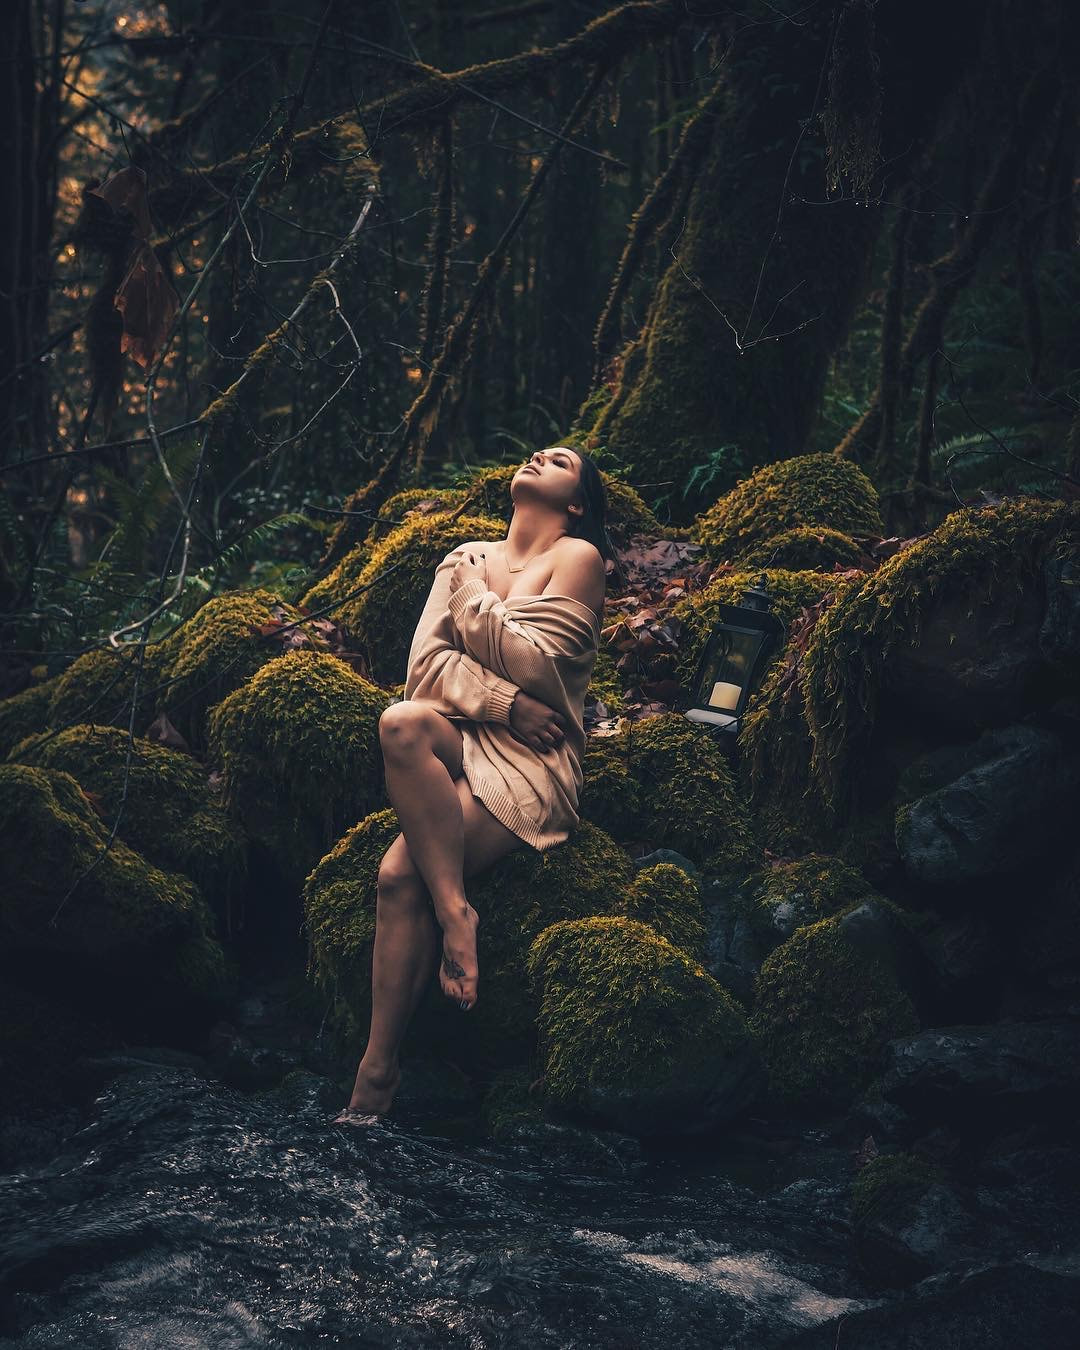
Model: @danillabean on IG
Now, same scenario except you have shade available to you. Any time you're shooting and the sun is harsh look for shade. This is crucial. You can almost always find some. For the example below we just used some shade from a few trees at the beach.
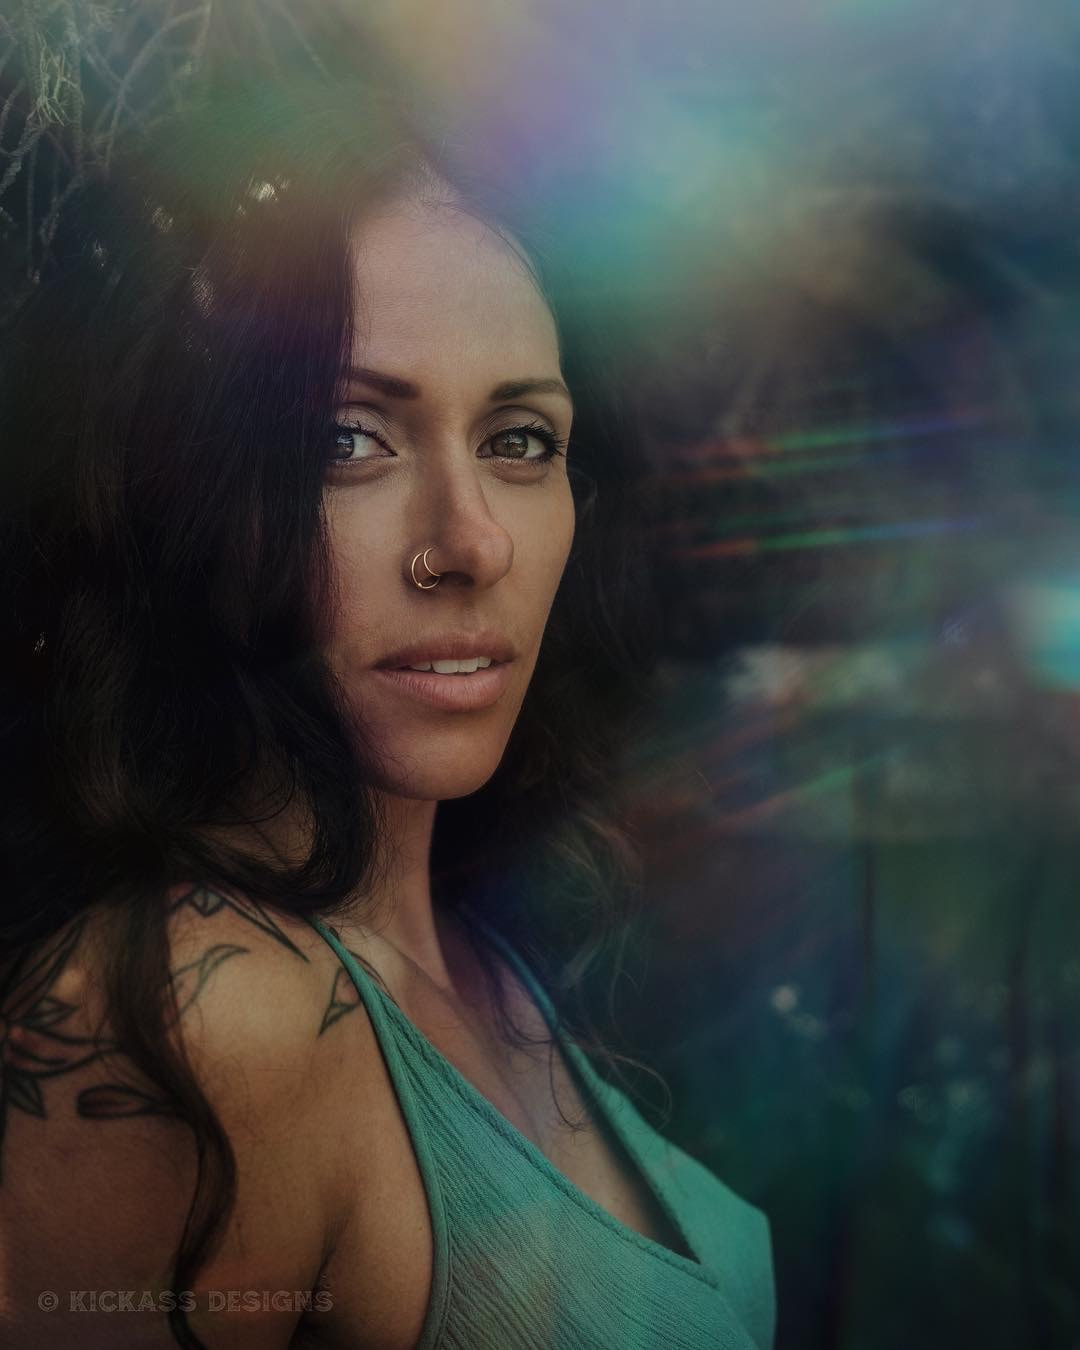
Model: @becka.888 on IG
Let's say your shooting inside a bar with no flash. It's sure dark, what do you do? Use whats available. For the shot below we just used the light from above the pool table. Make sure your model is as close the the light as possible. My settings: 1/160 sec /// ISO 320 /// F2.2
Model: @kamyar_jahan on IG
Let's say your shooting in a coffee shop. Take a look at these 4 examples of how to use the light coming in from the window and how the position of your model changes the mood.
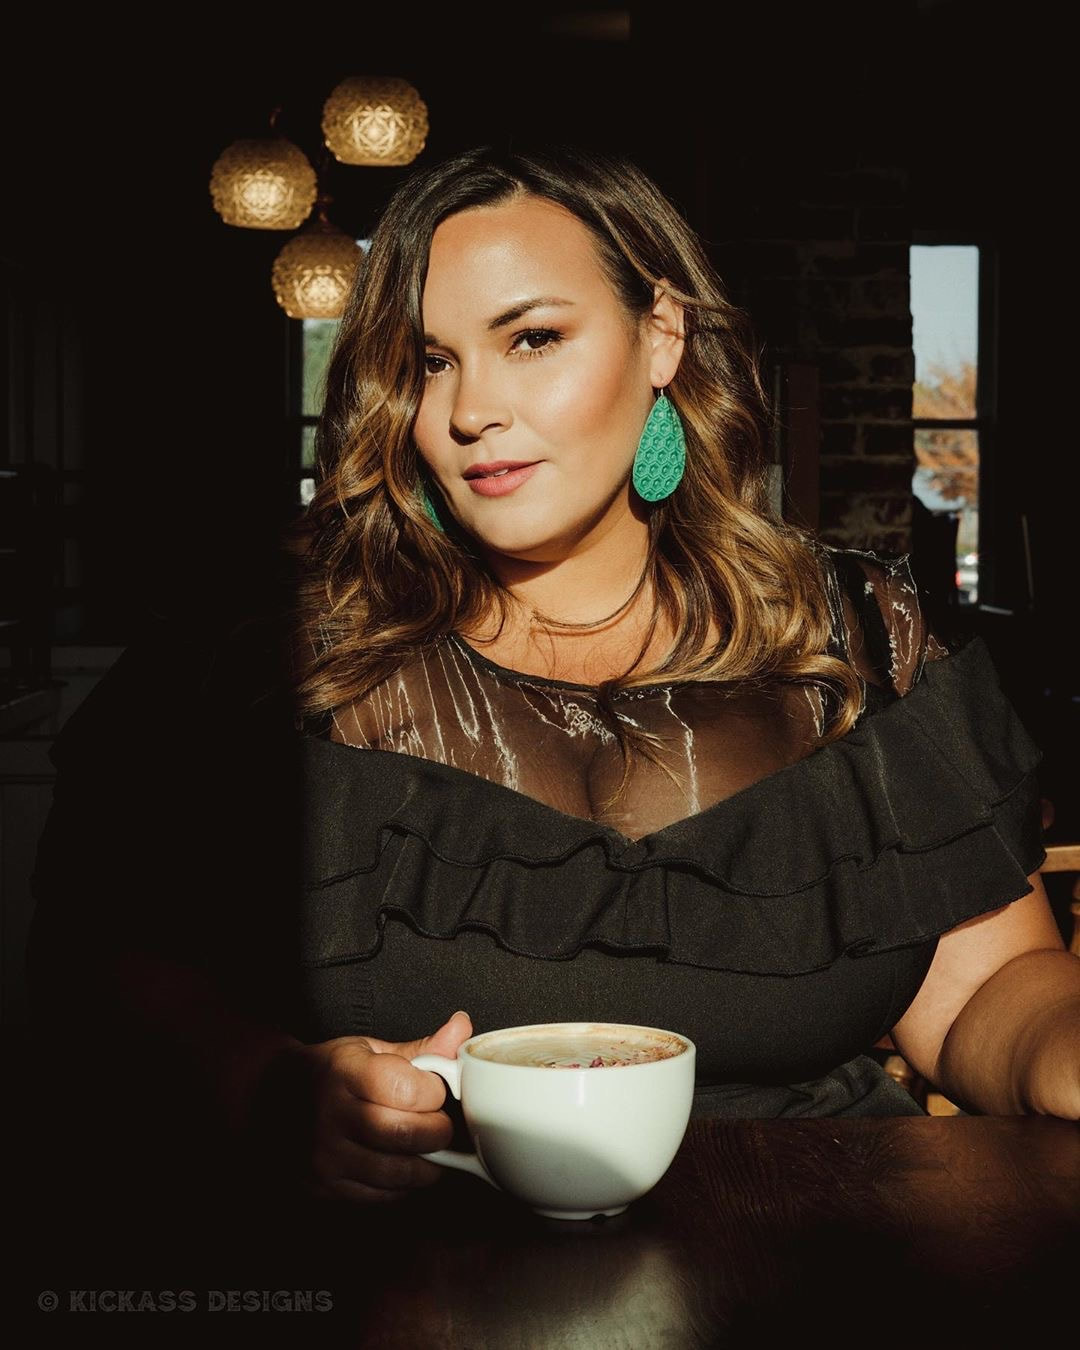
Model: @nicole.denise.johansson on IG
Model: @emmakateroberts on IG
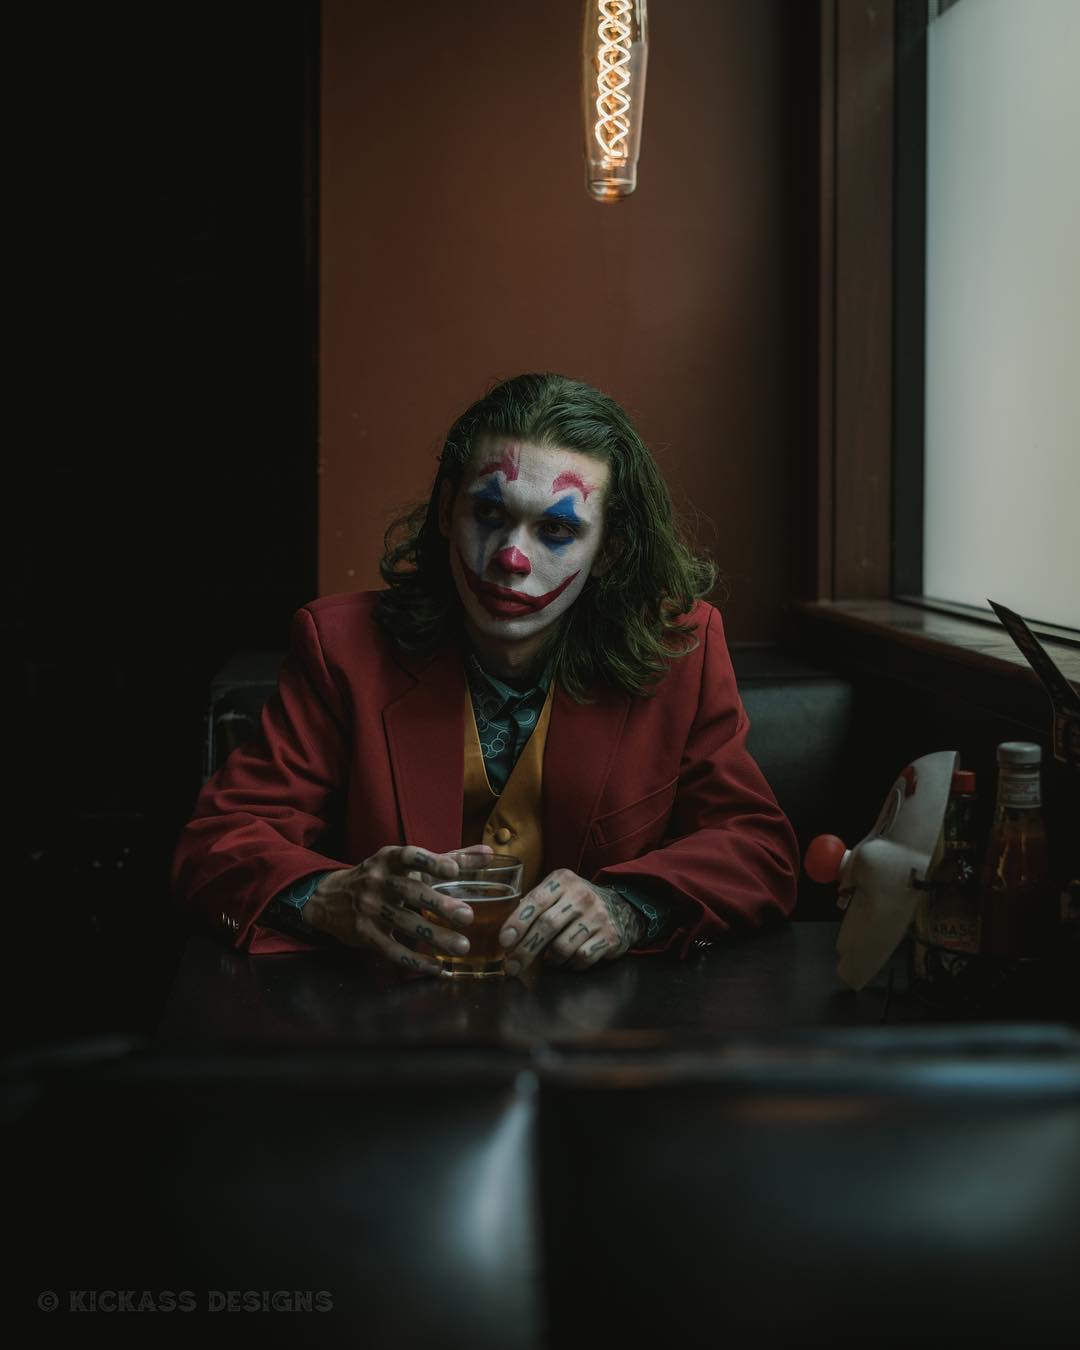
Model: @dyllan.tattoos on IG
Model: @saaphiirre on IG
Now let's say you're shooting in an arcade. They are always dark but the neon makes for really fun photos. The key to shooting with neon is having your model as close to the neon as you can get. If you have the Neon behind them and nothing to light their face it will be too dark. For the example below I had my model stand as close as she could to the arcade screen because it was producing a good amount of light. Settings used were: 1/200Sec /// ISO 640 /// F3.2  Model: @thehannahhawkins on IG Model: @thehannahhawkins on IG
The example below was shot in a hotel room at night using the standing lamp next to the sofa. Just point it towards the model and make sure it's as close as possible.
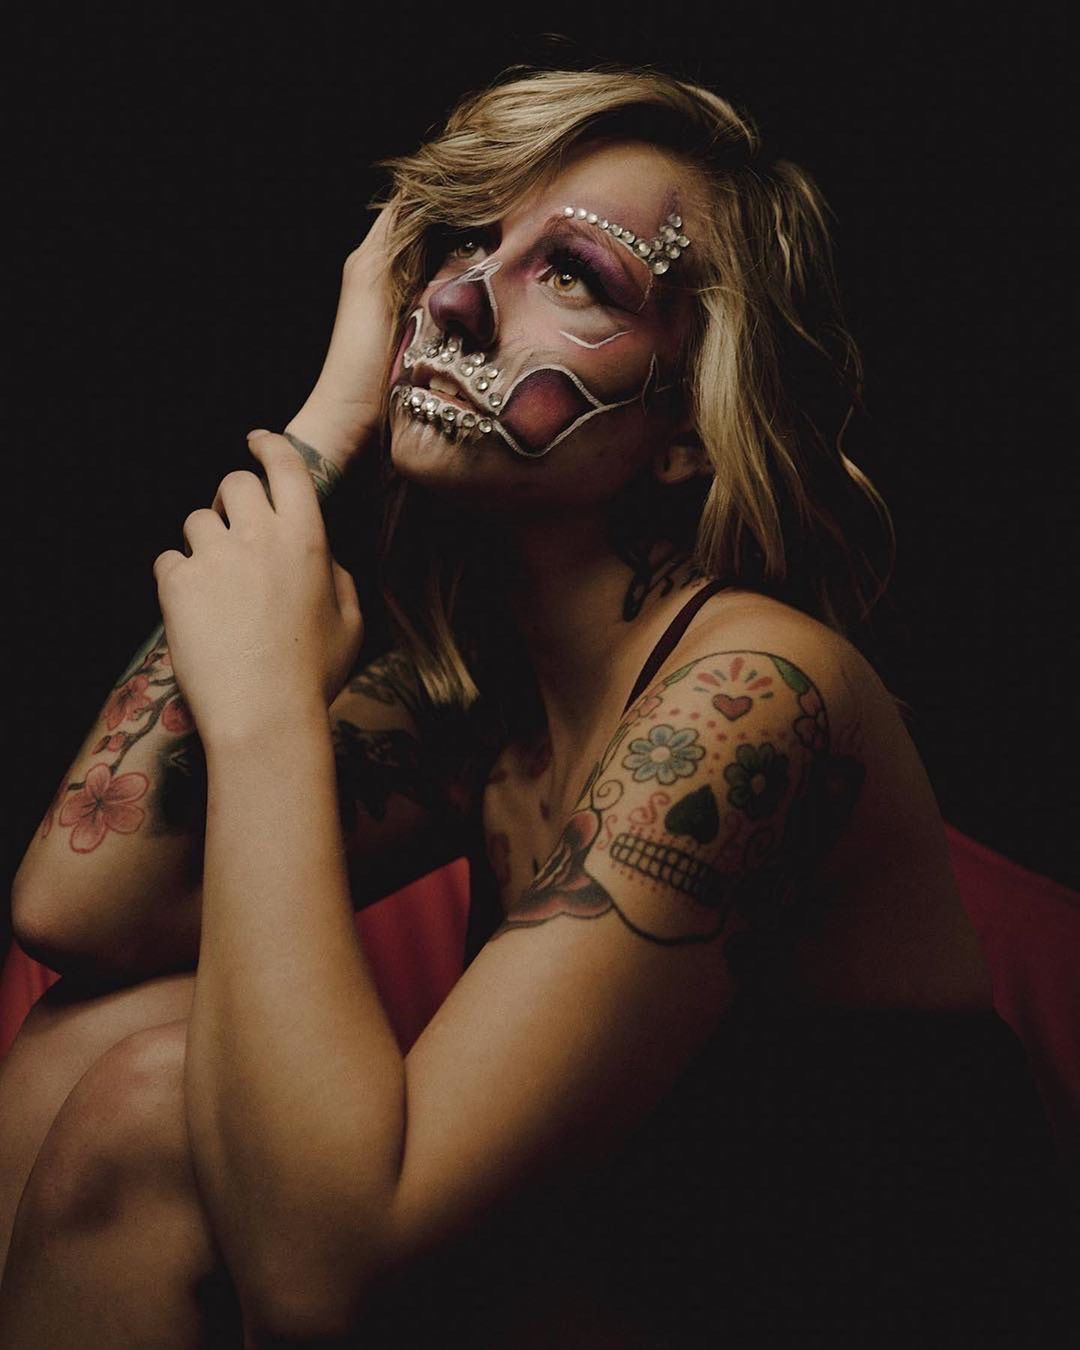
Model: @shybbyshy on IG
Always keep an eye out for fun shadows when the sun is harsh. Especially if your in an urban area. Below are some example of how I used shadows on a wall to create a dramatic image. The key is to have your exposure correct in camera. Make sure you bring the exposure down so you don't blow out the highlights and crush those darks. We want the detail in the highlights and we want to make those darks pitch black.
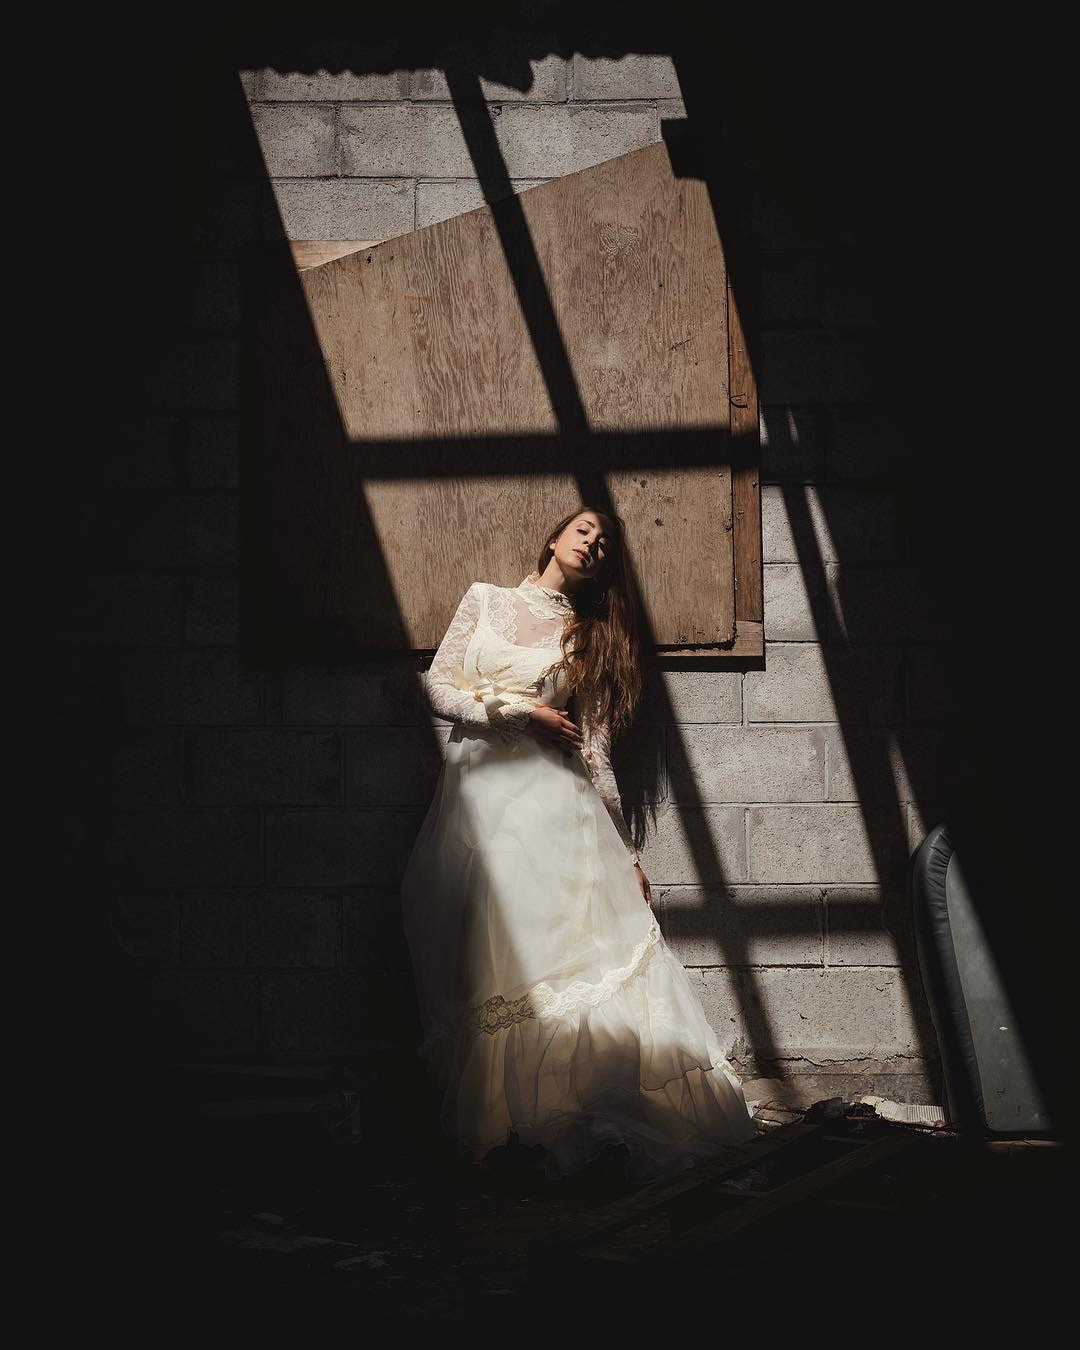
Model: @shawnna.lee on IG
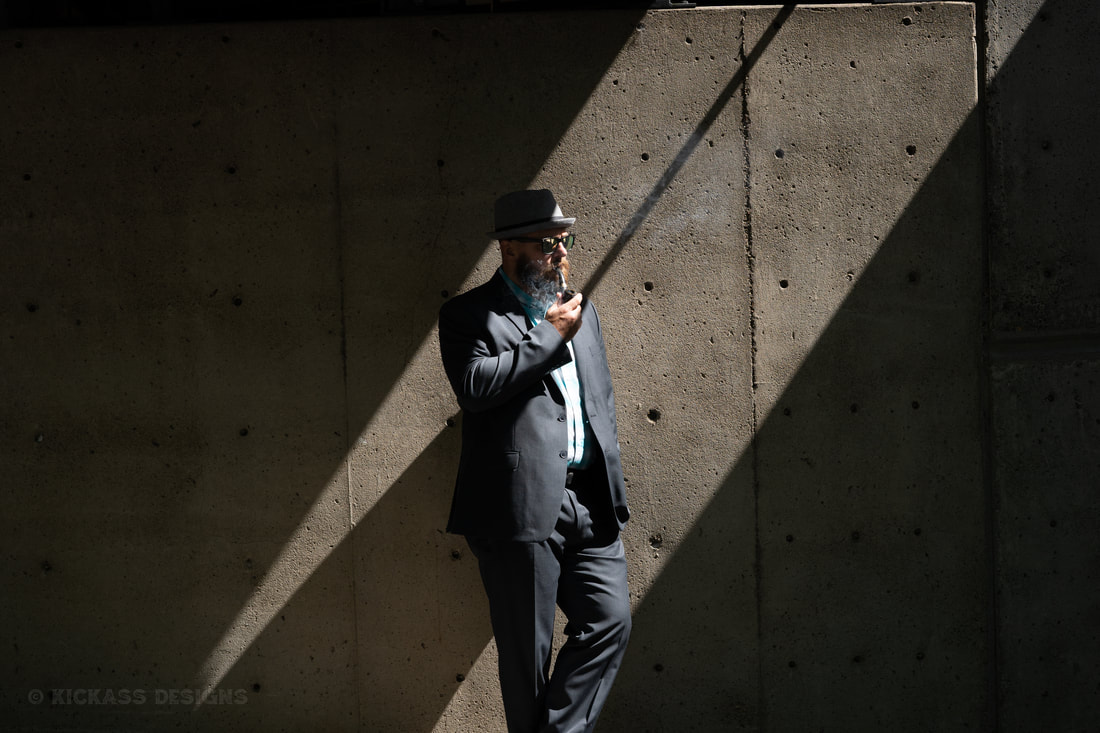
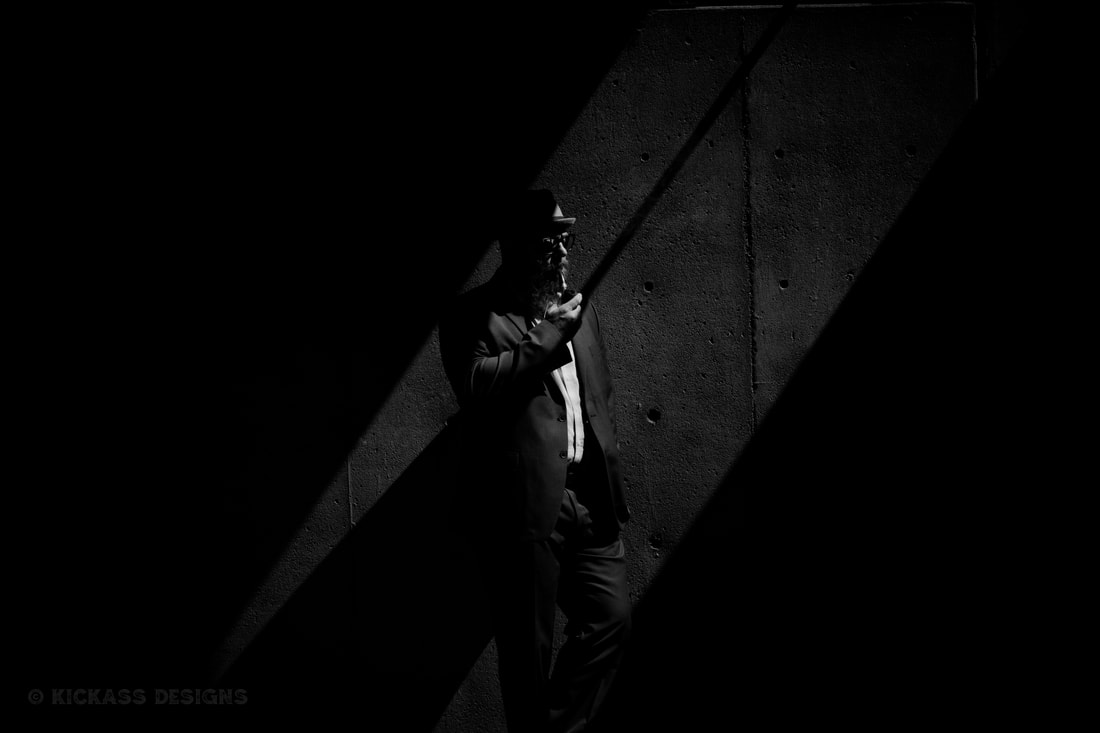
Model: Troy
Use whatever light is available, below is an example of using fire to light your subject.
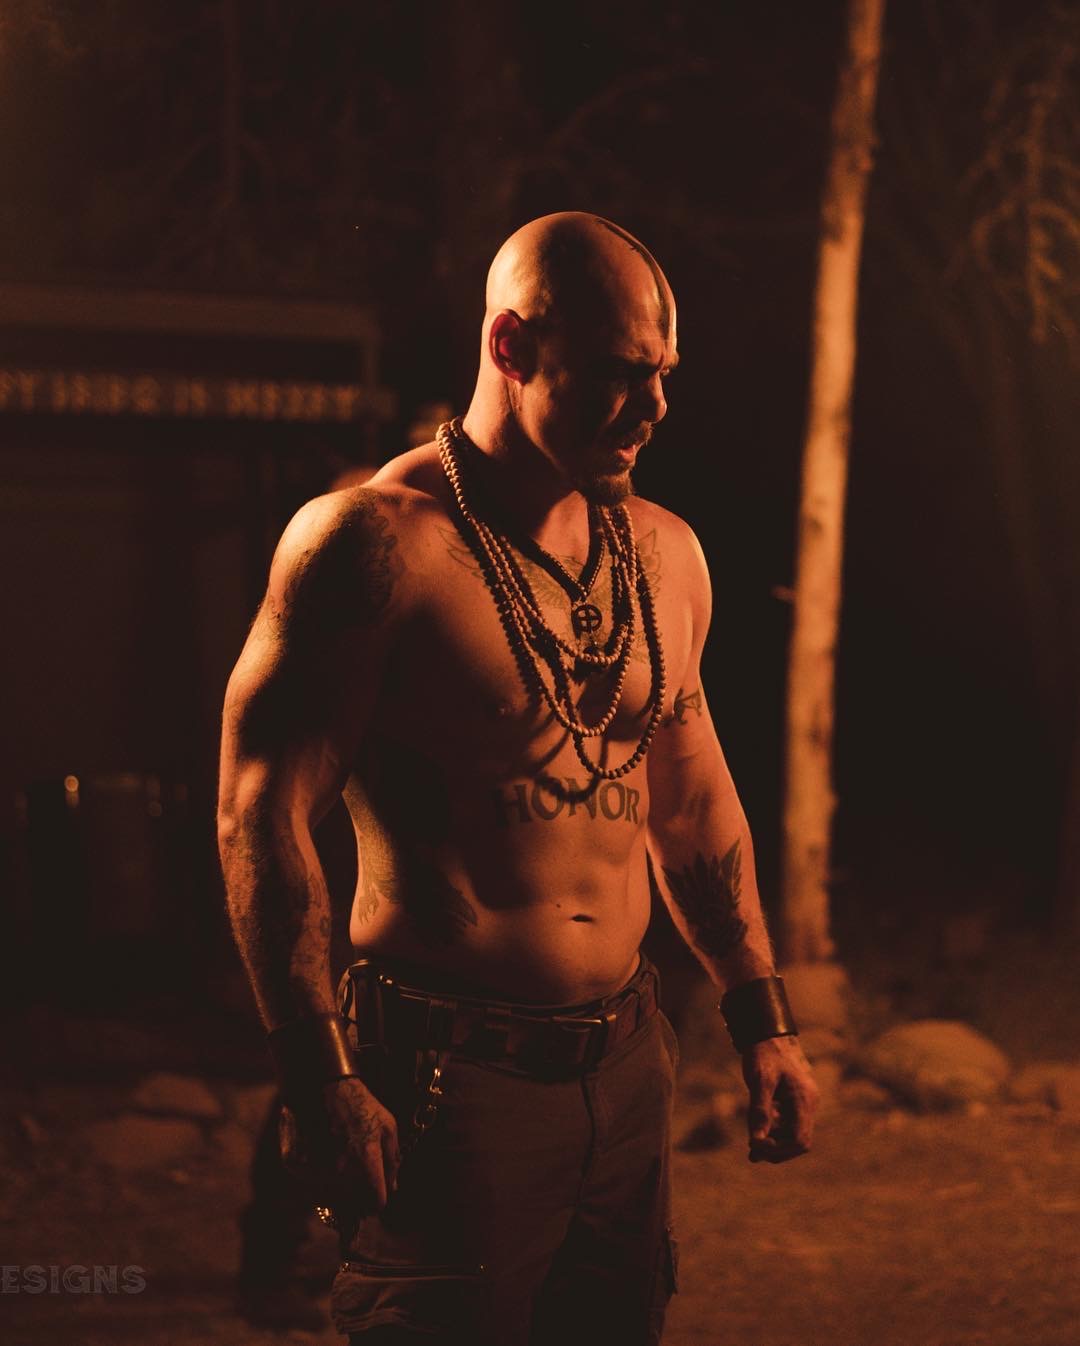
Model: @starttheworld on IG
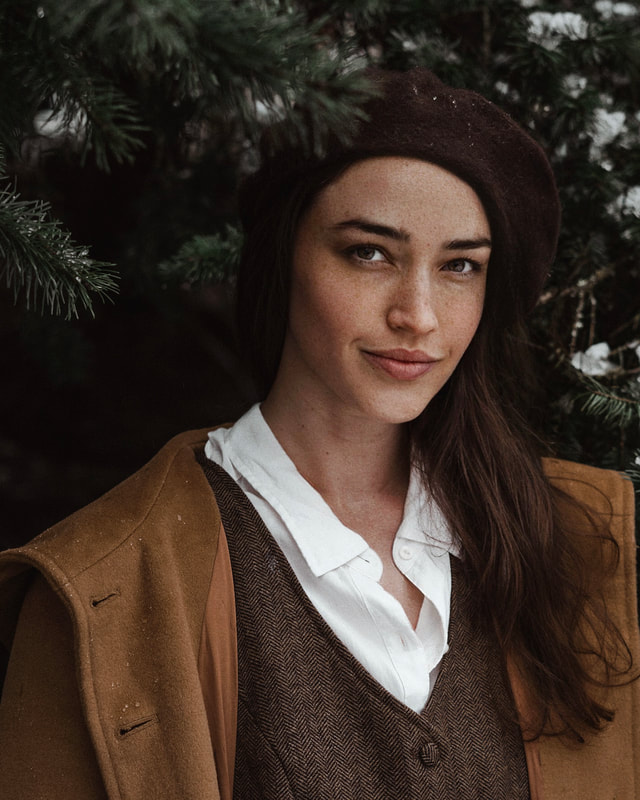
Try having the light source behind your model to create a fun silhouette like we did below.

If you're shooting somewhere urban at sunset keep an eye out for street lamps, neon, or lit door ways. The image below was at sunset so we used a lit doorway to add some dramatic lighting.
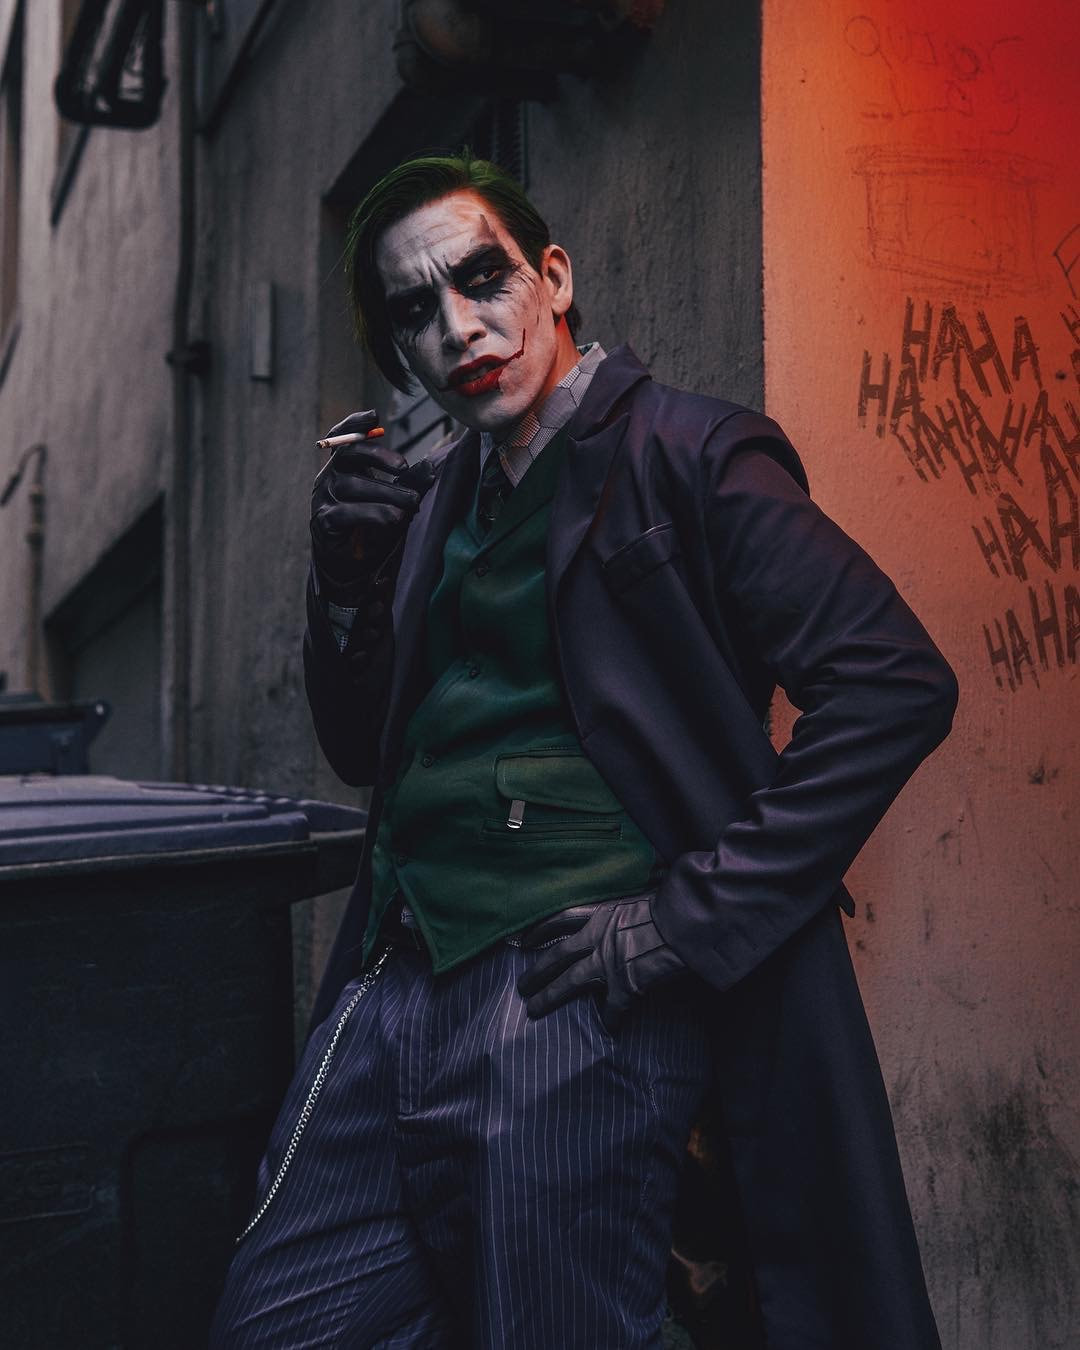
Model: @real_wade_wilson on IG
Maybe the sun has set so you're out of sunlight, use a lighter or street lamp for dramatic lighting as we did below.
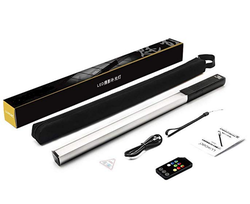
Now that you've seen some examples of using natural light here's an example of using a Portable Wand Handheld LED photography Light.

Models: @jacquelynnefaith & @ambernicotra on IG
Every now and then you'll be in a situation where you just don't have enough light. For emergency situations like these I like to have a light wand in my car just in case. It's about $80 on amazon, it's light, compact, easy to carry and use. These photos were taken in a bar with zero light to use so I used the wand to light the models.
All that being said. I'll leave you with this. As much as I love using natural light sometimes your clients requests will require a studio and a light setup. So do some research and become familiar with a studio you like best in your area. Some offer lighting some don't. Personally my favorite studio in Portland is Cobalt Studios. For only $75 an hour you get access to everything and that includes lighting! Not only that but the owners are amazing people and they take the time to help with lighting so its exactly how you want it. The staff is very knowledgeable and friendly.
If you found this article helpful I'd love to hear from you in the comments. 
Posing Ideas for Women in 2022
Lets face it, professional models can take a lot of the burden off us as photographers by bringing their posing expertise to the table. But unfortunately we don't always have the benefit of shooting with a professional model. As a high caliber photographer it is important to have the ability to pose normal people with little to no experience in front of the camera.
If posing for modeling is a challenge for you this list of 27 posing ideas along with photos for reference should help. Every photo below was taken by me.
| You May Also Like: 10 Safety tips every model should know
While certain genres of photography get to work with models, most genres involve shooting normal people who will have varying degrees of comfort in front of the camera and natural posing ability. Posing was the hardest thing to learn for me personally and it is something I still work on every day.
While I am jealous of photographers who have a natural ability to pose people on the fly, I unfortunately have found that I work best by having a list of go-to poses that I know work well for me and can fall back on if I need to.
| You May Also Like: 27 Posing Ideas for Men
Until now I have kept that list to myself. If you are a model or photographer who struggles with posing I hope this list helps. Make sure to bookmark this page so you can bring it up at any shoot and go down the list and nail every pose. You do that and you will be guaranteed to leave the shoot with tons of variety. Connect with me on Instagram HERE
1. The Profile Pose/Side View
If your model isn't blessed with perfect bone structure try different lighting, angles, chin movements, and hair placement to hide a double chin. Models: Don't worry, we all have one.

Model: @jacquelynnefaith on IG
2. Movement Pose/Action Pose
Have the model do some kind of movement or action. This could be walking, running, jumping, or spinning. For action shots make sure your shutter speed is 1/250 and up so it's not blurry.
| You May Also Like: How to get into Modeling. 11 Tips

Model: @stephaniejadesmith on IG
3. Seated Pose
Seated poses are great just keep an eye on posture and the tummy. Last thing you want is the tummy getting squished. If it's not flattering your model wont like it. Make sure your model engages her core at all times.

Model: @waterfallkristy on IG
4. Chin in hand pose
If your model is seated this is a great go to. Try a variety of hand placements on the chin. Have your model look into the camera and off into the distance.
Model: @lexylovestruck on IG
5. Look to the sky pose
Here's a tip to make your models eyes pop and lose those shadows when you're using natural light only. Have her look up. The light from the sky will make those babies pop and eliminate any unflattering shadows! This is very useful when shooting in a dark forest and your models face is super shaded.
| You May Also Like: Best Modeling Agencies in Portland
Model: @dear_miss_tiffany on IG
6. Over the shoulder pose
To change things up try an over the shoulder pose where your model plays with her hair with the hand furthest from the camera. Have her open up and get some space between the elbow and her body making a triangle.
Model: @ambermg_ on IG
7. Hands on hips pose.
Play around with hands on both hips or just one hand on one hip. Try having your model slighting turn her body and popping that hip to show some side booty.
Model: @igobytima on IG
8. Lean on wall pose
Try photographing at different angles and have your model lean with her side to the wall and her back to the wall for variety.
Model: @kaylaraecannon on IG
9. Play with hair pose
This is what I meant above when I said have your model play with her hair with the hand furthest from the camera. Have her open up and get some space between the elbow and her body making a triangle. Models will always ask what to do with their hands so letting them play with their hair is natural, fun, and gives them something to do with their hands.
Model: @aliciangates on IG
10. Legs crossed pose
Crossing the legs can give great shape to the body.
Model: @jennawilliamscpt on IG
11. Surprised Expression
I call this the Macaulay Culkin pose. I find adding the hands is just a bit over the top but a surprised expression really open up the eyes and makes for a fun photo every time.
Model: @alyxandriamodel on IG
12. Hand in pocket pose
Try both hands or try just one. The choice is yours. Live a little. Also try a thumb in the belt loop instead of pocket or a thumb in the waist band.
Model: @aliciangates on IG
13. Look into the distance
I call this the day dreaming pose. Have you model look into the distance like she's day dreaming about something she loves or like she's longing for something.
Model: @saaphiirre on IG
14. Funny Faces
Funny faces although not the most flattering are always the most popular in any photo set I post where there is a funny face. Catch those silly moments that happen between shots because people love seeing personality and it shows your model is more than just a pretty face. Have every model you work with give you at least one good ridiculous face.
Model: @carmacosplay on IG
15. Laughing
Much like the photo above you should be having fun during a photo shoot so catch those candid moments. Everyone loves a genuine smile and the best smiles happen right before or right after a laugh.
Model: @jacquelynnefaith on IG
16. Pouting Expression
Posing goes beyond just changing up body movements. Make sure to get a variety of expressions from your model as well. A good pout is a great start and almost always leads to a genuine smile.
Model: @littylerouge on IG
17. Sitting laid back pose
Let your model lay back and relax. She's been working hard she deserves it.
Model: @magiifit_ on IG
18. Laying on the ground
Change up perspective. Have your model lay on the ground and shoot from above. Just make sure she leans her head back so we don't get double chins.
Model: @alyxandriamodel on IG
19. One leg down one knee up pose
If you want the booty poppin a great way to achieve this is keeping one leg down and bring a knee up on something like steps or a bench. Have your model pop the booty with the foot that's on the ground.
Model: @ambrefit on IG
20. Arms crossed pose
This can be a great power pose or vulnerable pose depending on expression and posture. Have your model just slightly turn her torso away from the camera.
Model: @thehannahhawkins on IG
21. Back bend Pose
This is more of a high fashion type pose and not the easiest to do so leave this for your experienced models.
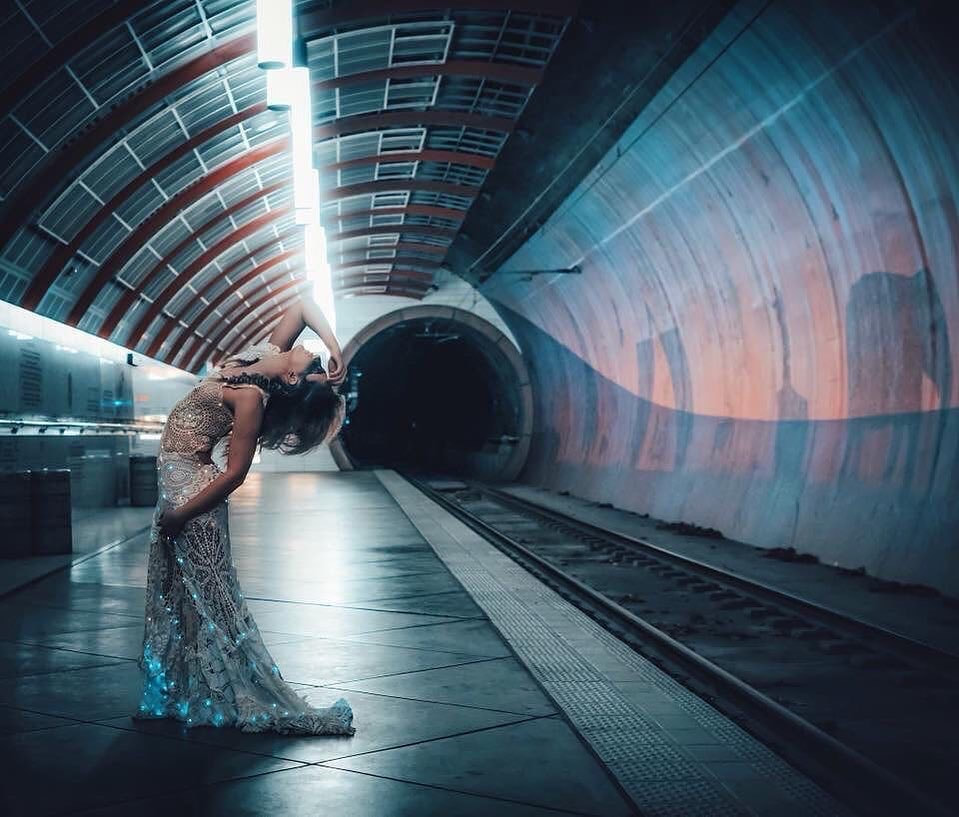
Model: @jordynnmontero on IG
22. Seated one leg under one leg over pose
I just love this pose. Feels elegant but sexy to me. This is a great pose for any model with really nice legs. Try pointing the toes and lifting the heel off the ground of the front foot for a good flex.
Model: @aliciangates on IG
23. The hair flip
Have your model stand still and move her head side to side getting some movement in just the hair. Turn your camera to rapid fire hope you get lucky. haha I have done this plenty of times where nothing turned out but when it does it's so fun!
Model: @alyxandriamodel on IG
24. The looking down pose
Remember the model does not have to be looking into the camera for every shot. Too often I'll look at a photographers portfolio and see nothing but photos of the model looking straight into camera. Change it up for a different mood.
Model: @anisamarieyee on IG
25. Half profile pose
So this one isn't a full on profile/side view because you still see both eyes but I absolutely love this pose. Do not forget to get close up shots and shots from far away. Change up perspective.
Model: @alyxandriamodel on IG
26. Hand on elbow hand on shoulder pose
This is a great high fashion pose. Again make sure to have the model turn her body just slightly so you aren't photographing straight on.
Model: @ambernicotra on IG
27. Revealing eyes pose
You will see this one a lot in ads. Have your model reveal her eyes behind a nice pair of sunglasses. Pro tip: This is a great opportunity to tag the brand of sunglasses on Instagram and even send them the photo. They just might share it and you'll get free exposure. If you're considering modeling, you can explore the different areas of the fashion industry. Some models experiment with one specialized category, while others try out multiple types of modelling. Here is another great resource to read on types of models.
Model: @littylerouge on IG
 Comic Con is a great place to see and take photos of some of your favorite super heroes and villains. It's chalk full of great photo opportunities. Search Comic Con on google and you will find thousands of photos of the most amazing costumes you've ever seen. You will also find thousands of very poorly executed photos. My goal with this article is to make sure you don't fall into that category. Elevate your game at the next Con with these 8 tips. If you like the photos below make sure and check out more of my work on Instagram HERE  Tip 1. Always Ask for PermissionThis is the biggest mistake photographers make at conventions. If you’re shooting at a convention or any other event where there are cosplayers, it’s always best to ask for the cosplayers permission before taking pictures of them. Your shots are guaranteed to be better if your model is fully aware of your camera pointed at them. They’ll be much more willing to strike different poses and maybe even allow you to direct the shot so you can have more control over the final image. The cosplayers I know hate it when someone gets a candid photo of them when they weren't ready. They don't want photos on the internet shoving food in their face while on a break half dressed and not in character. So do them and yourself a favor and ask for permission before you take their photo.  Art by Madeline DeCotes Tip 2. Cosplay is Not Consent Okay this tip wont really help you take better photos but it needs to be said. Let's face it many costumes for female leads in Hollywood are revealing so you are bound to see many ladies of all ages in revealing outfits. This in no way gives you permission to touch them. Maybe just assume every cosplayer you meet doesn't want to be touched in any shape or form. That goes for males and females. If you need to touch the cosplayer to help with posing always ask first but usually this can be done verbally or visually. Having your photo taken with a cosplayer still isn't an excuse to touch them. Odds are you don't know this person so just go the Keanu Reeves route and hover a hand behind them or to the side.  Model: @coolregularguy Tip 3. Allow them to Get Ready before you take the photo. Look, I get it, Comic Con is very exciting. As a photographer you want to take as many photos of your favorite characters as you can. However, just like photography in general, it helps to take the time to compose your shot and wait until your subject is ready before taking the photo. Allow them a few seconds to put on their masks, take off their hoodie, fix their costumes, touch up their makeup, and get into character for your shot. This also shows respect for the craft and for their hard work in putting their costumes together. They will appreciate it.  Model: @spidey_ty Tip 4. Create a Scene for the Character. When you can, choose a background that complements your character. You probably wont have much time or freedom to move your subject around, but there are always better options than capturing them exactly where and how you found them. Unless you're really good at composites try to avoid shooting in the convention center at all costs. Your best option will always be to give the cosplayer your card and plan a shoot at a future date at a studio or on location. If that's not an option familiarize yourself with your subject, and then quickly think of how you can make them connect with the available space. You should have done your research before hand and should know the area around the convention center well before you go. For example, if you’re shooting a Spider-Man cosplayer as seen above, you can simply ask them to pose like they are climbing the nearest wall out side or pose like they just landed from a high vantage point. In this case we used a dumpster in the alley behind the convention center. I dig the industrial urban feel of this photo.  Model: @real_wade_wilson Tip 5. Use Natural Lighting when you can. For the love of god Avoid using your camera’s pop-up flash at all costs and stick to natural lighting. If shooting inside during the day shoot near doorways or windows that allow sunlight in to make your subjects look as natural as possible. For the Joker photo above we went outside the Convention center at sunset and shot in the alley. As you can see the natural light from above and the light from the building lit the subject perfectly. If it was dark I would have him stand in the door way and just use the available light from the building above the door for a more dramatic photo. Your subject doesn't always need to be lit perfectly. There is no need to bring anything more than one camera and lens to get banger photos at Con.  Model: @seattle_spidey_cosplay Tip 6. Shoot from Different Angles Always experiment with different orientations and angles. I hate it when photographers only shoot straight on. Don’t be afraid to shoot up from below, especially for villains and other mysterious characters. This type of shot will work well for a character like the Darth Maul, as this perspective can highlight the makeup and the distorted angle will give viewers an unsettling feeling that matches his presence on screen. Shoot straight on, shoot downward, shoot from below, shoot close up, shoot from far away. Change it up and see what works.  Tip 7. Communication is key. Don’t just snap away. Take time to communicate with your model and ask them about how they want their photos to be interpreted and shot. Depending on your skills and experience, this can open you up to more options that you previously may not have thought of. You can also help the cosplayer achieve their goals and attract their target viewers. Communication goes a long way. If you think a pose could be better with a minor adjustment make sure to speak up. The model can't see themselves.  Models: @carmacosplay Tip 8. Posing, Use Pinterest. Now most of the time the cosplayer will know the popular poses of the character they are portraying but if they don't you should have the pinterest App. on your phone ready to go. Just type in the characters name and Boom! Tons of great ideas for posing. I can't stress this one enough. 7 key elements to a viral Cosplay photo. and Don't forget!!  |
Author Lance Reis
Most Popular Articles
27 Posing ideas for women
27 Posing Ideas for Men Location Scouting 33 Must See Castles in the US How to grow your Instagram Low Light Photography Tips Photography for Beginners Free Resources Take Better Cosplay Photos Categories
All

|
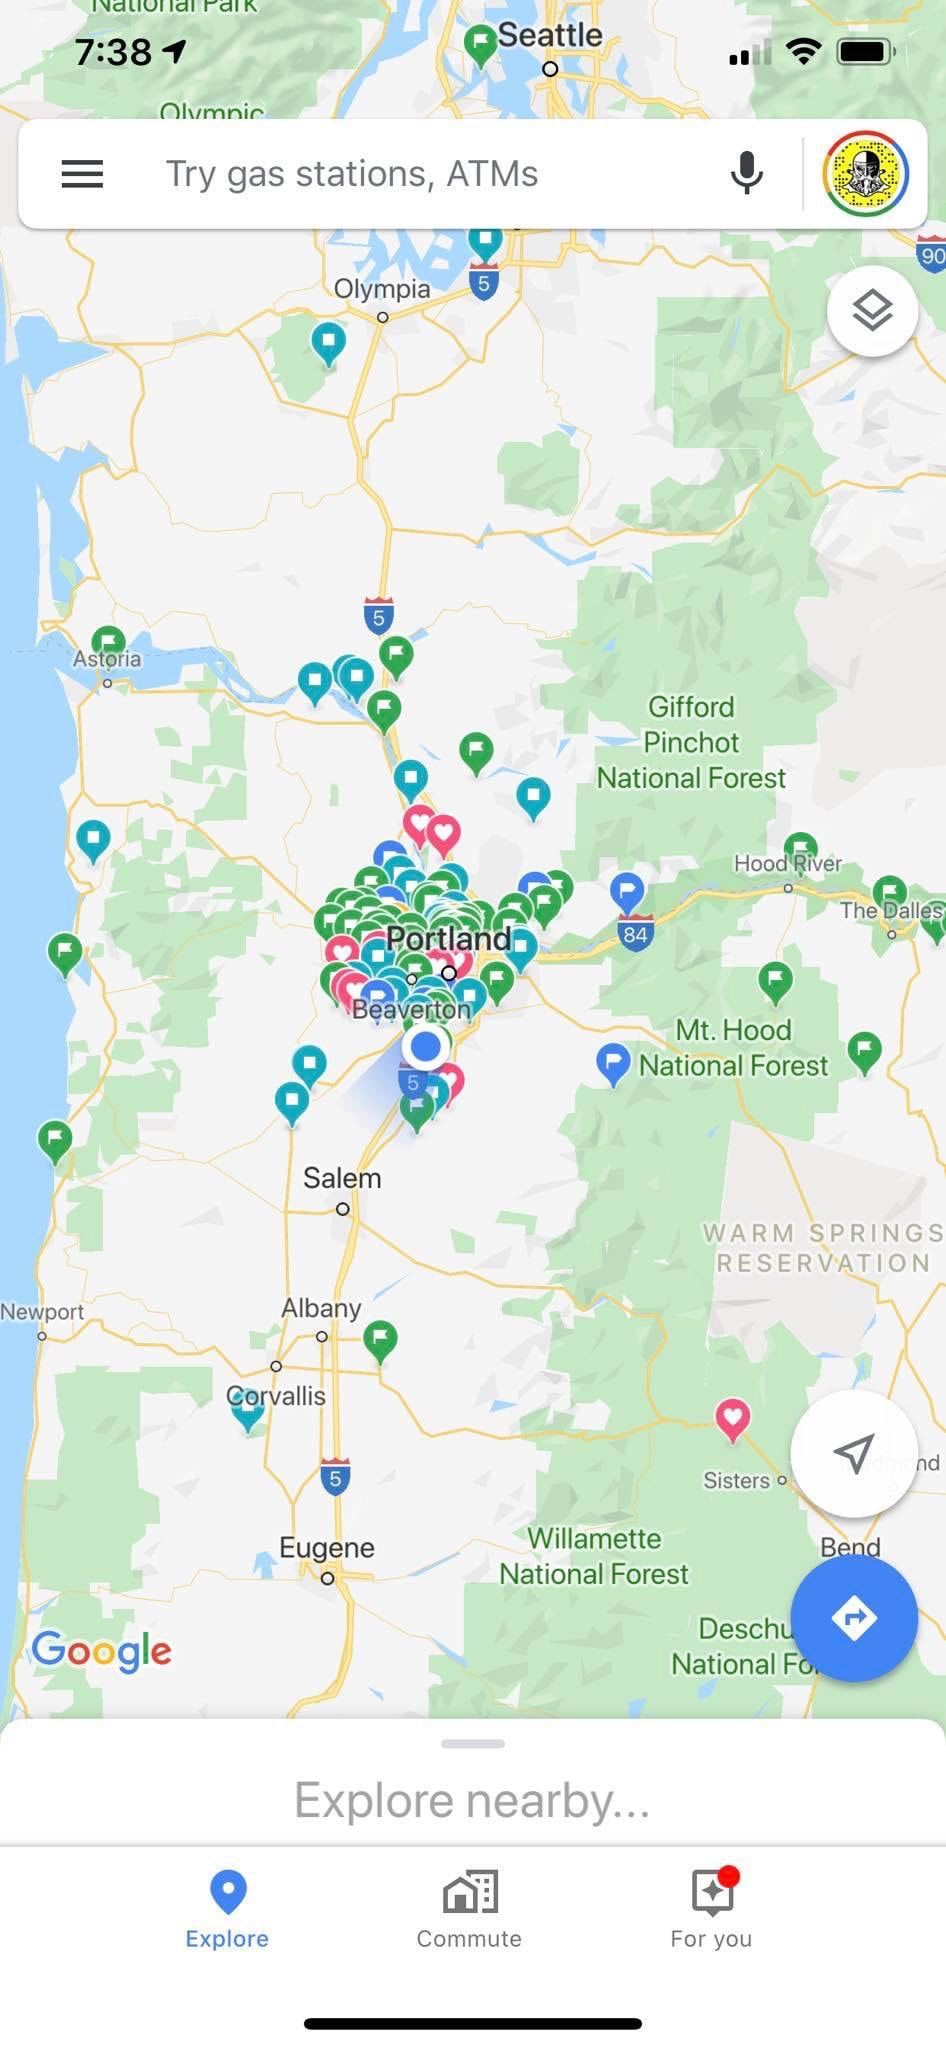


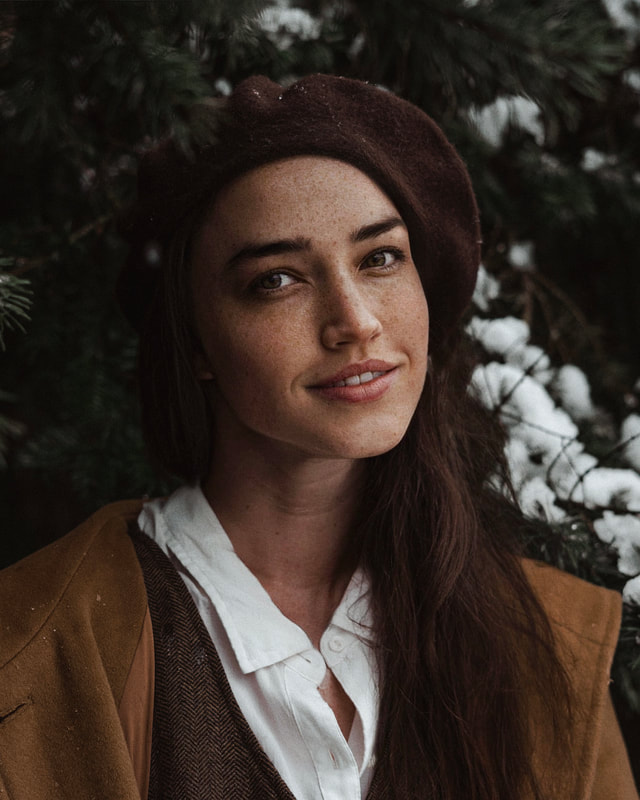
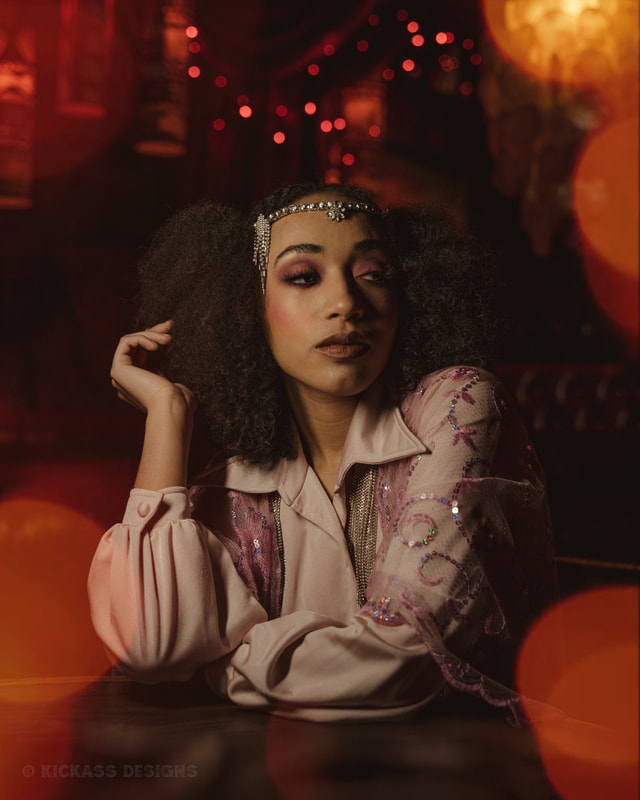
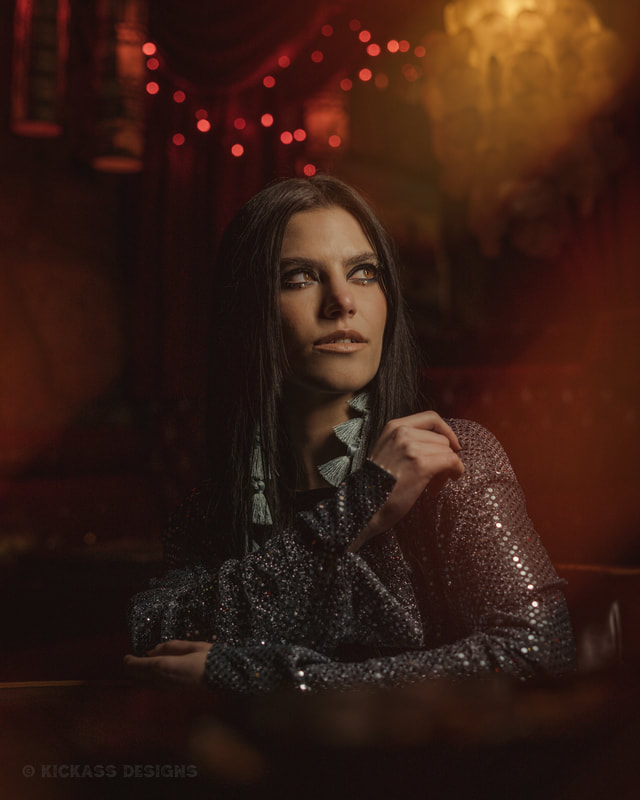
 RSS Feed