Most Popular Articles


 In this article I cover shooting portraits in low light situations. I love shooting in the dark because it forces me to be creative and use the light I have available to me but also creates a lot of obstacles to overcome. Getting a sharp image completely in focus with little to no noise is difficult when shooting in low light with no flash but I hope with these tips it will be a little easier next time you go and shoot in the dark. Photographing in low light situations presents many obstacles but if you use the tips in this article you can easily overcome them with confidence on your next shoot. All the photos below were taken by me. Make sure to connect with me on Instagram HERE Let me know if this article helped in the comments below. Find a light source Let's start with your light source. Low light photography doesn’t mean no light photography, you will always need some source of light. The biggest mistake I see photographers make in low light situations is having their subject turn their back to the light source with nothing to light their face which is great if you want a fun silhouette but otherwise you will want your light source as close to your subject as possible. whether your light source is a street lamp, Hotel lamp, arcade, neon sign, or flame from a lighter position the light source either to one side of your subjects face or directly in front of them behind the camera so it lights their face. 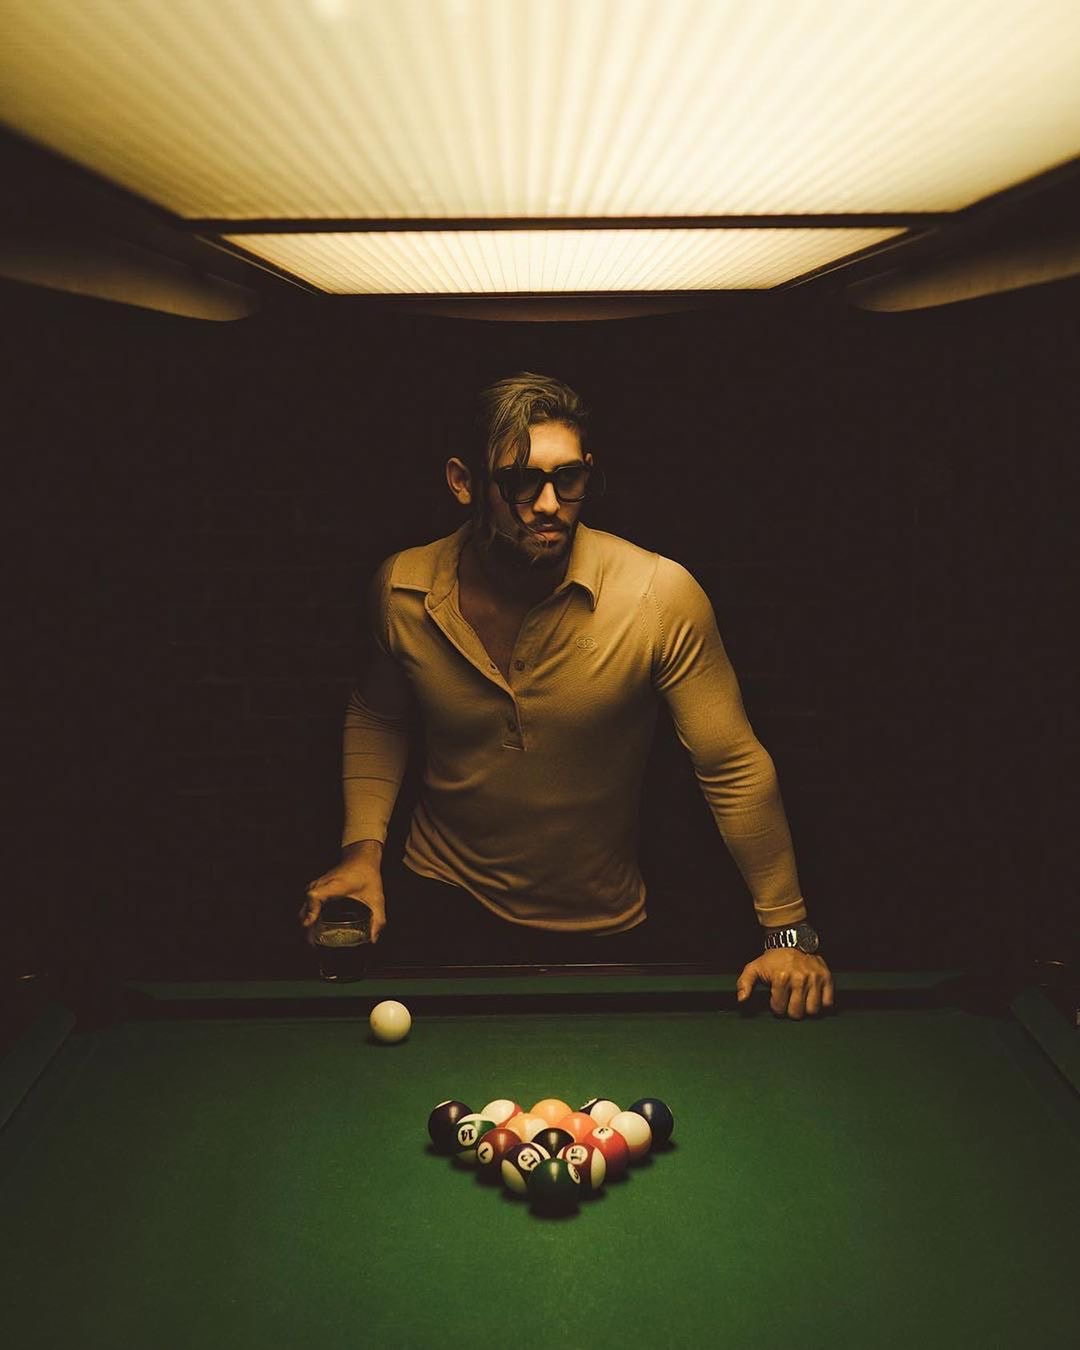 Model: @kamyar_jahan on IG Neon Lights whether you're using neon bar lights or an arcade try placing your model to the side of the light and have them look towards the light or straight at the camera. Play around and notice how the light effects their face. Keep an eye on those harsh shadows. Make sure your subject is as close as possible to the light source. Adjust colors as needed in post. 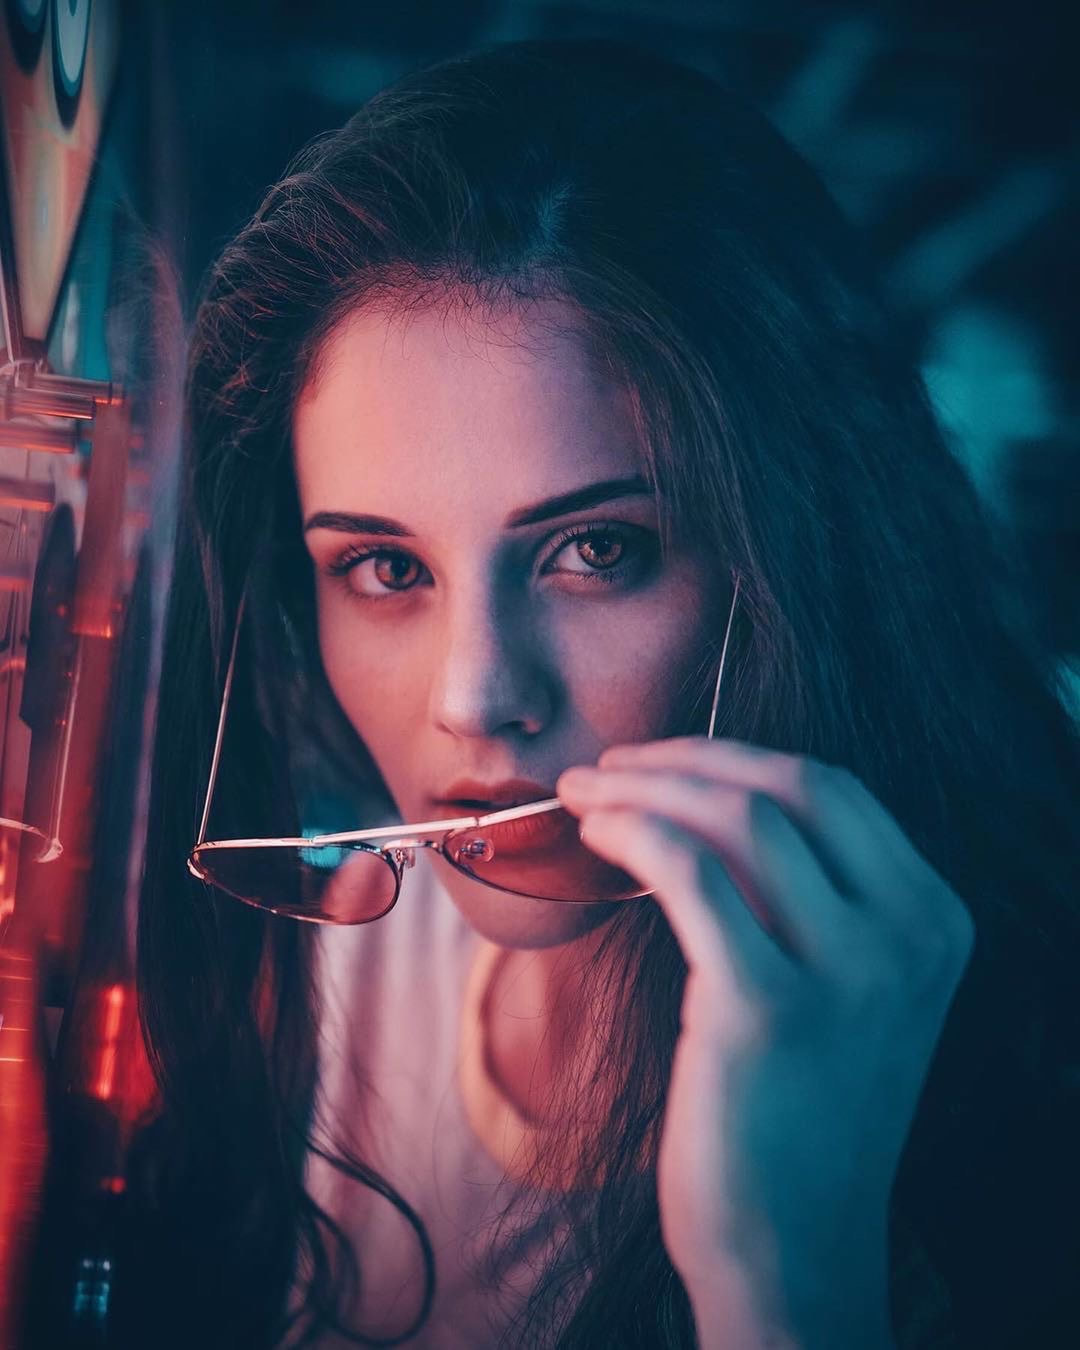 Model: @elloruthie_ on IG Model: @elloruthie_ on IG 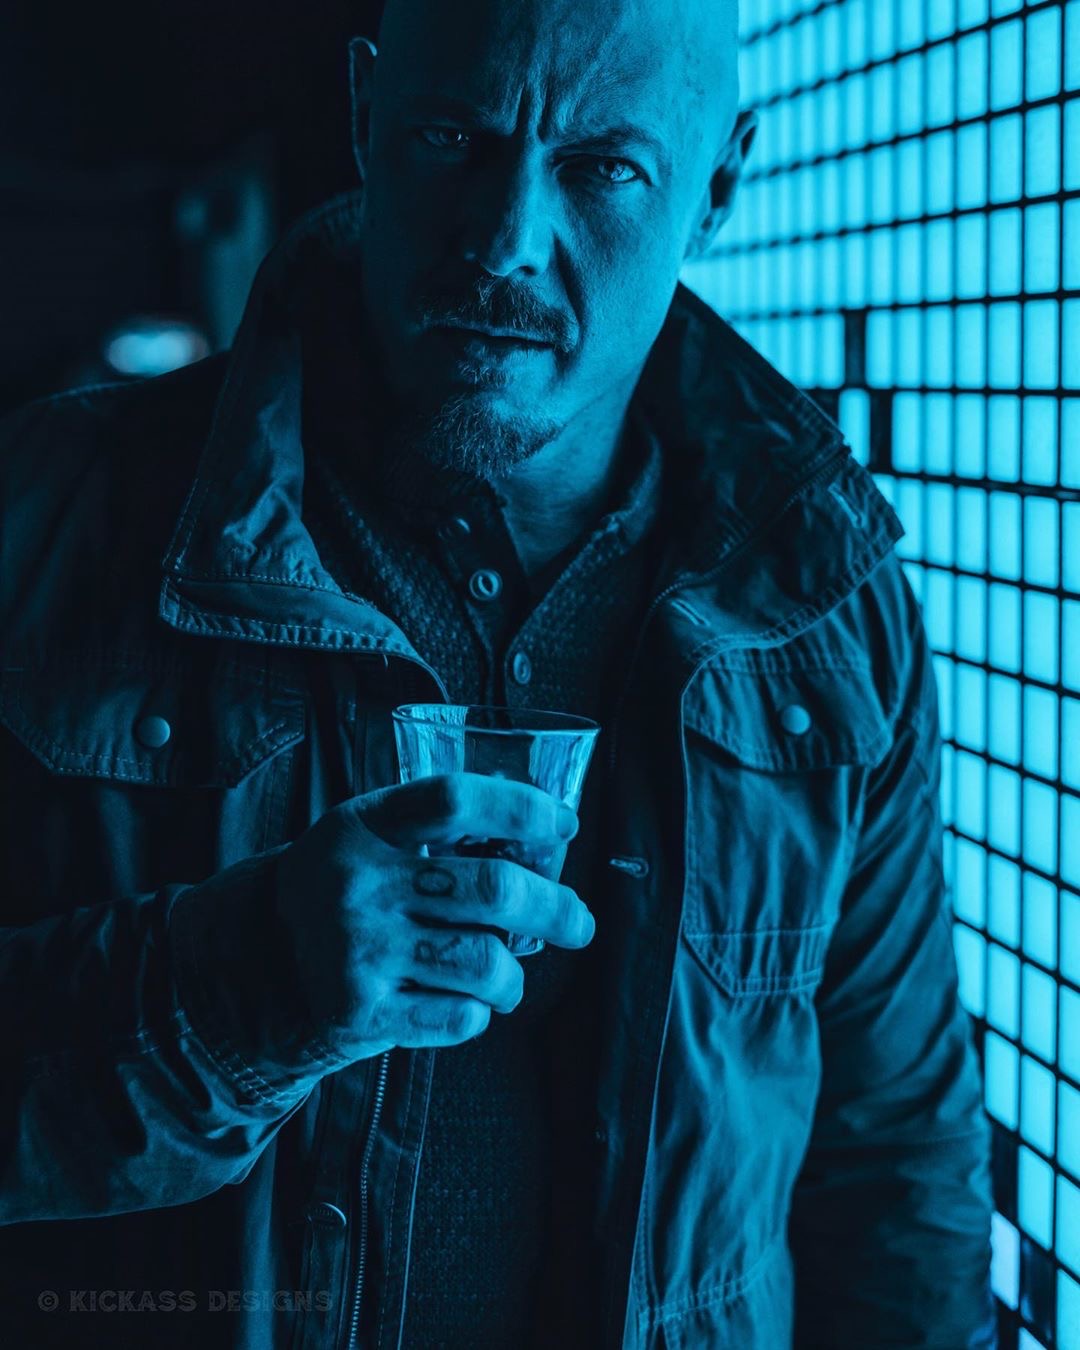 Model: @starttheworld on IG 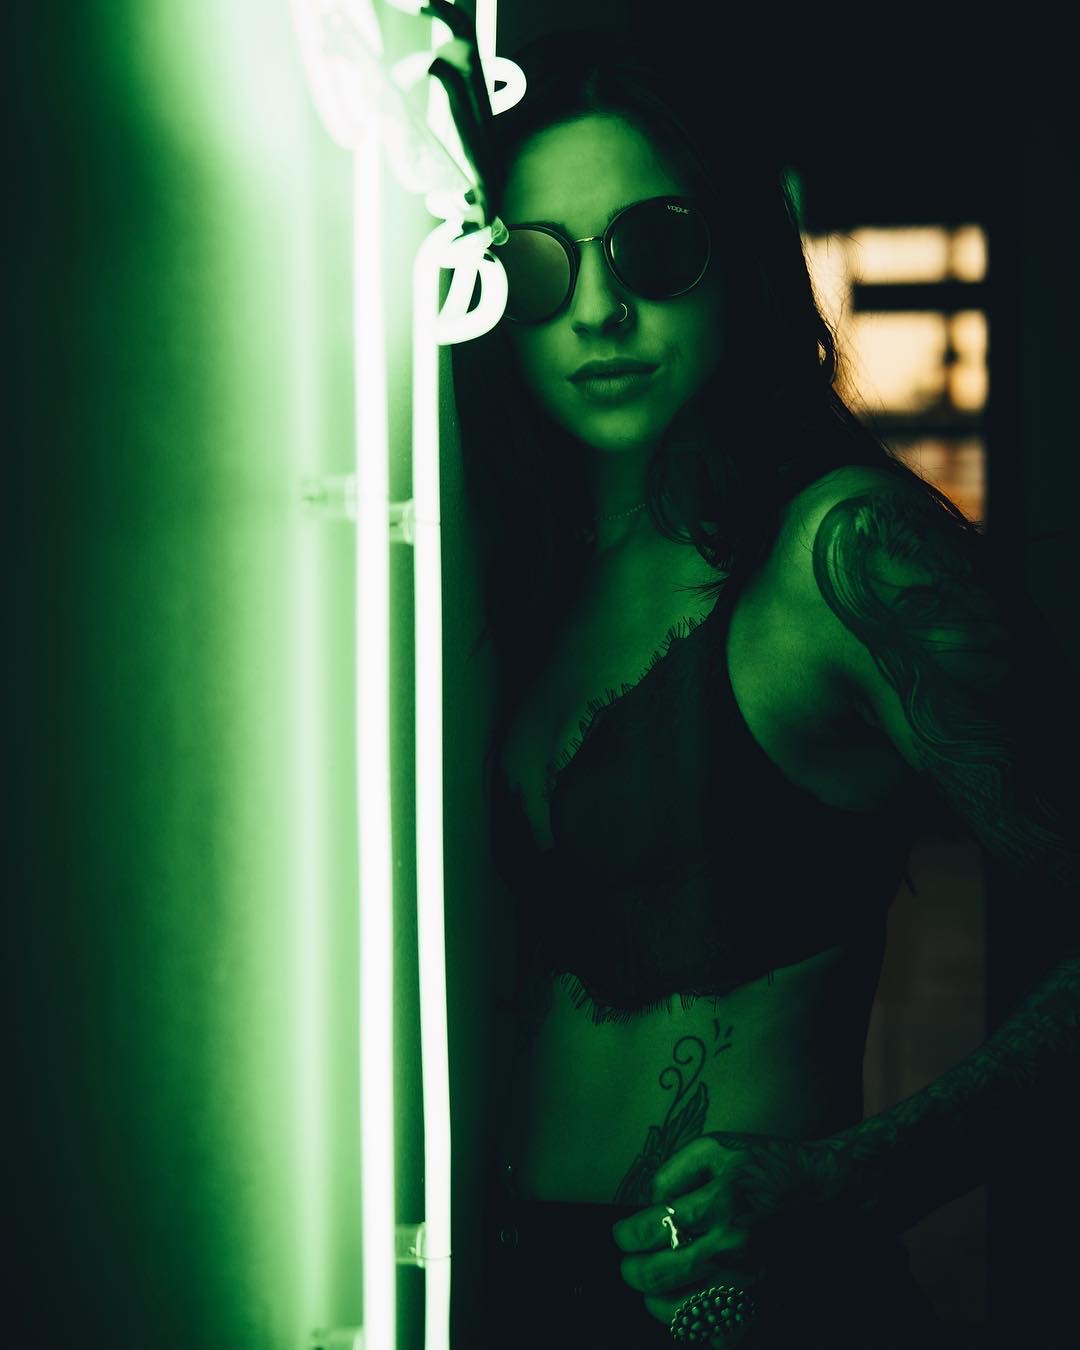 Model: @aliciangates on IG The key to shooting with neon is having your model as close to the neon as you can get. If you have the Neon behind them and nothing to light their face it will be too dark. For the example below I had my model stand as close as she could to the arcade screen because it was producing a good amount of light. Settings used were: 1/200Sec /// ISO 640 /// F3.2 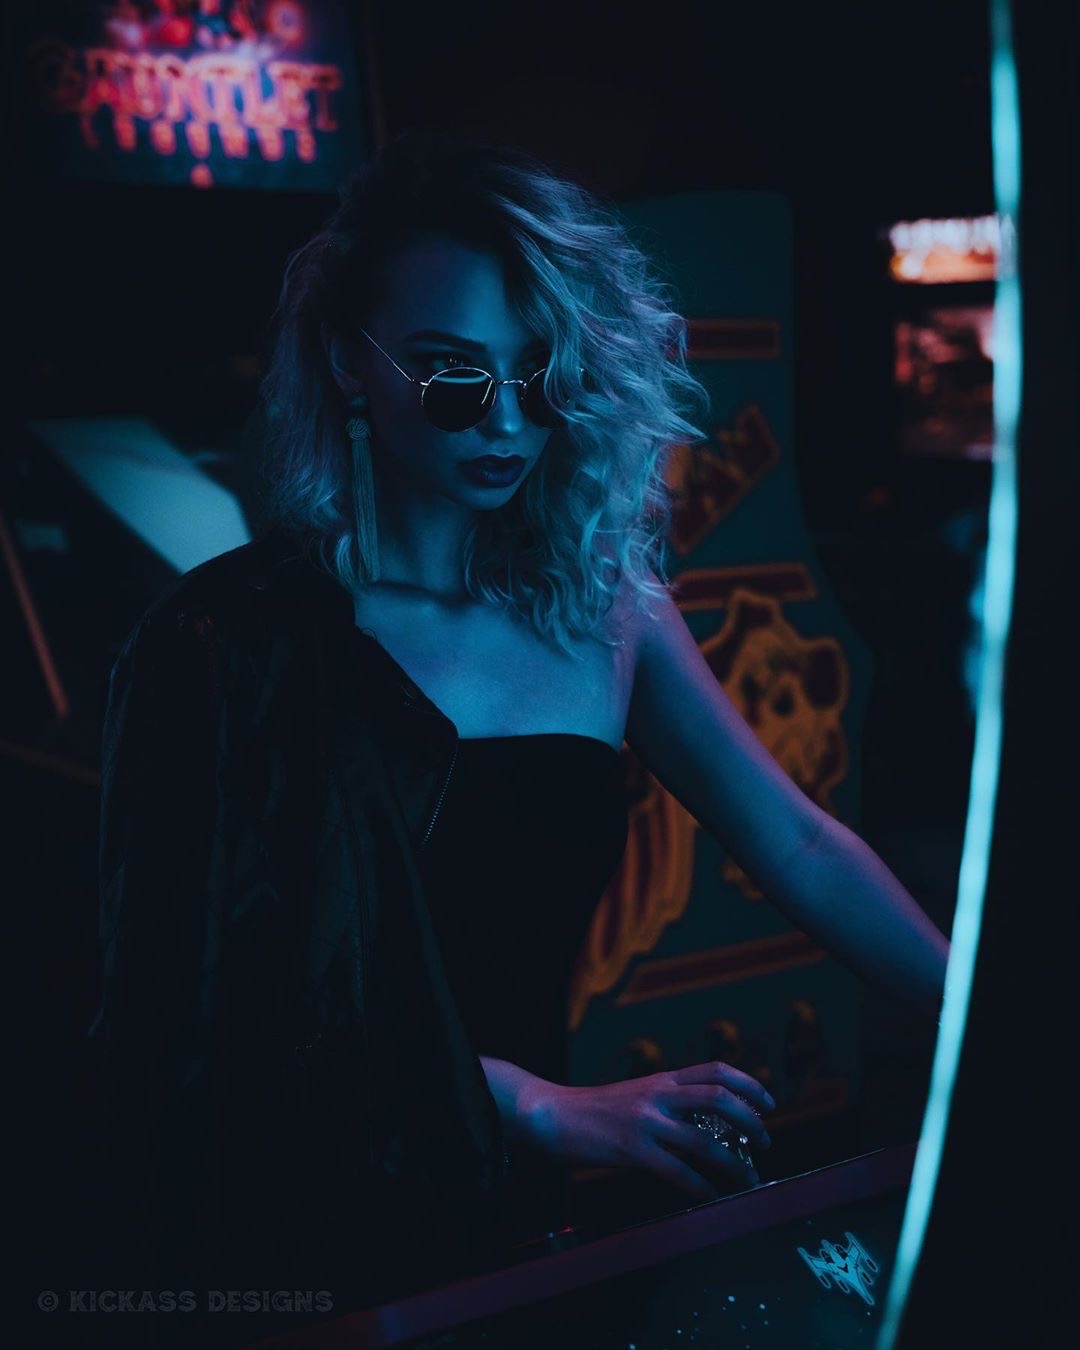 Model: @thehannahhawkins on IG   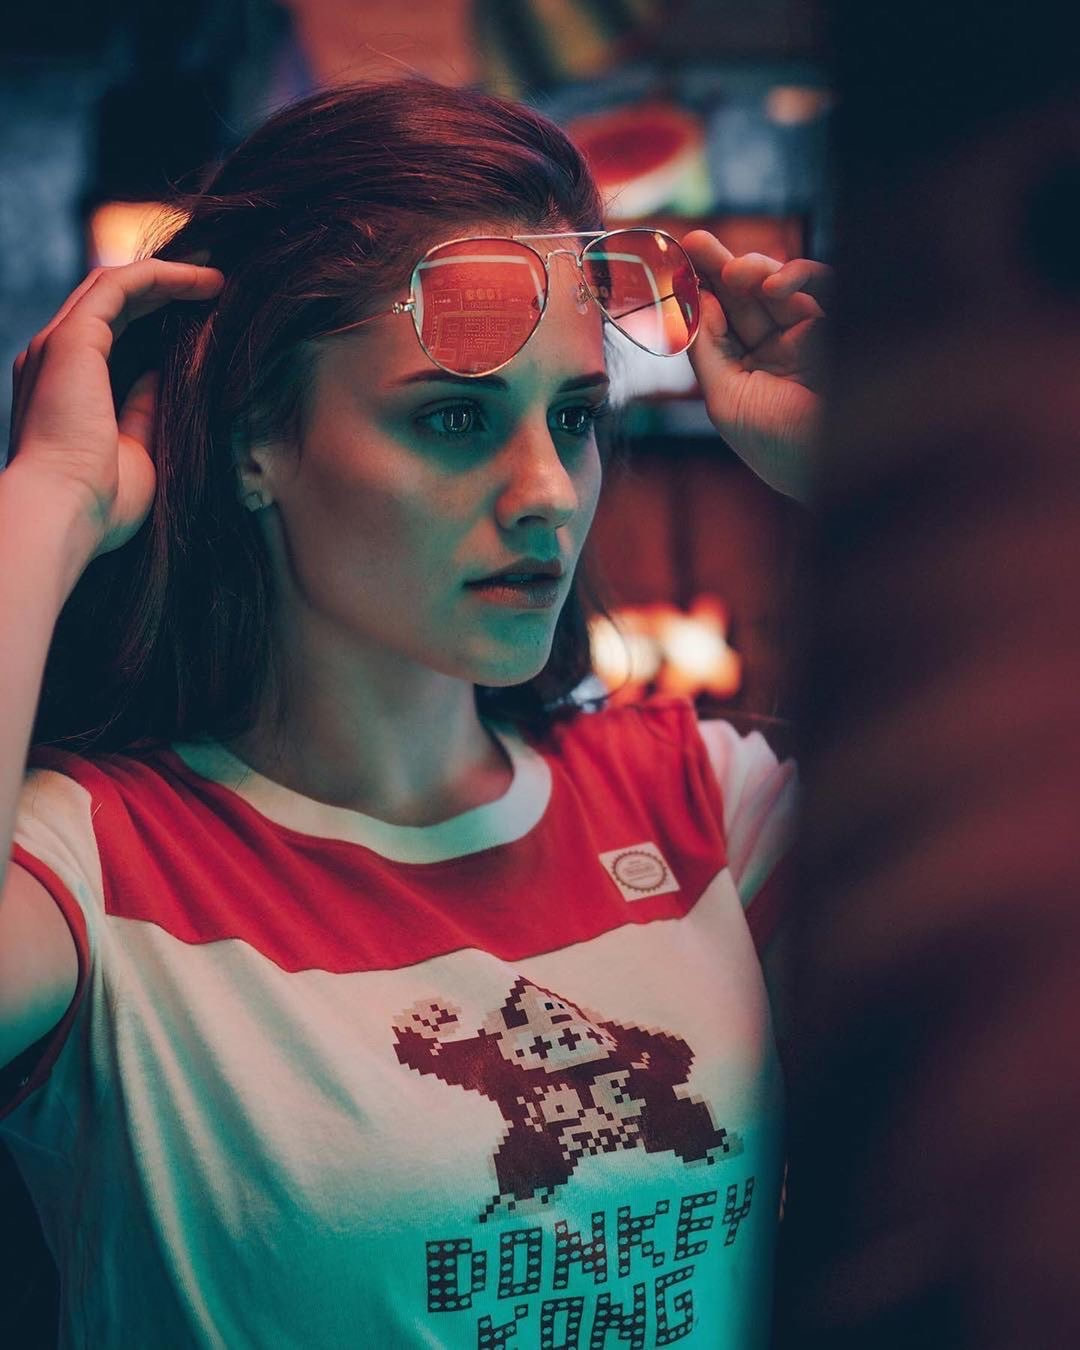 Model: @elloruthie_ on IG Use Sunglasses Mix it up. Sunglasses can make for some fun reflections with neon lights. 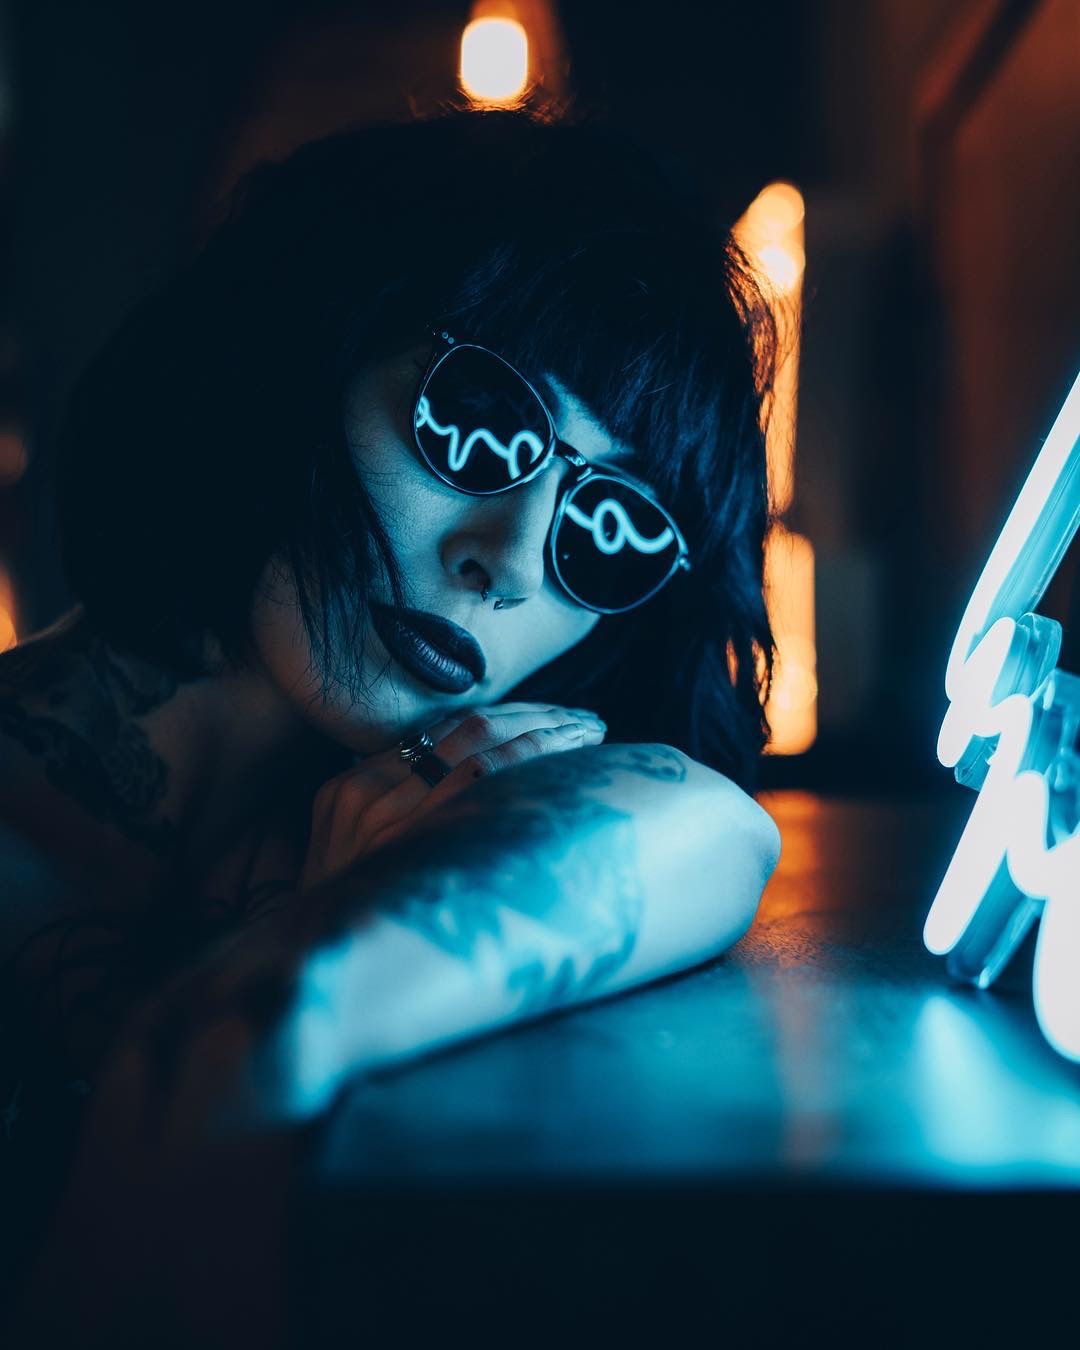 Model: @morbid_lady on IG 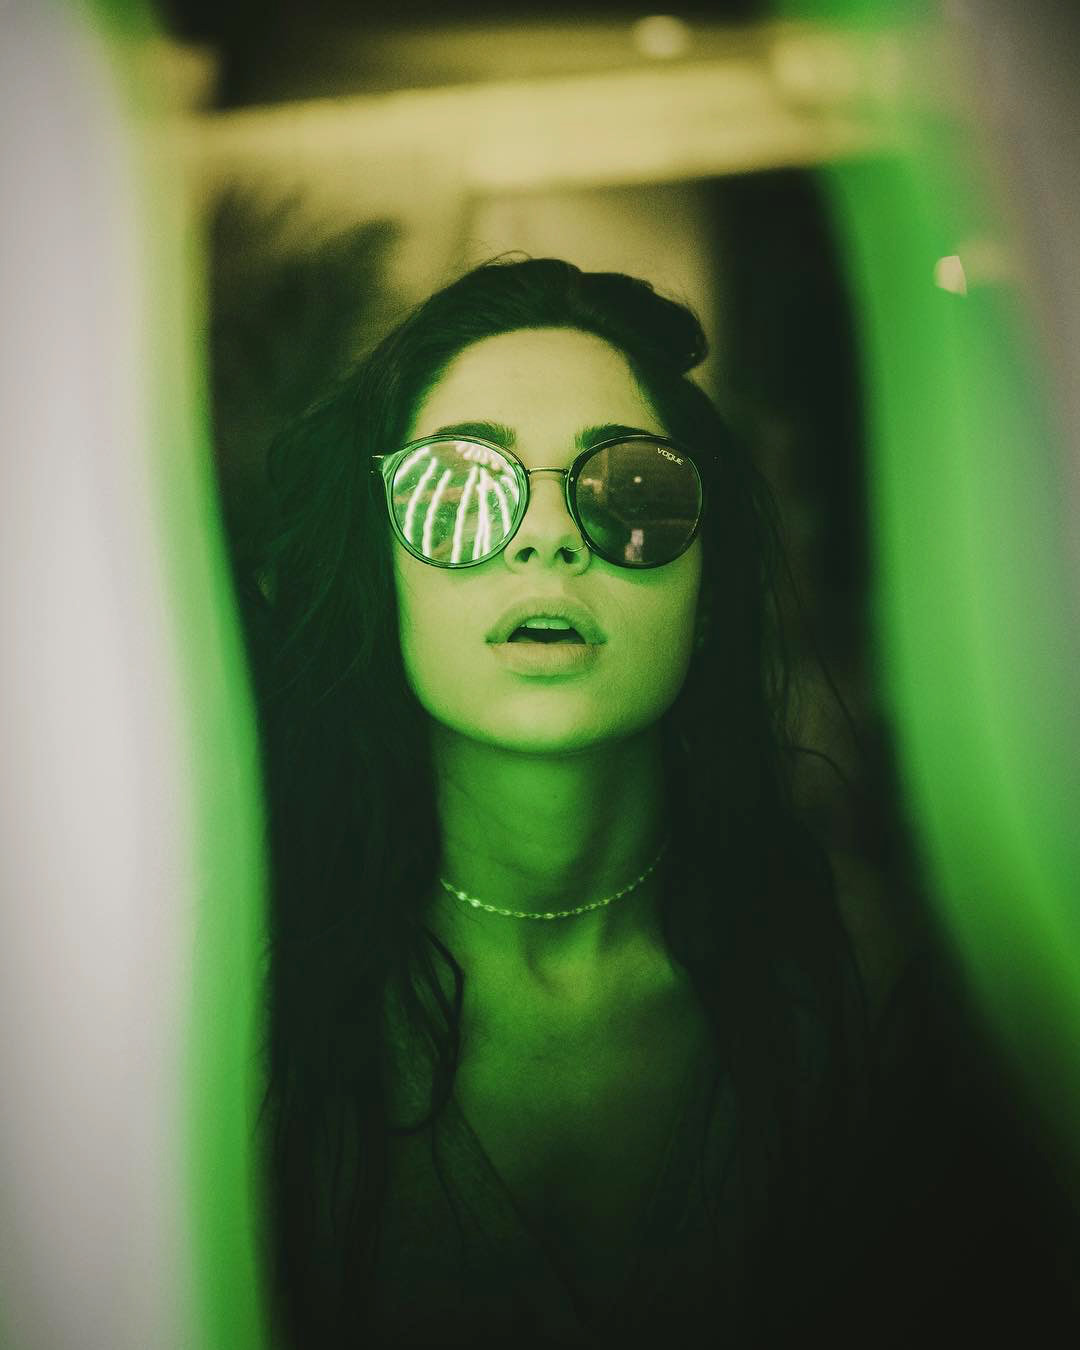 Model: @aliciangates on IG 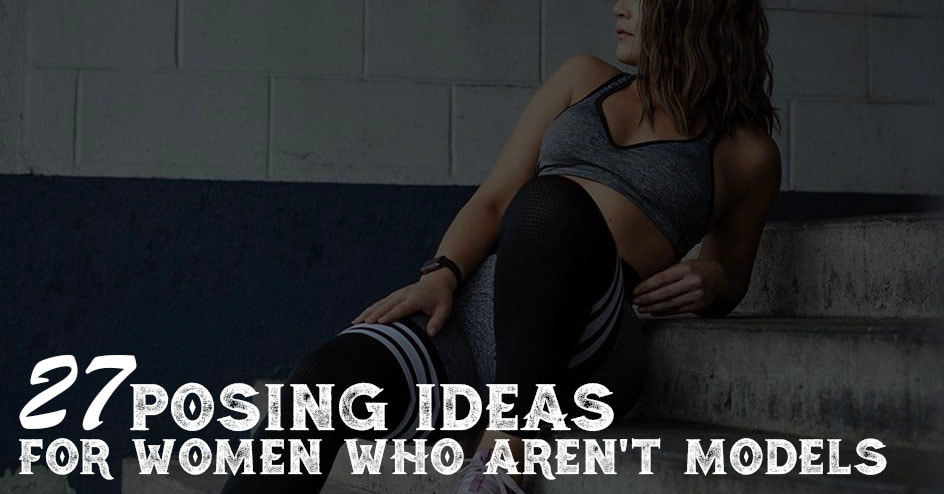 City Lights If you're shooting in the city at night there are a few options you can use to light your subject. You can use a lighter or street lamp for dramatic lighting or a neon bar sign in a window as we did below.   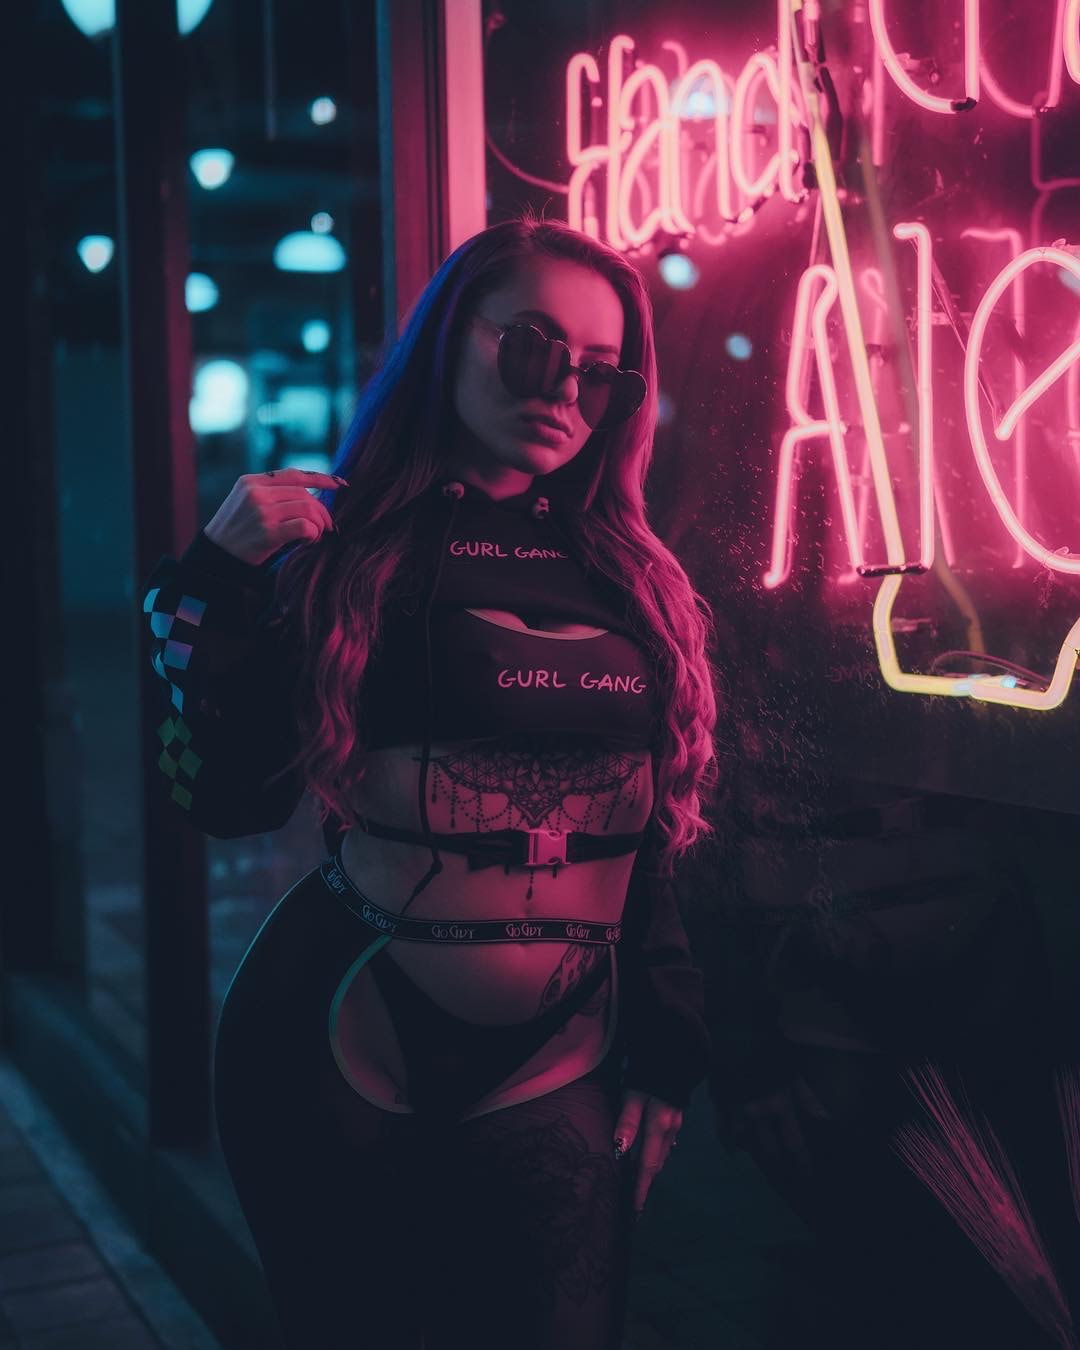 Model: @w33dhead on IG If there's a lamp, use it. The example below was shot in a hotel room at night using the standing lamp next to the sofa. If a lamp is all you have just point it towards the model and make sure it's as close as possible. Have your model look towards the light to reduce harsh shadows.  The Silhouette Try having the light source behind your subject with no light in the front to create a fun silhouette like we did below. 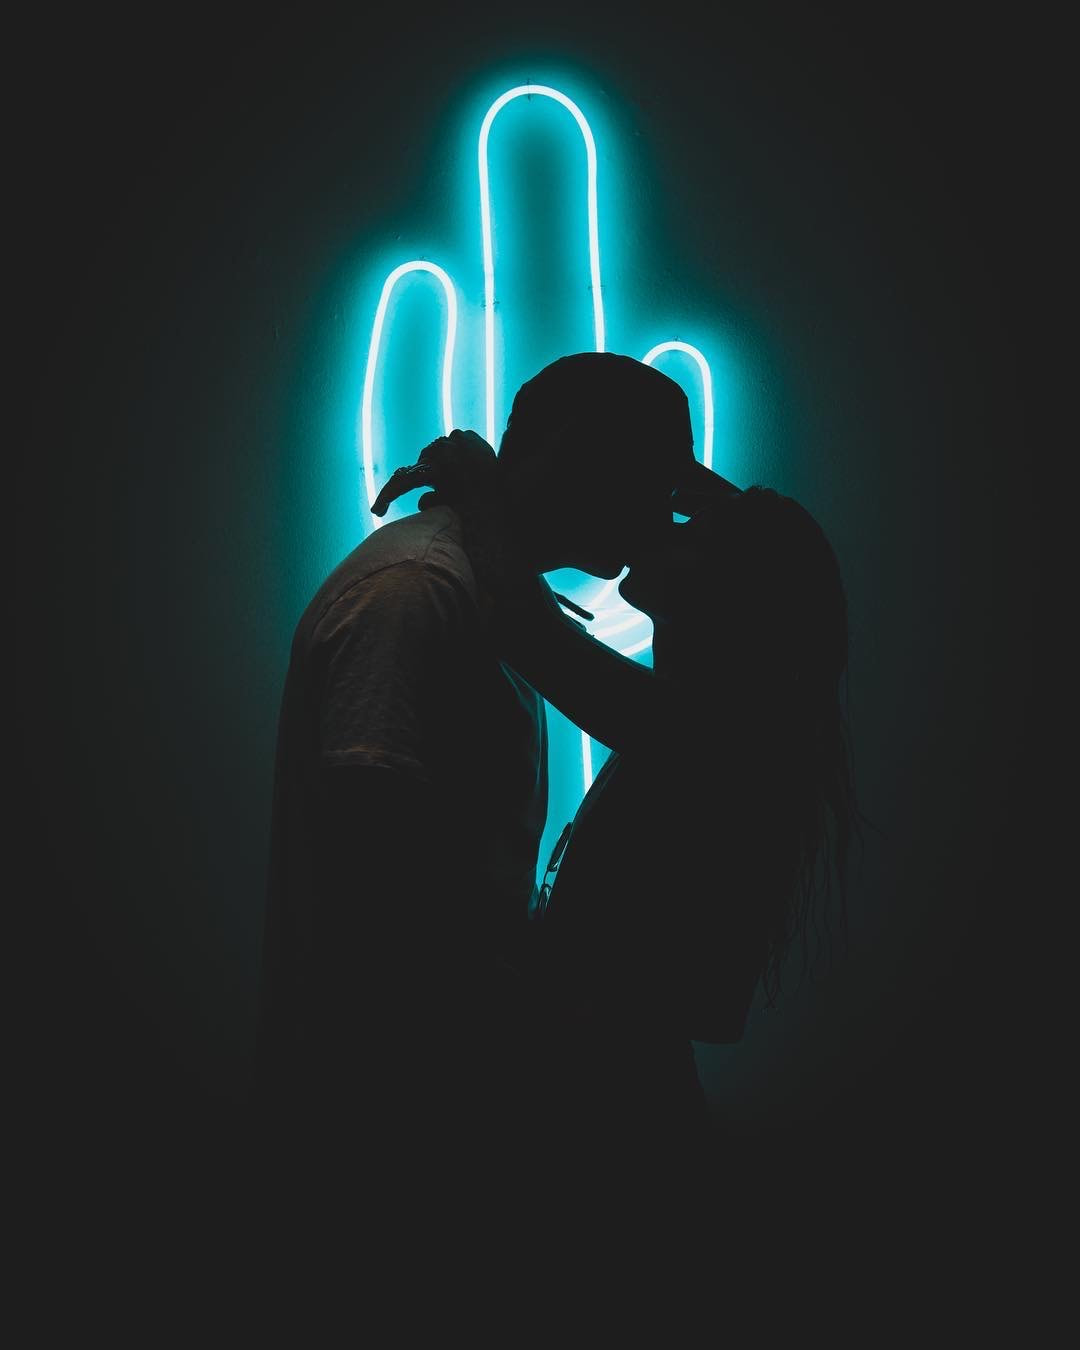 Model: @aliciangates on IG  Fun effects with a Prism On Amazon you can find a variety of glass and prisms to hold up to your lens when shooting with neon lights around. The reflections make for some fun effects as shown below but definitely takes practice. 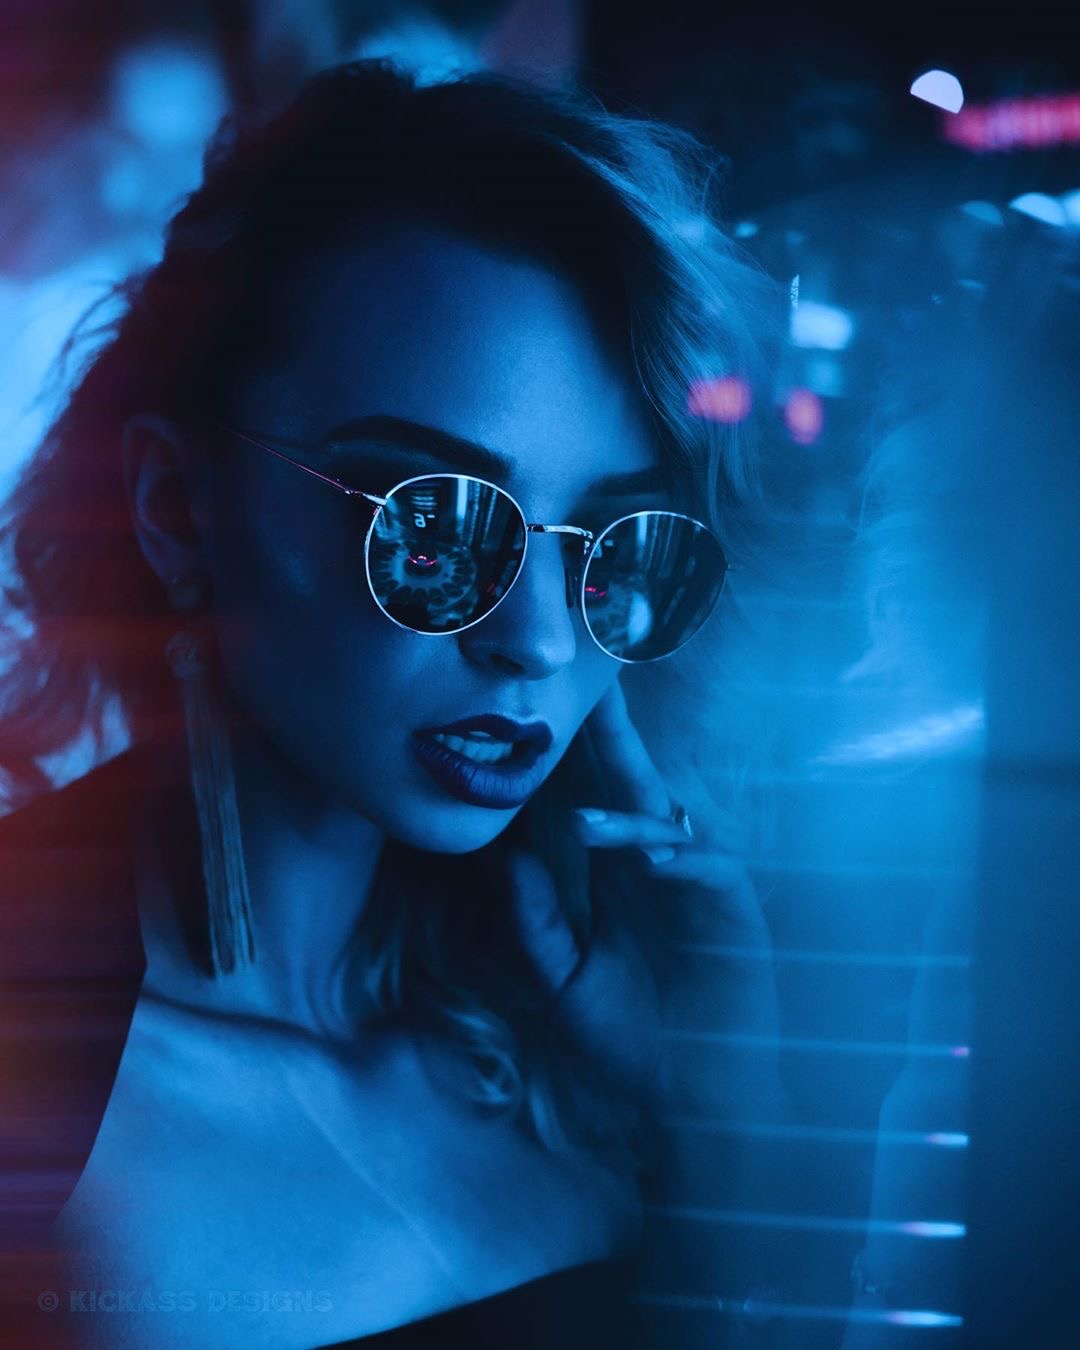 Model: @thehannahhawkins on IG 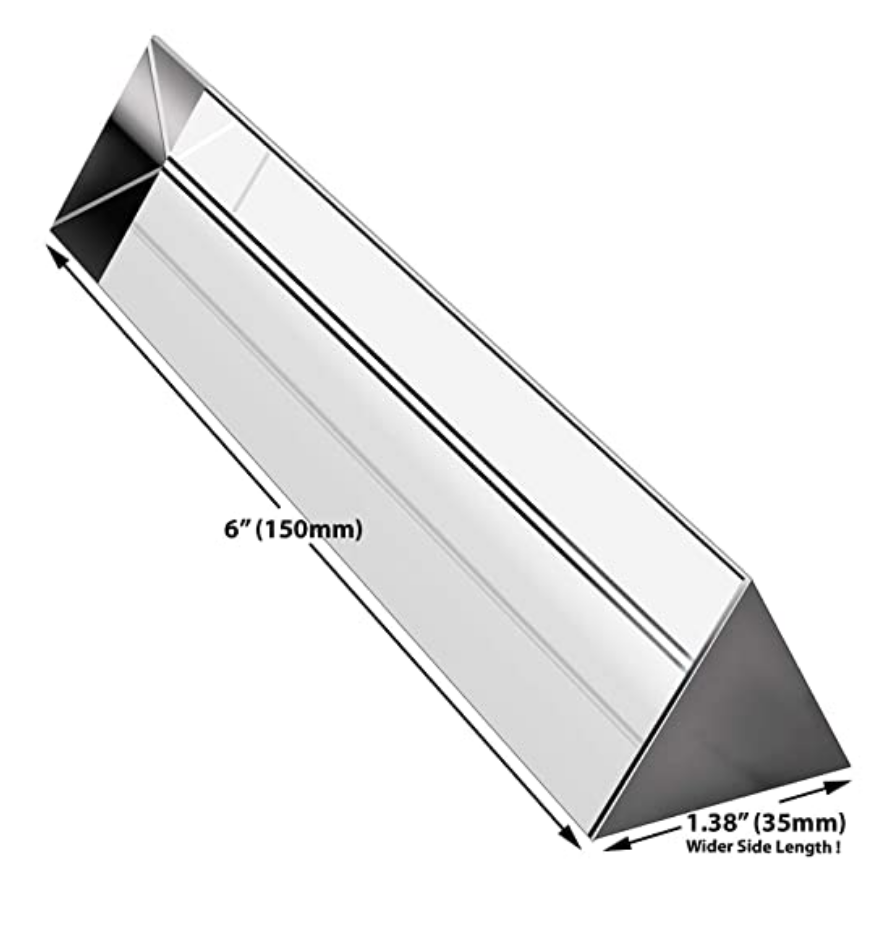 Shoot in RAW Why you should be shooting in RAW VS JPEG: I am blown away by the amount of photographers that don’t shoot in RAW or even know what it means. If you’re a professional photographer you are doing your self and your clients a massive disservice by shooting in JPEG. When shooting in a format like JPEG image information is compressed and lost. Because no information is compressed with RAW you’re able to produce higher quality images, as well as correct your shadows and highlights that would be unrecoverable if shot in the JPEG format. Recovering shadows is absolutely vital when shooting in low light. Cameras will vary but a trick you can use to pump up shadows dramatically without getting grain is keeping your ISO below 1,000. More on that below. On the flip side you have your brightness. Levels of brightness are the number of steps from black to white in an image. It’s very simple, the more you have, the smoother the transitions of tones in your photos will be. You want smooth transitions. For example JPEG records 256 levels of brightness, and RAW records between 4,096 to 16,384 levels! 😳 The effect this will have on your images is MASSIVE. Just remember shooting in RAW format lets you make more adjustments like exposure, blacks, fill light, recovery, detail, contrast, & brightness to your image in post (with a program like Adobe Lightroom) without a significant reduction of quality, because there’s more levels to work with that you don’t get when shooting in JPEG. Most importantly as Professionals we should be providing our clients with the highest quality possible. That means shooting in RAW. Understand ISO All you need to know about ISO is the Higher the number the more light your camera will bring in. But there's a caveat to ISO you need to know. The higher you go the more grain you will get. However grain isn't necessarily bad. Some photographers want that grainy look. That's their style. But if that's not the look you want it's best to keep your ISO lower than 1,000. That being said every camera is different and new cameras can go much higher with less grain than the older ones. For instance my SonyA7iii can shoot with ISO at 1,000 with no noise but my older SonyA6000 could only shoot at ISO 500 with no noise. It's best to play around with your camera in a dark location and find the sweet spot for your specific camera. Open the photos in light room and check the histogram to see what settings you used for each photo. Find the photo with the highest ISO but still has little to no grain. Remember that number and try your best to avoid going over it Last thing you want is to find out you just did a shoot for a client and all your photos are too grainy. 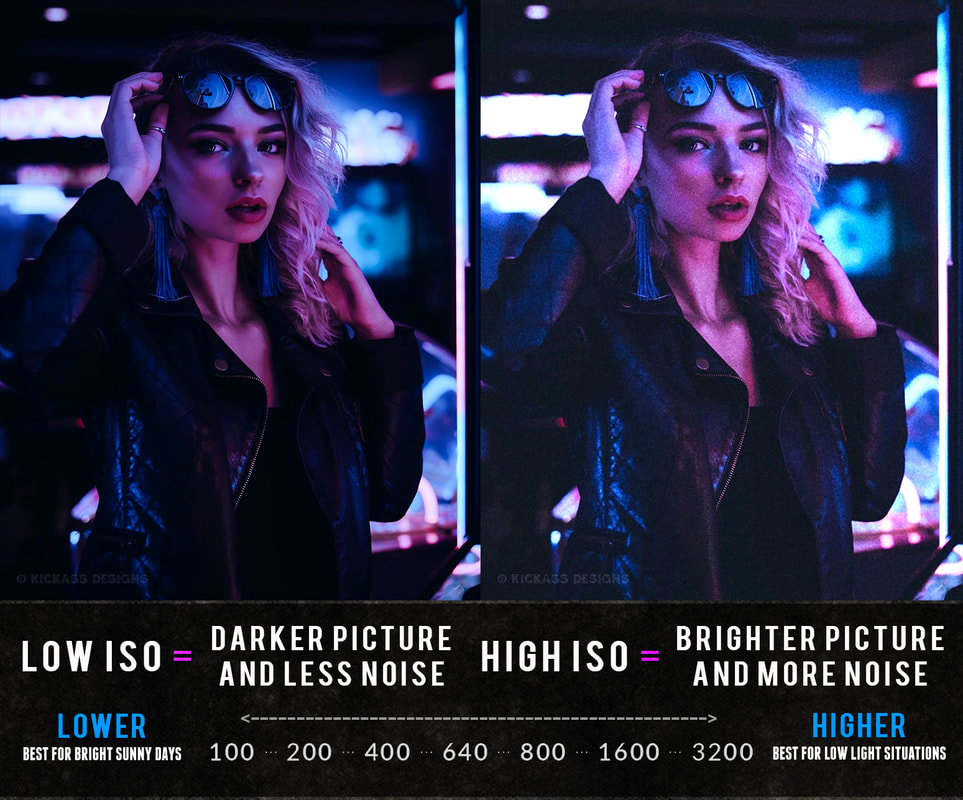 Keep your shutter speed low Without getting technical all you need to know is the lower your shutter speed the more light is let into the sensor and thus the brighter your image will be. The caveat for shutter speed is this: The lower you go the more sensitive your camera gets to movement and thus the blurrier your photo will be if any movement is involved. This means movement of the camera itself and the subject you're photographing. I highly suggest if you go under 1/100th of a second you use a tripod because anything below that and your camera will detect movement and the photo wont be sharp. Just remember your shutter speed effects brightness, darkness, and blur. A tripod is a MUST for slower shutter speeds. So is keeping your model perfectly still. Any movement from your camera or model under 1/100th of a second and your picture wont be sharp.  Use a Tripod As I mentioned above, when shooting in low light one option to bring in more light is slowing down your shutter speed. The lower you go the brighter your image will be but you'll need a tripod or flat surface to rest your camera on for a nice sharp image at lower shutter speeds. This is my go to Tripod. Also keep in mind any micro movements from your finger on the clicker as you take the shot may impact the sharpness. To avoid any micro movements when using a tripod I will set the camera to a 2 second delay or use a wireless remote. Keep your Aperture Low Aperture is a set of small blades that create a hole that determines how much light is let into the camera. The wider the hole the more light that comes in. The size of this hole is measured by F-stops. A large F-stop like F-22 means the hole is very small, and a low F-stop like F/2.8 means the hole is wide open. So the higher your F-stop the darker it will be and the lower your F-stop the brighter it will be but keep in mind brightness and darkness aren't the only thing that changes when you adjust your aperture. Aperture also controls depth of field. Depth of field determines how much of your photo is sharp and in focus and how much is blurry. A low F-stop like 2.8 is very narrow and will only focus on a specific part of the image while leaving everything else blurry. The closer you get to your subject with a small F-stop the more narrow the focus will be and thus the more blurry the background will be. A low F-stop is how you get that creamy background and beautiful bokeh effect with the lights in the background. Just keep in mind if you're shooting portraits it's extremely hard to get the eyes both in focus and everything sharp at a low F-stop like F/1.4 or 2.8. I find F/4.5 is best to get everything on your subject sharp and in focus if you're close to your subject. If you're about 6 feet away or more from the subject F/2.8 will work and bring in more light. If your photographing a beautiful landscape or group of people however you will want a large F-stop like F-11 or F-22 to make sure everything and everyone is in focus. Every lens is different and will determine how low you can go and how sharp an image looks at low aperture. My favorite lens in the Sony 85 MM 1.8 Prime 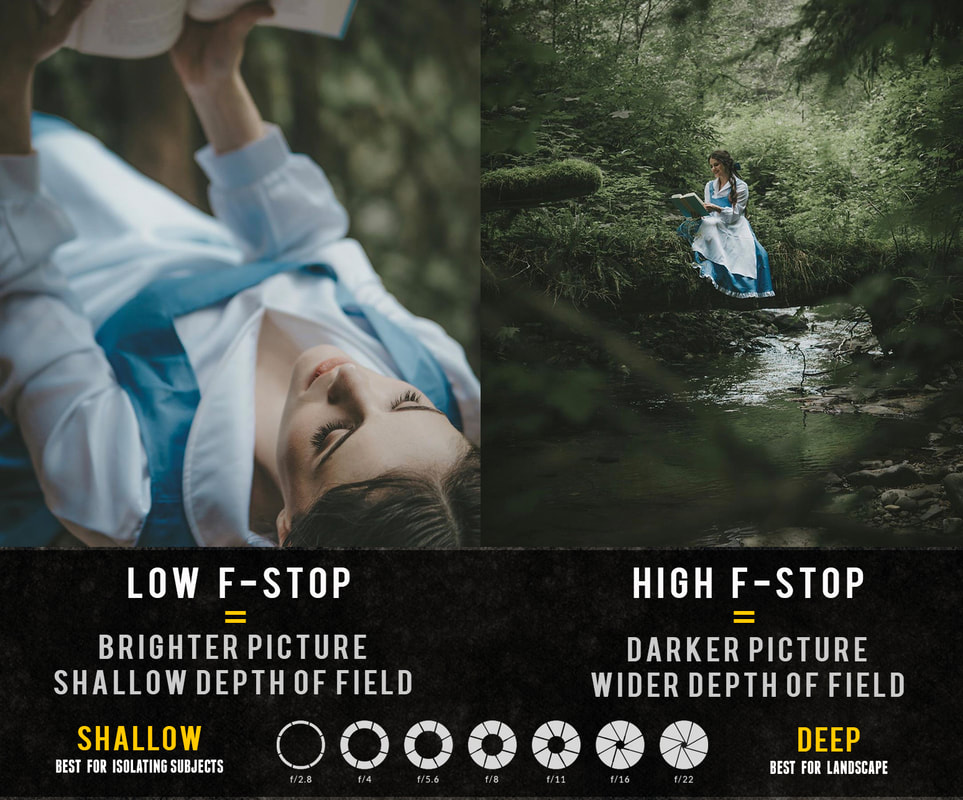 Get a Light Wand I know, I said no flash. But I don't count a small portable light wand as flash. I prefer not to carry around a bulky flash. You can bring in a wand to a bar with no problem. Now that we discussed using available light sources every now and then you'll be in a situation where you just don't have any light available. For emergency situations like these I like to have a light wand in my car just in case. It's about $80 on amazon, it's light, compact, easy to carry and use. The photos below were taken in a bar with zero light to use so I used the Portable Wand Handheld LED photography Light wand to light the models. 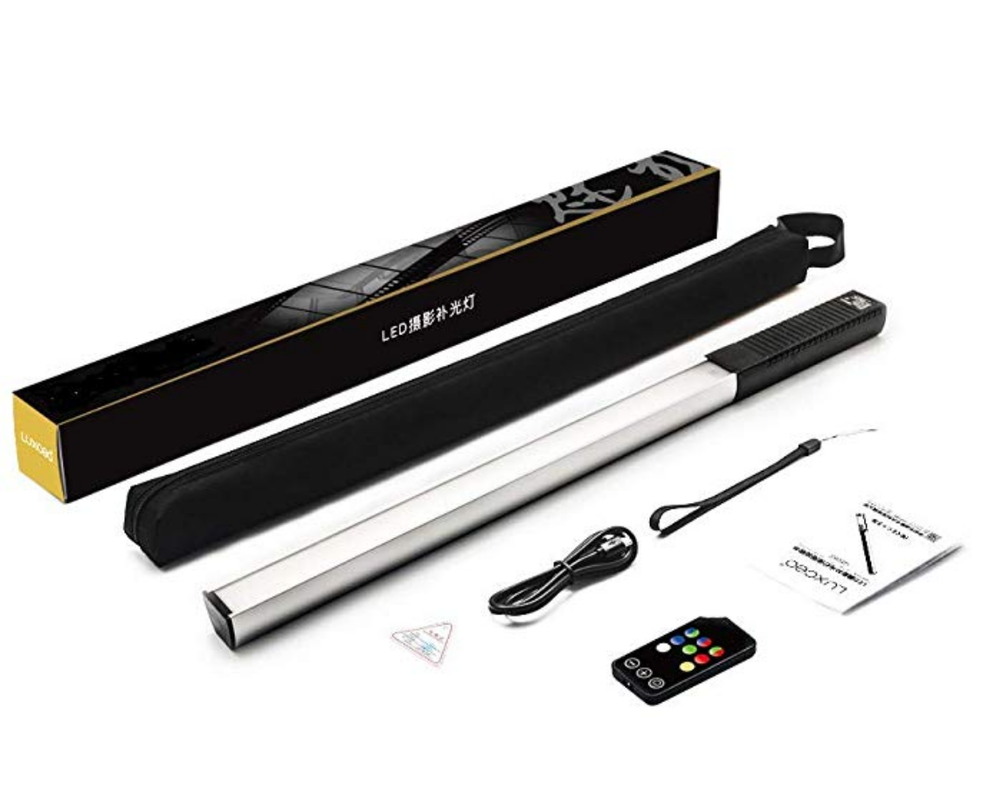 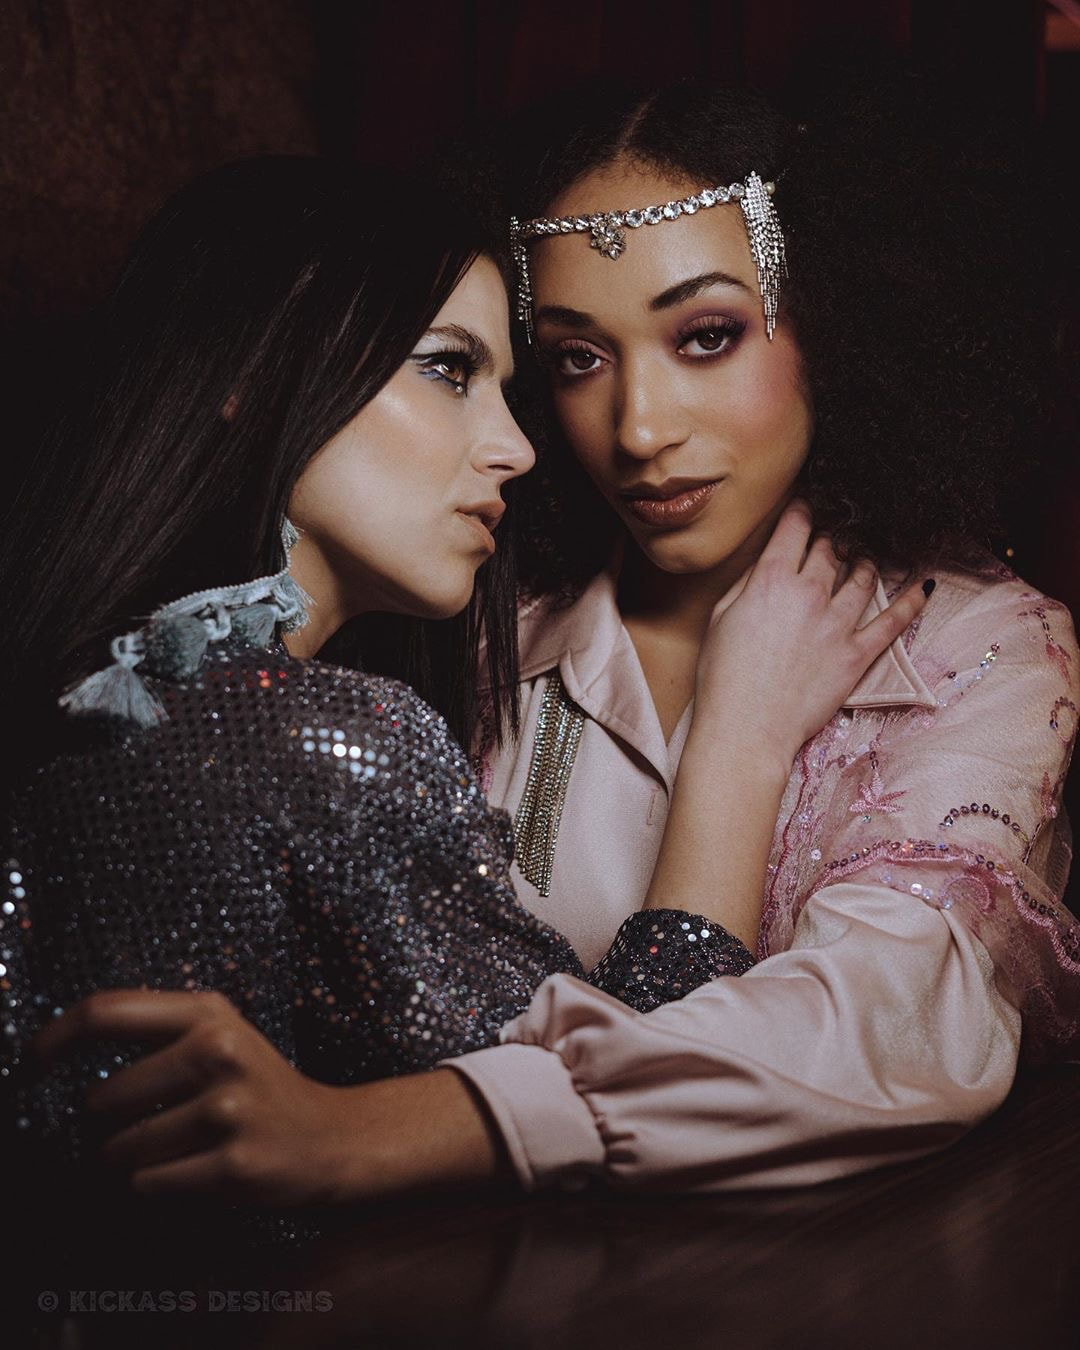 Models: @jacquelynnefaith & @ambernicotra on IG What I love about this wand is that it has multiple color options to choose from so you can match the color to the lighting behind the model when shooting with neon as seen below. My settings: 1/160 sec /// ISO 320 /// F2.2 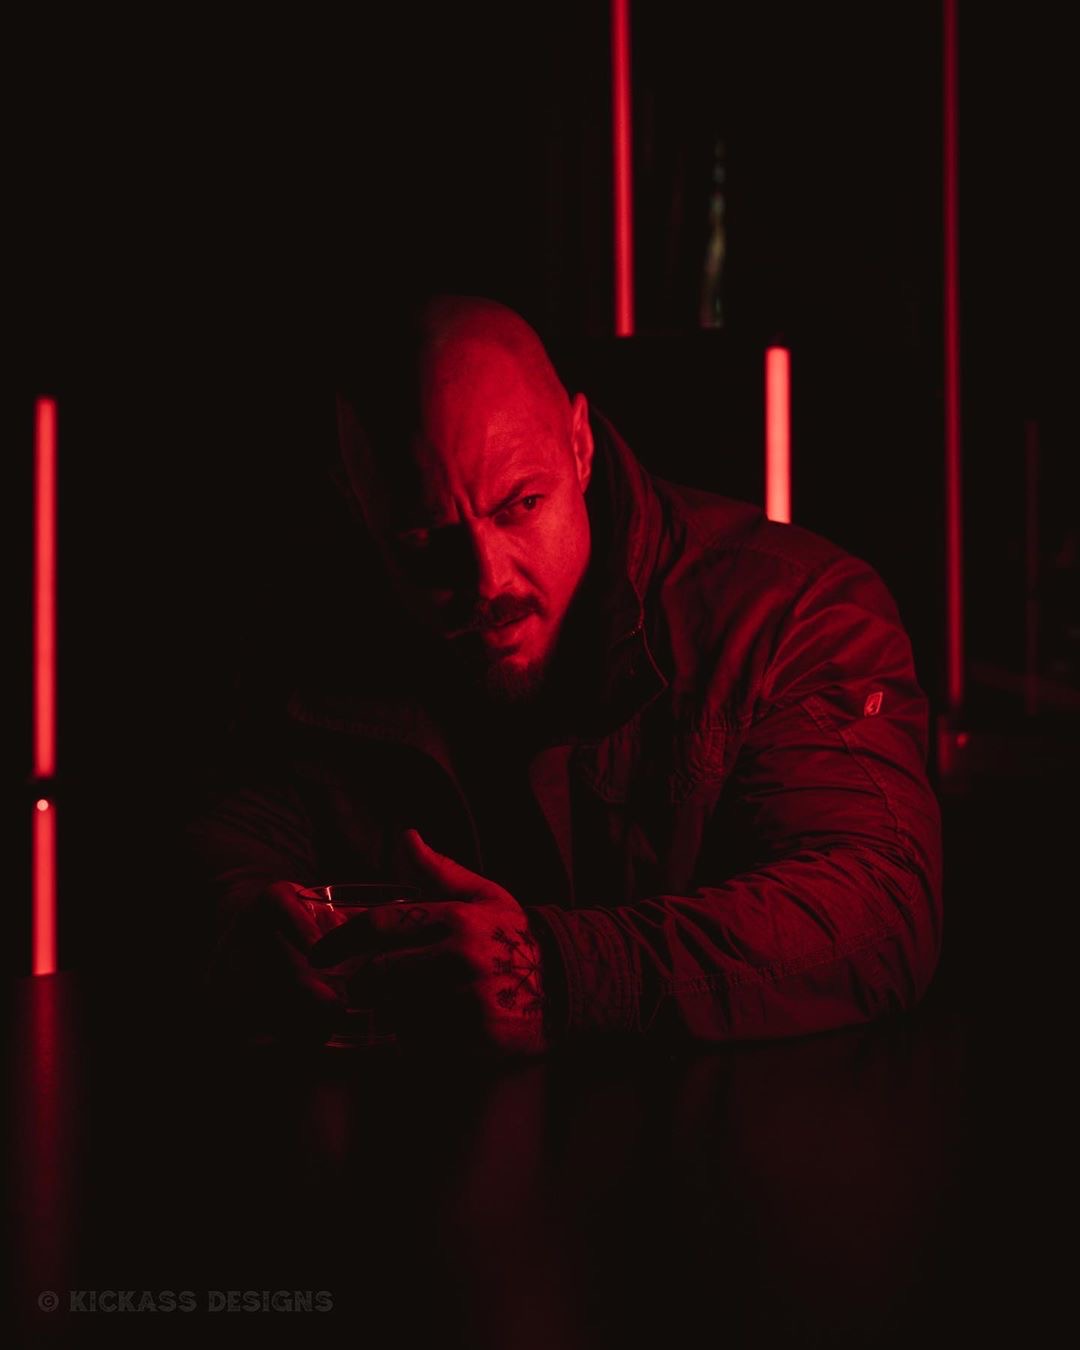 Model: @starttheworld on IG Photo Editing Software Purchase a photo editing software such as Adobe Lightroom. Photo editing software will allow you to edit your photos in post and really make those crucial adjustments to your highlights, shadows, exposure, saturation, and contrast.
In the end you just have to practice practice practice. Let me know any issues you're running into. I'm happy to help.
1 Comment
 In this article I will be breaking down ways you can survive this downtime that we have all suddenly been hit with as entrepreneurs. Although I will be focusing on photography many of these tips on leveraging downtime can be applied to any industry. I don’t know about my fellow photographers and business owners but I for one have had all my clients over the next two months cancel thanks to this virus going around. So now what? No money coming in, what do we do? How in the world do we turn this nightmare into a positive? How can we come out of this off time more valuable than we were before. Times are tough and they are likely to get tougher. Let’s be honest with ourselves, the reason we have found ourselves without work currently is out of our control so let’s focus on what is in our control. Make sure to connect with me on Instagram HERE Learn something new What better time than now to learn something new. Maybe something you’ve wanted to learn but never had the time to, like landscape photography, street photography, or wildlife photography. Maybe learn a new language, or how to meditate, or how to cook, or how to play an instrument. Learning a new skill can make a dramatic impact on your business. By learning how to be a better writer I’ve been able to write these articles that has not only helped my audience but made a dramatic increase in traffic to my website. 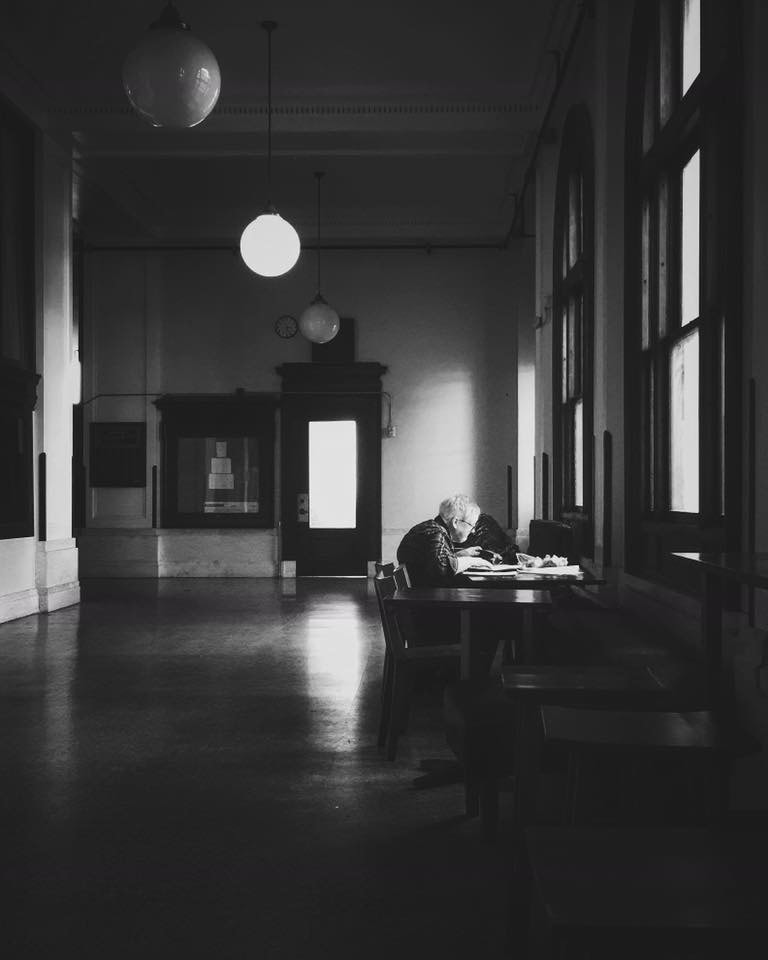 Photo by @kickassdesigns on IG I’ve always wanted to learn street photography so now that I have all this free time I can go learn and still keep a good distance from people. These days you can learn almost anything at the tip of a finger via YouTube for free without ever leaving your house. We all have things that we would love to learn but never make a priority due to lack of time so why not now? Work on Improvement Much like learning a new skill, improving on the skills we already have tends to get pushed aside because we are so busy. Work on improving your posing skills, or your lighting skills, or hell just the basics of photography. Maybe brush up on your cosplay photography skills or editing. For example, I am a portrait photographer but I also love wildlife photography, I just never get to do it. Unfortunately because taking photos of birds doesn’t bring in the bacon I never take the time to improve my wildlife photography. Now with all this talk of social distancing, now is the perfect time to shoot the birds. 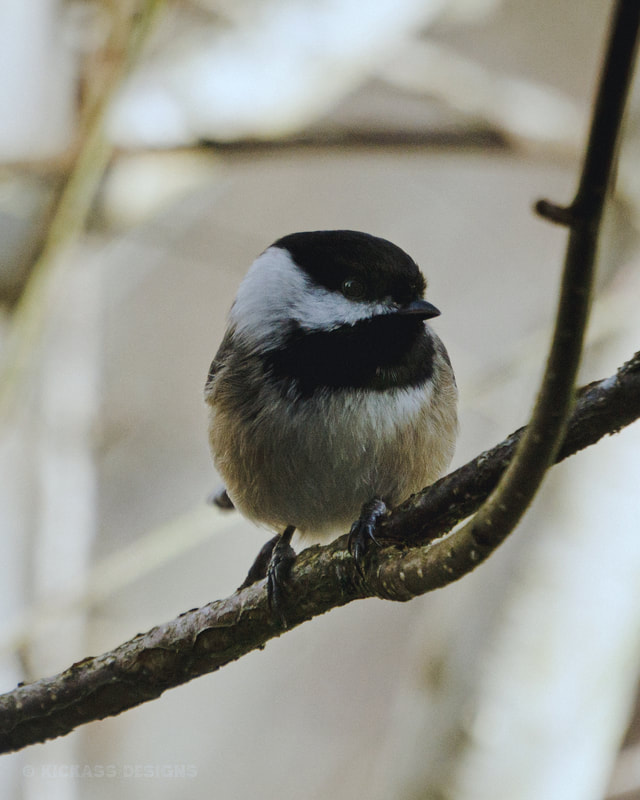 Photo by @kickassdesigns on IG Fine Tune Your Website It’s not sexy, it’s not fun, but making sure your website is up-to-date, user-friendly, and eye-catching makes a world of difference. If you don’t already have a website it’s never been easier to make one with sites like square space or Weebly. If you already have a website, when is the last time you updated your portfolio or your homepage or your Seo? I recently took a hard look at my website that I hadn’t touched in many months and found it was in need of a huge facelift. As photographers it is so easy for us to just upload all of our work on social media and forget about a website but having a website is crucial if you want to look professional and reach those higher paying clients. Update Your Logo I can’t tell you how many photographers I know who don’t even have a logo. Without a logo you have no brand identity. Think of your favorite brand right now and I guarantee you their logo is the first thing you think of. Brand identity starts with a logo and you might already have one but when is the last time it was updated? could it use a facelift? Is it in line with your current brand? If not now is the perfect time. If you want to save money you can always use Adobe illustrator to create one yourself for free or ask your cousin who's in college for graphic design otherwise I suggest using a professional service like Kickass Designs but hey I could be biased ;)  Work on Marketing What’s the point of having a website if no one can find it? How are you driving traffic to your website? That’s where marketing comes in, this can be done via social media or SEO or paid ads. My favorite method of marketing my brand is with social media. Of course I like it because it’s free but also because it gives me the opportunity to really get to know my audience. If you aren’t leveraging platforms like Instagram or Facebook or YouTube you are missing out on massive amounts of opportunity. Unless you’re selling tombstones this is where all your potential clients are so why not take advantage of these free platforms and get in front of those people. In an age where we day trade attention you should be posting fresh content every day to drive traffic to your site or social media platforms. If you have been slacking on the content creation now is the perfect time to make enough content to last you the rest of the year.  Go Location Scouting As I’ve mentioned in past articles, location scouting is imperative if you want to stand out among the sea of photographers in your town. Offer your clients epic locations that other photographers don’t know about. Location scouting is the best way to do this but it is time consuming and often last on the list of things to do. So now is the perfect time to walk around your neighborhood and find some great spots or drive around town or out in the country with no destination in mind. Just pin the spots you want to come back to you on Google maps and you're all set.  Practice Video In this day and age if you’re not offering video you will start losing clients to those that do. Plain and simple. Everyone wants video these days. This might just be one of the most beneficial skills you can learn while on this time off to make yourself more valuable when all of this blows over. I learned this the hard way. I had a photo shoot go viral and articles about it were shared on numerous news outlets. However I was contacted by numerous brands that had the potential to take that shoot to a whole other level but were uninterested when they found out I had no video of the photo shoot. The accounts that wanted to share my work until they found out I didn’t have video had massive audiences. I missed a huge opportunity on that one. 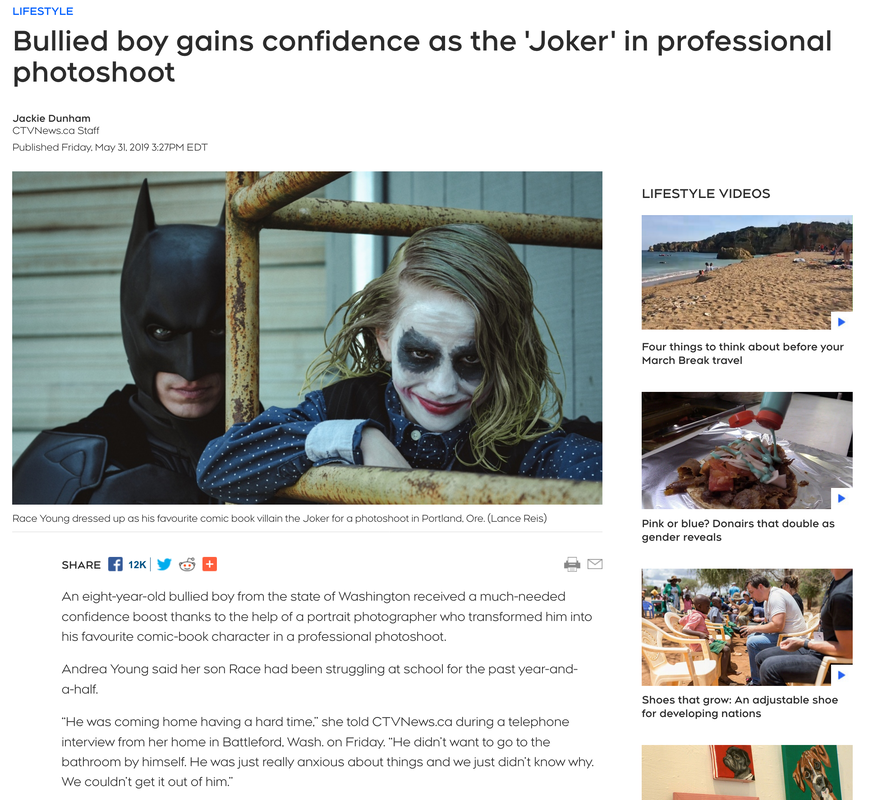 Retouching I know a lot of photographers outsource their retouching because many photographers hate the editing process. However, taking this time to really master the skill of retouching Will make you a far more valuable photographer when all of this blows over and it will save you money in the long term if you’re not paying to outsource the work. 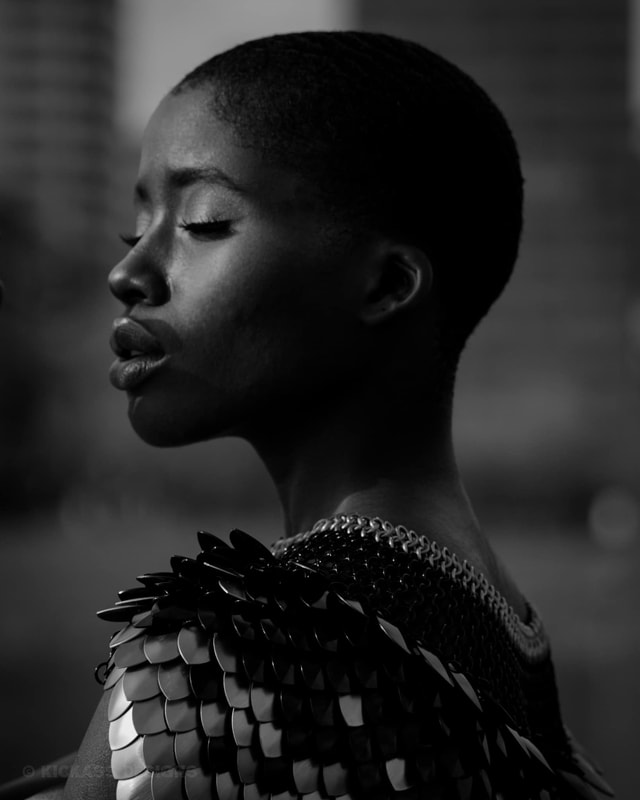 Photo by @kickassdesigns on IG Personal Projects As photographers we all have a list of personal projects that we’ve been meaning to shoot. Maybe it’s collaborating with a local designer or makeup artist or model. Our personal projects are so important for us to really show our creativity and passion. So contact that friend you’ve been meaning to collaborate with and set a date. It will be a great opportunity for both of you to take your mind off this nightmare. With no paid clients coming in now is the time for all those free projects with friends.  Photo by @kickassdesigns on IG Accounting and Bookkeeping Oh hey my least favorite thing to do. Blech.. Taxes and bookkeeping are always the last thing on my list but making sure you stay on top of your taxes is absolutely crucial. Have you been putting it off this year? If so, now is the perfect time to sit down and get organized with either Quick books or with an accountant. I am awful at taxes so I leave that up to my accountant at Serenity Tax & Accounting. Define your perfect Client If you haven’t done this by now you really should take the time to define your perfect client, what is their age range, are they male or female, are they married or single, what does their income look like, where are they located, what are they interested in, do they have children, what social media platforms are they using etc. Once you have defined your perfect client see if that’s in line with your current clientele, if not make the necessary adjustments. You can use your Google analytics from your website or Instagram analytics to find your current client demographic.  Photo by @kickassdesigns on IG Rest Look, if you’re an entrepreneur then I know you work your ass off. So take this time to rest and get inspired. Re-ignite that flame. Take it easy and watch some movies, search Instagram and Pinterest for inspiration. As business owners we never take the time to rest so take this opportunity to relax and reflect on why you chose to do what you do in the first place. If you have anything to add to this list I'd love to hear it in the comments below. We can all use more ideas right now.
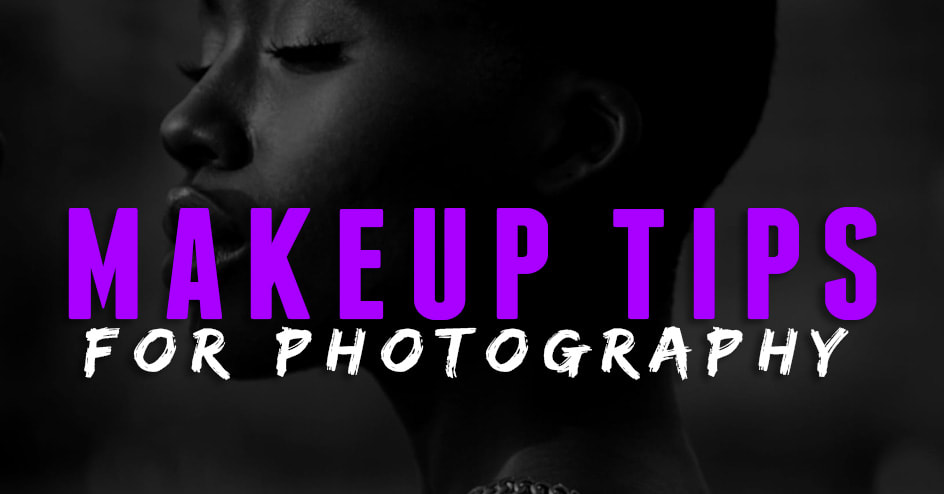 Some of the most common questions asked by my clients before a shoot are: How do you prepare your makeup for pictures? Should I wear makeup to a photo shoot? How do you prepare for a photo shoot the night before? How should I do my makeup for an outdoor photo shoot? What makeup looks best on camera? How do you prepare your skin for a photo shoot? What foundation is best for photo shoots? How do I style my hair for a photo shoot? So I thought this would be a perfect opportunity to bring in my talented friend and Makeup artist Renee Jacobson for some insight on the topic of pre shoot makeup and skin care. Renee and I have worked together on multiple projects and she is one of the most popular makeup artists in Portland. I'm honored she took the time to be my guest author for today's blog. We hope these tips help. Make sure to connect with Renee on Instagram HERE 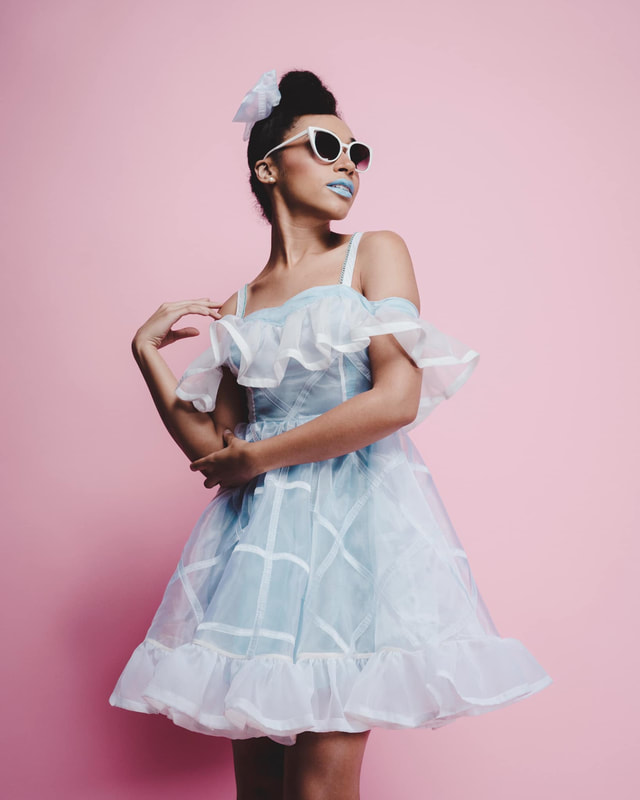 Makeup by @reneejbeauty on IG Let's keep it simple You’re beautiful. You’re perfect. You’re fabulous. Don’t feel pressured to stray too far (or at all) from your typical beauty/grooming routine. A gentle exfoliation for your face and lips the night before your shoot, followed by your favorite moisturizer will go a long way in helping your skin look it’s best. Check that your hair, skin, brows, and nails are all clean, tidy, and groomed to your liking, and Voilá! You’re photo shoot ready! Book ALL the Things (with a buffer)
Giving yourself that buffer allows your skin time to normalize and recuperate. It also provides a ‘woopsie’ window in case one of said services doesn’t quite turn out how you expected. 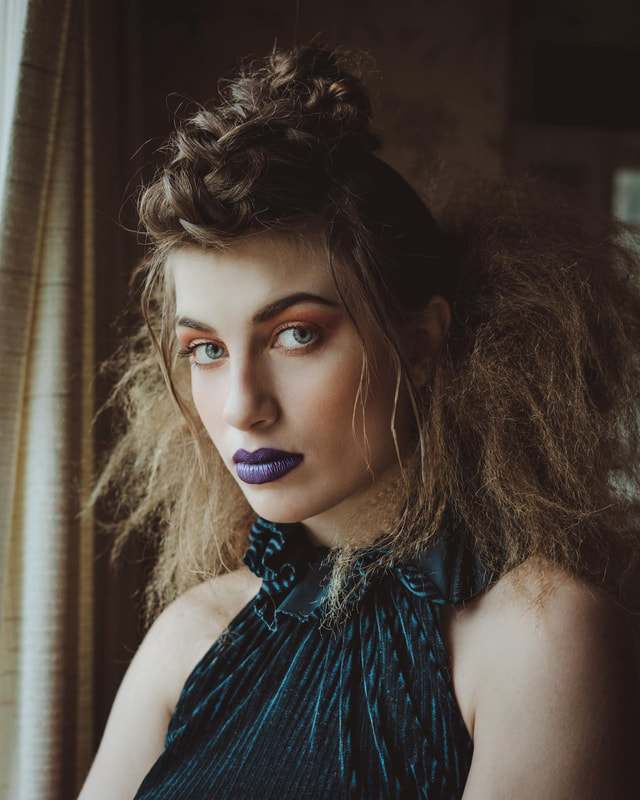 Makeup by @reneejbeauty on IG DIY Warning Any of the above mentioned services can be done at home. If you’re a DIYer and/or on a budget, I see you. You’re a champion. Two bits of advice: 1. Give yourself a buffer. Plan your self care and grooming into your schedule at least a couple days before your shoot. Procrastination can lead to a late night pre-shoot, and the power of beauty sleep should not be underestimated. 2. Stick to what you know. If you’ve never waxed your own eyebrows, the night before your photo shoot is not the time to try. And remember- it’ll be tempting...you’ll find little things that beckon for it... but RESIST the urge to pick. Leave it alone. Yes, you. Yes, that. Leave it be. 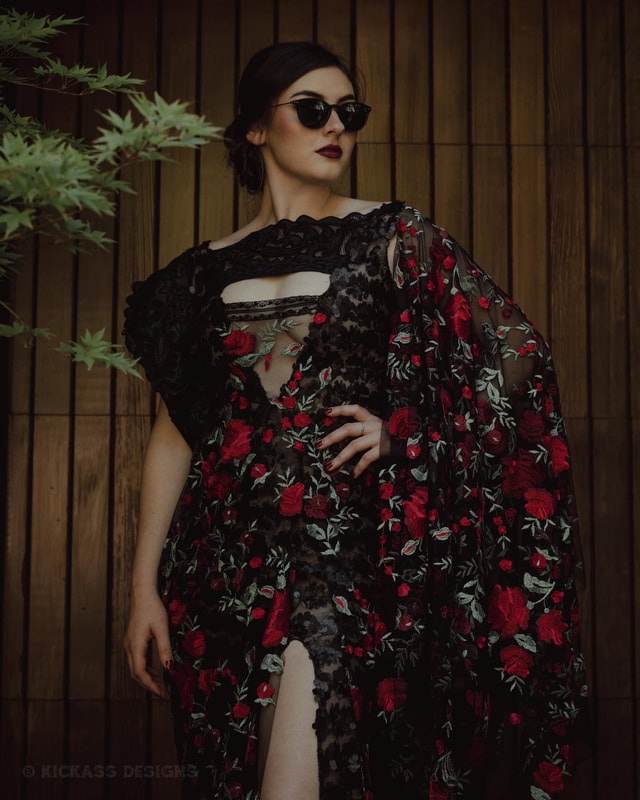 Makeup by @reneejbeauty on IG Practice in the mirror If the very thought stresses you out, skip it. You’ve booked a photographer who will direct your movements and help you feel comfortable and look fabulous in front of the camera. However, bringing your own poses to the table can be a great way to ensure that your photos capture your authenticity and most flattering form. If you want to get some practice in, spend some time with yourself in the mirror. Find the poses and shapes that flatter your form and take note of how they feel in your body, and how you moved into them, so you can recreate that sensation when the mirror is a camera. But again, don’t stress! Your photographer will guide you. Makeup by @reneejbeauty on IG Stretch No, really. Being in front of the camera can be surprisingly physical. You may be asked to bend, stretch, twist, lift, sit, stand, climb, leap... This will not be a passive experience so do your body the favor of a few down dogs the night before and/or morning of. Makeup Cameras see differently than our eyes do. The inconsistencies in skin tone and texture become more exaggerated and apparent through a lens. Basic cosmetics can brighten dark under eye areas and smooth away tonal inconsistencies, saving your photographer hours of editing. Anyone and everyone who professionally exists in front of a camera wears makeup. In the world of photography, it’s a must. Even if makeup isn’t a part of your daily life, it should be included in the schedule and budget for shoot day. 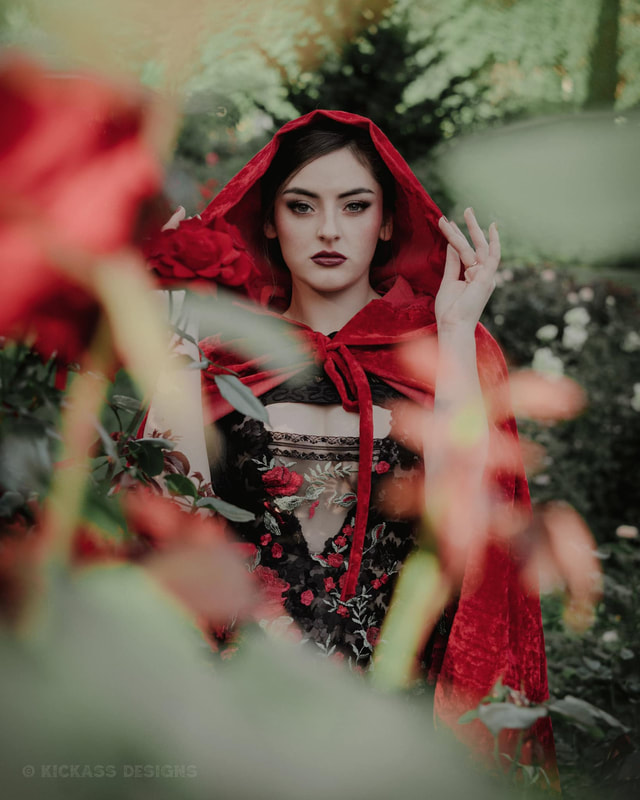 Makeup by @reneejbeauty on IG Options Hire a professional! Hair and makeup artists exist to help you look and feel your best for your big day. Freelance hair and makeup artists will meet you at the photo studio, or even at your home, with all of the tools, products, and expertise to create the look you want, that the camera understands, and that will keep your photographer behind the lens (their happy place) instead of stuck editing in front of the computer (significantly less happy place). 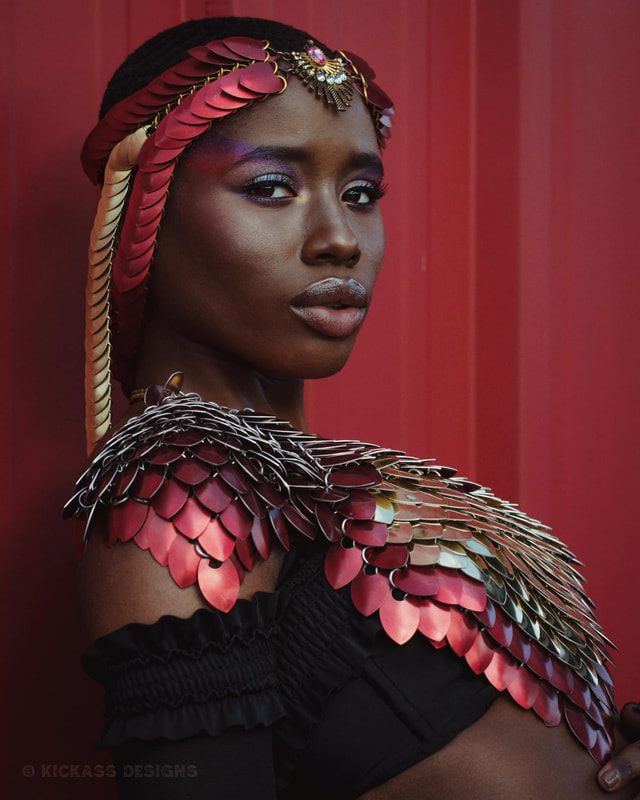 Makeup by @reneejbeauty on IG DIY Makeup If you’re confident with your own cosmetic skills, you may still want to consider hiring a pro as the products and techniques for photography makeup do differ from day to day makeup. But if you’re going to DIY, here are some things to keep in mind: The goal is to create an even “canvas” and accentuate the features that you’d like to be seen- typically brows, eyes, cheeks/contours, lips. There are thousands of tips and tricks to consider when planning out your makeup look. Here are a few: -Foundation doesn’t need to be a mask. Well-chosen and well-blended concealers are often enough. Allowing your natural skin to show through keeps you looking like you, and also helps prevent the dreaded mismatched jaw “line.” -Which brings us to blending. Use less product and build slowly. Buff, blend, blend, and blend some more. Harsh lines, mismatched tones, and uneven application can lead to even more hours of editing than no makeup at all. Blend it out, boo. 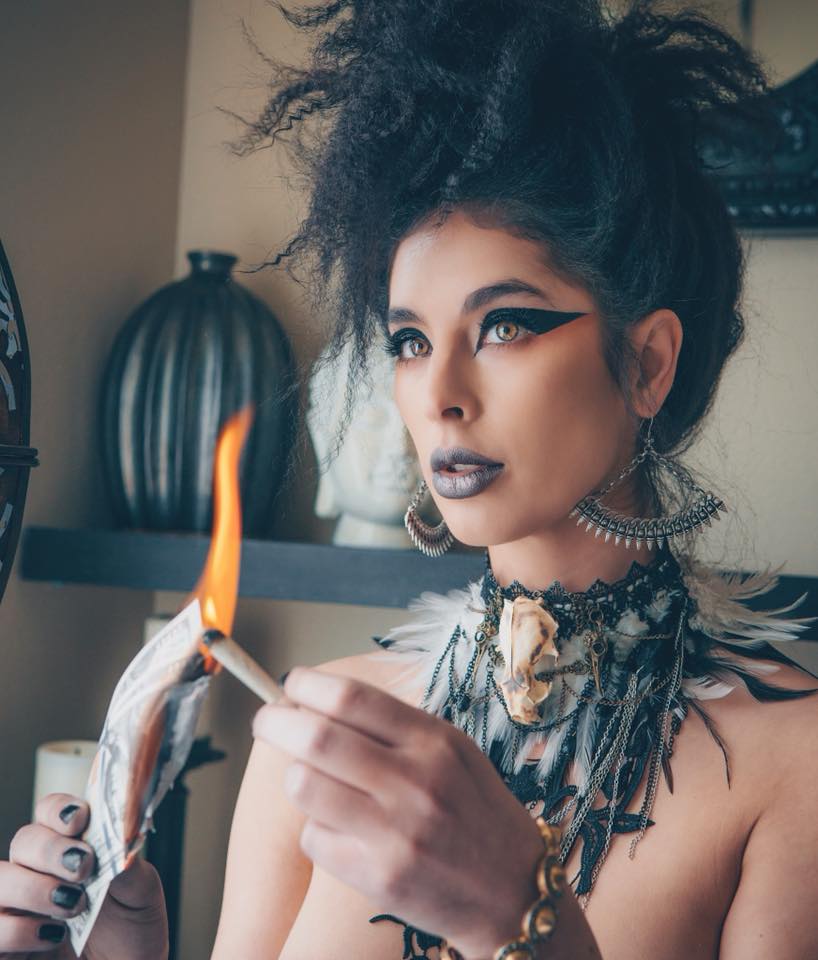 Makeup by @reneejbeauty on IG Contouring Demystified Don’t be scared. Choose a color that’s just a couple of shades deeper than your skin. Start at the top of your ear and bring it down no lower than the bottom of your nose, following your cheek bone. Not in the hollows of your cheeks, but juuuust above that, and still below the crest of your cheek bone. Add a kiss to both temples, a dusting to your hairline and under your jaw line, and to the sides of your nose. Blend it out. Boom. Now the camera can see the natural contours of your face, and they won’t get lost or “blown out” in bright light. Be blushful Go a bit bolder with your blush than you would on the daily. Much of the color gets lost in light and editing so make sure to include it in your look. But above all, remember that you are art. You are beautiful and worthy of existing in photos.  For more information on
 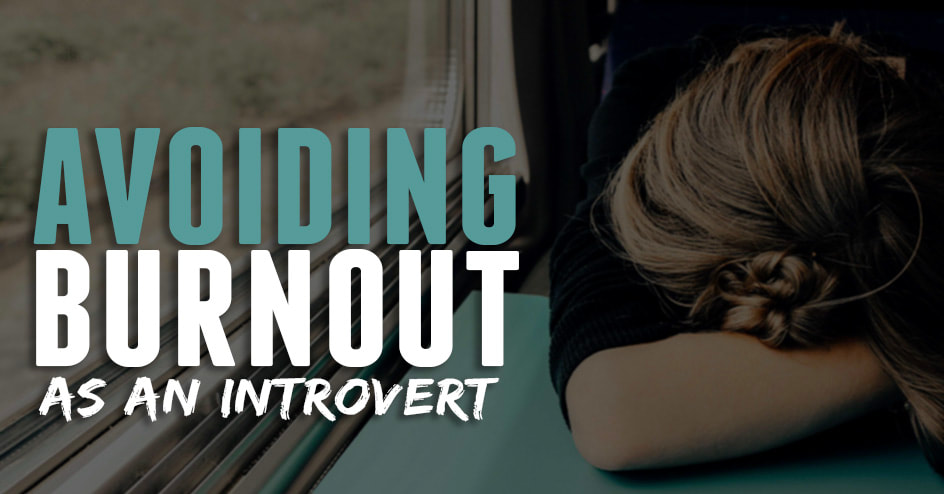 Someone asked me the other day how I avoid burning out when I photograph people almost daily. I should start by saying I'm an introvert and I'm pretty vocal about that on social media. For all you extroverts out there FYI, Introverts, by definition, expend energy when they’re around other people. We recharge our energy by being alone, doing solitary activities like reading, watching Netflix, meditating, spending time in nature, and in my case editing photos at home. You could say I run a higher risk of burnout from too much social interaction as I am an introverted photographer and I work with a lot of people. In this article I'll explain how I shoot almost every day and don’t burnout. Make sure to connect with me on Instagram HERE I Guard my schedule fiercelyAnything that involves interaction with people, like client meetings, photo sessions, and networking events all drain my energy. Don't get me wrong, I love photography and everything that comes with it but I can feel very low on energy at the end of these social activities. I’m very careful that I don’t force myself into a schedule with too many social activities and not enough recharge time. I like to alternate photo sessions or meetings with plenty of down time. This is where time blocking really comes in handy and I learned this strategy in the Book The ONE Thing: The Surprisingly Simple Truth Behind Extraordinary Results. I find it necessary to give myself permission to rest and recharge even though it can be hard sometimes. I Prepare Mentally & PhysicallyBy preparing in advance for photo sessions and meetings etc, I allow myself time to become mentally engaged in what I’m doing. I have to be ready and prepared to shoot so I don’t feel put on the spot or unprepared. I also find it helpful to prepare physically. For example, by cleaning my gear, charging my batteries, and packing my bags the day before a shoot, to keep myself from scrambling at the last minute, and having to worry that I forgot something. Another way I like to prepare is finding photos on Pinterest or Instagram the day before that I can show my client on the day of shooting for posing ideas based on what we are photographing, Fashion, lifestyle, portraits, etc. 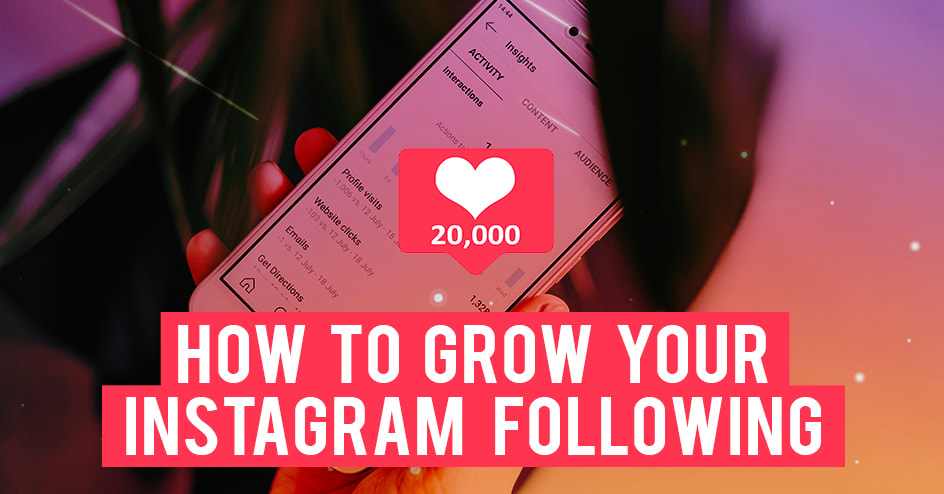 Practice, Practice, Practice In order for me to instruct my models confidently, I need to practice my favorite poses until I’ve mastered them. My clients take their cues from me. Not all my clients are professional models working for an agency, so by practicing ahead of time I’m able to feel confident and secure in my directions which allows for less anxiety during a shoot. You don't have to be a high energy outgoing extrovert to be a successful photographer. If you’re a soft spoken introvert like myself I would suggest using pictures like I mentioned above as examples to have your clients mimic the pose. I Rest and RechargeAs I mentioned above, as an introvert I have to set aside time for rest and relaxation. This could be meditation, reading, Netflix, Location Scouting, walking outside, hiking, playing with my dog, a good workout, or going to a movie. I know how hard it is to stop working when there’s a mountain more that could be done. It’s so easy to say, “I can read when I’m done. I’ll just edit one more picture.” Which turns into 2 then 4 then 10 and before you know it hours have passed. So I HAVE to time block to get it in. The truth is there will ALWAYS be something else you could do. If you don’t take time out for yourself, you’ll burn out, resent your business, and quit. And if you don’t quit you sure as hell won’t thrive in your business so give yourself permission to rest and recharge, so that you can continue to serve your clients and serve your business like a Rockstar. If you’re an introvert like me, chances are you’re even more prone to burnout than others. It’s just a fact of life. Especially at the end of a long, intensely busy day or week or month of shooting. But take it from me, you CAN avoid the burn!
Hope these tips help. And if you have any to add please do in the comments below 🙏😀 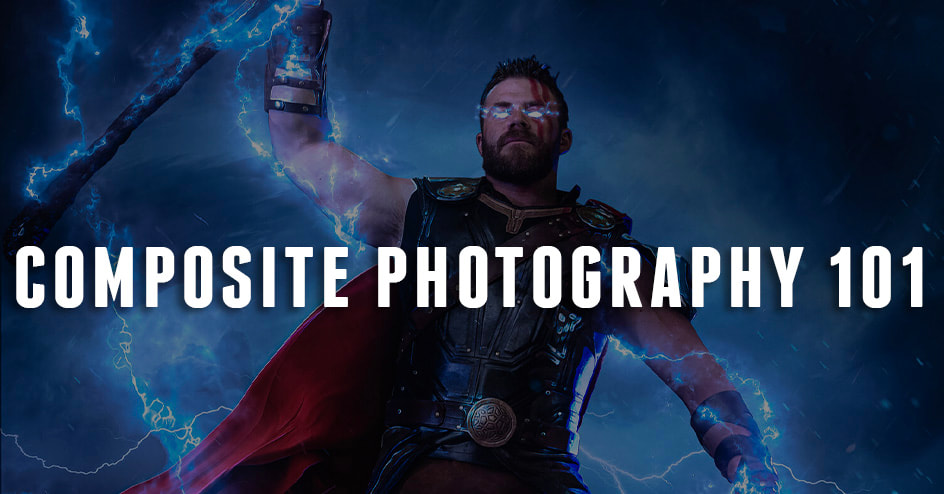 Digital Stylized photography, other wise known as Composite Photography is one of the most compelling and visually stunning forms of photography and digital art you'll ever see and a personal favorite of mine. A Digital Stylized photographer will create what's known as a composite image. These are made up of two or more photographs, which are combined to create one image. And while this definition makes compositing sound quick and easy, it's anything but, often times it requires several hours of photography and Photoshop work to complete a final piece. Believe it or not you've seen composite images in ads, on websites, in the news, even on your friend’s Instagram. As a Cosplay Photographer myself naturally I'm friends with other Cosplay photographers and I'm often envious of their composite skills. Photoshop is my weakness so I take more of a cinematic or editorial approach that requires less Photoshop but I look up to my fellow artists who can take out the background, put their subject anywhere and add effects like light, background, particles, explosions and other images. One of these talented artists is my friend Anthony with Soul Studios in Seattle. I'm constantly in awe of his work so I asked him if he'd like to be my guest author for today's article and he obliged. Below you will find some of his work and his take on Digital Stylized photography. We hope this inspires you. 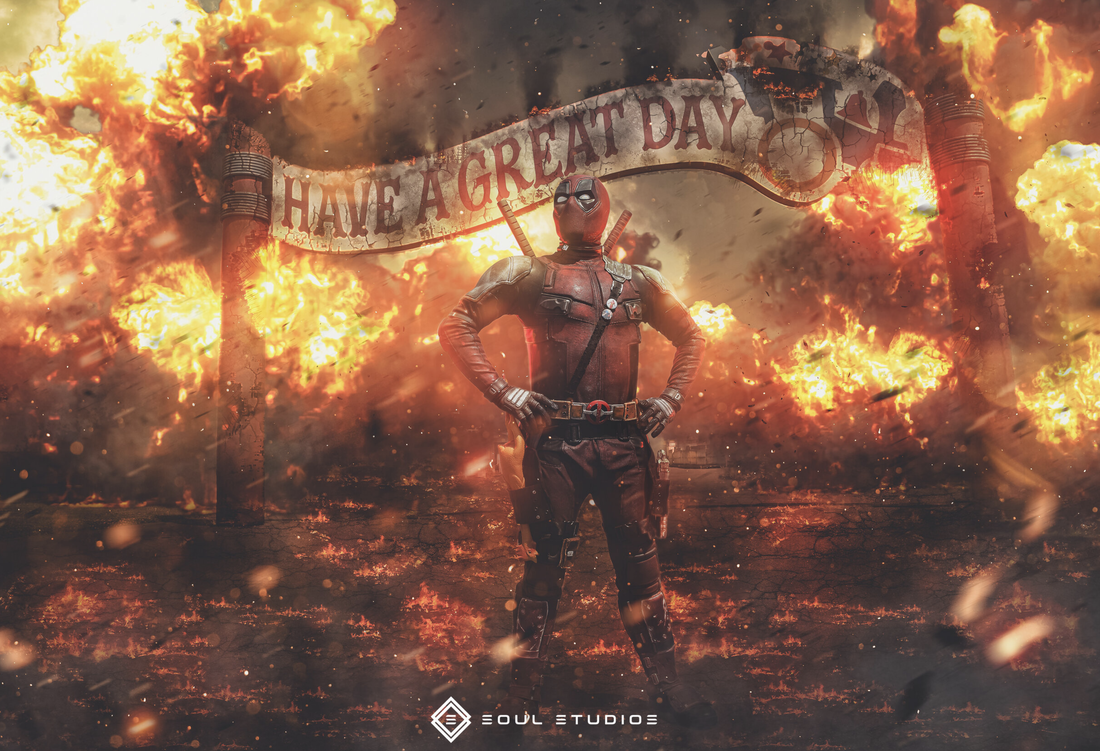 Photo by @gfxsoulstudios on IG Painting with Light Photography has been around for a long long time, but the way it has been done has shifted greatly since it began. Painting with light, that is what photography means, and these days photography is everywhere. With high resolution cameras at most people's fingertips with the technology of cell phones, everyone is a photographer. Instagram is a popular tool used for capturing and editing photos, and with today's influx of selfies, landscapes, and random cell phone photos, it has become increasingly difficult to stand out. What makes a photo unique? Is it the subject matter? The lighting? The costume? Or maybe the Photoshop effects? To be honest, it is all of the above. In this digital age, photography is as immersive as any other form of digital media. 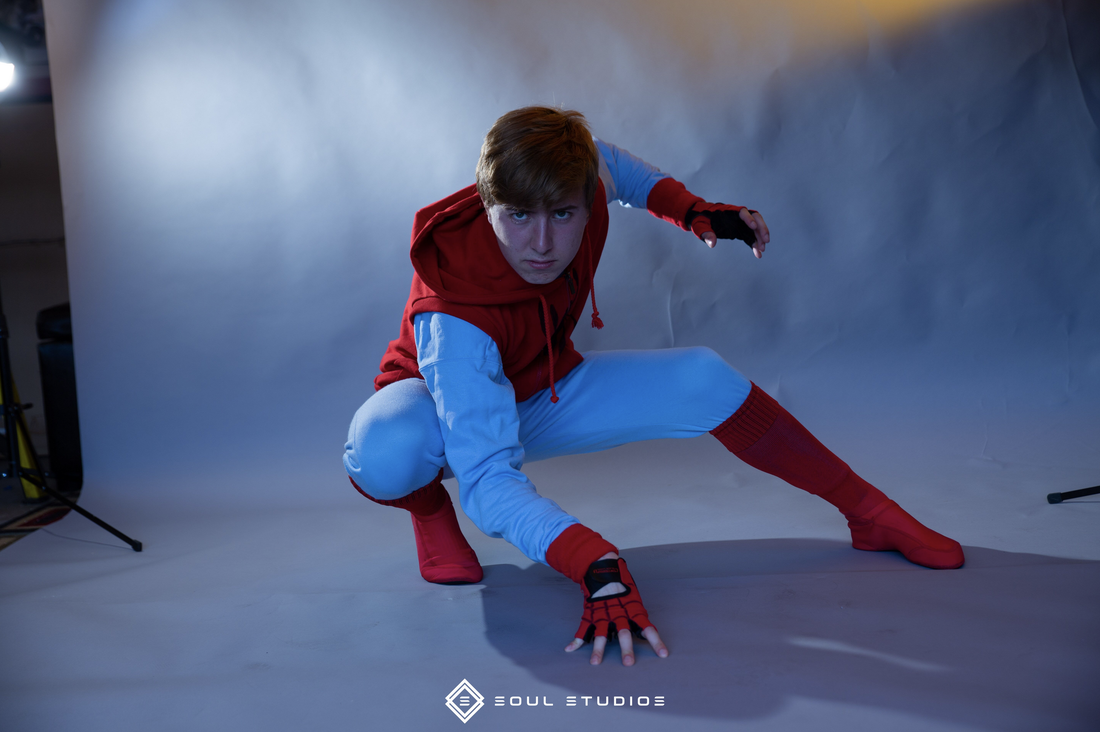 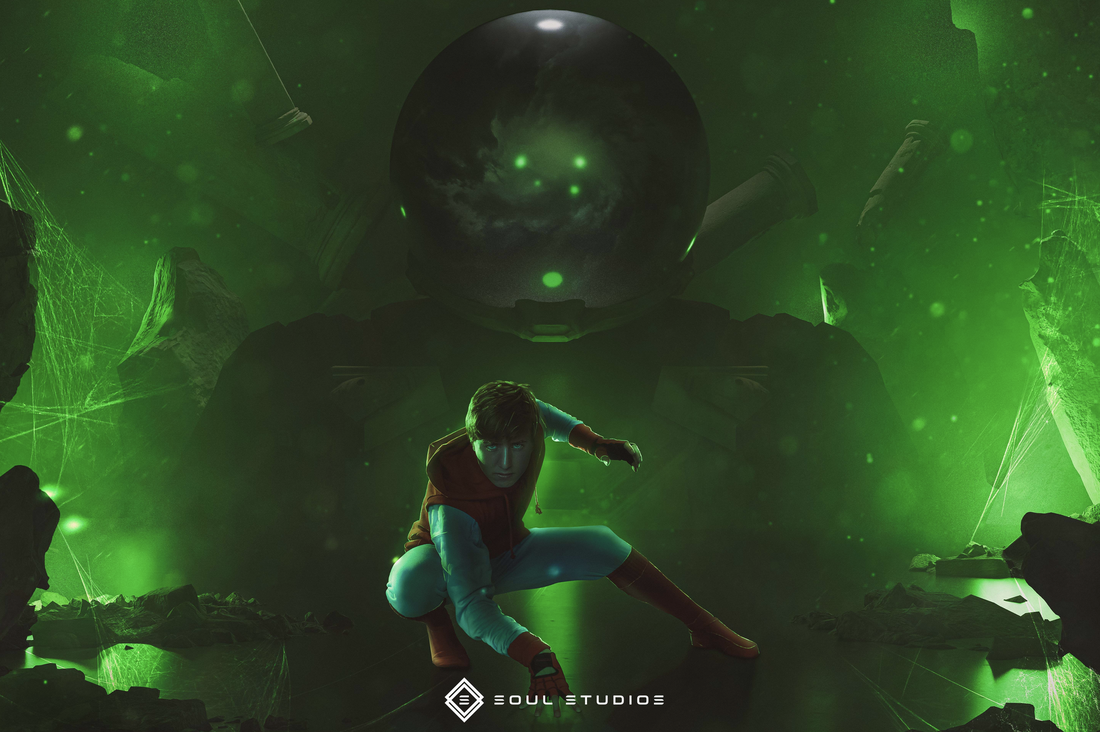 Photo by @gfxsoulstudios on IG Define your Style Finding the right balance of traditional photography vs. added digital effects is tough and one of the keys to making your photos stand out. Digital Stylized photography is something that can consist of any digital image. It does not have to be some crazy Photoshop composite to be a stylized photo, in fact I would say most are not. But effects can bring a photo to life and make a photo that one could see as dull stand out. There is not any one subject matter that is exclusive to this style of photography as any photo can be enhanced to a point. But there are subject matters that are made for this stylized approach to photography. One of the most important things to find in doing stylized photography is your style. A style that defines you and how you want your images to look. This is 100% up to you, whether it is a high contrast look with low saturation, or adding film grain to give it that gritty feel. Finding what fits you and makes you happy is the most important. For example, something I add to all of my images is particles and atmospherics. I want my viewers to feel like they are looking at a real image, something that was taken in camera. So I try my best to make my images as camera accurate as possible, with some added pop of course. 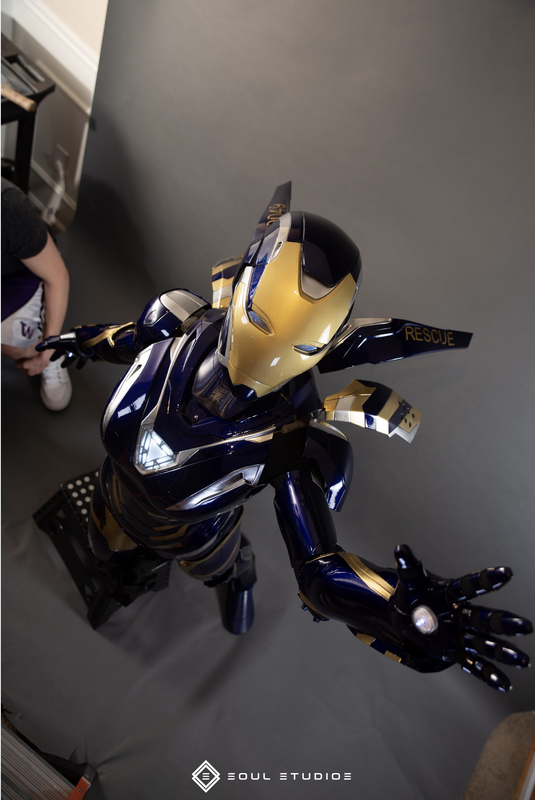  Photo by @gfxsoulstudios on IG Find your Process Finding your process is also important. While it is very easy to see someone else’s gear and lighting set-up and try to copy every aspect of that to a T. But does it work for you? Or are you just doing what you think is the best way? Who said it was the best? What works for you? You are the artist and this is your vision. I often fight off the urge to compare my images to that of the amazing digital artists that I admire, wishing my images could look like theirs, and feeling like my work is no good once I look at both. But there is something to always remember. While having inspiration is so important, do not let that inspiration turn into doubt. Looking at someone's amazing work should never hold you back from creating something. 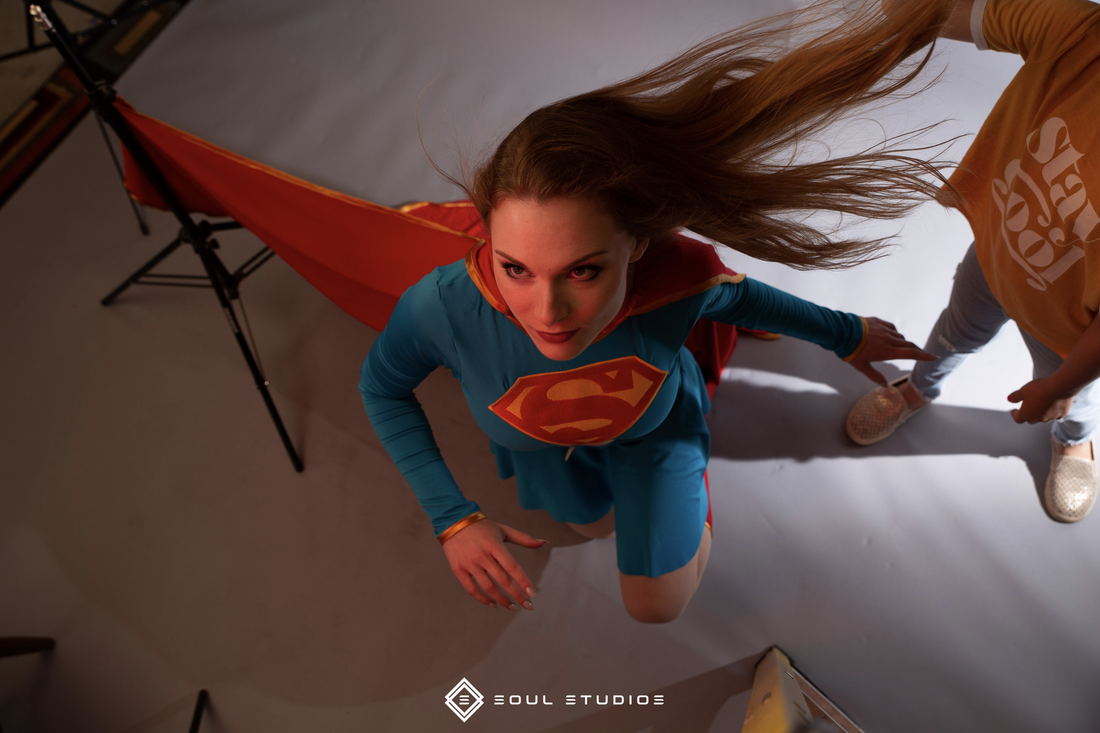  Photo by @gfxsoulstudios on IG Be Creative You are probably wondering how someone creates a digitally stylized photo. Well that is where your creative mind comes in. When I am shooting, I often try and have what I want the end result to be in my own mind, striving to make the subject look as close to that as I can in camera. This has many elements to it. Is the pose right? How about the angle? Does the horizon line match up? What is glowing? Do I need to adjust my lights to match how the light is going to be hitting them? What color is the light? These are all things I think about when I am shooting my images. For example, if I know my subject is going to have an explosion behind them in my final image, I am going to want to put a orange light behind them to have that same glow of light that would come from the explosion. But that is my style of shooting, that is what works for me. And that works knowing my limits in my editing skills.  Break the Rules Can you still do digital stylized photography if you are not a Photoshop wizard? Of course you can. Get creative and ask yourself, how can this photo stand out more? Should you get low and shoot up to make it look more dynamic? Should you try and get them mid-air so there is action in the photo? Try new things and think outside of the box. Break the rules of photography and see what you can and can't do. It might not work, but that does not mean you have failed, that just means that you can try something else that might work. Whether you have the skill set to take your photo into Photoshop and add an epic explosion or someone holding a fireball. Or you love to do things in camera and you have your subject hold your flash to make them appear to be holding an energy ball. There is no right way to do photography. Be bold, be creative, and try new things.  This article was brought to you by my guest author, good friend and fellow photographer Anthony El with Soul Studios. Make sure to check out his amazing work and connect with him on Instagram HERE
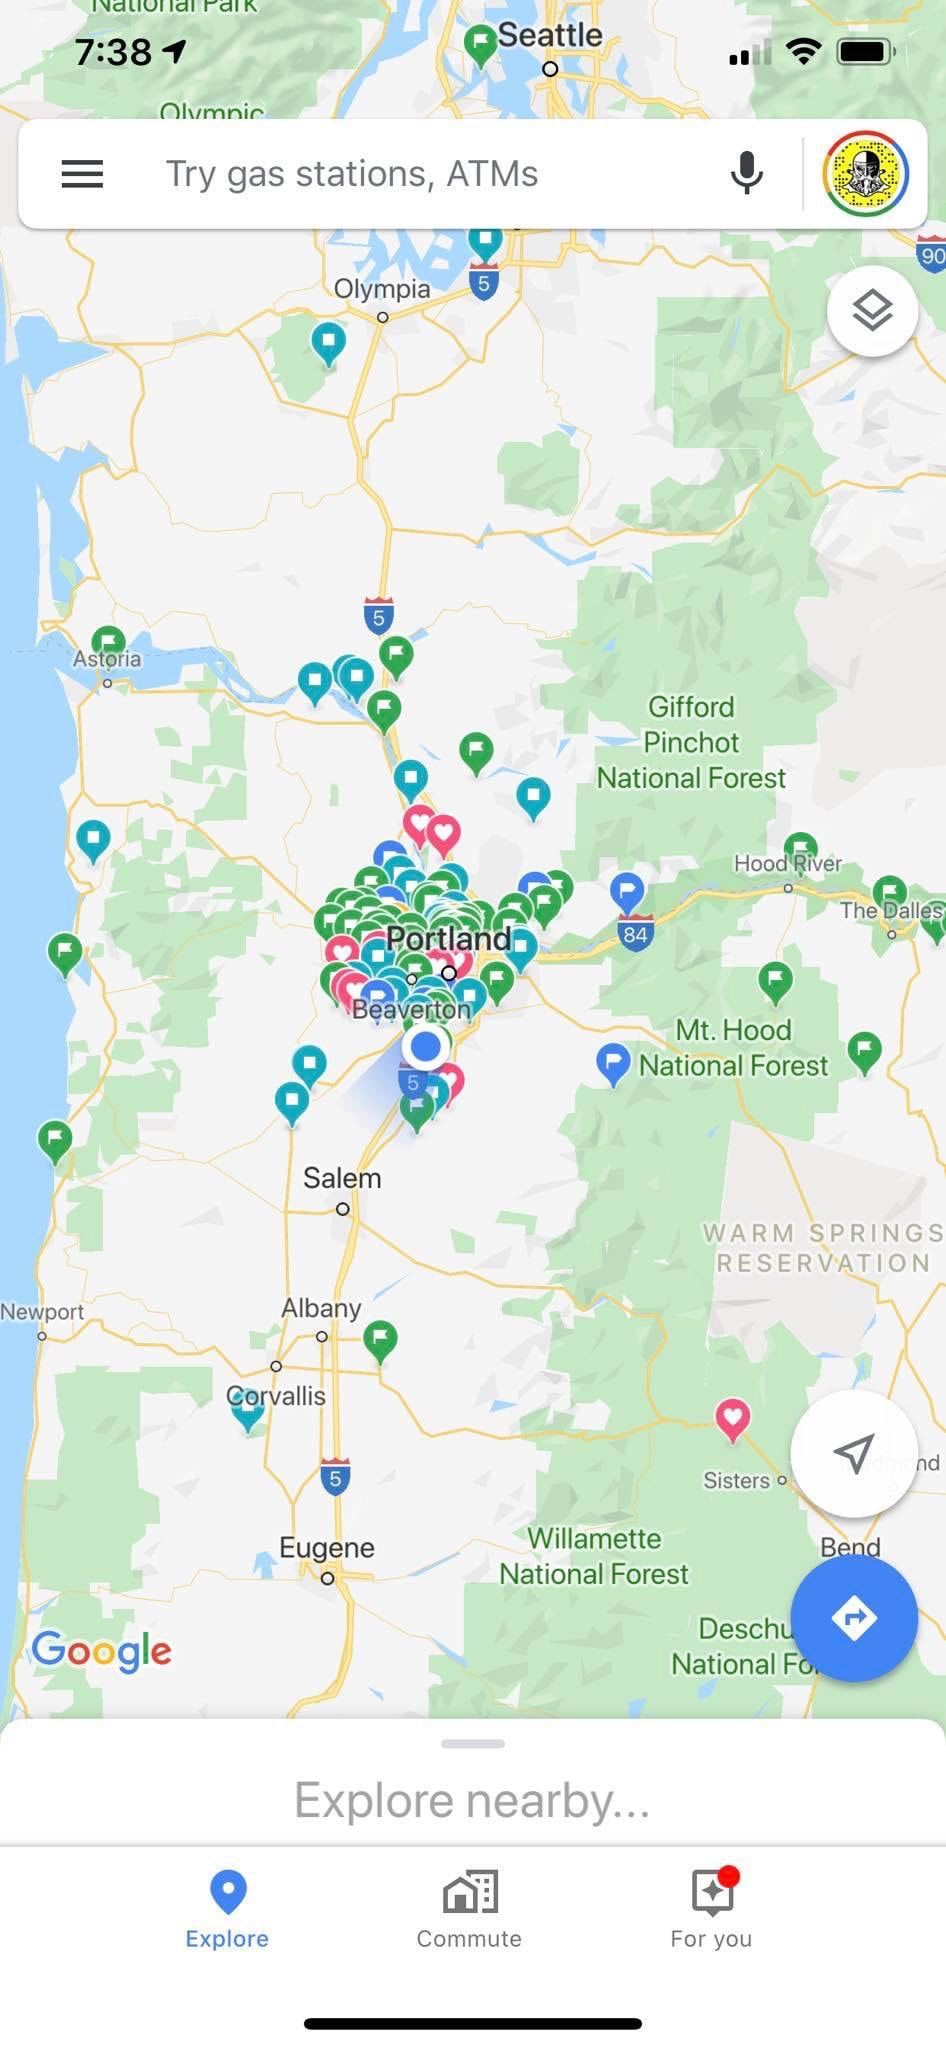
 Location Scouting. One of the most undervalued aspects of photography. Whether you're a landscape photographer, wedding photographer, portrait photographer, or fashion photographer, the more locations you have at your disposal the more valuable you become. In fact I'm often told by my clients one of the reasons they hired me was because they love the locations I use. I Always try my best to find new and unique locations that most people don't know about. I have spent countless hours researching locations and driving around scouting locations. Because of this I'm not always quick to giveaway my favorite locations to anyone who asks. In this article I wont be giving away my locations but rather teaching you how you can find the perfect location for your next shoot all on your own. Connect with me on Instagram HERE and let me know the most helpful tip in the comments below. Model: @roguesgalleryfitness on IG Location Scouting Tip 1: Just Drive Let's start with the best way to find a new location. Literally drive around and look with your eyes. As I'll mention below the problem with scouting online is you can't always be guaranteed a location will still be around or that it's in the same condition as in the photos you saw or if it's on private property or if there are obstacles to get there. For example if you need a field or even abandoned house for a shoot you probably want to try driving out in the country. That's where you'll find fields and abandoned dilapidated houses. You may have to drive down random roads with no destination in mind until you come across the perfect spot you're looking for. When you find one open Google maps. - Look for the blue dot indicating where you are. - Tap and hold next to the blue dot until a red pin appears. At the top of the App it will say "Dropped Pin." - At the bottom of the App click "Label" - Name the label something that you'll remember like "Abandoned 2 story house in Field" Then save. - You now have that secret spot Saved in google maps so you can GPS to it in the future. Check out what my google maps looks like after all the locations I've saved.
Now for your final step. After you've Pinned the location take a photo or 2 for reference when you forget in the future and trust me, you will. Open the photo in your Instagram story, add corresponding text to the photo as shown below. The text should match what you labeled it in google maps. For example I have a folder in my phone for abandoned places. So when I find an abandoned location that I'd love to come back to I'll pin it and label it something like "Apocalypse 1." I'll then take a photo and add corresponding text that says "Apocalypse 1." That way if I open my maps and can't remember what the pinned location was or I want to share location ideas with a client I can find it in my folder on my phone. Organization is king. You can use other apps to add text to a photo but Instagram is easy so I'll use it to add the text and save the photo but not post it. Then I'll save the photo to the corresponding folder on my phone. Boom! 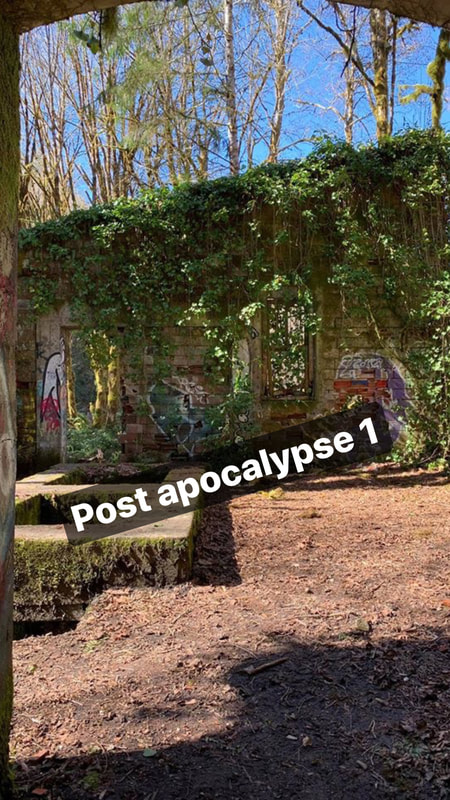 Location Scouting Tip 2: Instagram Instagram is a great tool to find locations. Just think about it. Everyone uses Instagram to post where they are and what they're doing so more often than not a photo will be tagged with the location. So get on Instagram and go to the search bar and click places. Let's say I need a coffee shop for my location or I just wanna explore the area to see if anything jumps out at me. Search the general area you're looking for like "Portland Oregon" Make sure you're under the places tab. Once you type in "Portland Oregon" it will come up as an option as well as popular locations in the area. This is the perfect place to explore nearby locations. When you click one, like "Oregon Zoo" it will take you to a feed of photos where people have tagged that location and you can get ideas of what you can expect. Let's say you click "Oregon Zoo" and it doesn't look like a good location. Go back and try the next location like "Portland Cars & Coffee" Do this until you see a location you like. 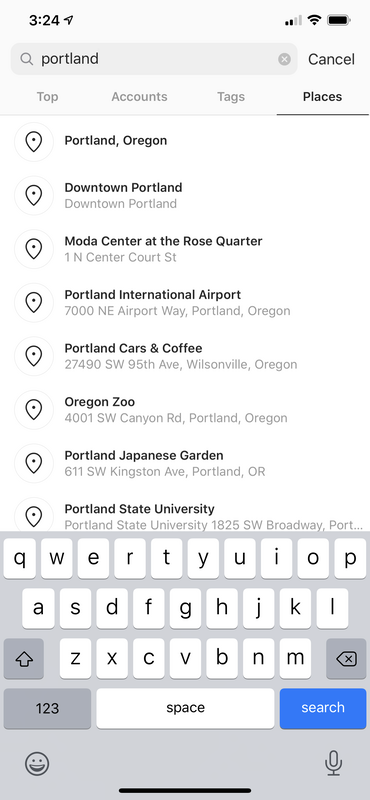 An even better option for searching Instagram and my go to is searching with tags instead of places. So You might search Oregon under the tags tab. Then you'll see a feed of photos anyone has posted with the #oregon. When you see a location that looks good click the photo and hopefully they tagged the location. If they tagged the location it shows at the top under their user name as shown below. Click the location that's tagged and it will take you to a feed of photos all tagged with that location as I mentioned above. This way you know they tagged the right location (Sometimes they don't) Once you have your general location you can start your research via google. 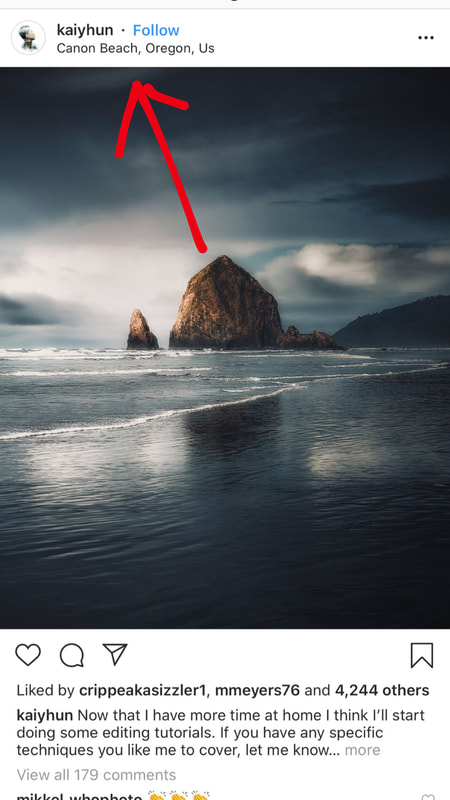 Location Scouting Tip 3: Evaluate the area Do your best to evaluate and prepare. Especially when shooting with a client. It's always a good idea to visit the area before meeting a client there. Be aware of any obstacles. Be aware of the weather and temperature. A desert location, mountain location, or beach location will all have different weather and temps. Is your subject posing in water? How cold is the water? Could be a hot day but the water might be freezing. Prepare for that. What will the lighting be like? This will make a huge difference. Where will the sun be rising, where will the sun be setting. I use an app called PhotoPills to know ahead of time the direction of the sun at a specific location. How popular is the location? Know the up and down times. Lets say you need a coffee shop or dinner. Find out when the slow times are so you can shoot without disrupting customers or getting people in your photo. Maybe you're shooting at a popular landmark. Unless you want a tone of people in the background behind your subject you might want to get there at sunrise. Is the location on private property? This is a big one I run into all the time. When it comes to trespassing I can't tell you it's a good idea. That being said I do it all the time. However my caveat is this: I would never trespass on property that is currently occupied. That's just dangerous and extremely rude. But if I come across somewhere that's clearly abandoned I'll usually take my chances. Just don't forget it is against the law and I've been caught trespassing more than once. It's never fun. Any chance you get to ask for permission you should.  Photo by @kickassdesigns on IG Location Scouting Tip 4: Flickr Much like Instagram, Flickr is a photo sharing app where photographer share beautiful photos from all around the world and more often than not they will share the exact location. Try searching an area your interested in and see what you find :)  Photo by @kickassdesigns on IG Location Scouting Tip 5: Loaded Landscape Loaded Landscapes is one of my favorite tools when traveling. What they do is simple, they help photographers find the best locations to photograph, and provide helpful information that you can use to plan your own trips. I love that they constantly add more destinations. This site is made for Landscape photographers but is a huge tool for portrait photographers and lifestyle photographers. Just click the link and click the state your interested in. You're guaranteed to find something new :)  Photo by @kickassdesigns on IG Location Scouting Tip 6: ShotHotspot So, ShotHotspot is my favorite website for finding abandoned locations. They use sites like Flickr and Panoramio to build up an idea of which areas of the world are the best for photography. I use them to scout locations for photo shoots all the time, abandoned places, beautiful landscapes, and more. Urban exploration is huge right now but if you're exploring an abandoned location it's best not to go alone and if you do please be careful. 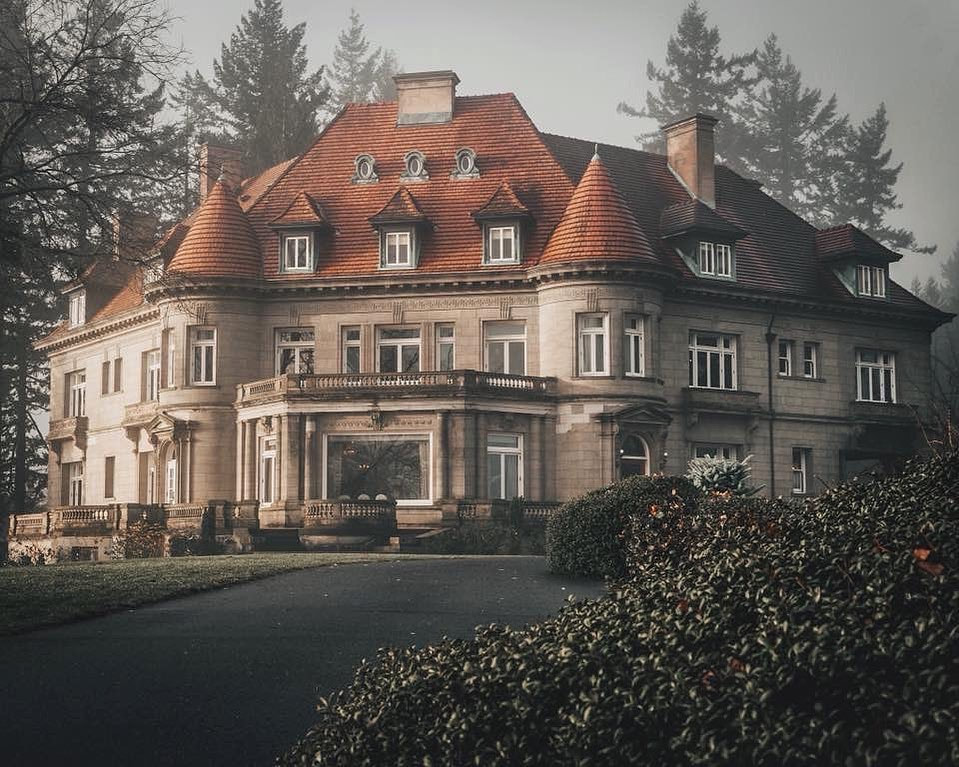 Photo by @kickassdesigns on IG Location Scouting Tip 7: Leave no Trace This is the most important tip of all. As photographers we all know how important it is to keep our favorite locations exactly the way we found them. It's imperative that we never leave anything behind and always respect the location.
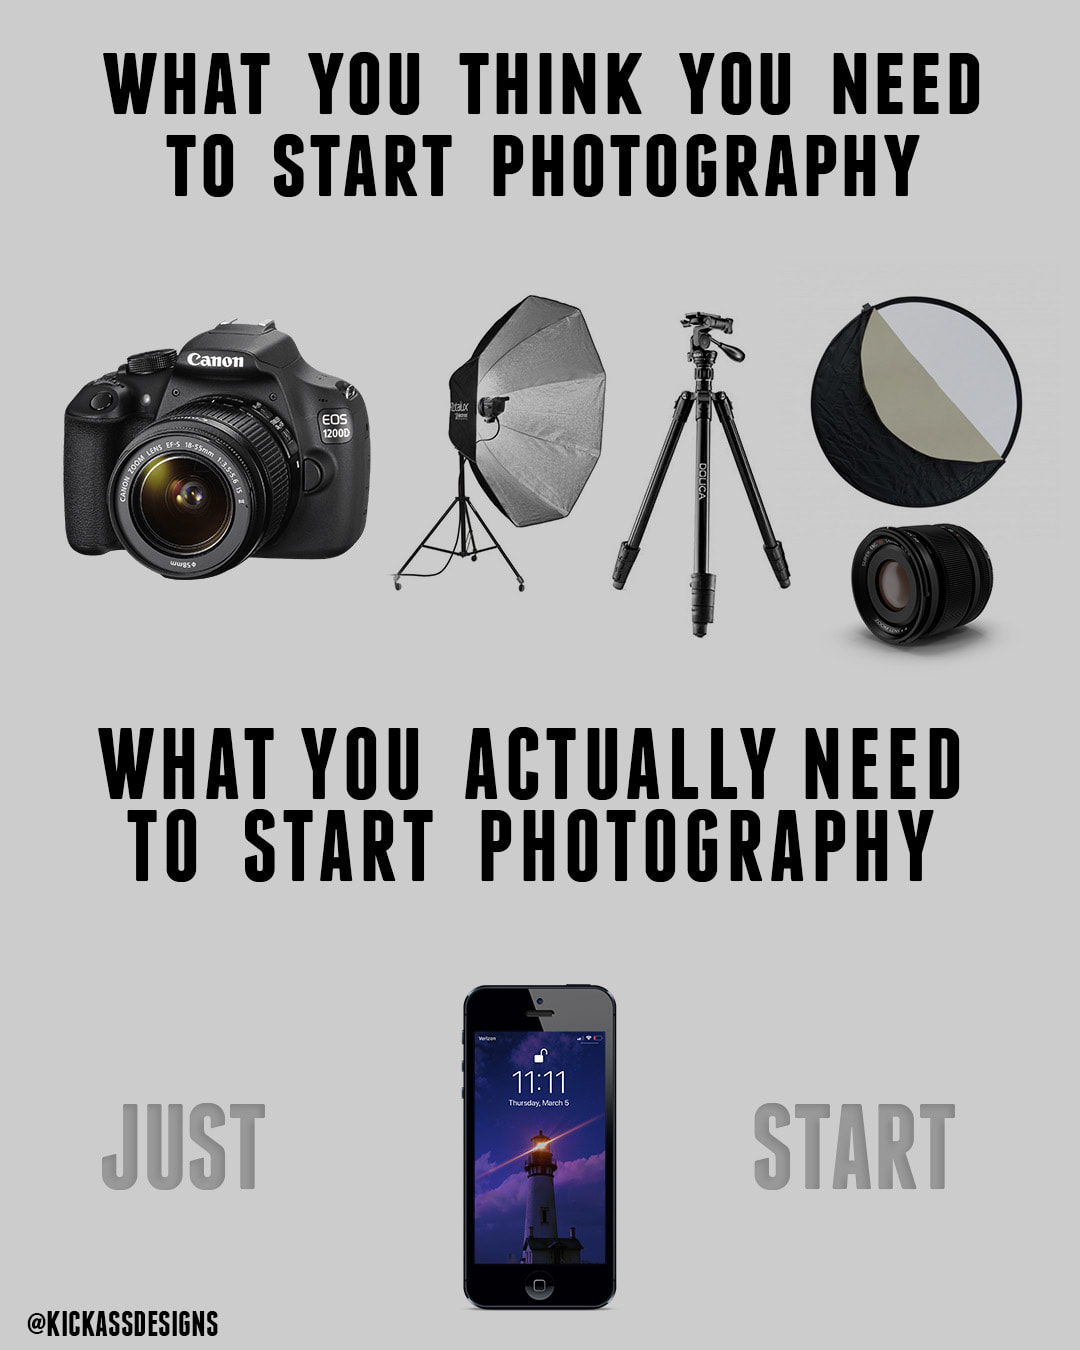 GEAR 👏🏻DOESN'T 👏🏻 MATTER (When you start out) Honestly, you do not need an expensive camera, fancy lighting, or an outrageous lens to get started. The key is just starting. Everyone has a cellphone with a camera on it. You have the tools you need right in your pocket. Some of the best creators on Instagram right now only use their iPhones. And as they say “The best camera you have is the one you have on you” I once had to use my cell phone for a real estate gig because my camera lens wasn’t wide enough for some shots and the client didn’t even notice. Don’t believe me? Checkout these 5 random Mobile Photographers who are killing it right now. 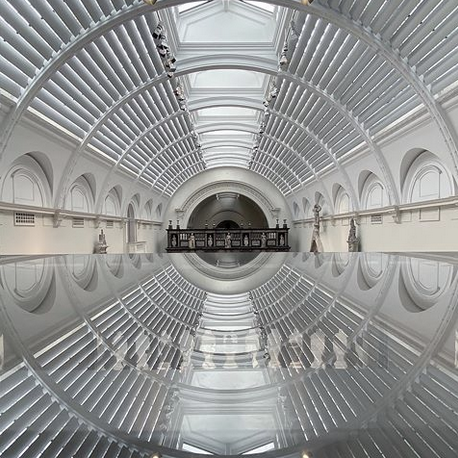 Taken by @britannia6009 on IG 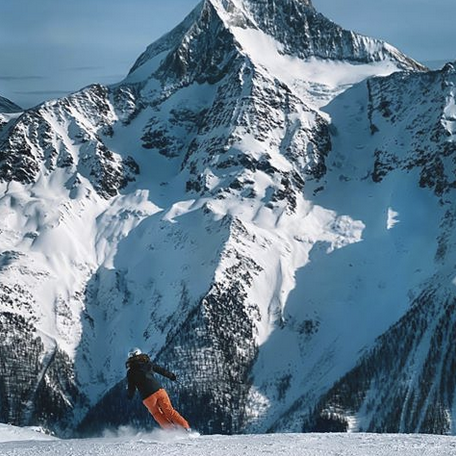 Taken by @the__phonetographer on IG 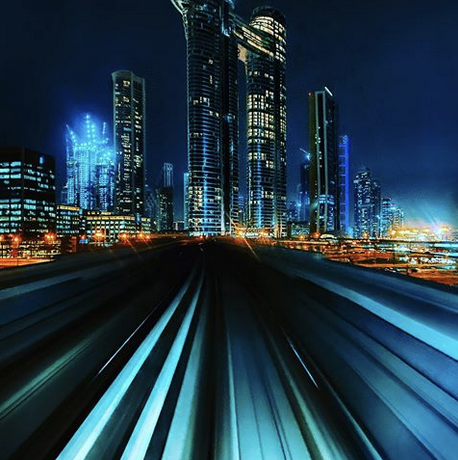 Taken by @jeromerafael on IG 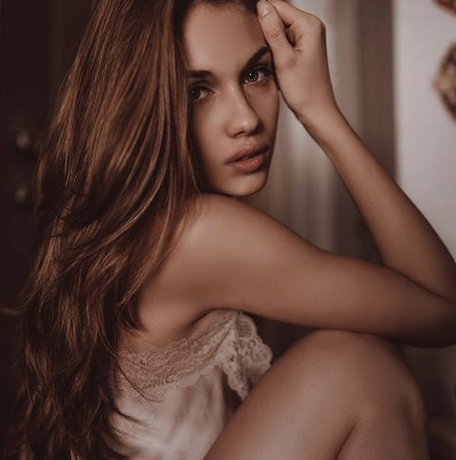 Taken by @enricabresciaph on IG  Taken by @barbaranebel on IG The gear you use doesn’t matter when you start out. It's about the story, the creativity, the composition, and the emotions behind the photo. What’s most important is just start. I shot with a cellphone for years before I got my first camera. Plus, if you don't teach yourself the principles and techniques of photography, it won't matter if you have a nice camera, because your photos will look like garbage. One of my most popular photos (The Pittock Mansion) was taken on my cell phone because that’s the only camera I had on me at the time. Professional photographer Sephi Bergerson shot an entire wedding on his iPhone 6s Plus and were the results as good as they would have been with a camera? No. But were the bride and groom happy? Yes. Did he get paid? Yes. and that's all that matters. Making your clients happy 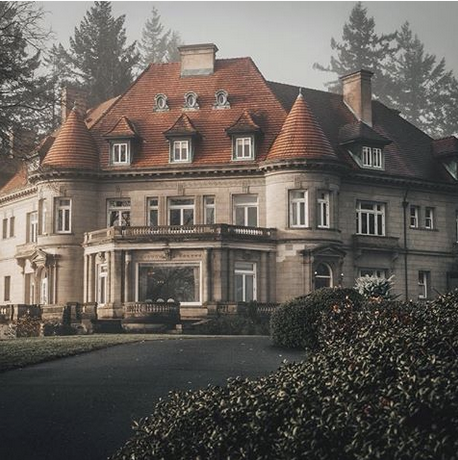 Taken by me @KickassDesigns on IG Same can be said for video. In fact did you know the Award-winning director Steven Soderbergh made his latest film Unsane using an iPhone 7 Plus, and the accolades the film has received suggest it was worth the risk. Did you know Lady Gaga‘s music video Stupid Love was shot on an iPhone 11 pro as well as Selena Gomez's Lose you to Love me video? And check out this epic snowball fight filmed by the great John Wick Director David Leitch on an iPhone 11 pro. Now before you show this to a gear head and they lose their mind over the thought of someone using a cellphone for business keep in mind I'm only suggesting starting with a cell phone and upgrading when you're ready. There is no dispute, a camera lens will always take Higher Quality images than a cellphone. i.e. more pixels. and a cellphone will never give you that great depth of field you can get with a camera.
Say it with me: The👏🏻equipment👏🏻doesn’t👏🏻make👏🏻the👏🏻photographer. Do you agree? With over 1 billion monthly users you would be a fool not to leverage Instagram to promote your brand in 2020. Unfortunately it’s a lot harder to grow a following than it used to be and it’s far more competitive but with the strategies and tips I give you in this article you will see growth in no time. In this article I lay out the blueprint to gaining new followers organically without spending money in 10 steps. These are easy actionable steps anyone can take to grow their Instagram following. Grow your Instagram Following Tip #1: Create Memes That Resonate with Your AudienceIf there's one thing you can't go a day without seeing on social media it's a meme. Meme's are popular right now, like, really popular. Probably why Instagram accounts like fuckjerry & mytherapistsays built their brand around memes. They have both massed over 4 million followers thanks to memes. Brands are starting to realize the power of witty Instagram memes, especially when it comes to building brand identity, driving product interest, and gaining more Instagram followers. Memes will typically have some kind of cultural relevance, they’re often clever or funny, and they typically feature a combination of text and imagery (this can be a photo, a GIF, or even a video). Take for example my meme on models choosing what to wear. It got 49 shares, 25 saves with a reach of 6,146 and 57 profile visits. These are the insights that matter. and they are better than most of the photos I post. Don't worry about likes as Instagram is taking those away soon anyways. Likes and comments don't convert to new followers. Shares, Reach, and Profile visits do.  Like my meme above your goal should be to generate a meme that is relatable to you audience, funny, and on brand. For example, my audience is mainly models, photographers, cosplayers, and anyone who loves photography. So any meme related to those 4 things will be relatable and preform alot better than if I posted a random meme about car owners or video games. All you need is a meme generator to get started. The App I use is Meme generator shown below. 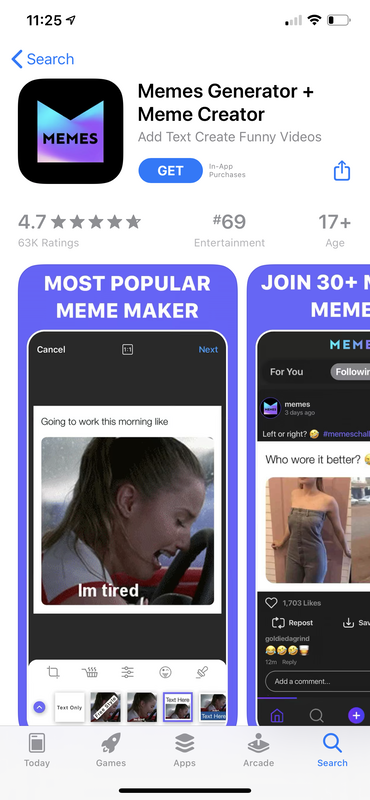 Grow your Instagram following tip #2: Collaborate With Kickass Brands The power of collaborating with like-minded and complementary brands is undeniable and will introduce your brand to a completely new and hopefully engaged audience you may have never reached on your own. When another Instagram user discovers you through a collaboration you’ve done they are more likely to crush that follow button because odds are if they found you from a collaboration they are the demographic you’re looking for. Collaborations with complementary brands will double your organic reach and are 25 times less expensive than digital advertising! Just make sure that your collaboration is mutually beneficial and both your audiences will benefit from your collaboration. 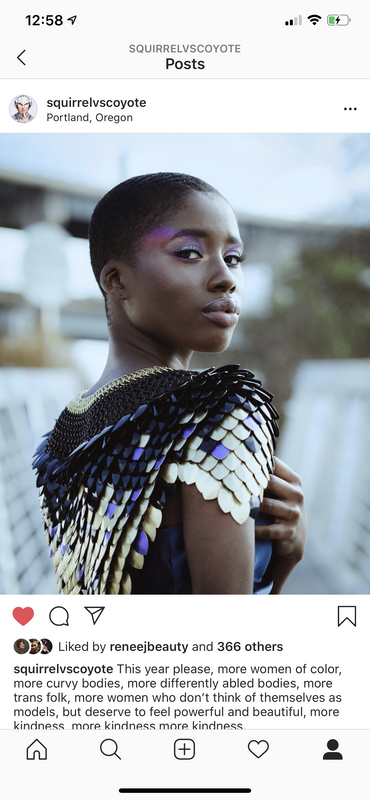 On brand collaborations for example: Because I shoot alot of fashion it makes sense that I would collab with influencers, models, designers, and makeup artists because their audience will be similar to mine and thus mutually beneficial. 7 things I look for in a collaboration (meaning not paid). What's their following like? Whats their engagement like? Will their audience connect with my work? Will mine connect with theirs? Do we have similar values? What kind of connections do they have? How skilled are they? I try to find people and brands that have a similar or bigger following than me but will collab with someone with little to no following if they are incredibly talented. The 7 things I look for are important. If you're just collabing with anyone and everyone with no intention you will fail in your industry, miserably. So how do you find people and brands to collab with? Do your research, join local facebook groups related to your industry like Portland Models. Search local hashtags like #portlandmodel or #portlanddesigner or portlandMUA Grow your Instagram Following Tip #3: Promote Your Instagram Content on Other Platforms This might be one of my favorite tips on the list. If you want to grow your Instagram following you should really promote your page outside of the Instagram app. I have gained a majority of my following this way. Promote your Instagram page on your website, email, Twitter, Facebook, YouTube, Pinterest, and Tiktok. My favorite platform to cross promote my Instagram content is Facebook groups. For example, I joined the Halloween 24/7 Facebook group because there is a big audience there who will most likely like my horror cosplay content. So when I post in that group I always link to my Instagram account to see more. I do this in multiple groups and every time I do I notice new followers who came from that post on Facebook. Grow your Instagram Following Tip #4: Get in front of the Camera More Don’t forget social media is still social and your followers want to see the person or people behind the brand. It’s extremely important to make your account as relatable and personable as possible not to mention photos with faces get 38% more likes on Instagram. 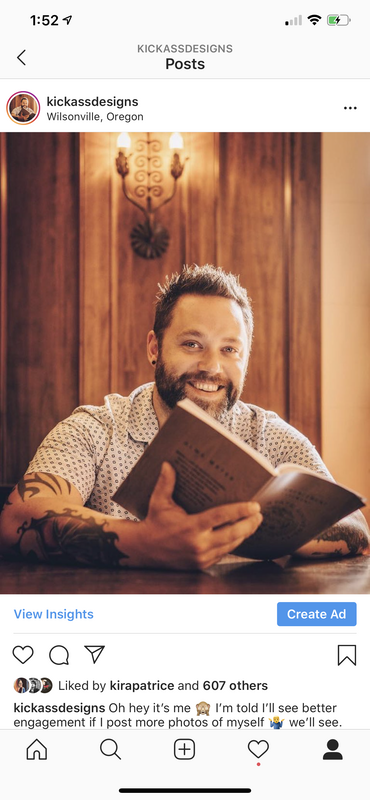 People want to know who is behind the brand just as much as your business and products. If you have a team why not have them post and share content about the business from their personal pages. You never know, your employees followers may have an interest in your brand and people love behind the scenes content. Grow your Instagram Following Tip #5: Post more Videos In 2014 the future of social media content was video well the future is now. Every brand is now creating video content for Tiktok, Youtube, IGTV and their feed to drive business because that’s what people want to see. Video has by far become the most popular form of content in 2020. IGTV is a great place to post your video content and behind the scenes. And if your video appears on the explorer page they appear four times larger than photos. Video content isn’t going anywhere so if you really want to start growing your audience you must start incorporating more video content into your social media strategy. Grow your Instagram Following Tip #6: Use Instagram Stories Instagram stories are a great place to interact with your audience. Post things that don't need to be in your feed like a new post, behind the scenes, polls, quiz's, shout outs, tips, funny memes, everyday life, and questions. 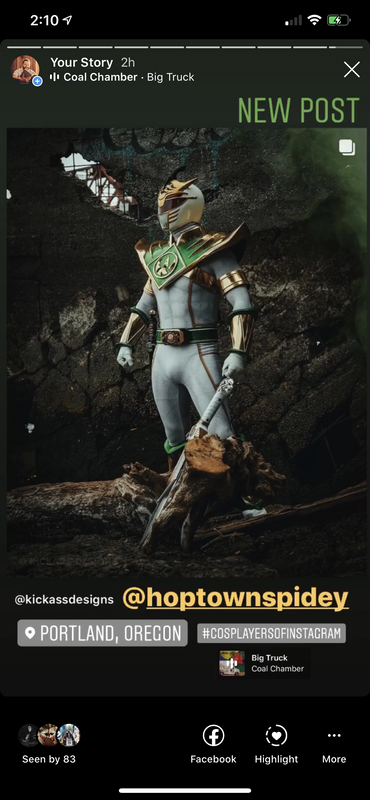 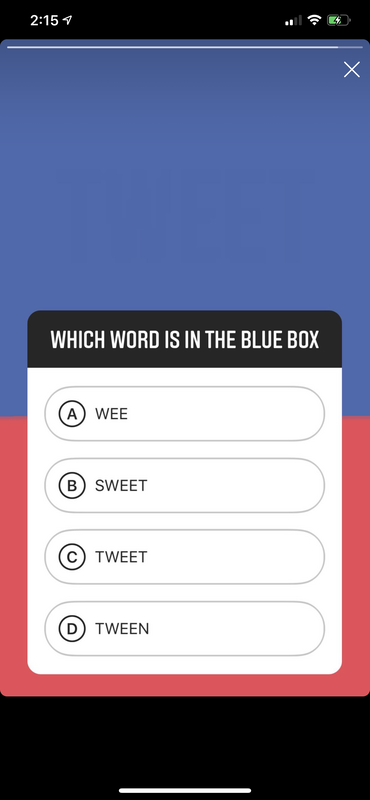   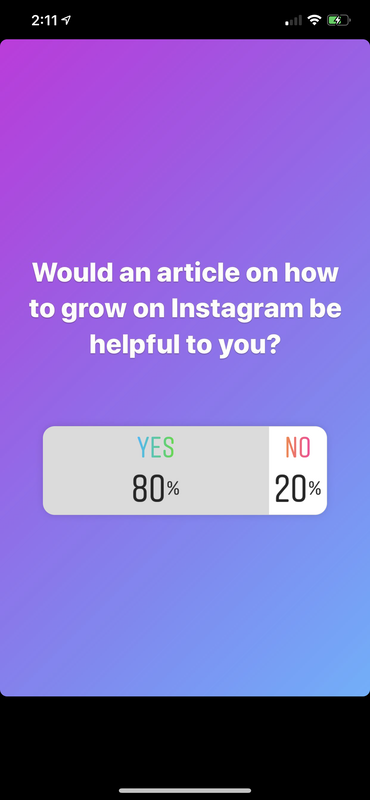 Give people a reason to follow you besides your work by posting more personal and fun daily content on your story. As far as photos go keep your feed business and your story personal. I'm also told that Instagram shows your feed to more people if people are interacting with your stories. Grow your Instagram Following Tip #7: Post long captions or multiple photos at once. The Instagram algorithm knows how long people are looking at your post. A post will be more successful the more time people spend on your post. If everyone is scrolling right past it you wont get much engagement or reach. Long meaningful or entertaining captions do better than short and sweet ones. And posts with multiple photos seem to preform better than one photo.  Grow your Instagram Following Tip #8: Check your Insights! How do you expect to find out what's working and what's not without data? The only way to get that data is through insights and the only way to get insights is by making sure your Instagram profile is set to Business or Creator. To check and or switch your profile open Instagram and go to your profile, then click the top right 3 bars, then click settings, then click account, and at the bottom you'll see your options to switch your account to Business, Personal, or Creator. Once you see your insights you can see your followers age, gender, location, and most popular time of day your audience is online. Most importantly you can see what posts were shared, saved, and commented on the most as well as the reach of each post. This information will tell you what your audience is connecting with. Grow your Instagram Following Tip #9: Use Hashtags! Potential clients are using hashtags to search for what you have to offer. This is how they find you. For example someone might be looking for a local MUA for their wedding so they might search #OrlandoMUA. The key with hashtags is to use quality over quantity. Instagram allows 30 hashtags but I have been told posts preform better with 9. but however many you use make sure they aren't all too popular. When choosing a hashtag Instagram tells you how many people are using that tag. Try choosing 4 relevant hashtags below 100K and 4 between 100K-500K and 2 Super relevant hashtags like #PortlandWeddingPhotographer or #PDXphotographer. I've had multiple people find me and follow me from searching #Portlandphotographer. 2 Apps I use for every post is Focalmark to find relevant hashtags and IG LineBreak for clean spacing between paragraphs. 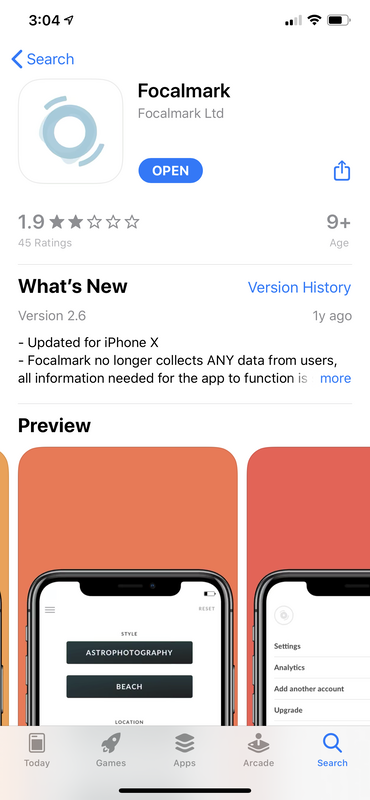 Grow your Instagram Following Tip #10: Always Comment Back I’ll never understand why brands with under 20,000 followers don’t comment back. If you’re getting under 100 comments on a post you can make the time to comment back to your community. I understand if you have 1 million followers being overwhelmed and not being able to comment back but for most of you this won’t be the case. Your fans notice if you never comment back and before you know it they will stop commenting altogether. Show your fans you appreciate them by at least saying thank you to each comment. Don’t forget you wouldn’t be anywhere without them. And go a step further by interacting with them on their posts. It is called social media for a reason, you can’t succeed without being social. If you have to time block 30 minutes each day just to make sure you are interacting with your community I promise in the end it will be worth it. Grow your Instagram Following Tip #11: Bonus tip, Stop buying followers. Buying followers and joining engagement groups and Instagram pods is the quickest way to be shadow band or even having your account disabled. All of these things are against Instagram rules and guidelines but more importantly they just don’t work.
It’s blatantly obvious when someone has purchased followers, I see it all the time. 100,000 followers with little to no engagement on each post makes your account worthless. You’re not fooling anyone and it’s not helping you gain clients. So stop it. Not to mention purchasing followers is a waste of money. I know this all may seem like alot of work and it is but if you're trying to succeed in your industry you must grow your reach and these tips will help you do that. Let me know in the comments below what tip helped you the most or if you have any to add :) Connect with me on Instagram HERE |
Author Lance Reis
Most Popular Articles
27 Posing ideas for women
27 Posing Ideas for Men Location Scouting 33 Must See Castles in the US How to grow your Instagram Low Light Photography Tips Photography for Beginners Free Resources Take Better Cosplay Photos Categories
All

|
 RSS Feed