Most Popular Articles


 In this article I cover shooting portraits in low light situations. I love shooting in the dark because it forces me to be creative and use the light I have available to me but also creates a lot of obstacles to overcome. Getting a sharp image completely in focus with little to no noise is difficult when shooting in low light with no flash but I hope with these tips it will be a little easier next time you go and shoot in the dark. Photographing in low light situations presents many obstacles but if you use the tips in this article you can easily overcome them with confidence on your next shoot. All the photos below were taken by me. Make sure to connect with me on Instagram HERE Let me know if this article helped in the comments below. Find a light source Let's start with your light source. Low light photography doesn’t mean no light photography, you will always need some source of light. The biggest mistake I see photographers make in low light situations is having their subject turn their back to the light source with nothing to light their face which is great if you want a fun silhouette but otherwise you will want your light source as close to your subject as possible. whether your light source is a street lamp, Hotel lamp, arcade, neon sign, or flame from a lighter position the light source either to one side of your subjects face or directly in front of them behind the camera so it lights their face. 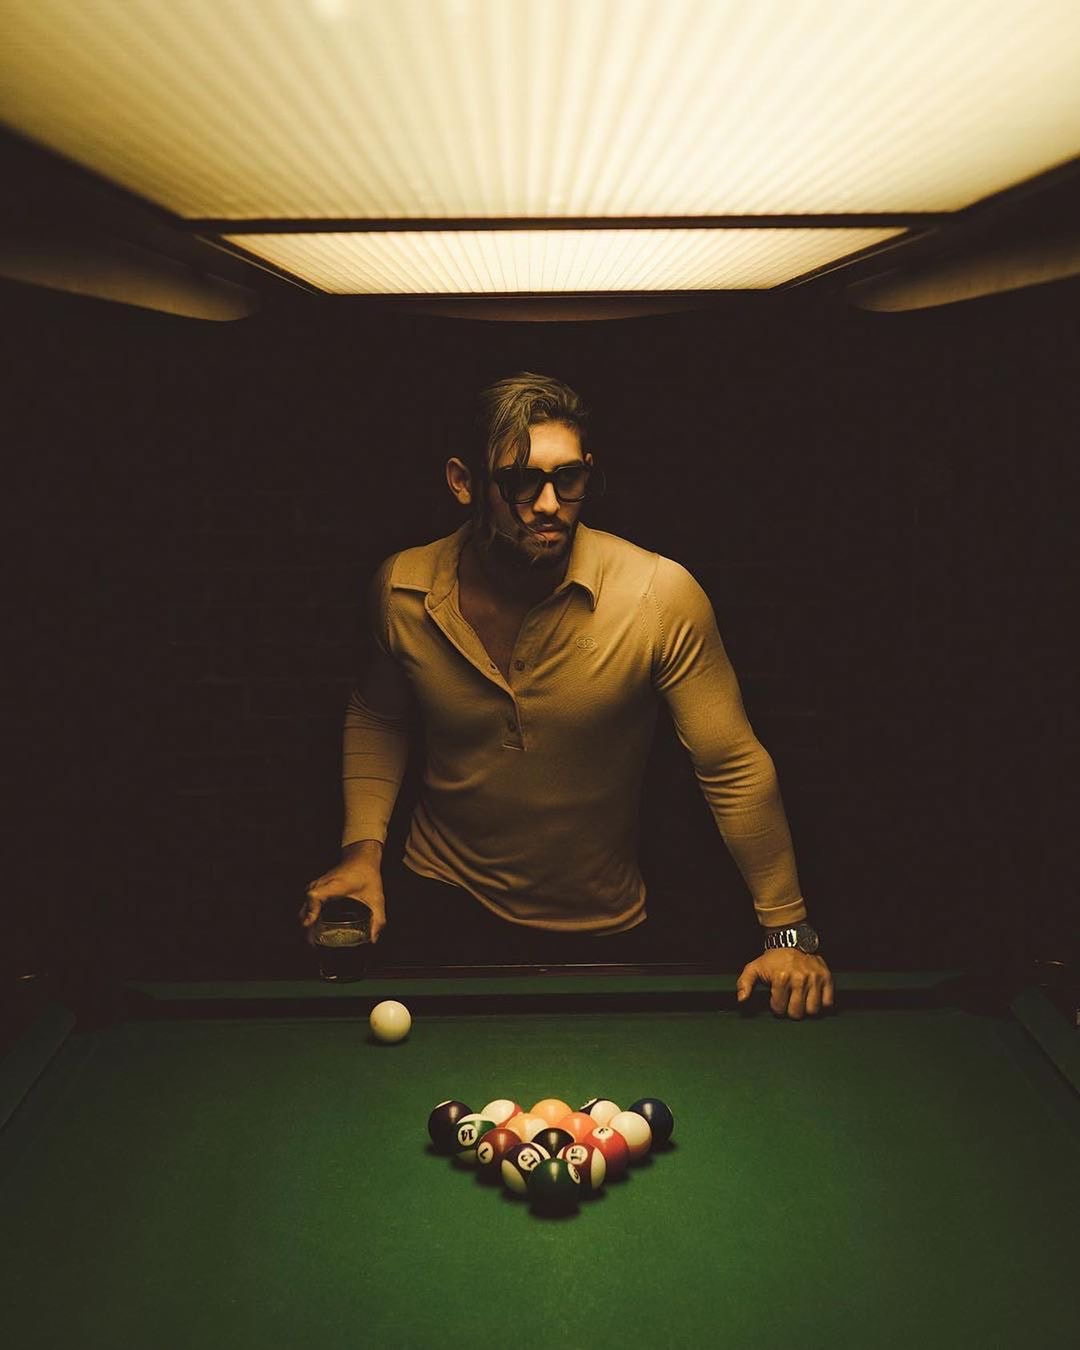 Model: @kamyar_jahan on IG Neon Lights whether you're using neon bar lights or an arcade try placing your model to the side of the light and have them look towards the light or straight at the camera. Play around and notice how the light effects their face. Keep an eye on those harsh shadows. Make sure your subject is as close as possible to the light source. Adjust colors as needed in post. 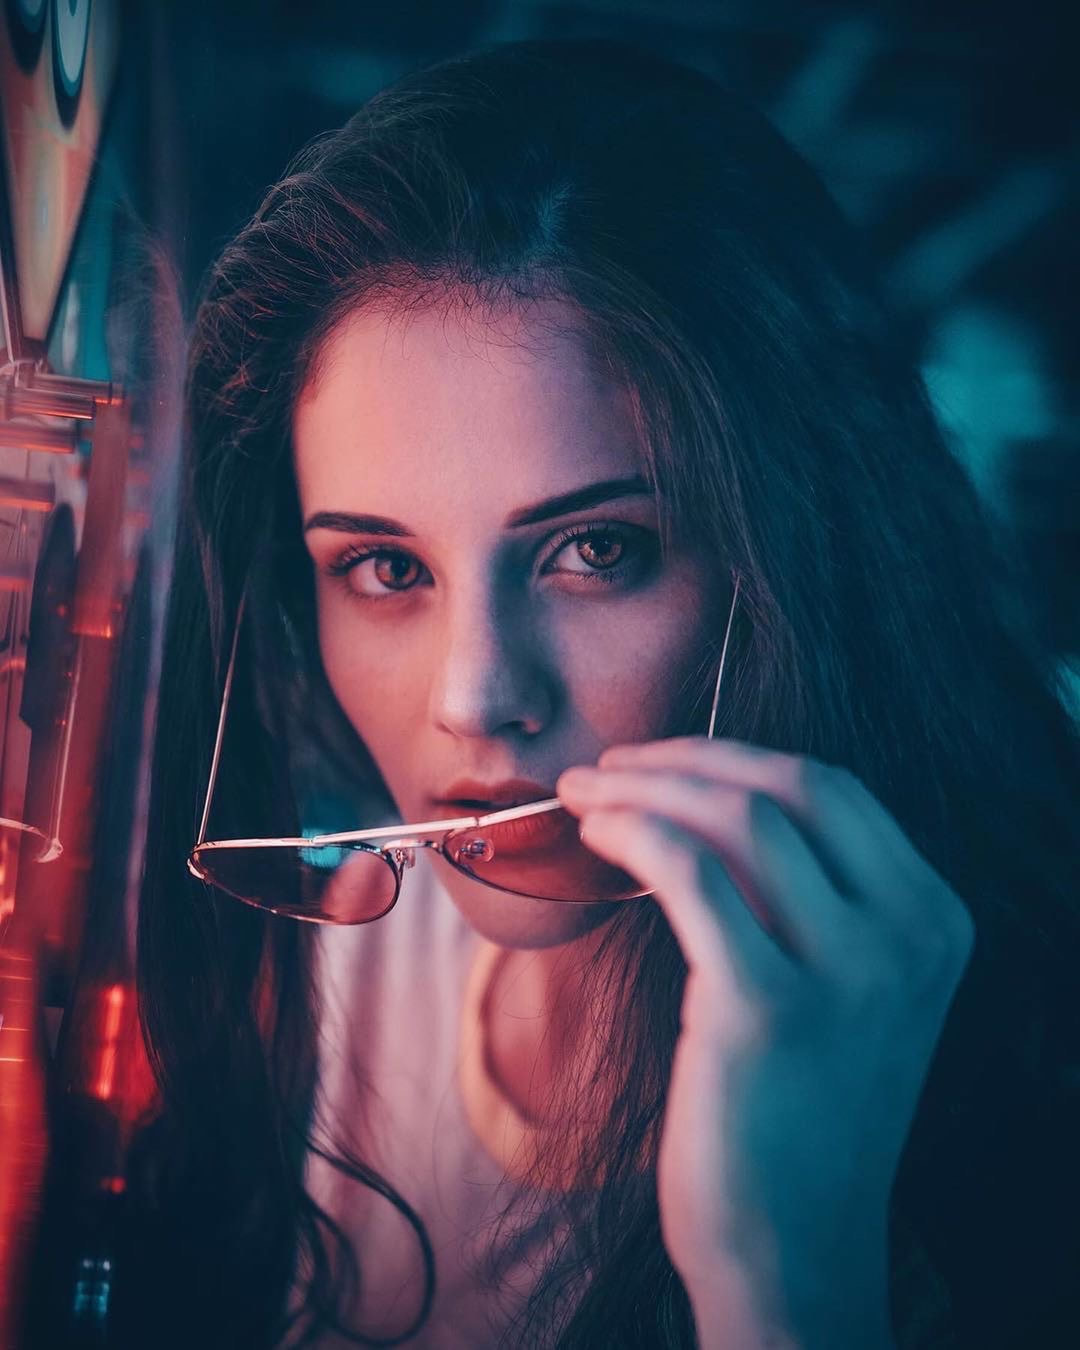 Model: @elloruthie_ on IG Model: @elloruthie_ on IG 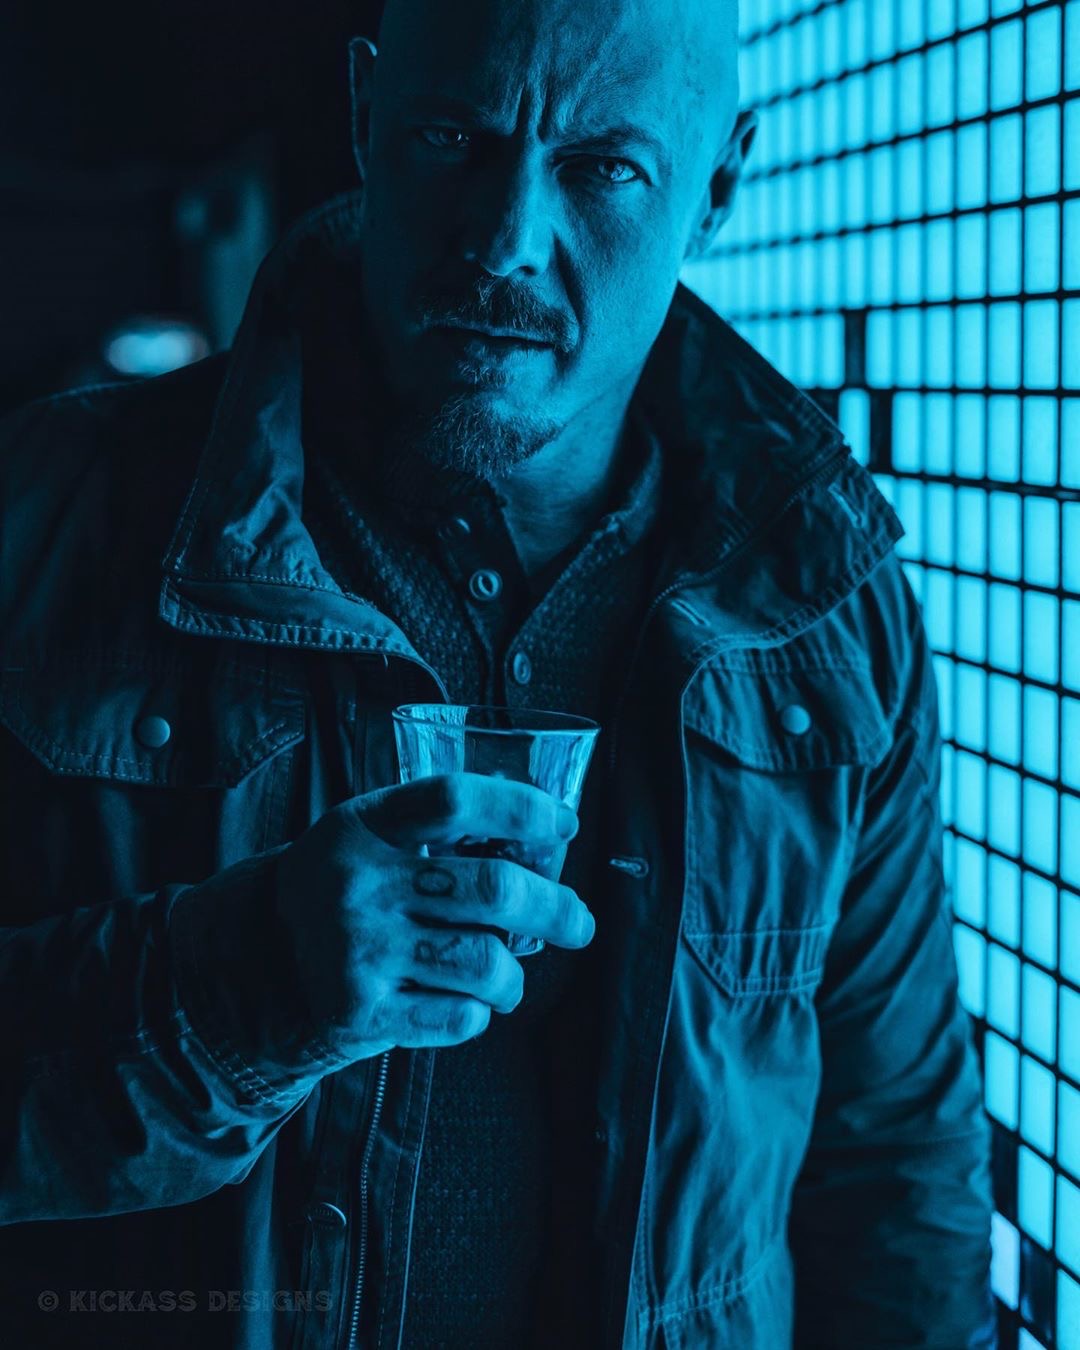 Model: @starttheworld on IG 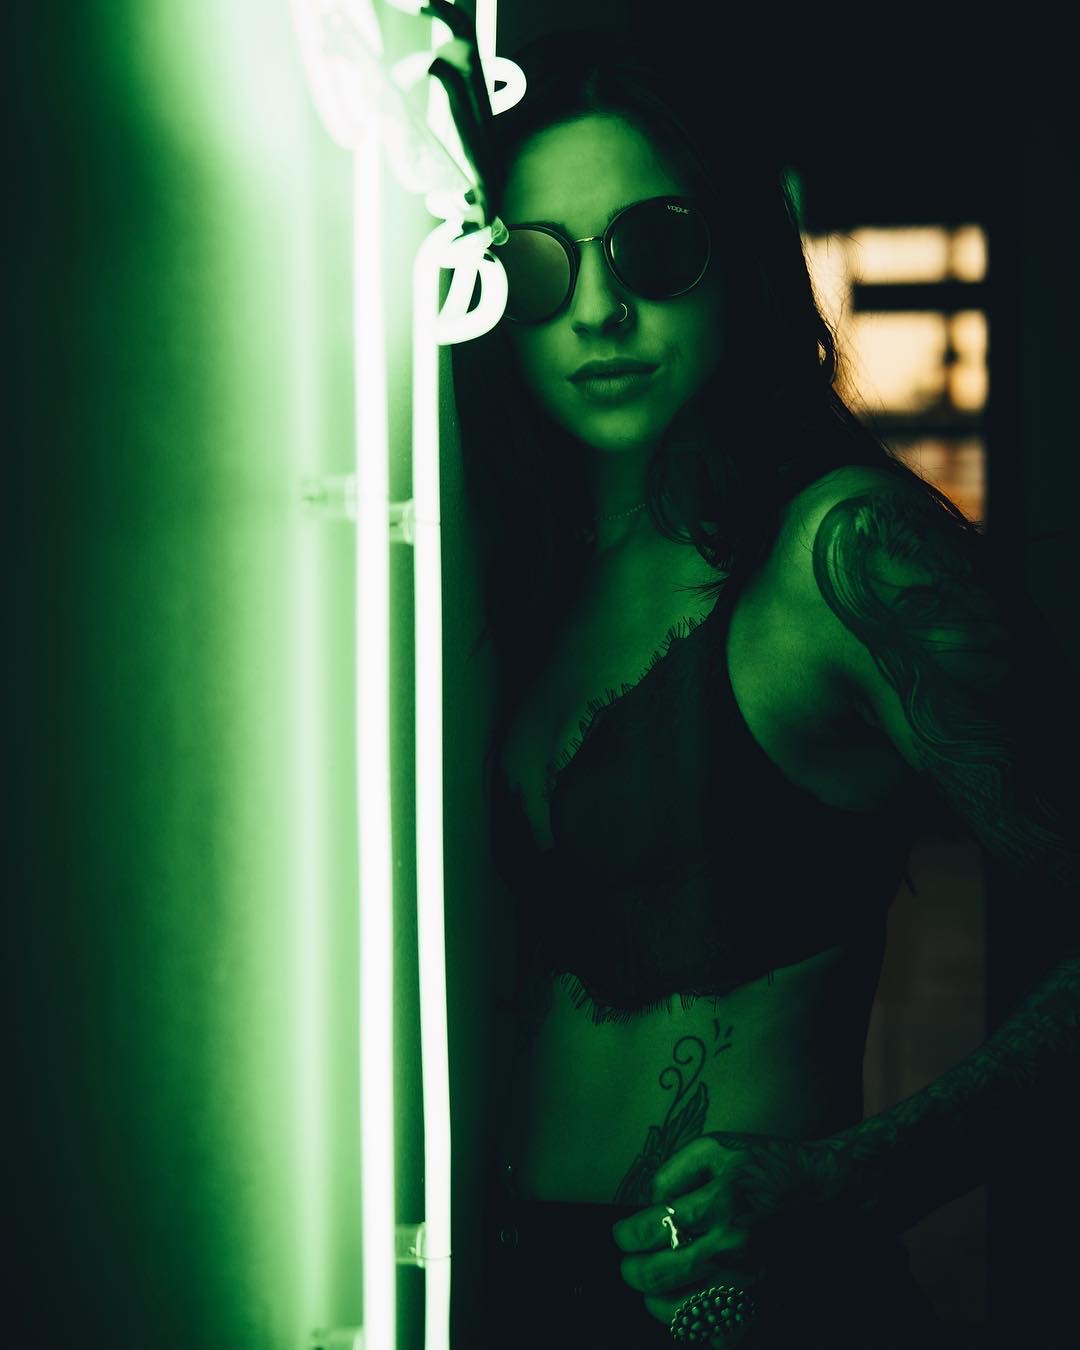 Model: @aliciangates on IG The key to shooting with neon is having your model as close to the neon as you can get. If you have the Neon behind them and nothing to light their face it will be too dark. For the example below I had my model stand as close as she could to the arcade screen because it was producing a good amount of light. Settings used were: 1/200Sec /// ISO 640 /// F3.2 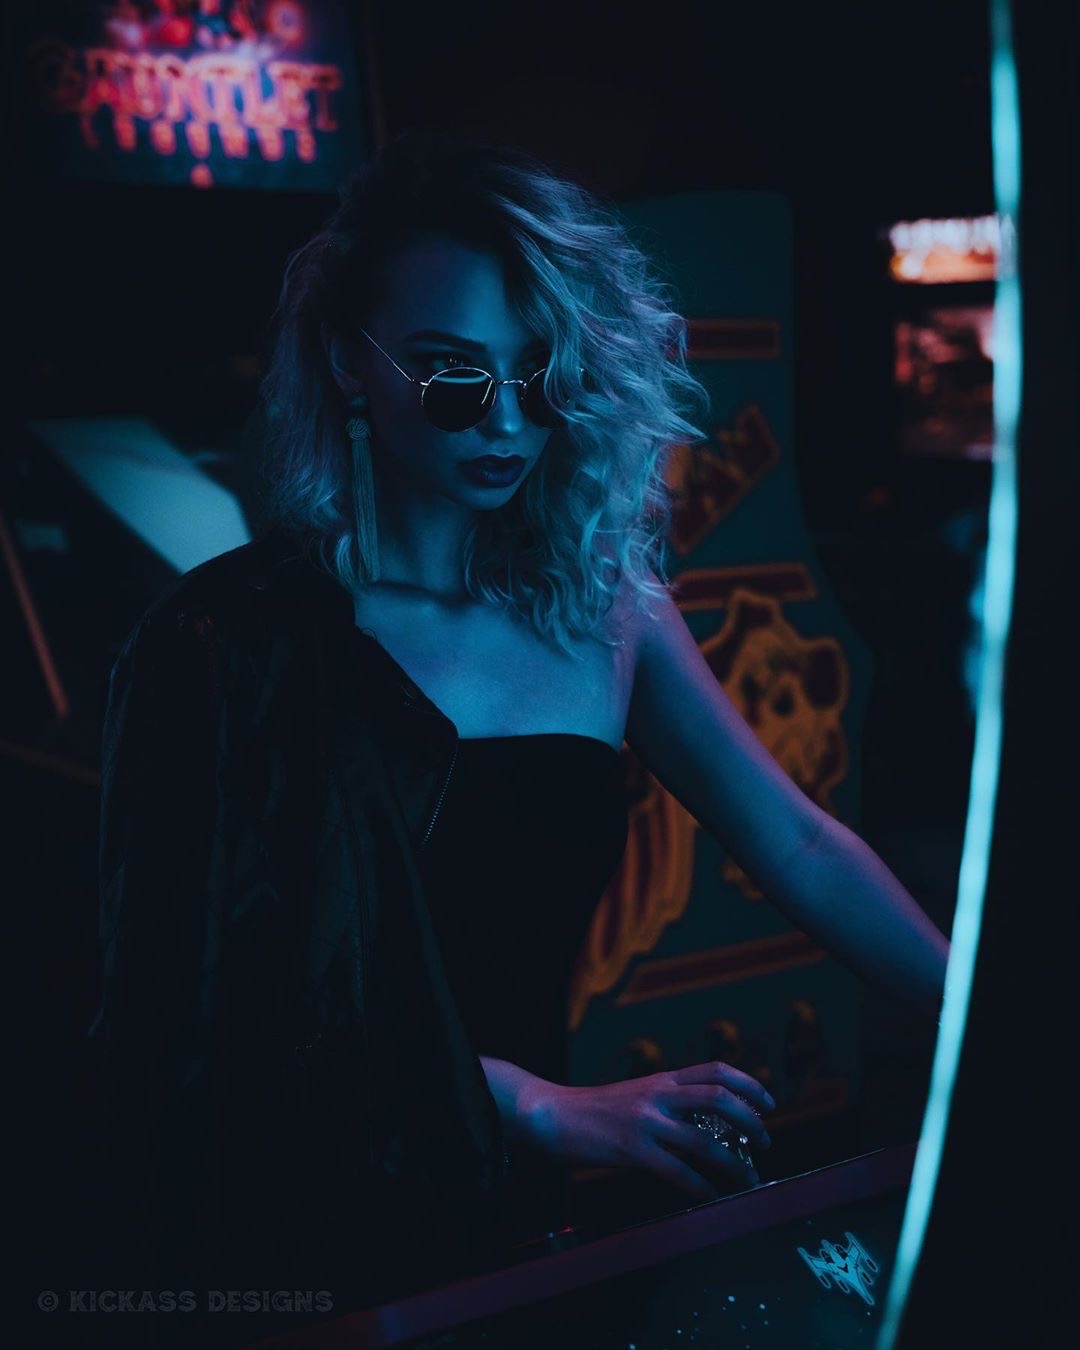 Model: @thehannahhawkins on IG   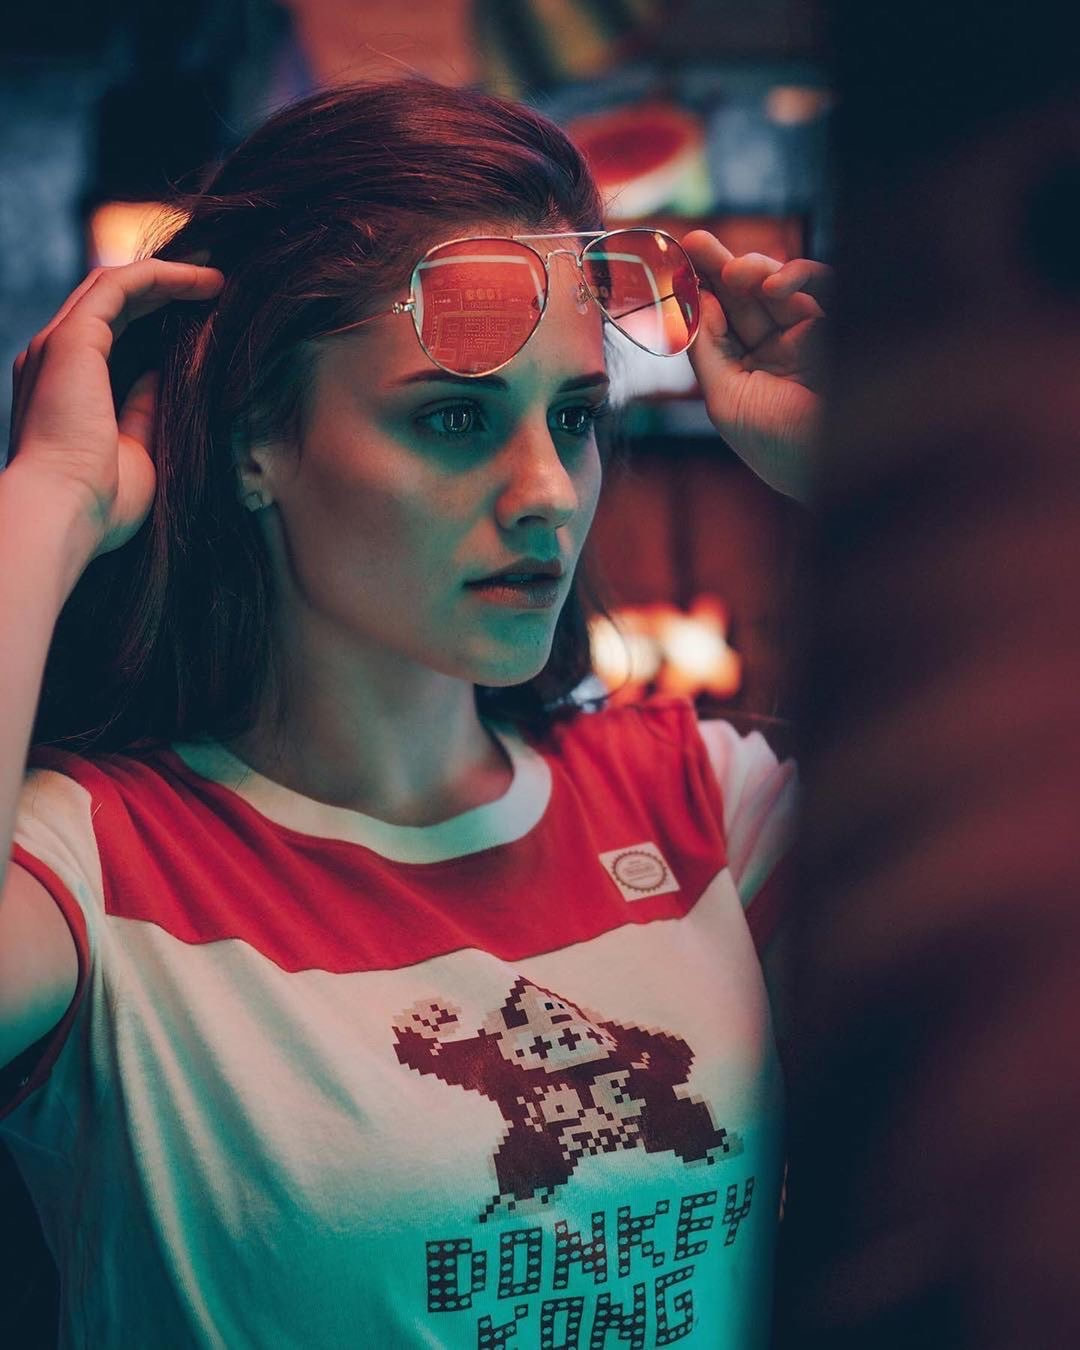 Model: @elloruthie_ on IG Use Sunglasses Mix it up. Sunglasses can make for some fun reflections with neon lights. 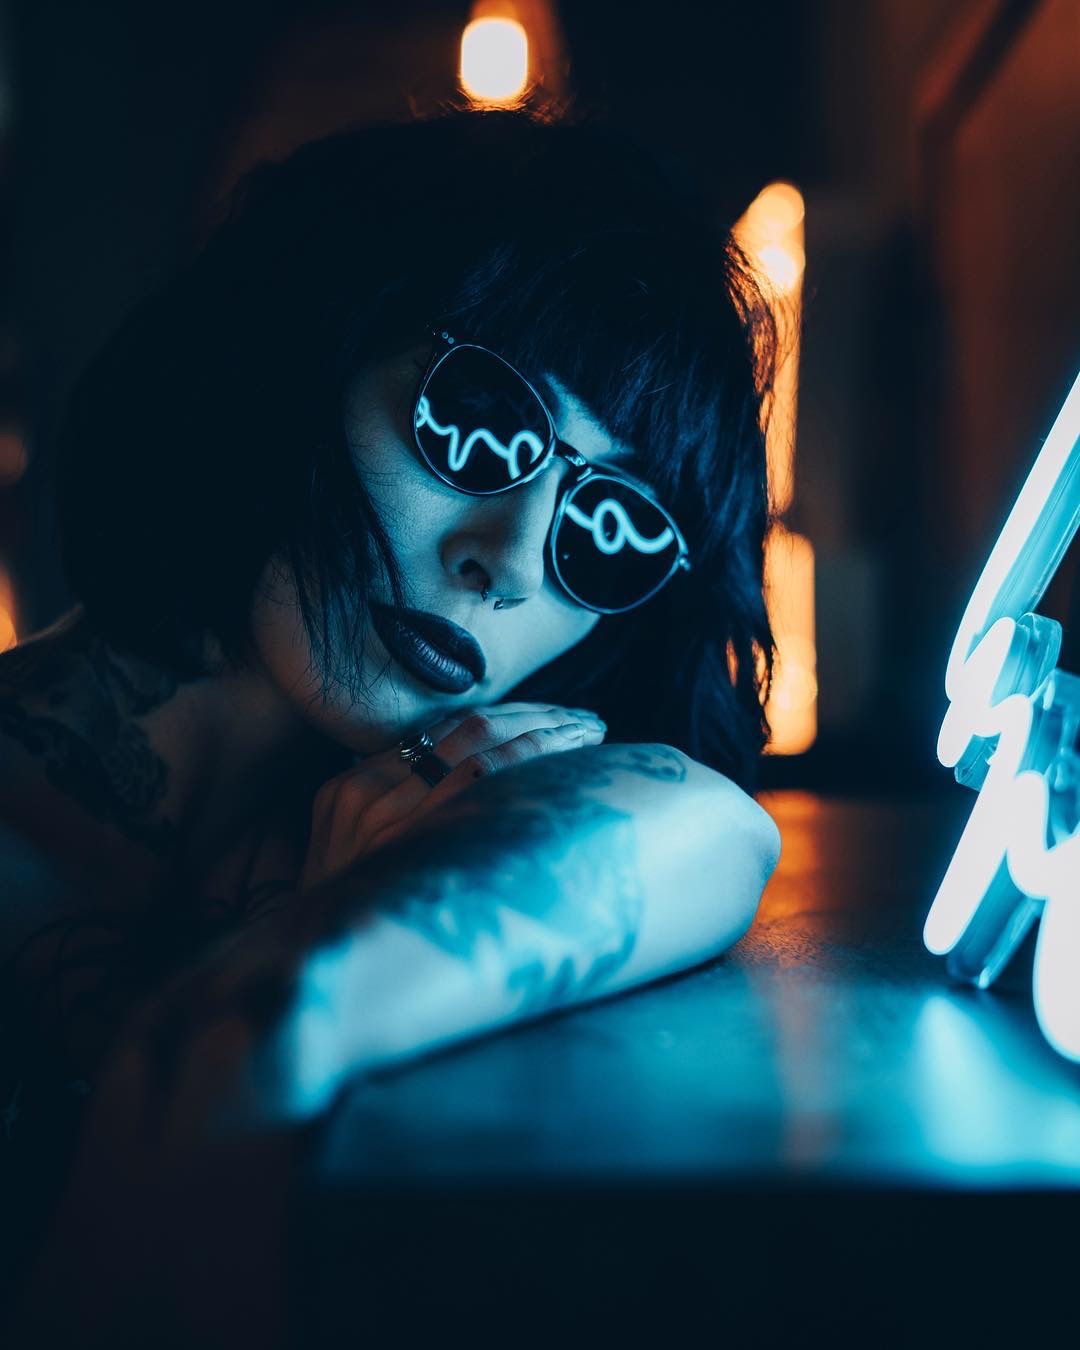 Model: @morbid_lady on IG 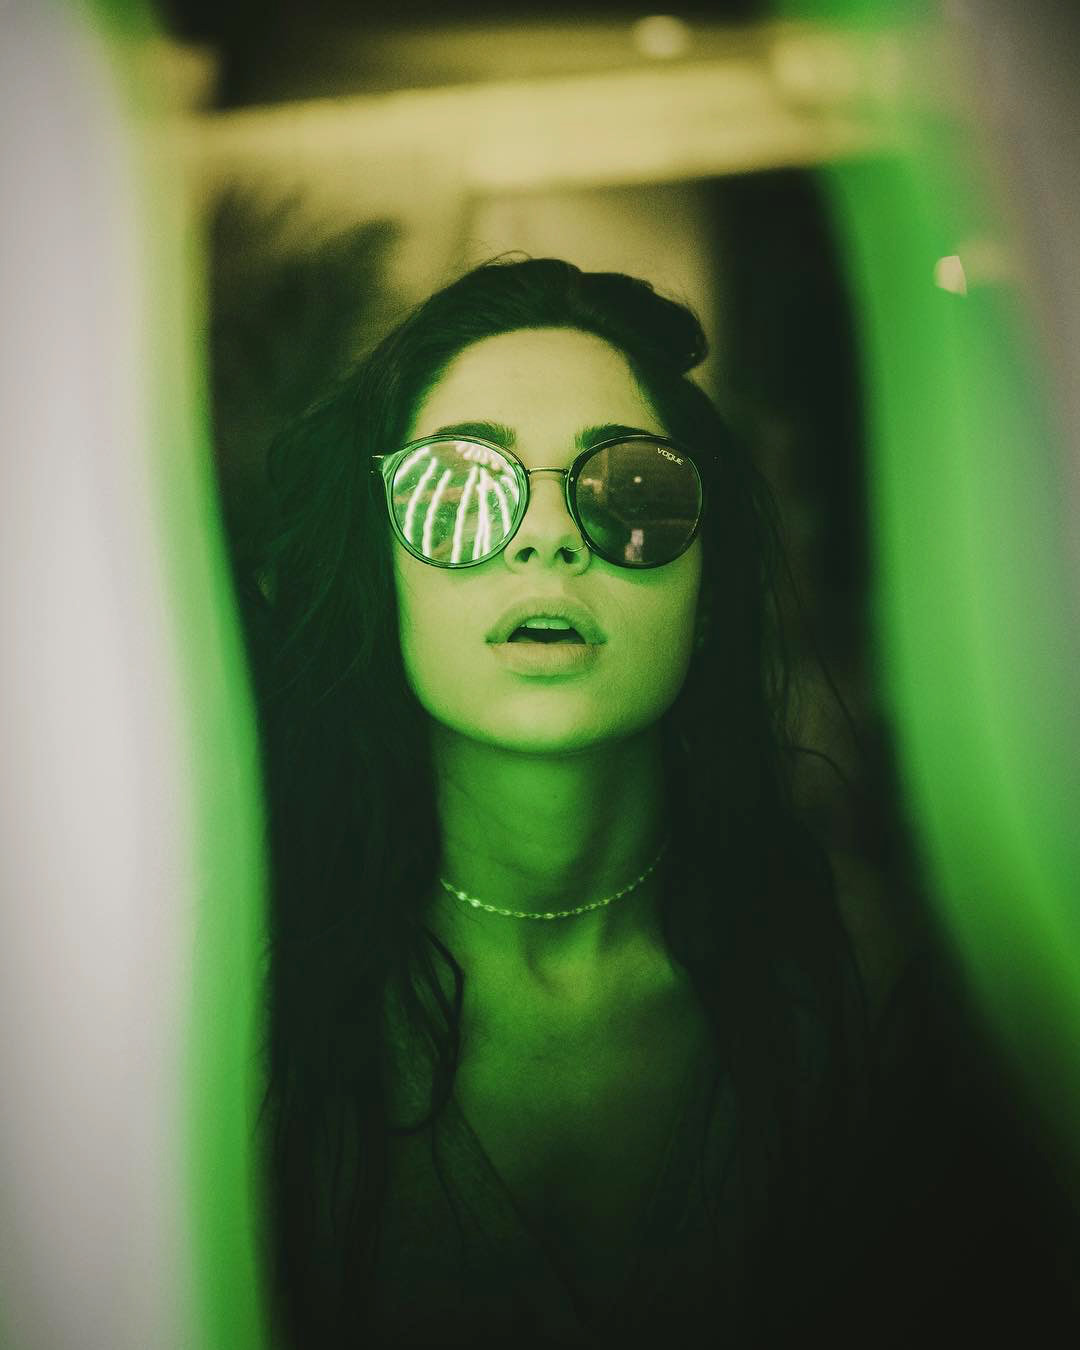 Model: @aliciangates on IG 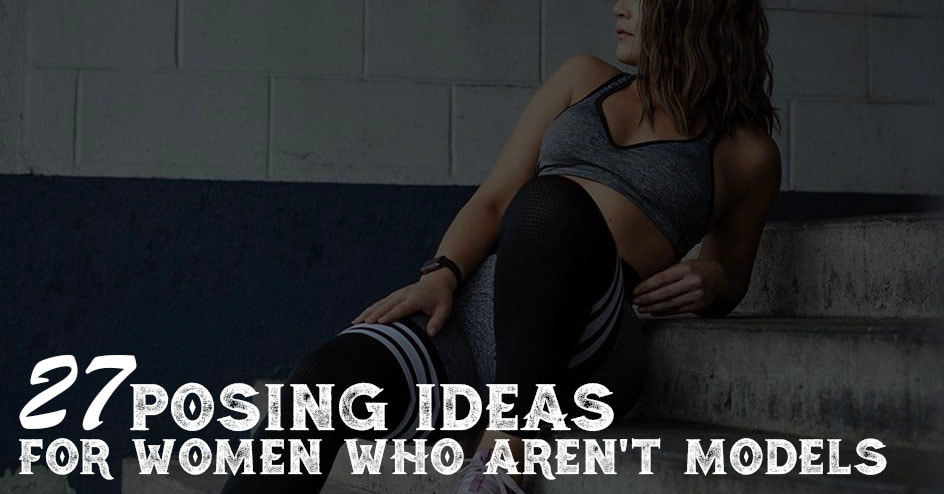 City Lights If you're shooting in the city at night there are a few options you can use to light your subject. You can use a lighter or street lamp for dramatic lighting or a neon bar sign in a window as we did below.  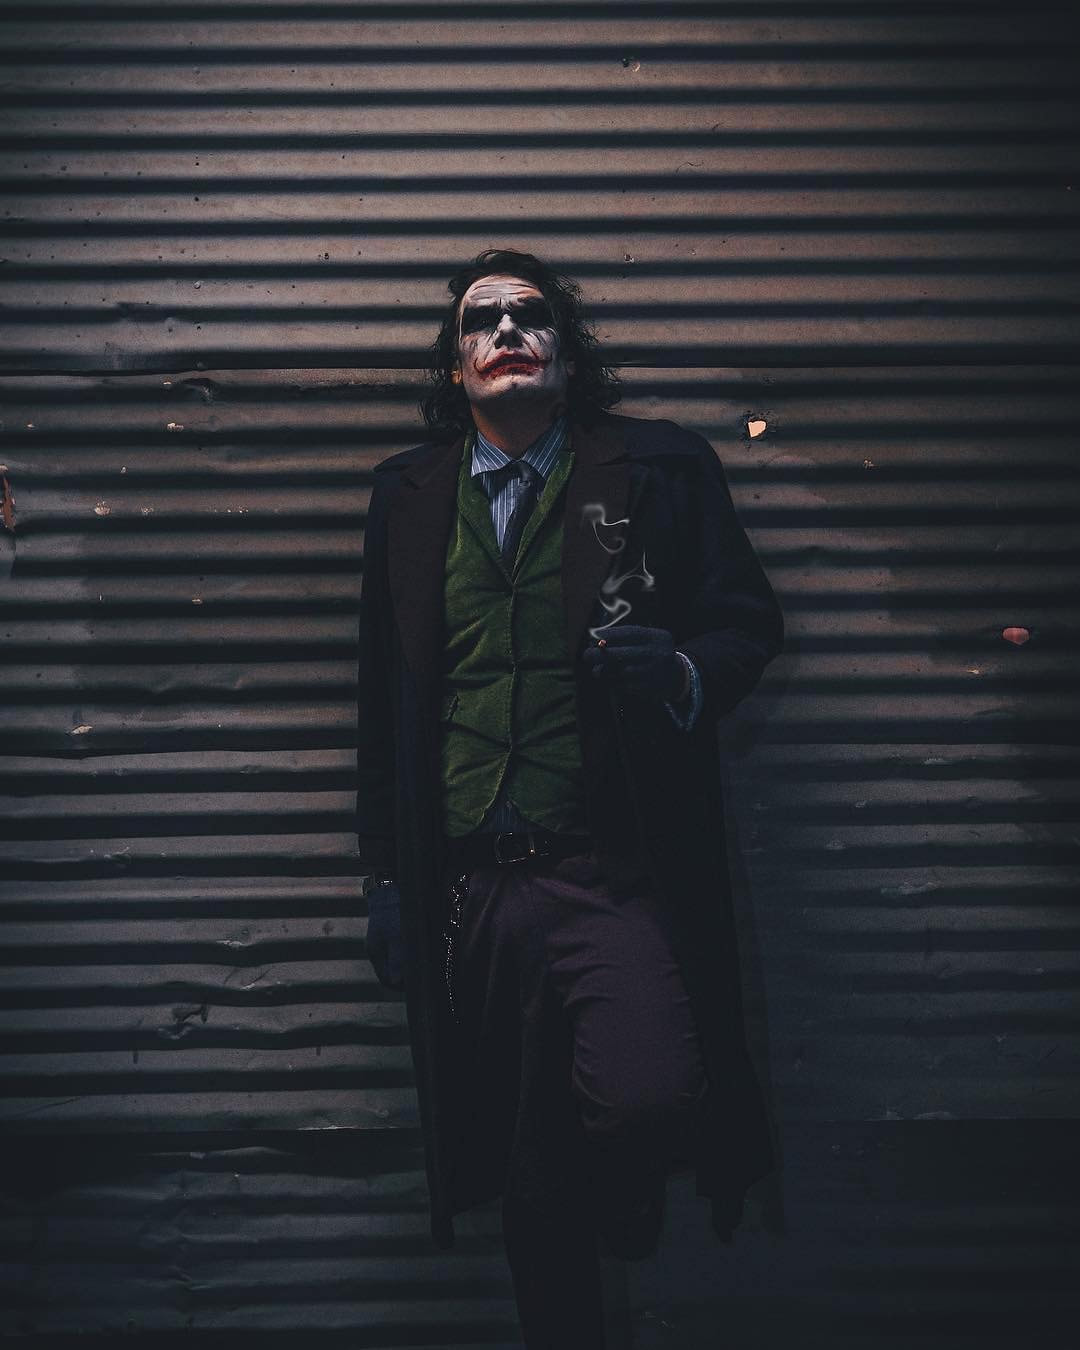 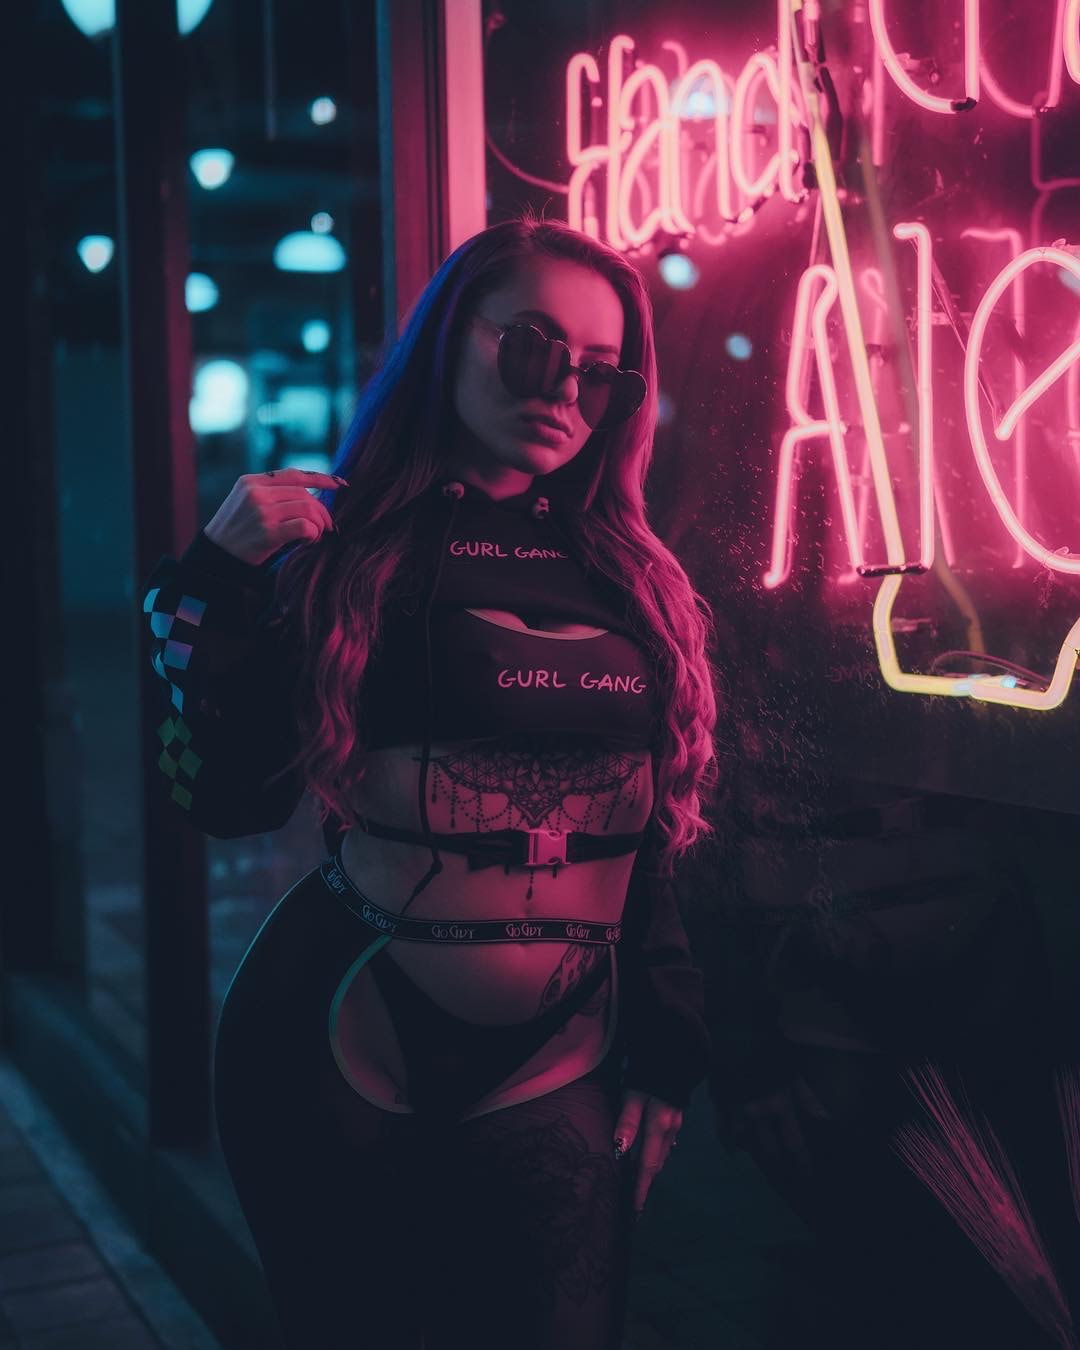 Model: @w33dhead on IG If there's a lamp, use it. The example below was shot in a hotel room at night using the standing lamp next to the sofa. If a lamp is all you have just point it towards the model and make sure it's as close as possible. Have your model look towards the light to reduce harsh shadows.  The Silhouette Try having the light source behind your subject with no light in the front to create a fun silhouette like we did below. 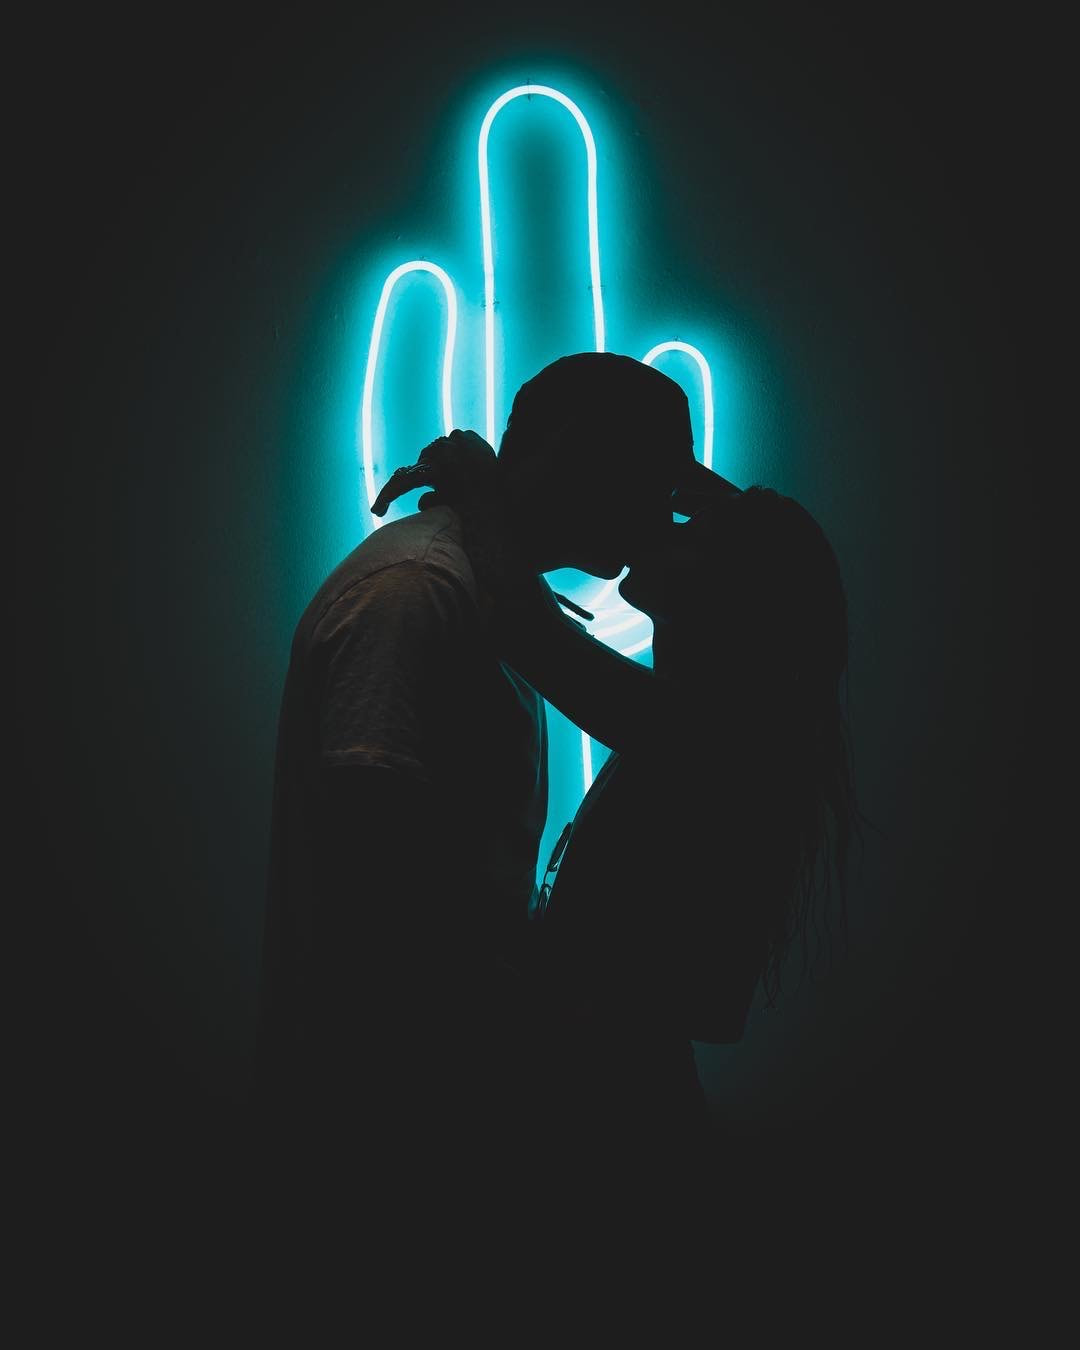 Model: @aliciangates on IG  Fun effects with a Prism On Amazon you can find a variety of glass and prisms to hold up to your lens when shooting with neon lights around. The reflections make for some fun effects as shown below but definitely takes practice. 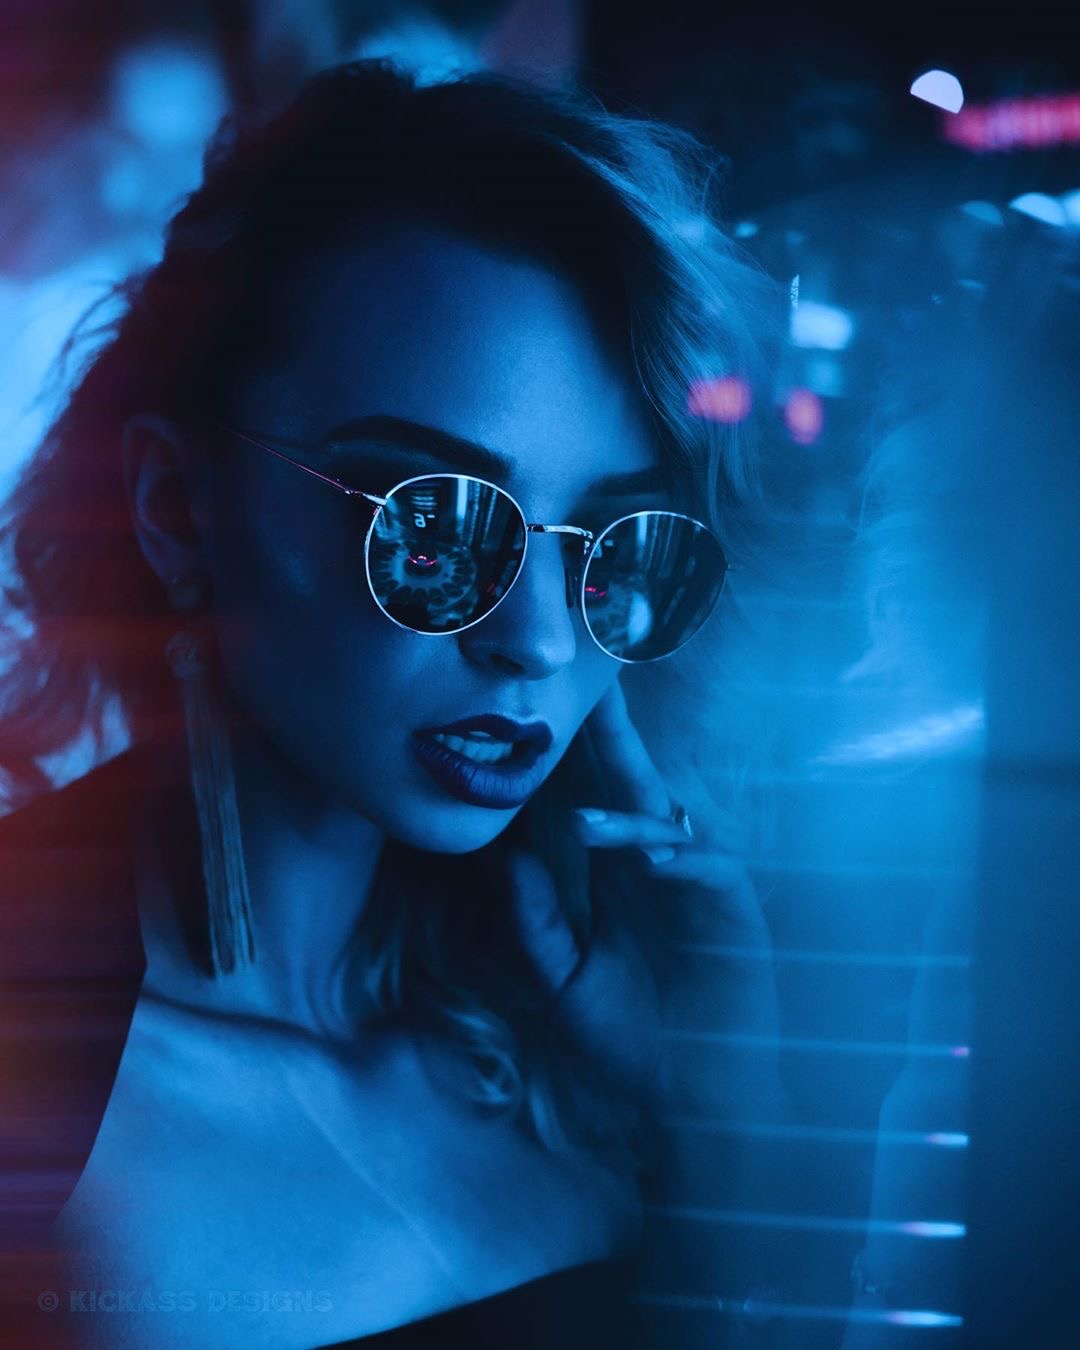 Model: @thehannahhawkins on IG 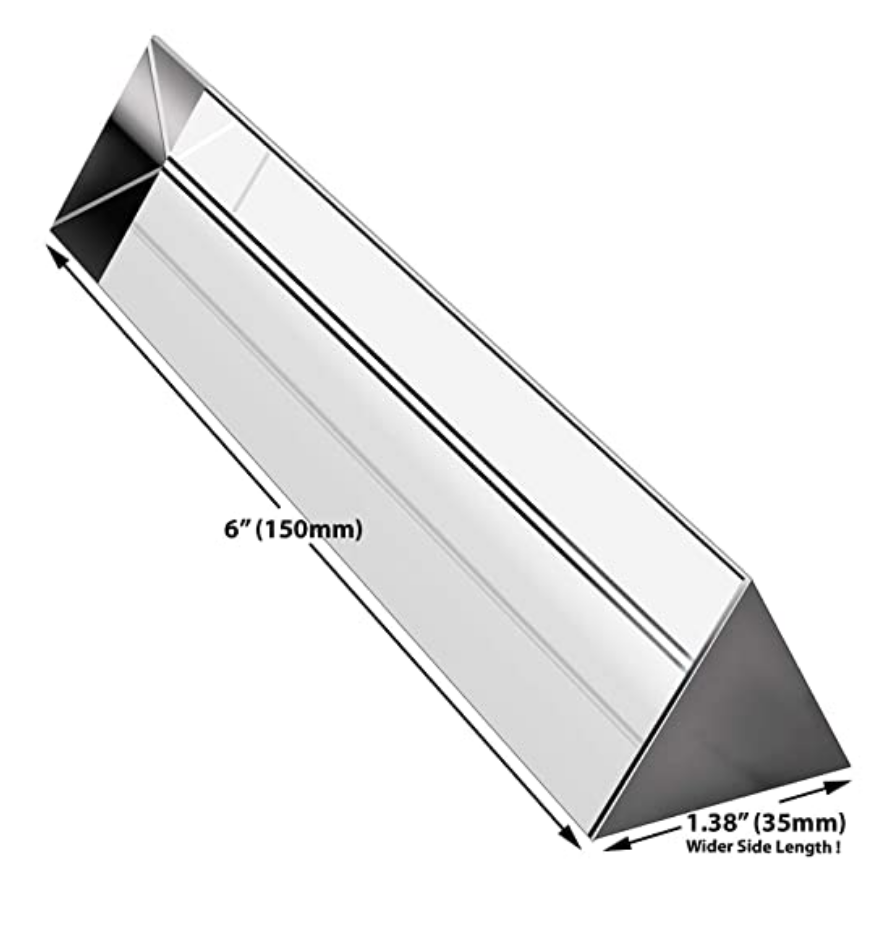 Shoot in RAW Why you should be shooting in RAW VS JPEG: I am blown away by the amount of photographers that don’t shoot in RAW or even know what it means. If you’re a professional photographer you are doing your self and your clients a massive disservice by shooting in JPEG. When shooting in a format like JPEG image information is compressed and lost. Because no information is compressed with RAW you’re able to produce higher quality images, as well as correct your shadows and highlights that would be unrecoverable if shot in the JPEG format. Recovering shadows is absolutely vital when shooting in low light. Cameras will vary but a trick you can use to pump up shadows dramatically without getting grain is keeping your ISO below 1,000. More on that below. On the flip side you have your brightness. Levels of brightness are the number of steps from black to white in an image. It’s very simple, the more you have, the smoother the transitions of tones in your photos will be. You want smooth transitions. For example JPEG records 256 levels of brightness, and RAW records between 4,096 to 16,384 levels! 😳 The effect this will have on your images is MASSIVE. Just remember shooting in RAW format lets you make more adjustments like exposure, blacks, fill light, recovery, detail, contrast, & brightness to your image in post (with a program like Adobe Lightroom) without a significant reduction of quality, because there’s more levels to work with that you don’t get when shooting in JPEG. Most importantly as Professionals we should be providing our clients with the highest quality possible. That means shooting in RAW. Understand ISO All you need to know about ISO is the Higher the number the more light your camera will bring in. But there's a caveat to ISO you need to know. The higher you go the more grain you will get. However grain isn't necessarily bad. Some photographers want that grainy look. That's their style. But if that's not the look you want it's best to keep your ISO lower than 1,000. That being said every camera is different and new cameras can go much higher with less grain than the older ones. For instance my SonyA7iii can shoot with ISO at 1,000 with no noise but my older SonyA6000 could only shoot at ISO 500 with no noise. It's best to play around with your camera in a dark location and find the sweet spot for your specific camera. Open the photos in light room and check the histogram to see what settings you used for each photo. Find the photo with the highest ISO but still has little to no grain. Remember that number and try your best to avoid going over it Last thing you want is to find out you just did a shoot for a client and all your photos are too grainy. 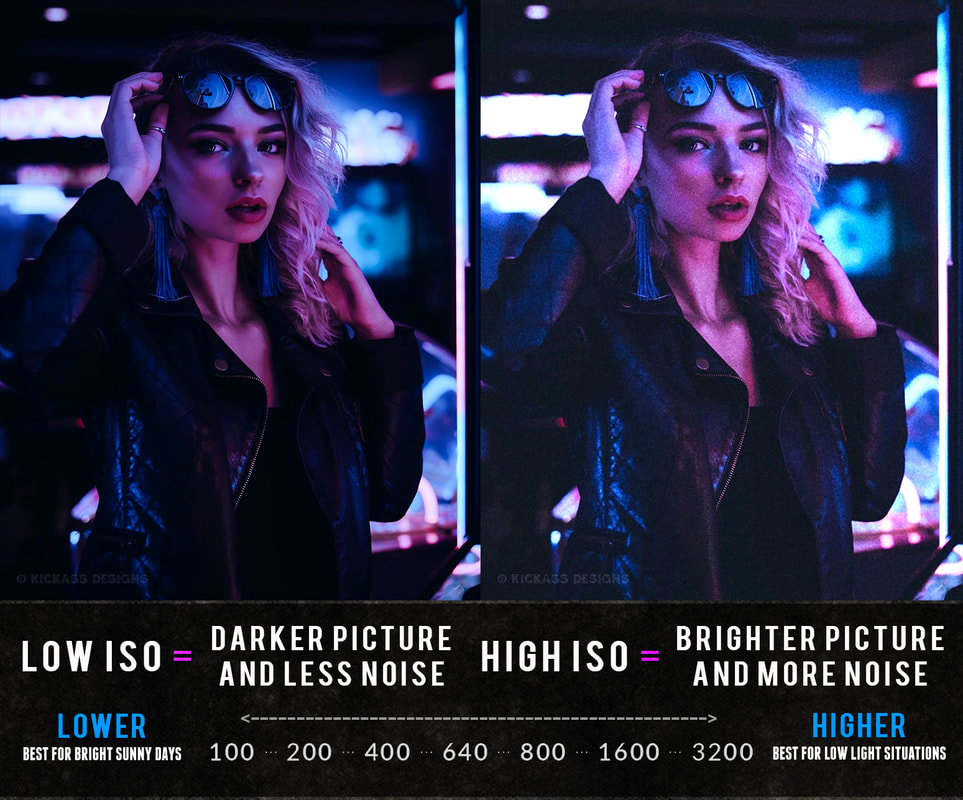 Keep your shutter speed low Without getting technical all you need to know is the lower your shutter speed the more light is let into the sensor and thus the brighter your image will be. The caveat for shutter speed is this: The lower you go the more sensitive your camera gets to movement and thus the blurrier your photo will be if any movement is involved. This means movement of the camera itself and the subject you're photographing. I highly suggest if you go under 1/100th of a second you use a tripod because anything below that and your camera will detect movement and the photo wont be sharp. Just remember your shutter speed effects brightness, darkness, and blur. A tripod is a MUST for slower shutter speeds. So is keeping your model perfectly still. Any movement from your camera or model under 1/100th of a second and your picture wont be sharp.  Use a Tripod As I mentioned above, when shooting in low light one option to bring in more light is slowing down your shutter speed. The lower you go the brighter your image will be but you'll need a tripod or flat surface to rest your camera on for a nice sharp image at lower shutter speeds. This is my go to Tripod. Also keep in mind any micro movements from your finger on the clicker as you take the shot may impact the sharpness. To avoid any micro movements when using a tripod I will set the camera to a 2 second delay or use a wireless remote. Keep your Aperture Low Aperture is a set of small blades that create a hole that determines how much light is let into the camera. The wider the hole the more light that comes in. The size of this hole is measured by F-stops. A large F-stop like F-22 means the hole is very small, and a low F-stop like F/2.8 means the hole is wide open. So the higher your F-stop the darker it will be and the lower your F-stop the brighter it will be but keep in mind brightness and darkness aren't the only thing that changes when you adjust your aperture. Aperture also controls depth of field. Depth of field determines how much of your photo is sharp and in focus and how much is blurry. A low F-stop like 2.8 is very narrow and will only focus on a specific part of the image while leaving everything else blurry. The closer you get to your subject with a small F-stop the more narrow the focus will be and thus the more blurry the background will be. A low F-stop is how you get that creamy background and beautiful bokeh effect with the lights in the background. Just keep in mind if you're shooting portraits it's extremely hard to get the eyes both in focus and everything sharp at a low F-stop like F/1.4 or 2.8. I find F/4.5 is best to get everything on your subject sharp and in focus if you're close to your subject. If you're about 6 feet away or more from the subject F/2.8 will work and bring in more light. If your photographing a beautiful landscape or group of people however you will want a large F-stop like F-11 or F-22 to make sure everything and everyone is in focus. Every lens is different and will determine how low you can go and how sharp an image looks at low aperture. My favorite lens in the Sony 85 MM 1.8 Prime 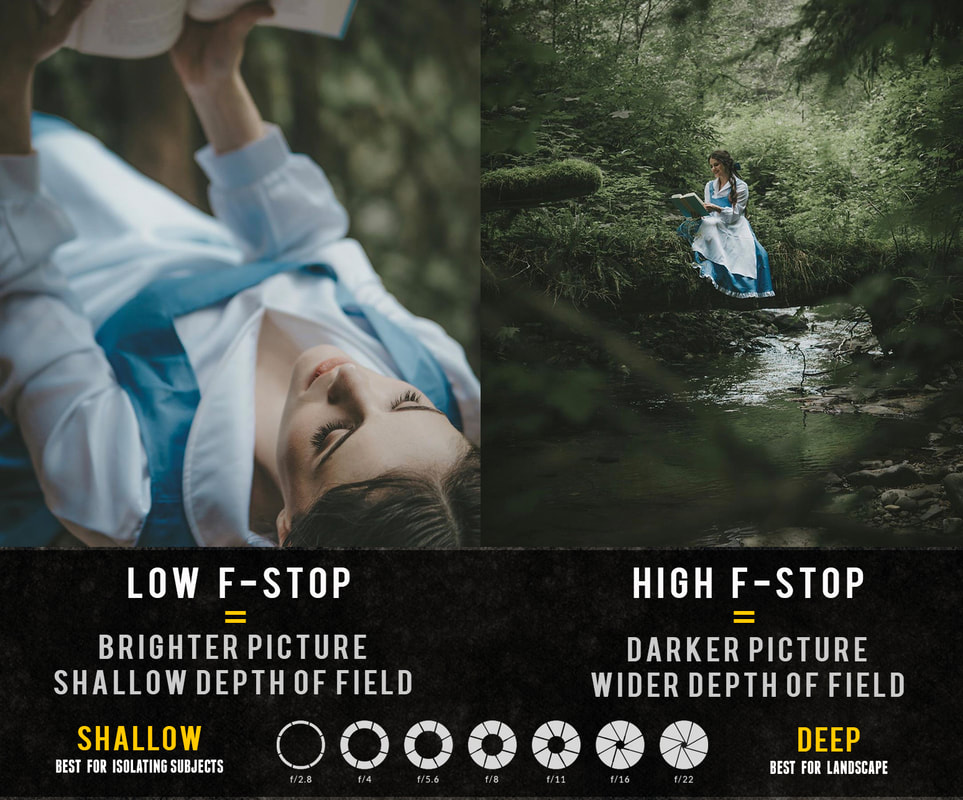 Get a Light Wand I know, I said no flash. But I don't count a small portable light wand as flash. I prefer not to carry around a bulky flash. You can bring in a wand to a bar with no problem. Now that we discussed using available light sources every now and then you'll be in a situation where you just don't have any light available. For emergency situations like these I like to have a light wand in my car just in case. It's about $80 on amazon, it's light, compact, easy to carry and use. The photos below were taken in a bar with zero light to use so I used the Portable Wand Handheld LED photography Light wand to light the models. 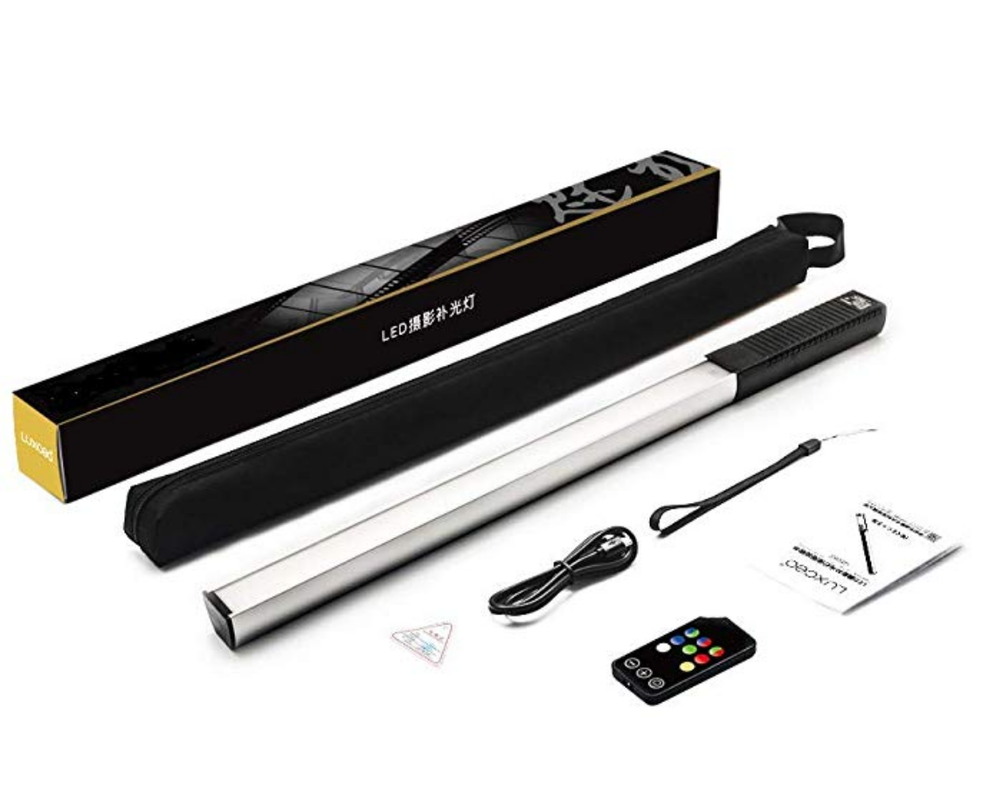 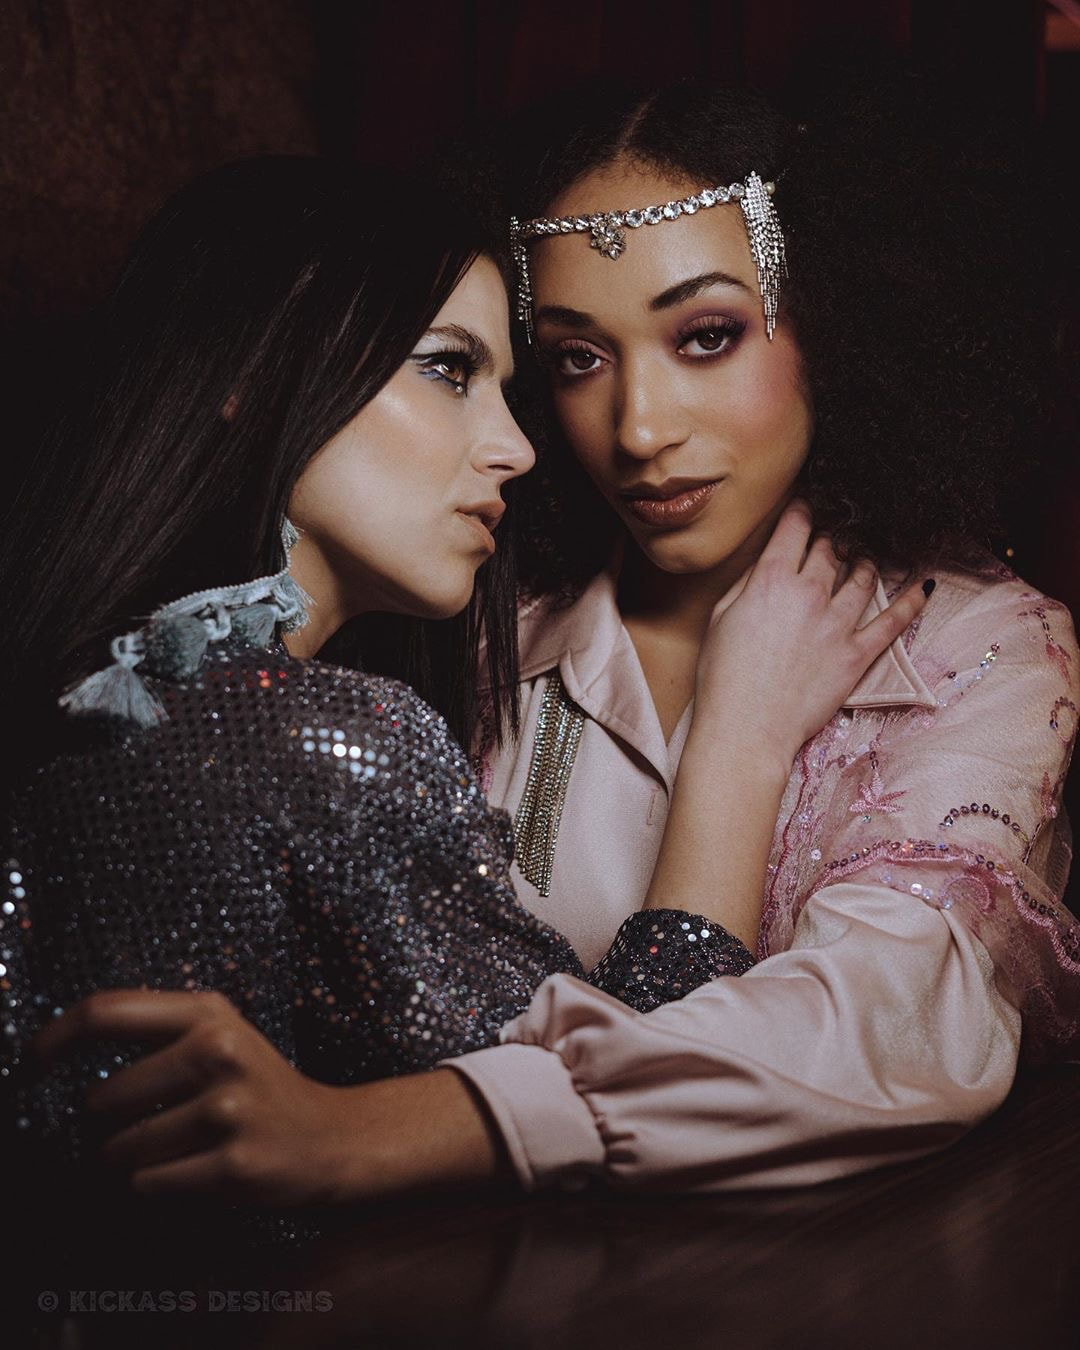 Models: @jacquelynnefaith & @ambernicotra on IG What I love about this wand is that it has multiple color options to choose from so you can match the color to the lighting behind the model when shooting with neon as seen below. My settings: 1/160 sec /// ISO 320 /// F2.2 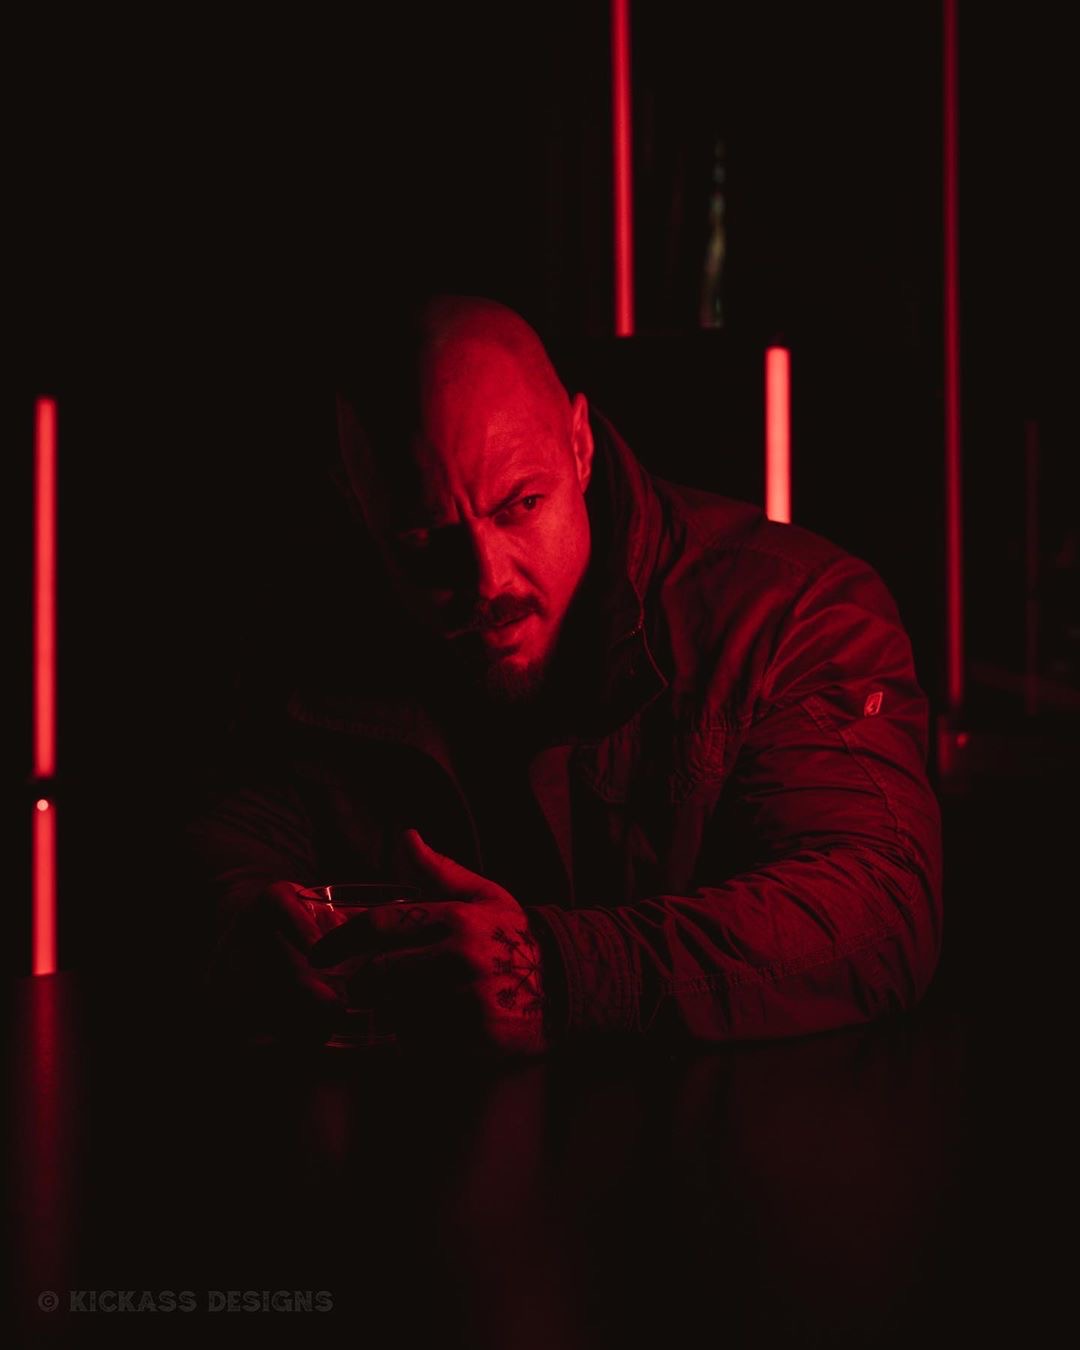 Model: @starttheworld on IG Photo Editing Software Purchase a photo editing software such as Adobe Lightroom. Photo editing software will allow you to edit your photos in post and really make those crucial adjustments to your highlights, shadows, exposure, saturation, and contrast.
In the end you just have to practice practice practice. Let me know any issues you're running into. I'm happy to help.
1 Comment
|
Author Lance Reis
Most Popular Articles
27 Posing ideas for women
27 Posing Ideas for Men Location Scouting 33 Must See Castles in the US How to grow your Instagram Low Light Photography Tips Photography for Beginners Free Resources Take Better Cosplay Photos Categories
All

|
 RSS Feed