Most Popular Articles


Lighting is one of the most crucial aspects of photography. Good or bad lighting can make or break a shoot. However I believe there is a misconception in our industry that you're a better photographer if you own a great light setup and a studio. That's simply not true. 90% of my photos are done with natural light as in only using the light that is available to me. This could be the sun, fire, street lamp, arcade, or desk lamp in a hotel. No flash, no reflector, no diffuser. I will always prefer natural light and I get asked about lighting constantly so I thought I would share my tips on how you can improve your natural light photography skills.
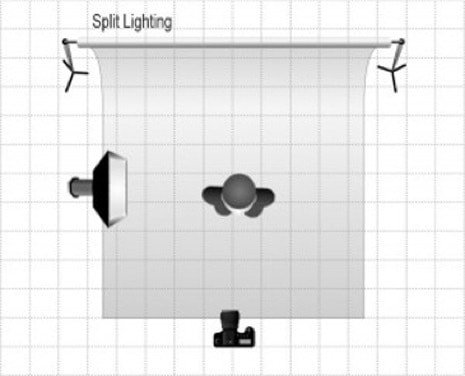
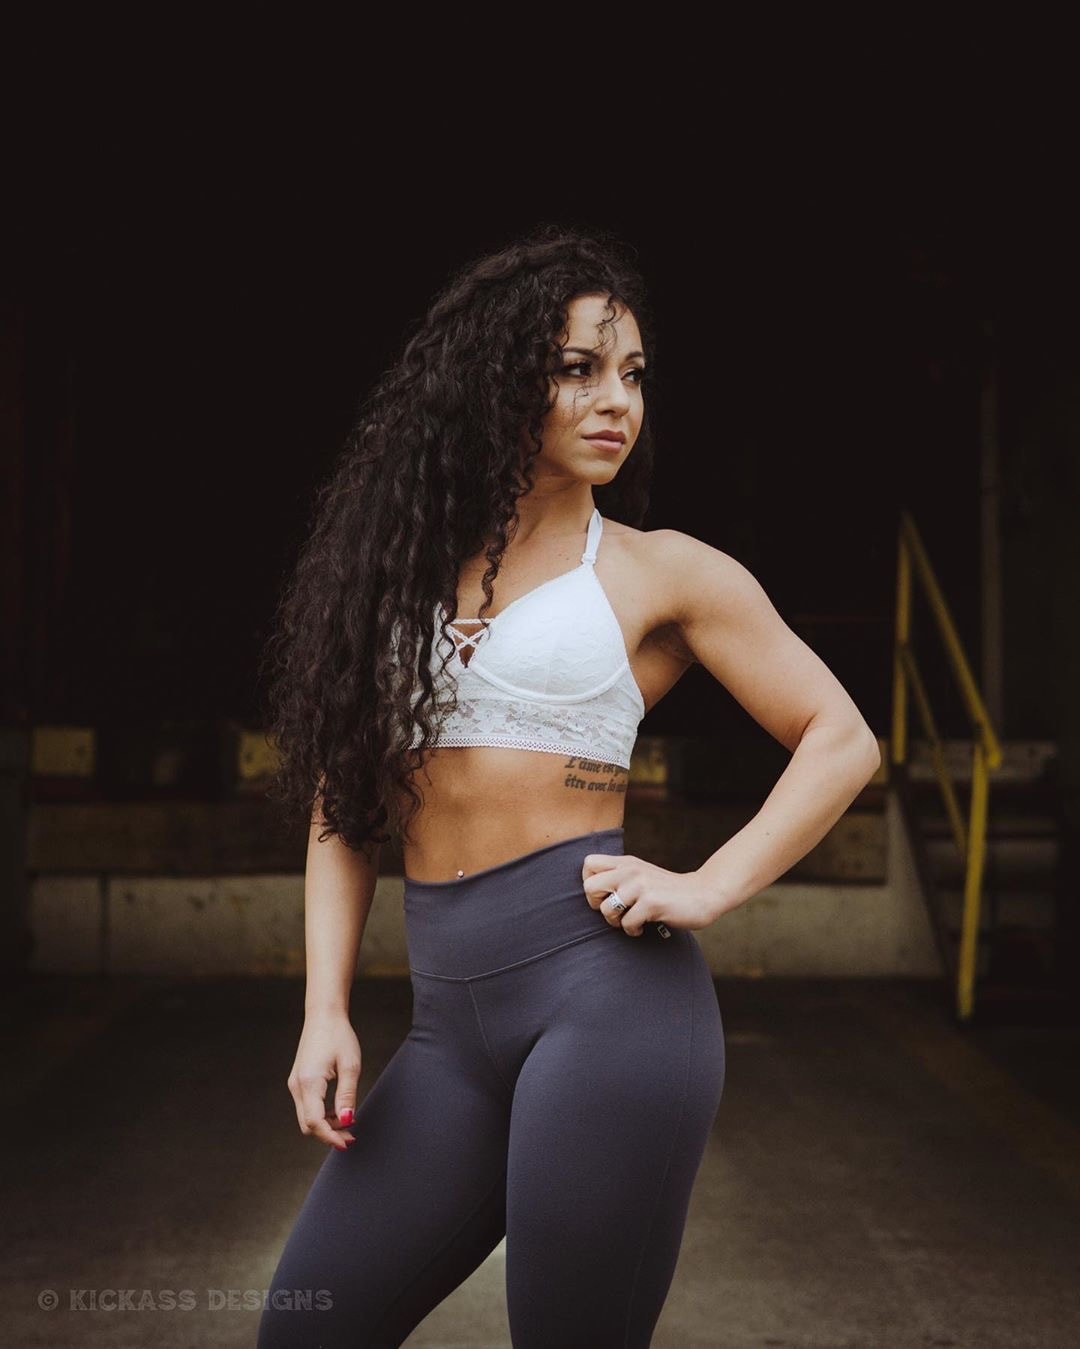
27 Posing Ideas for Women Who Aren't Models Let's start with Studio lighting. This may seem counter-intuitive, but learning the fundamentals of studio lighting has vastly improved my natural light photography skills, specifically for portraiture. Knowing where to position the subject in relation to the light in order to achieve a specific result is key to making excellent portraits no matter what your light source may be. I'll start with 5 examples of the most common studio lighting set-ups and how you can re-create them using natural light and I'll follow that up with some great examples of how I use natural light for different moods and scenarios. All the photos below were taken by me. Make sure to connect with me on Instagram HERE. How to Improve your photography with natural light: 1. Split lighting
Light is 90 degrees in relation to your model to the side at face-level. One side of the face is highlighted and the other is in shadow, half and half, for a dramatic effect.
Outdoors: Position your model so the sun is directly hitting one side of the face. It should be a sunny day, not too cloudy, and the sun will need to be relatively low in the sky. Indoors: Using natural light coming through a window, make sure your model is positioned parallel to the window with bright, even light directly hitting one side of the face. Example: 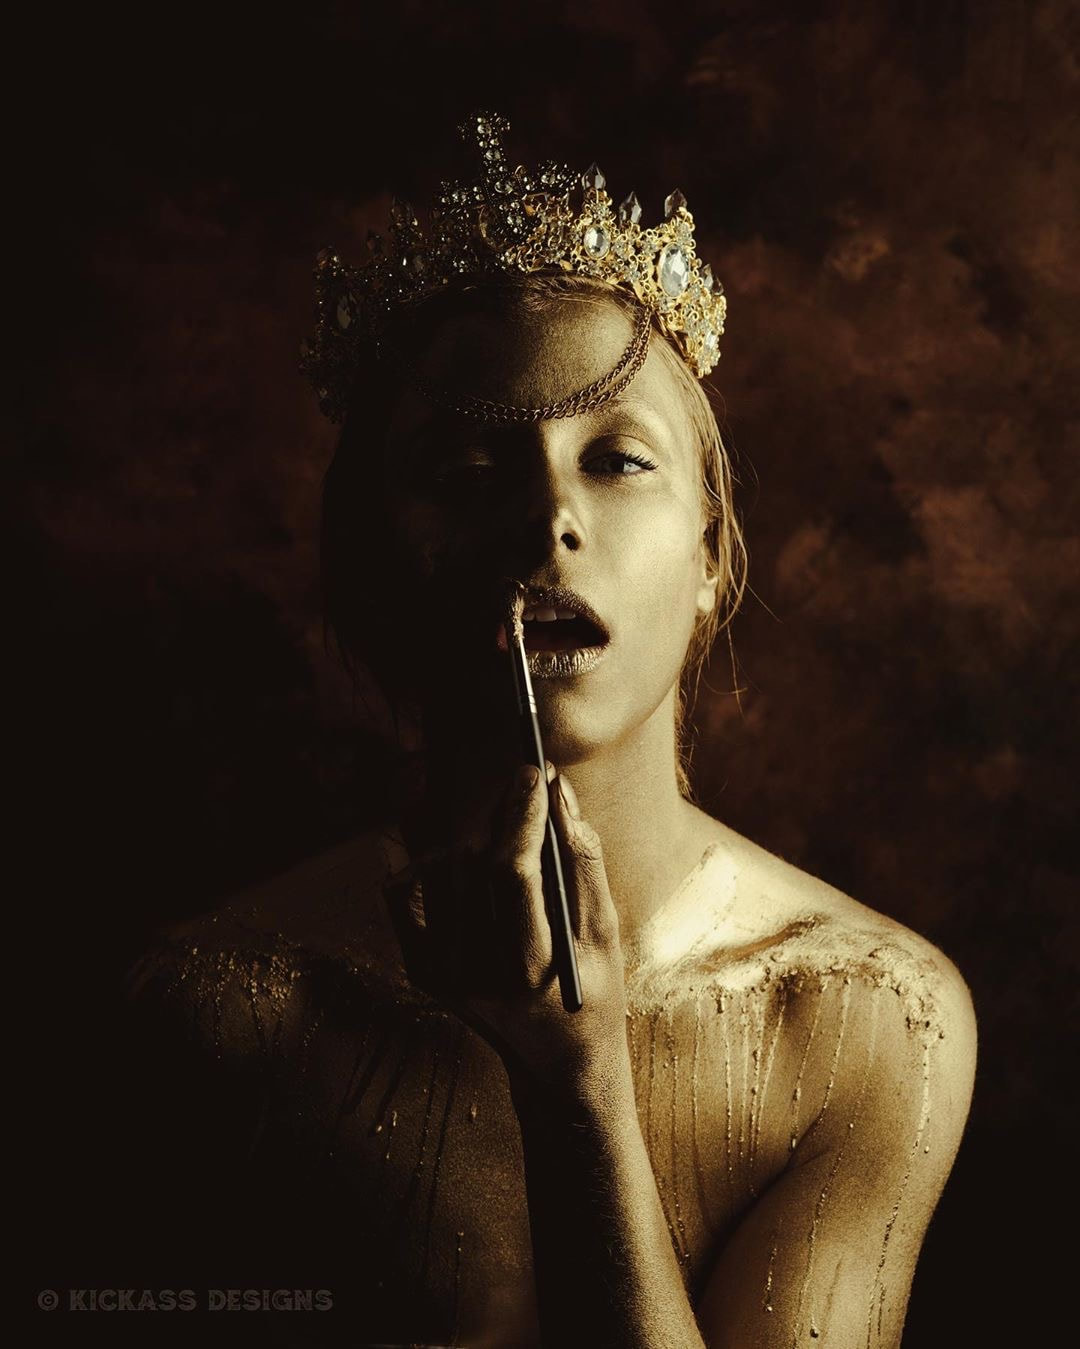
Model: @littylerouge on IG
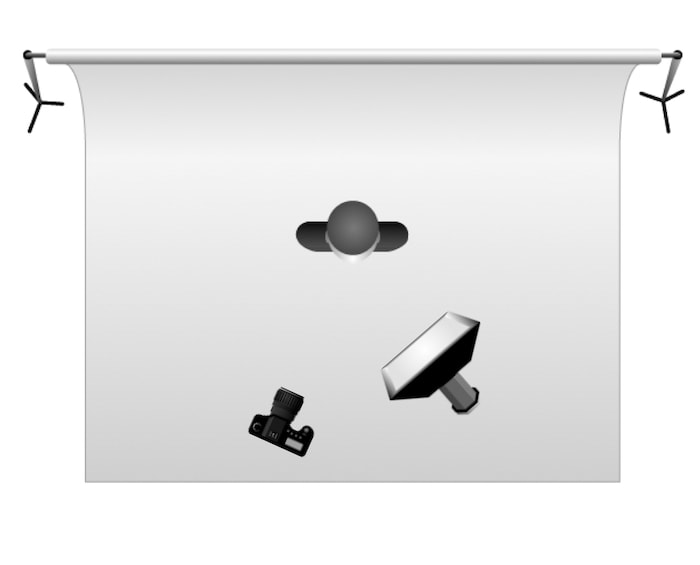
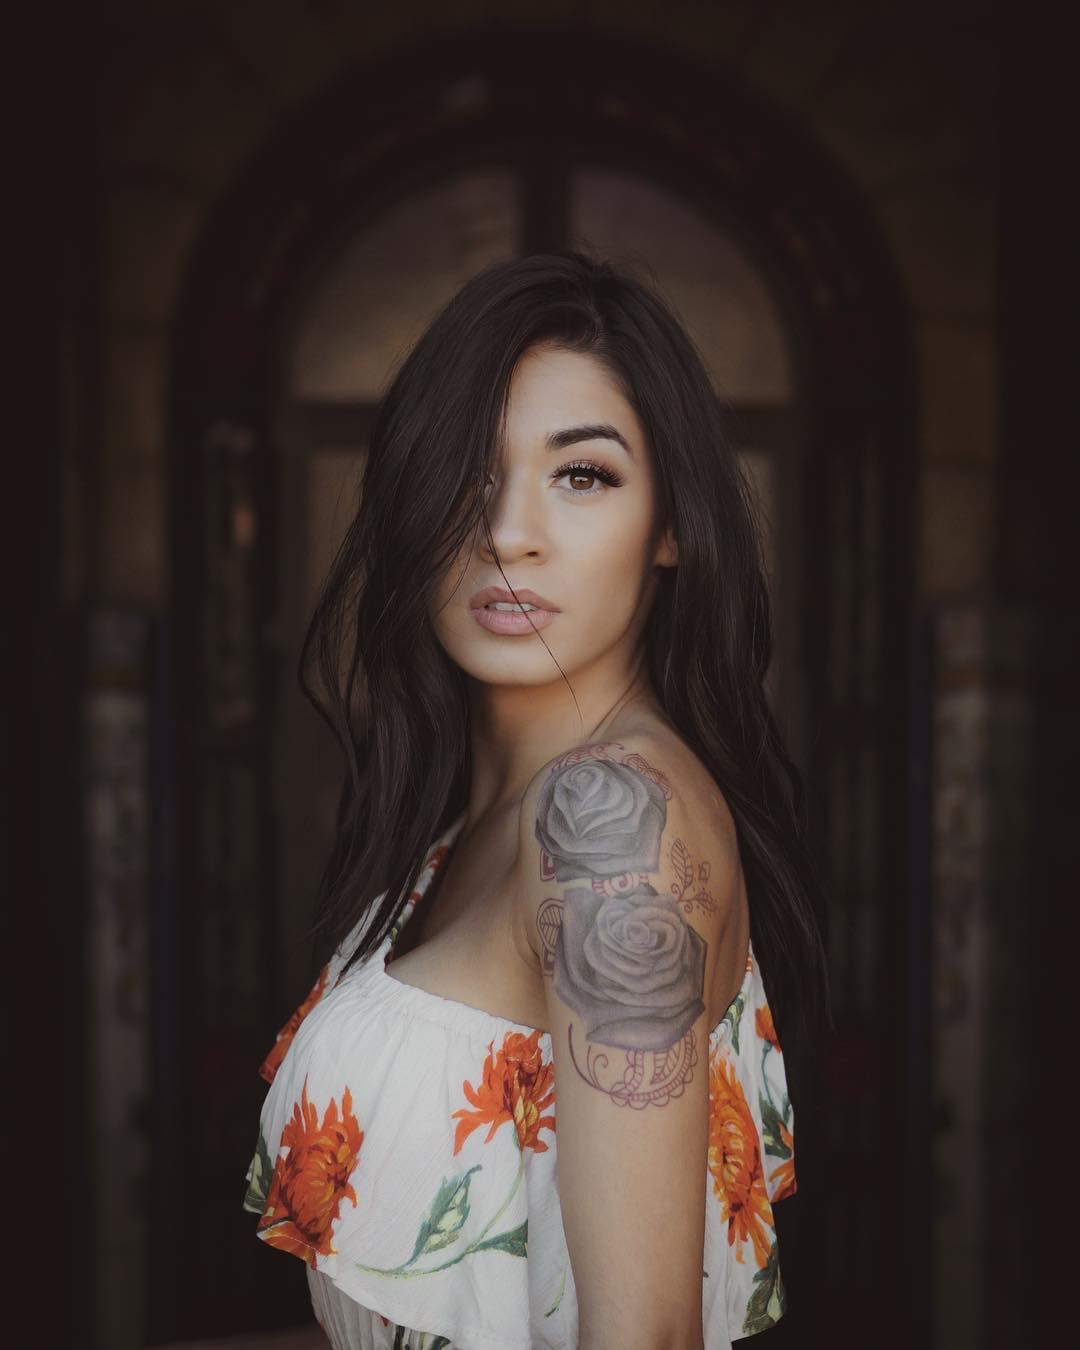
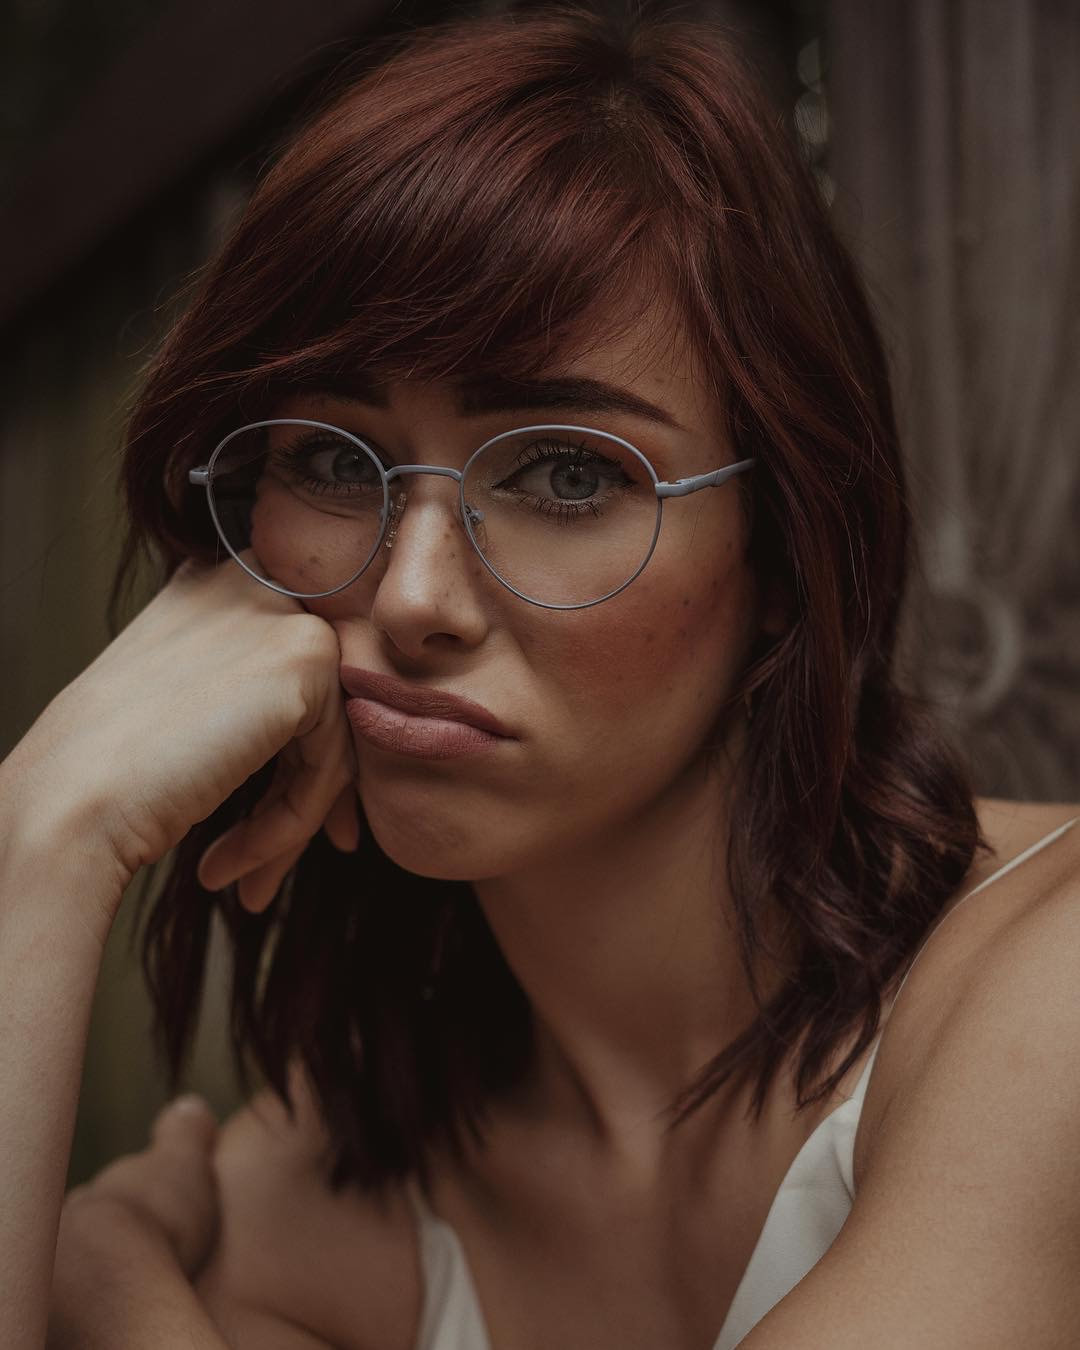
2. Rembrandt lighting
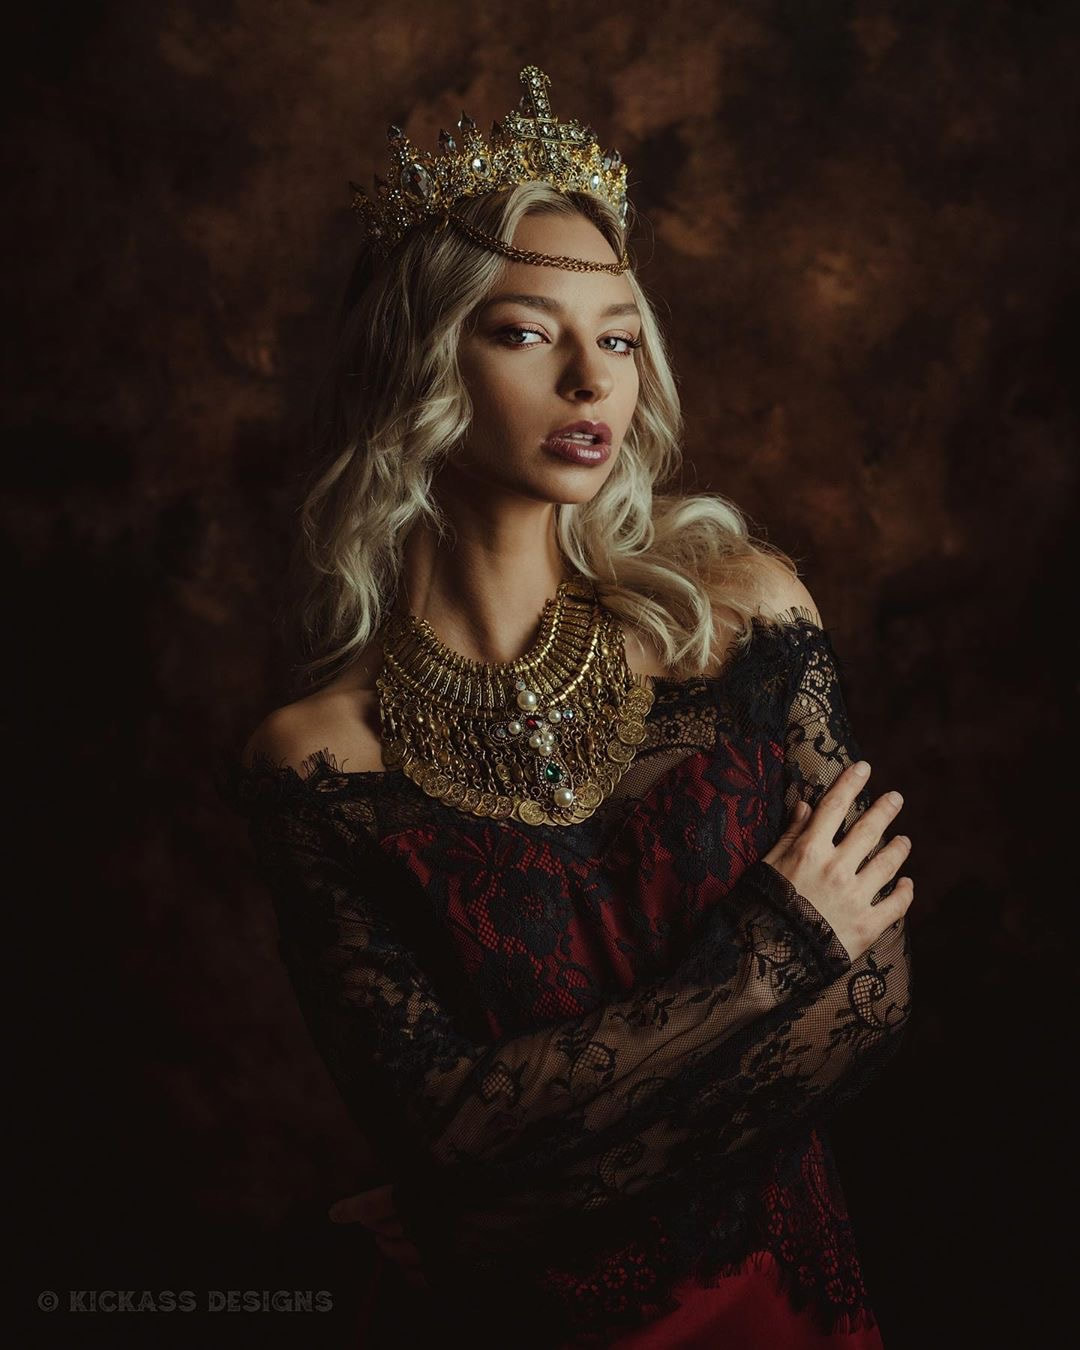
Light is 45 degrees in relation to your model slightly to the side coming down from an angle just above their head. One side of the face is highlighted with the other side in shadow, with the exception of a triangle-shaped highlight beneath the eye. This effect is a more dramatic version of loop lighting (see below) with the nose and cheek shadows merging.
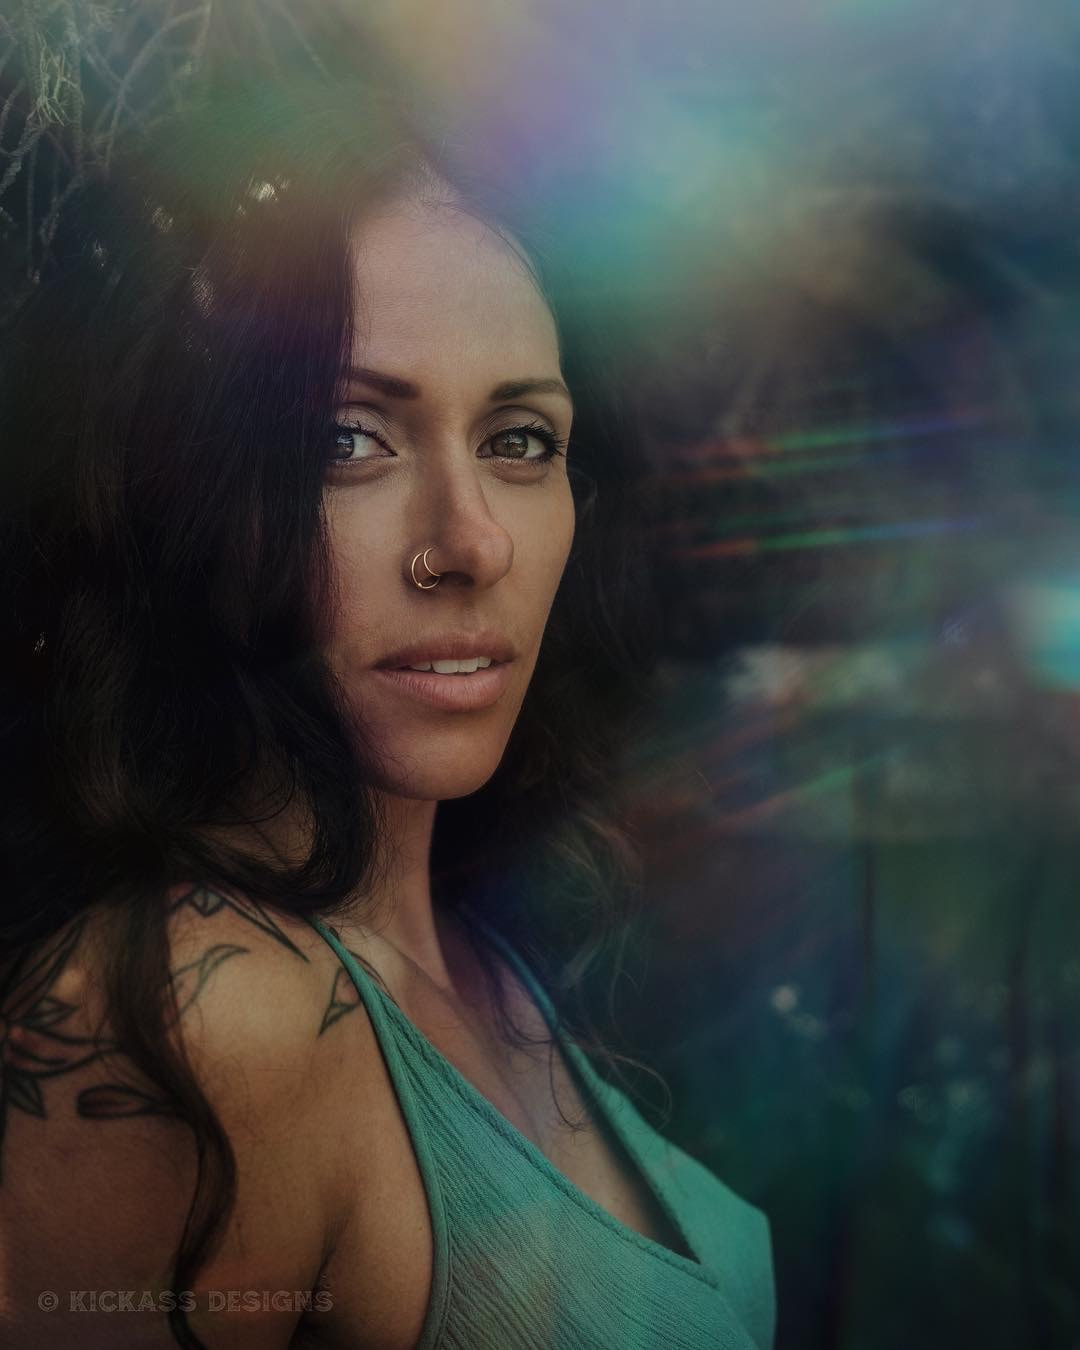
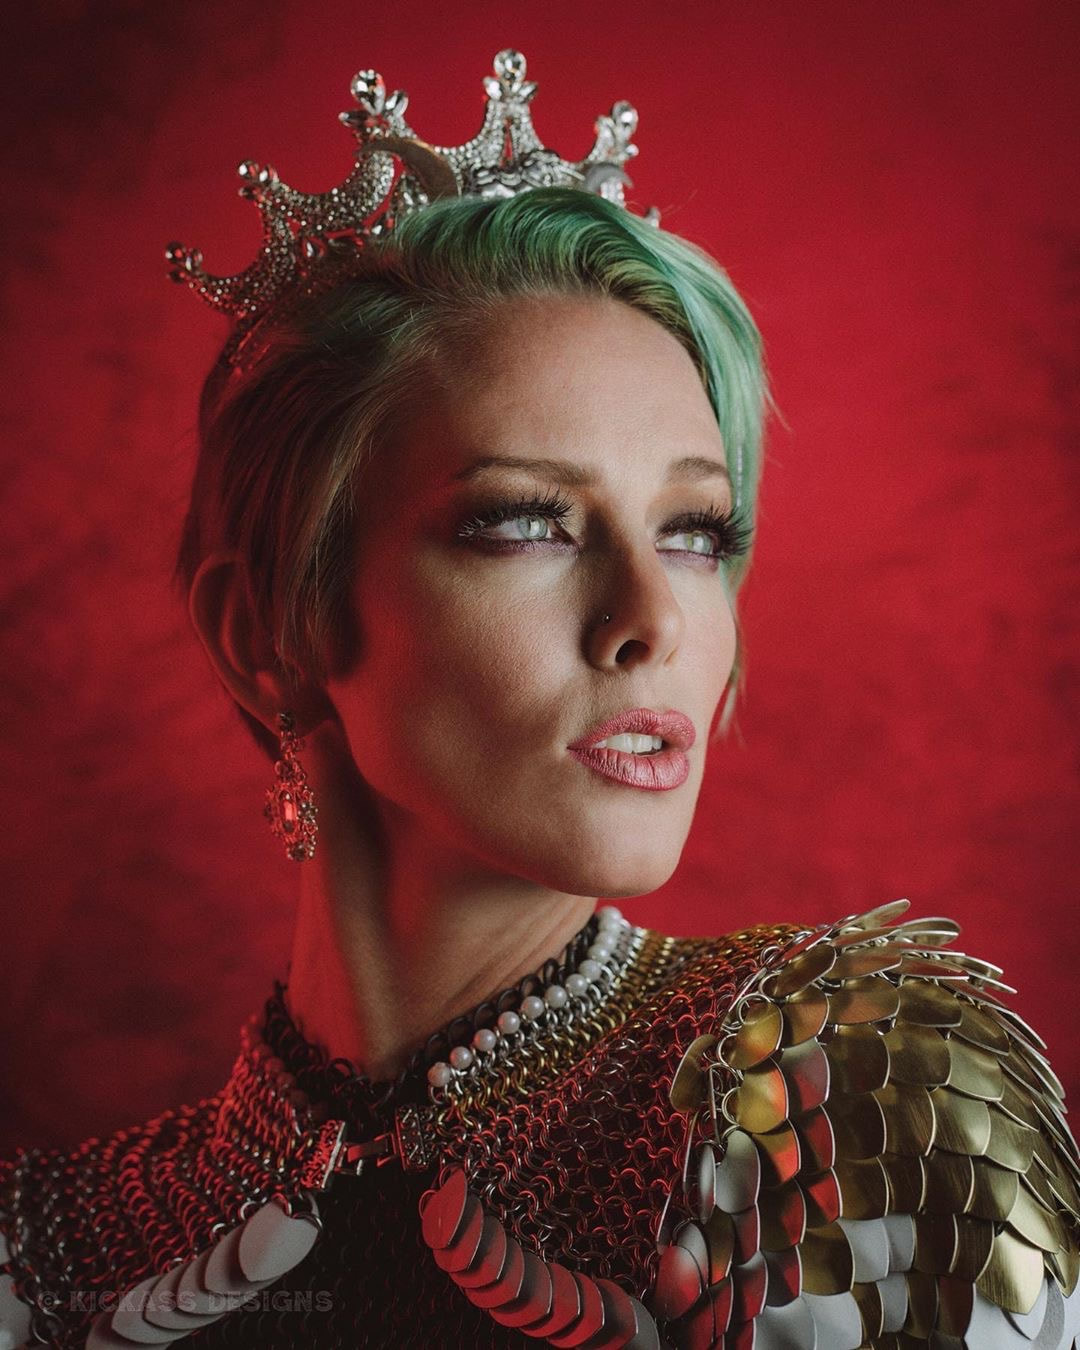
Outdoors: Position your model so the sun is at a mid-to-high angle in the sky, with your model slightly facing towards the sun. For that dramatic and moody Rembrandt effect, a sunny or partially sunny day is best to create the deepest shadows. Indoors: Position your model to turn towards a window with bright, even lighting coming down just above the head. Example: 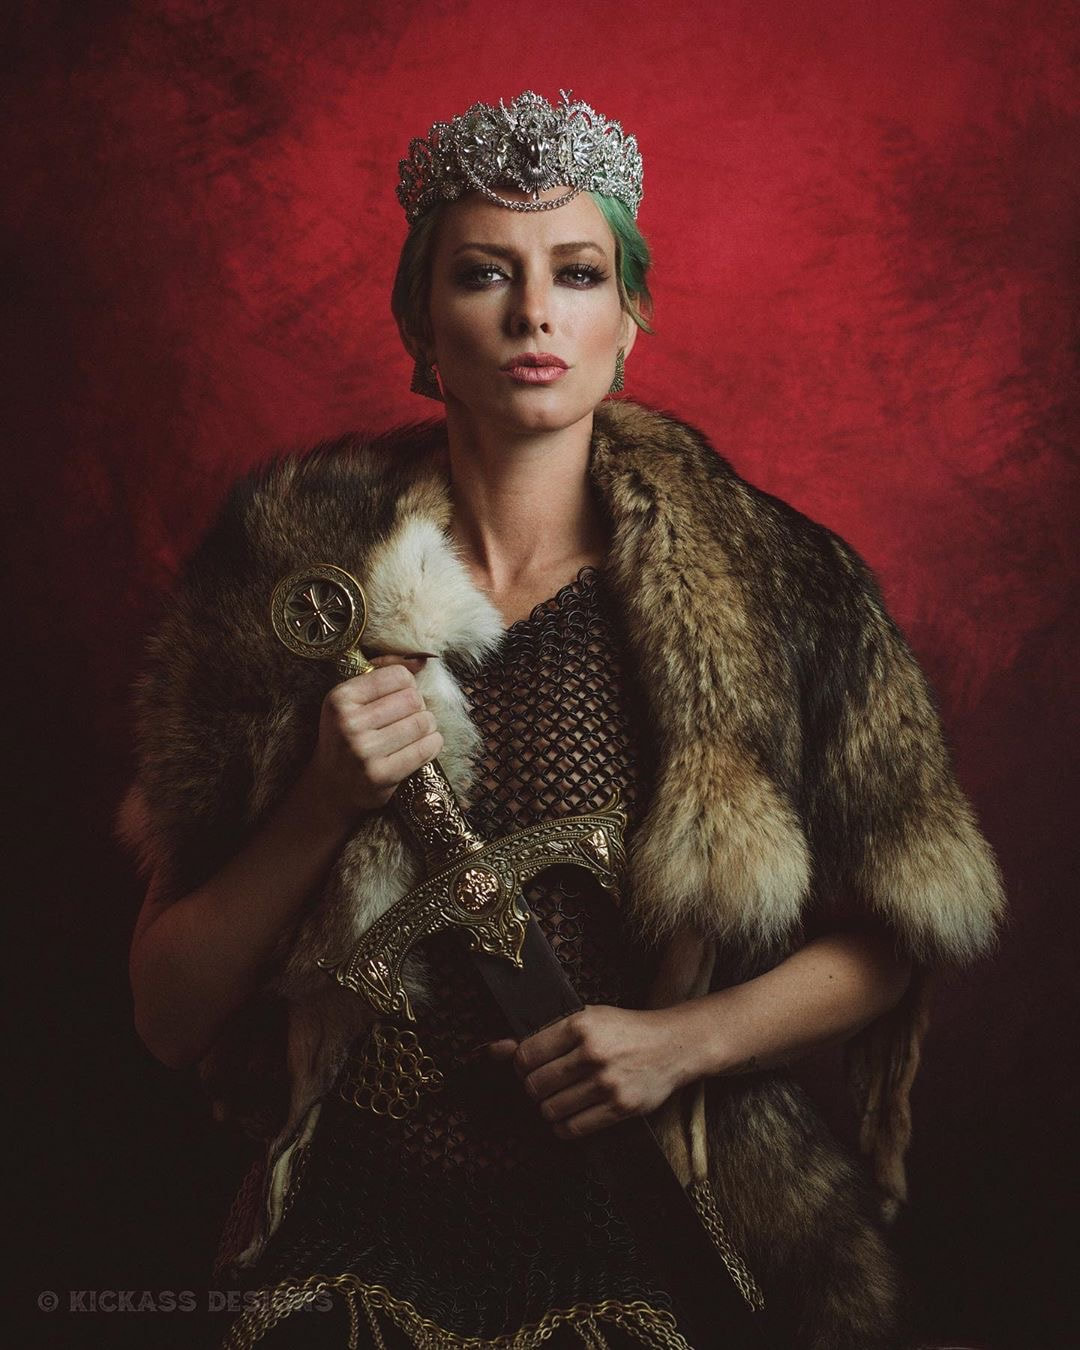
Model: @alyxandriamodel on IG
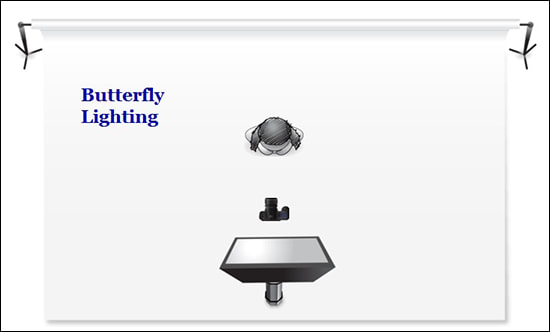
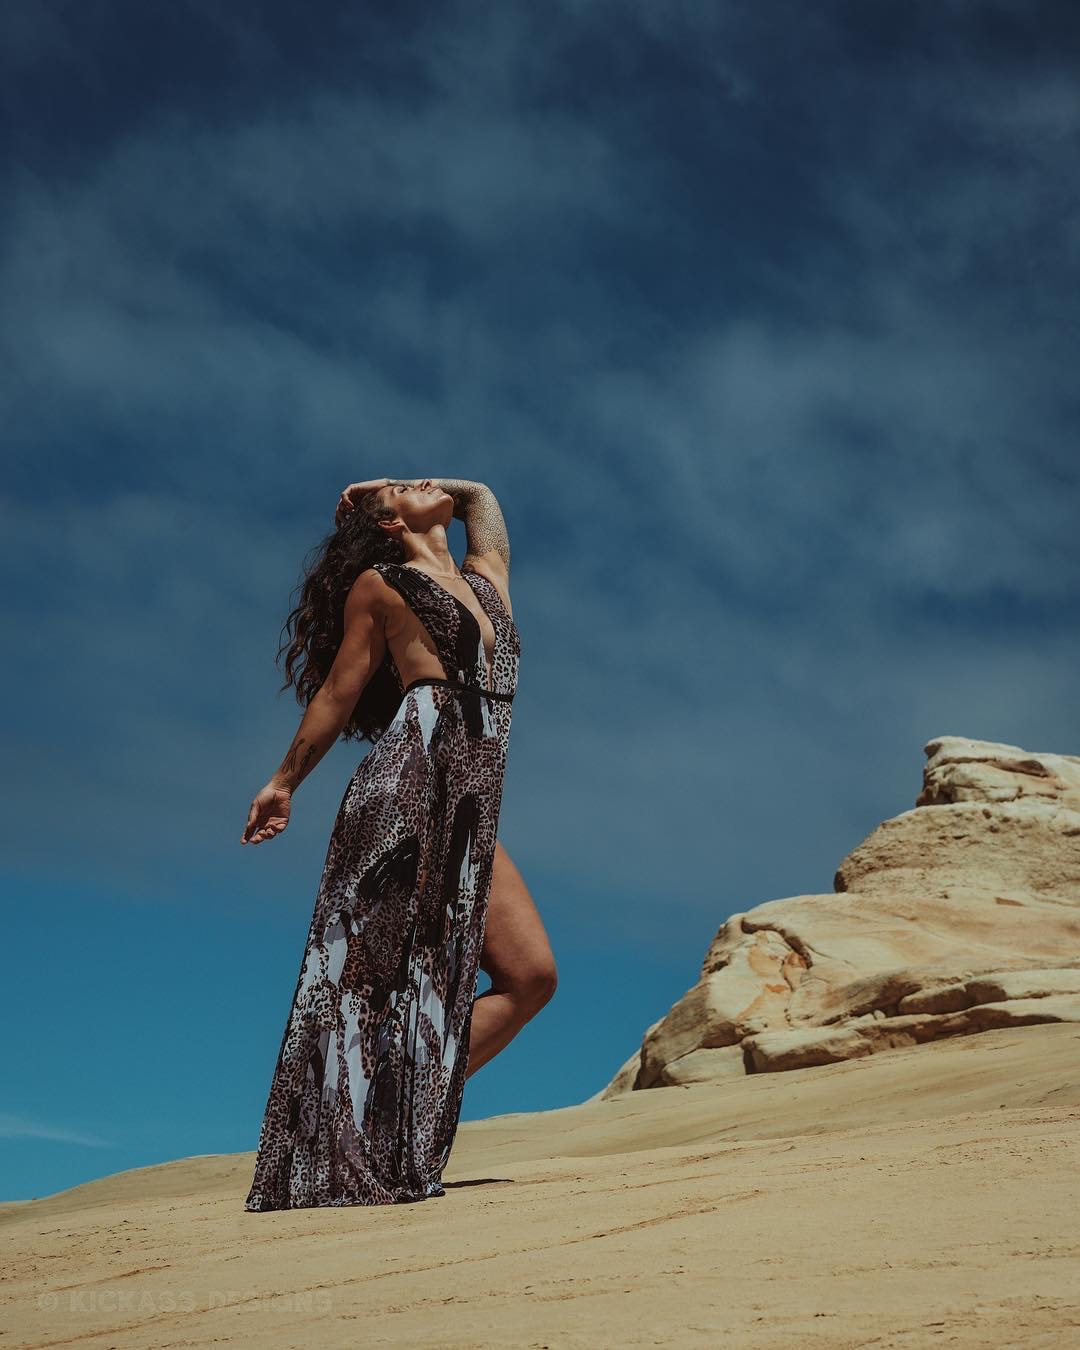
3. Butterfly lighting
Light is 0 degrees in relation to your model direct coming down from a high angle. A small butterfly shadow is created under the nose along with subtle shadows under the cheeks and chin for a very flattering effect.
Outdoors: Position your model so the sunlight is directly hitting the front of the face. The sun will need to be relatively high in the sky. You may want to have your model slightly tilt their head up towards the sun. A cloudy day will soften the shadows. Indoors: Position your model below and directly facing a window, ideally a high one, with light hitting the front of the face. You may need to get creative for example, covering/blocking the bottom portion of a large window so sunlight only shines down through the top to produce the right effect. Example: 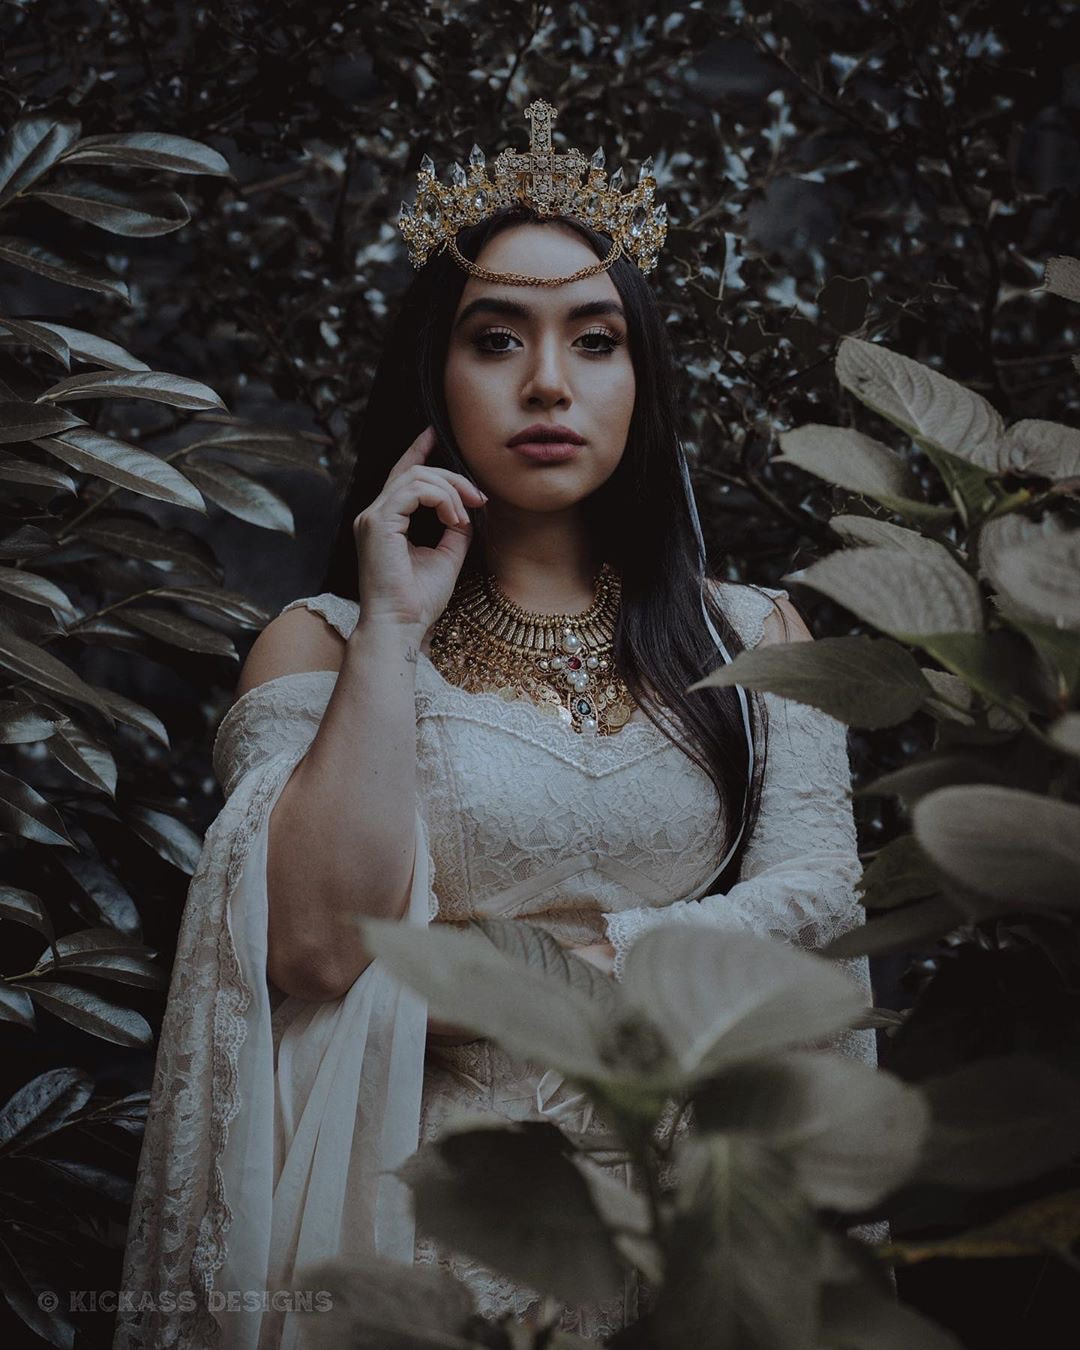
Model: @cristellin on IG
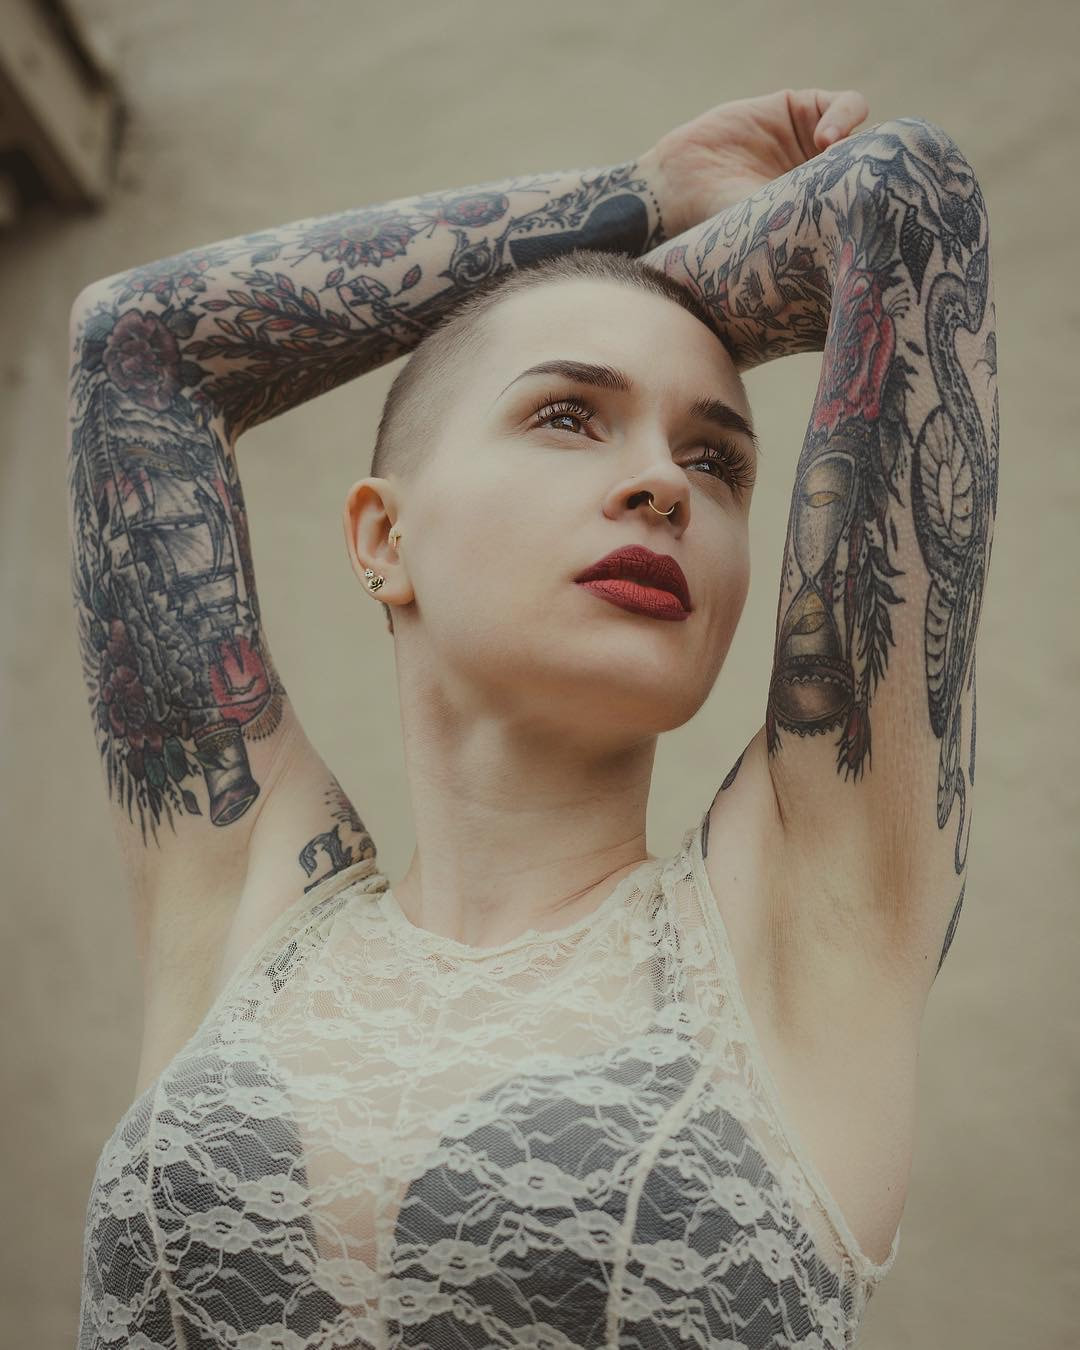
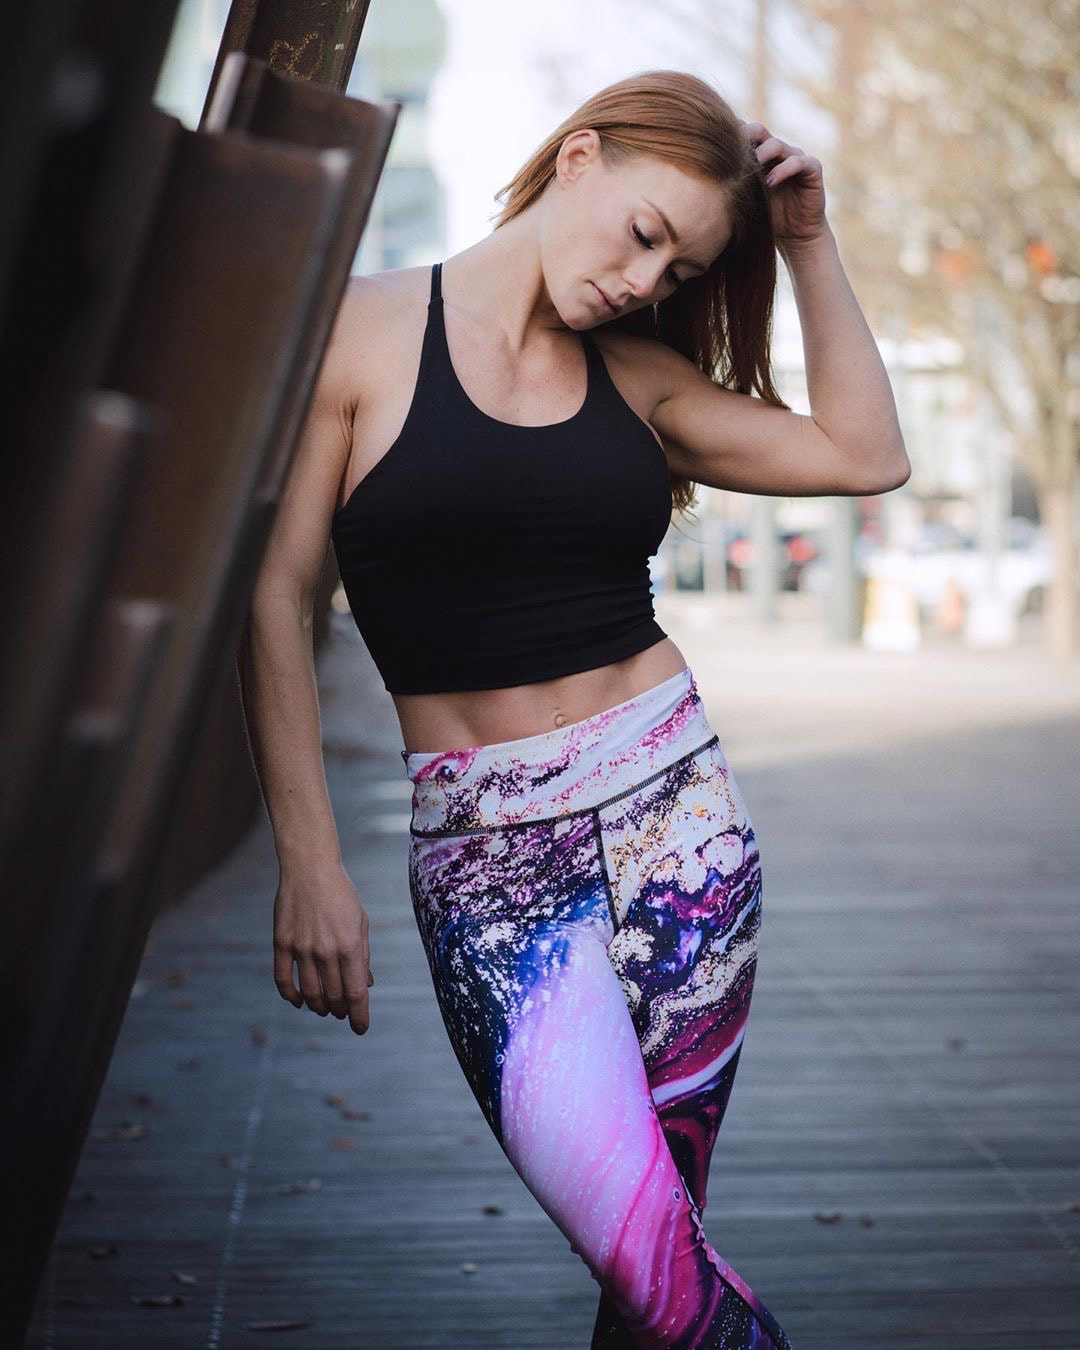
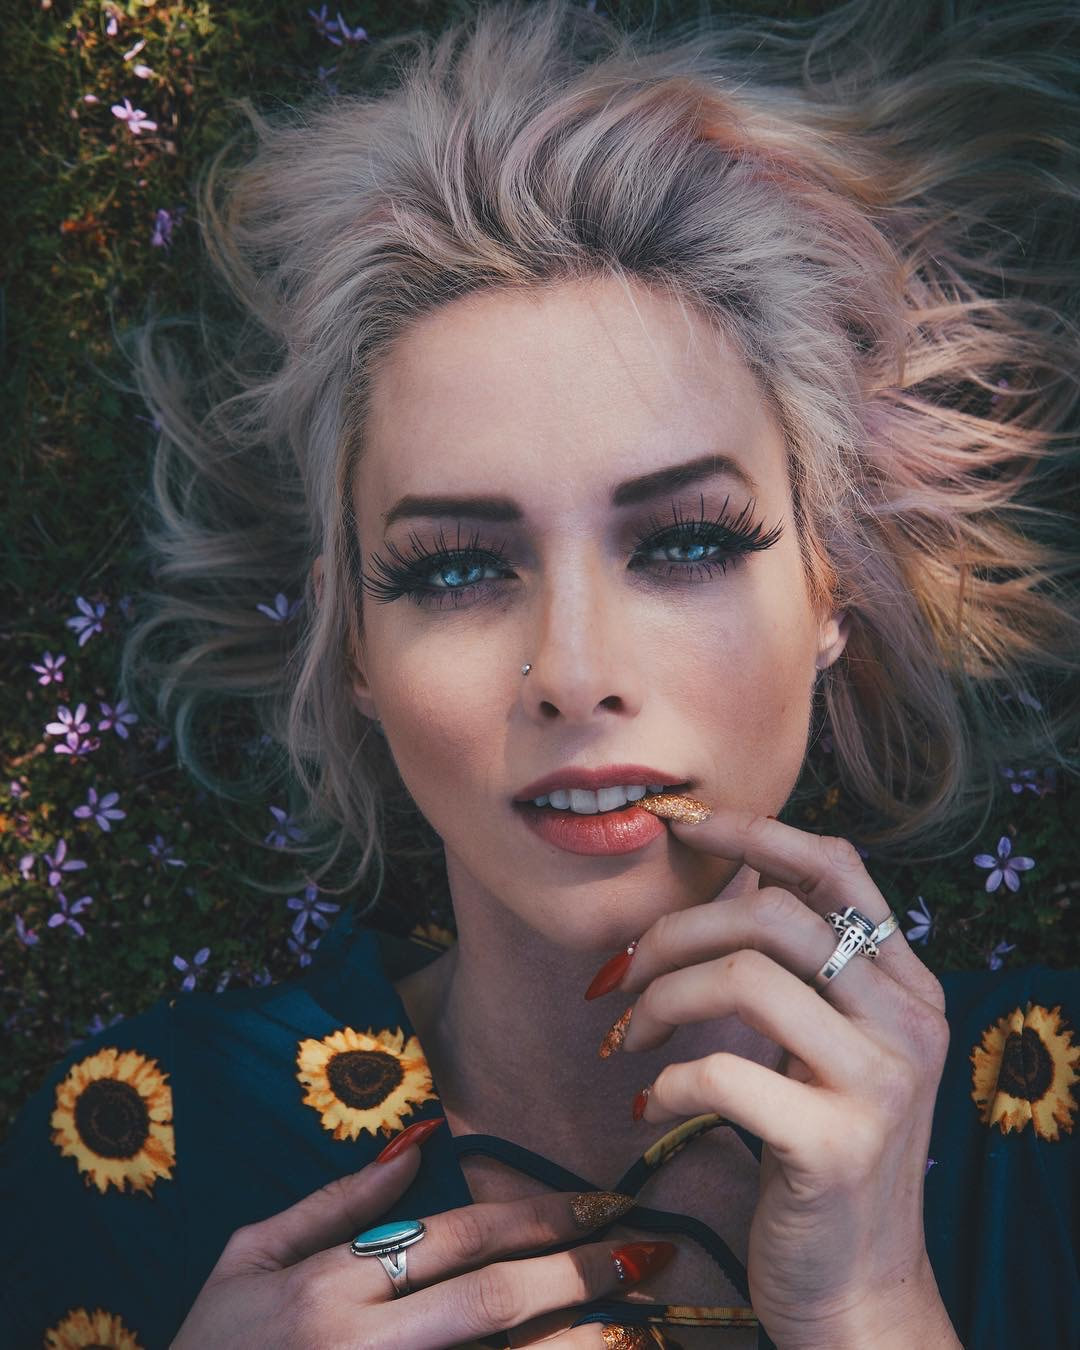
4. Flat lighting
Light is soft, even, and diffused. There are no/minimal shadows on the face.
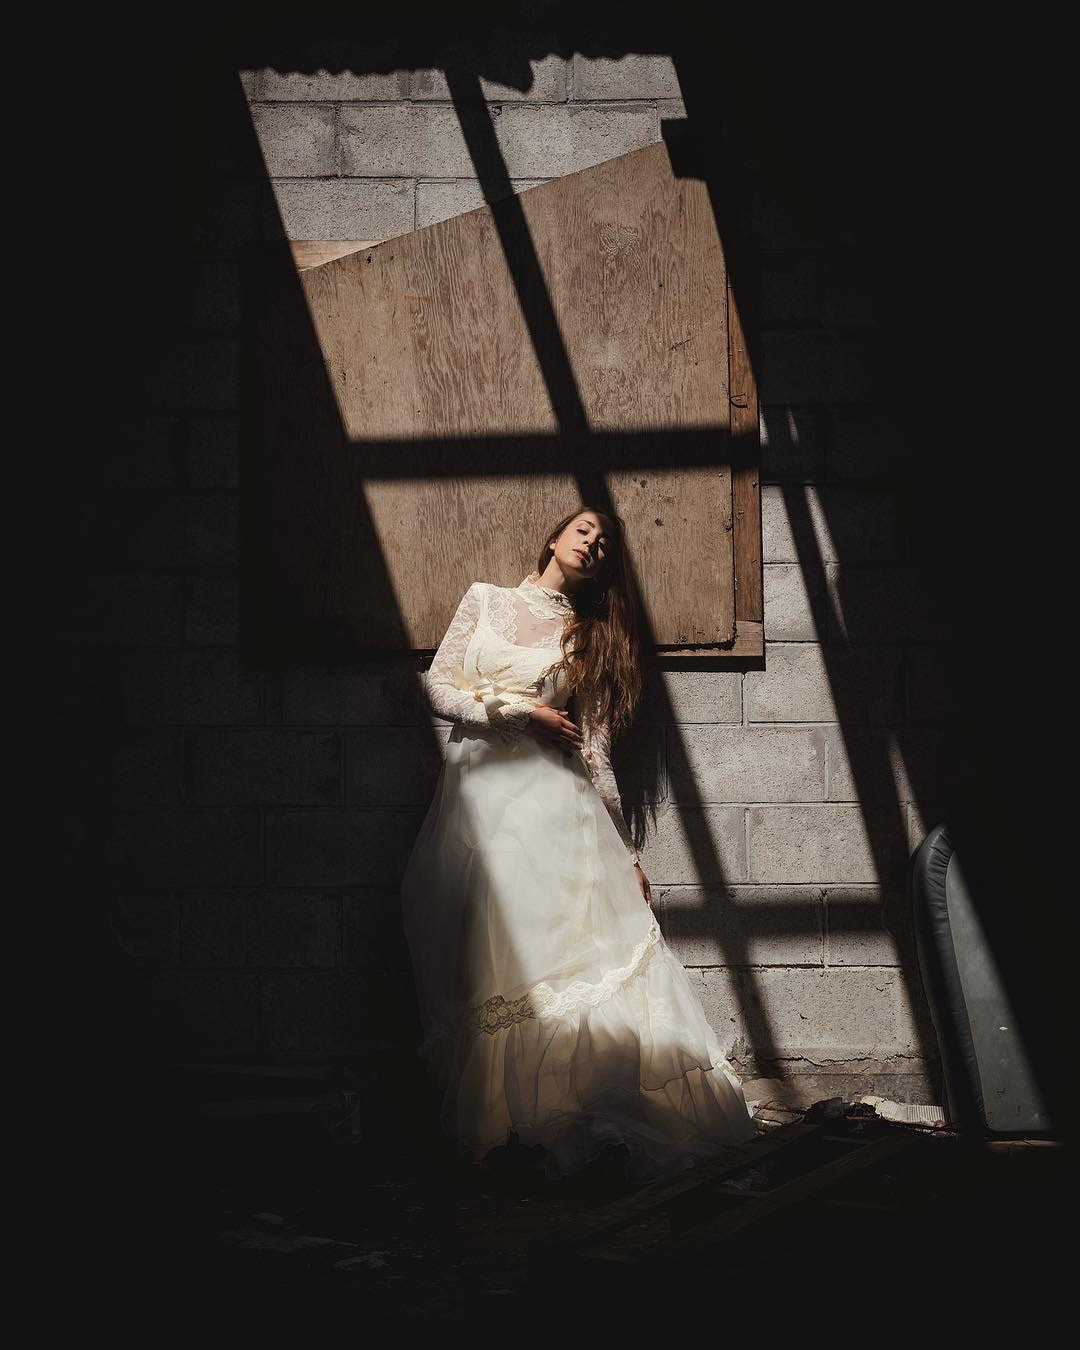
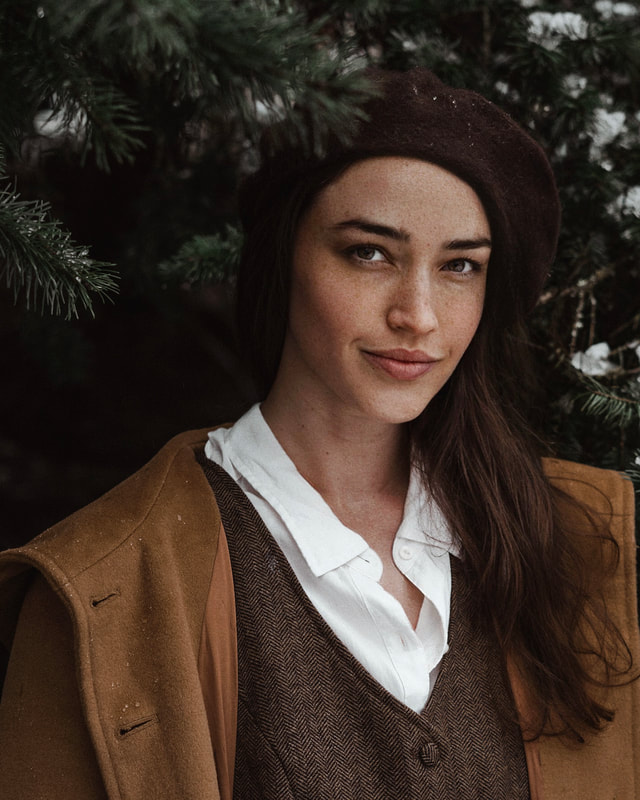
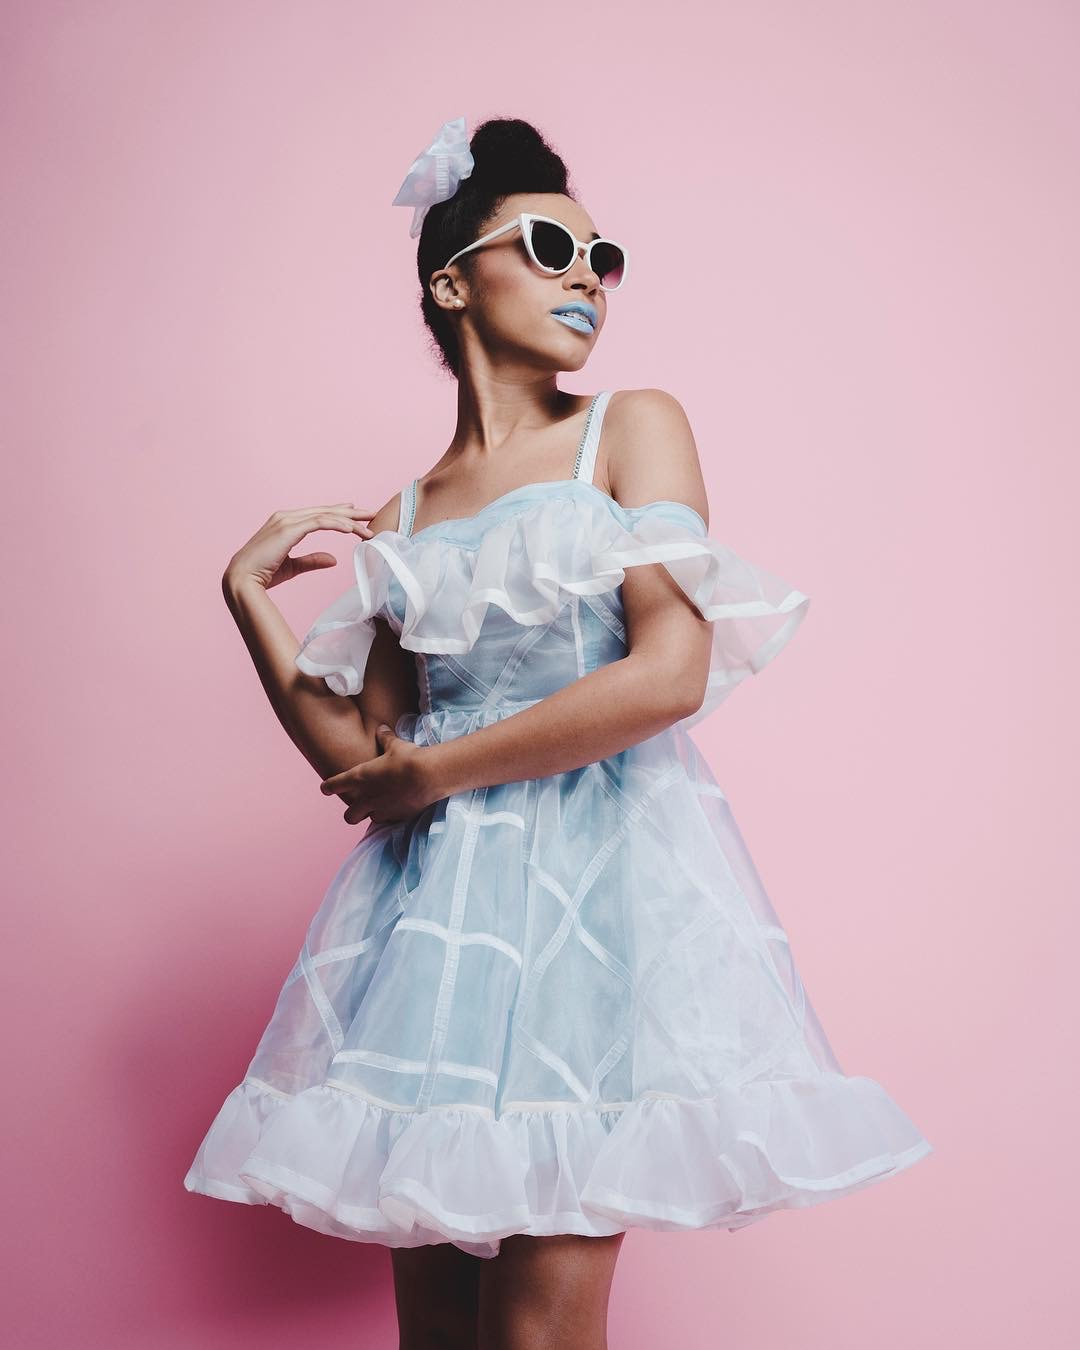
Outdoors: Ideally, it will be a completely overcast, cloudy day so you can position your model anywhere in the environment. However, if it is a sunny day, put your model in a shaded area for example, under a tree or beneath a building overhang. Indoors: Use a window that does not receive direct sunlight for example, a north-facing window or use white curtains over the window to diffuse bright light before facing your model directly towards it. Additionally, turn the model away from the window altogether this way the hair is backlit while soft, ambient light evenly highlights the face. Example: 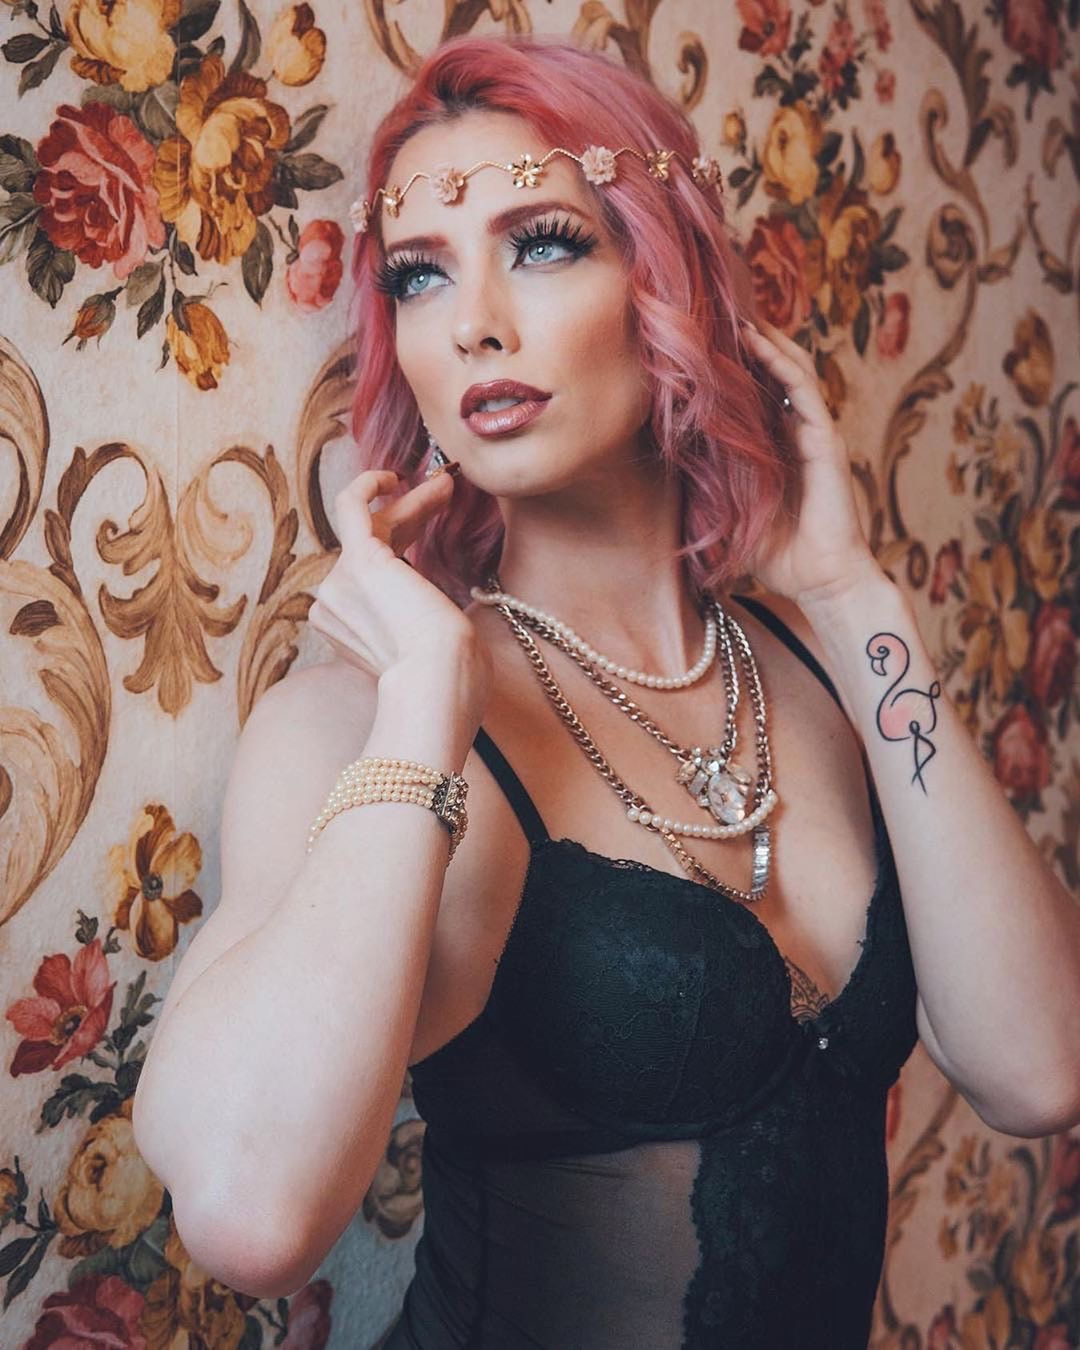
Model: @alyxandriamodel on IG
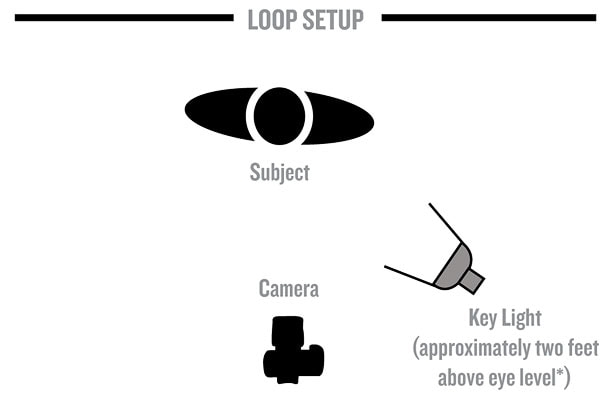
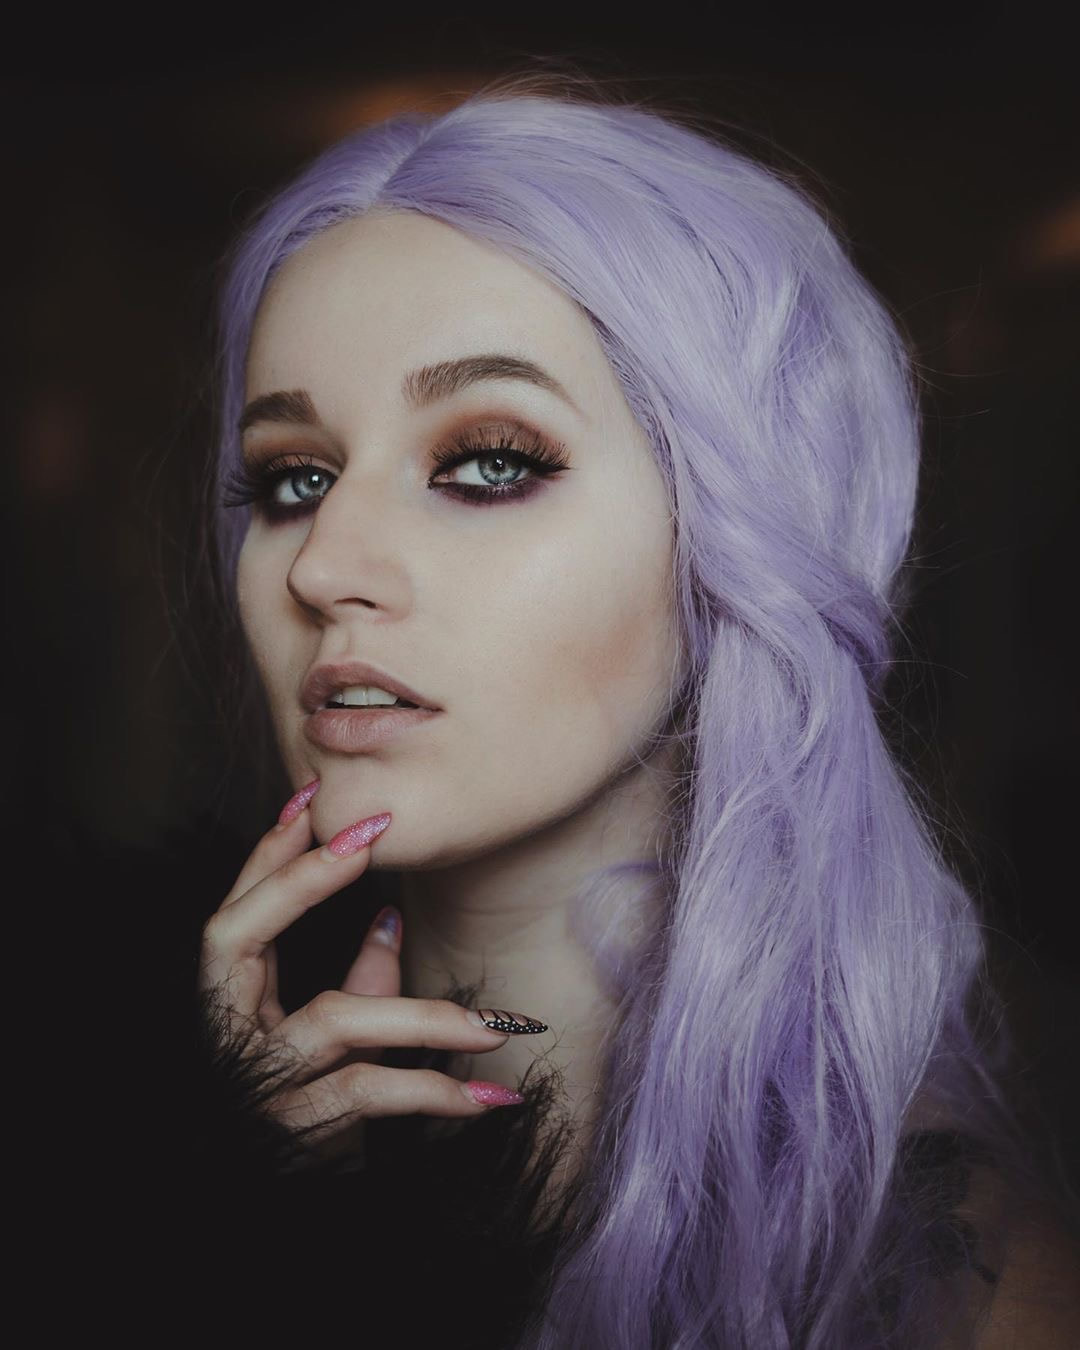
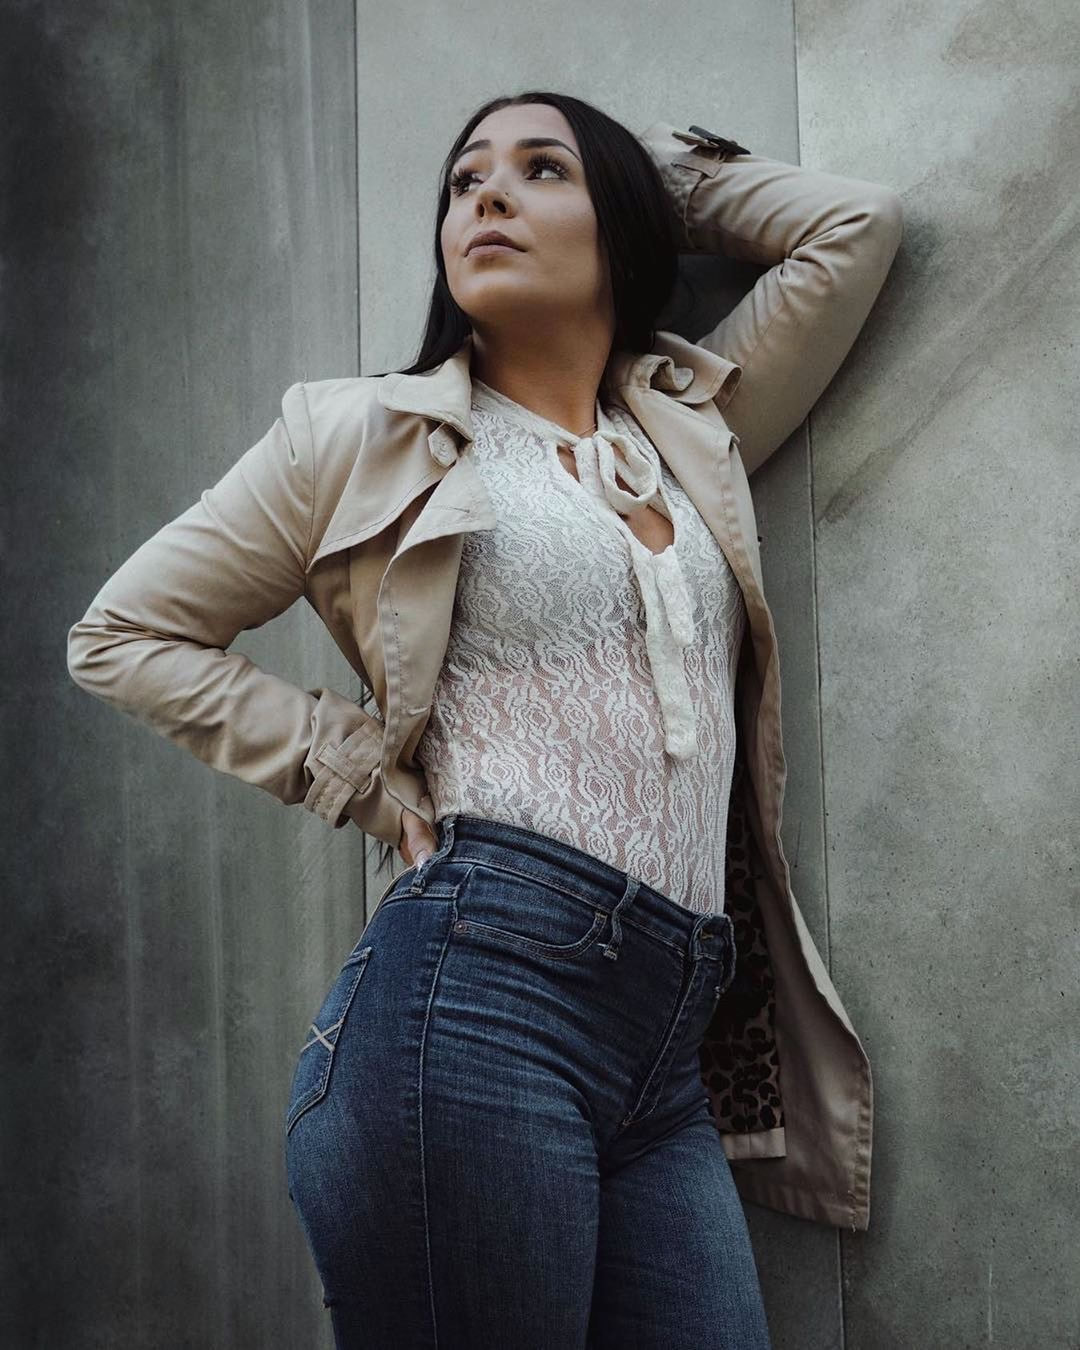
5. Loop lighting
Light is 30 to 45 degrees in relation to your model slightly to the side coming down from an angle slightly above eye-level. A small loop shadow is created beneath and to the side of the nose along with a soft shadow on the cheek of that same side. However, these two shadows do NOT touch, otherwise that would be considered Rembrandt lighting (see above.)
Outdoors: Position your model so the sun is at a mid-to-high angle in the sky, with the model slightly facing towards the sun. Indoors: Have your model turn a bit towards a window with diffused light coming in right above eye-level. Example: 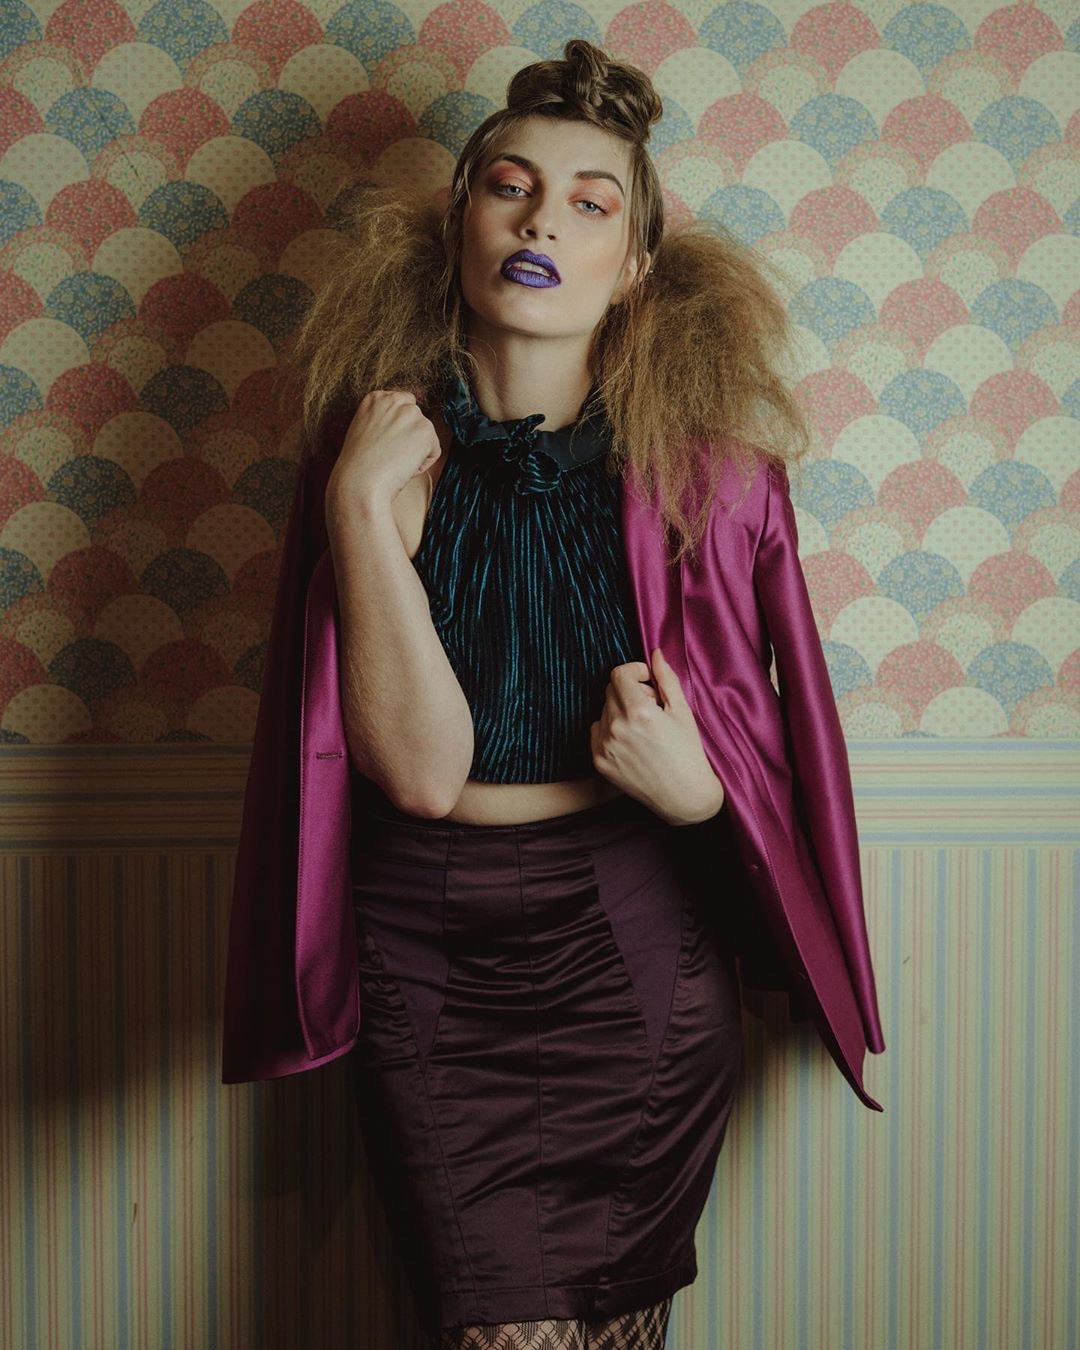
Model: @nihlisticmuse2.0 on IG
If you want to fill in shadows for a softer and less dramatic portrait a reflector can be a great asset when using only natural light. However a reflector takes up space and usually requires an assistant. Ever seen a senior portrait going on and the photographer will have a flash and someone holding a reflector. I just laugh every time I see it because it's just not necessary. You don't need all that to create a great photo.
Just remember when using natural light, you must continuously move, turn, and re-position your model to get the desired lighting effect. Never underestimate strong verbal communication skills. :) In addition, the infamous Golden Hours before sunrise and after sunset produce warm, rich light that can't quite be re-created in a studio. Experimenting during these times, particularly with backlighting, will also improve your skills and most likely produce beautiful photographs. That being said I rarely shoot at golden hour because it just feels over done to me but golden hour is still beautiful lighting.
Now that I've shown you examples of the most common studio lighting set-ups and how you can re-create them using natural light I'll show you some examples of how I use natural light for different moods and scenarios.
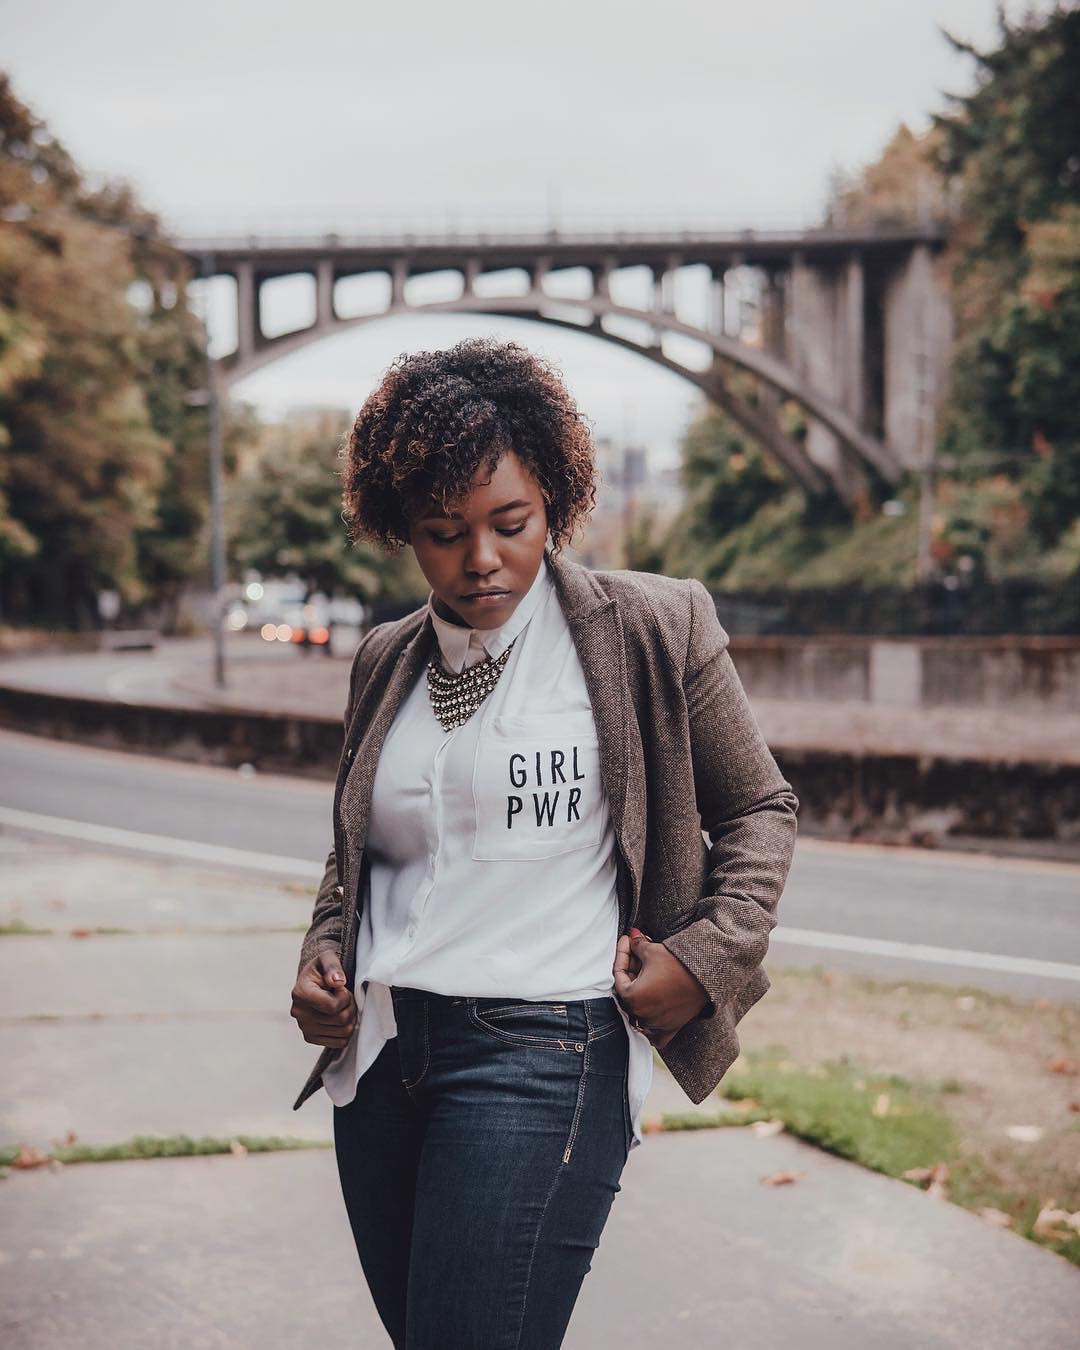
First scenario: Let's say you have no choice but to shoot at noon out in the open when the harsh sun is right over head. Try having your model look up to avoid any harsh shadows. I'll show 3 examples below. 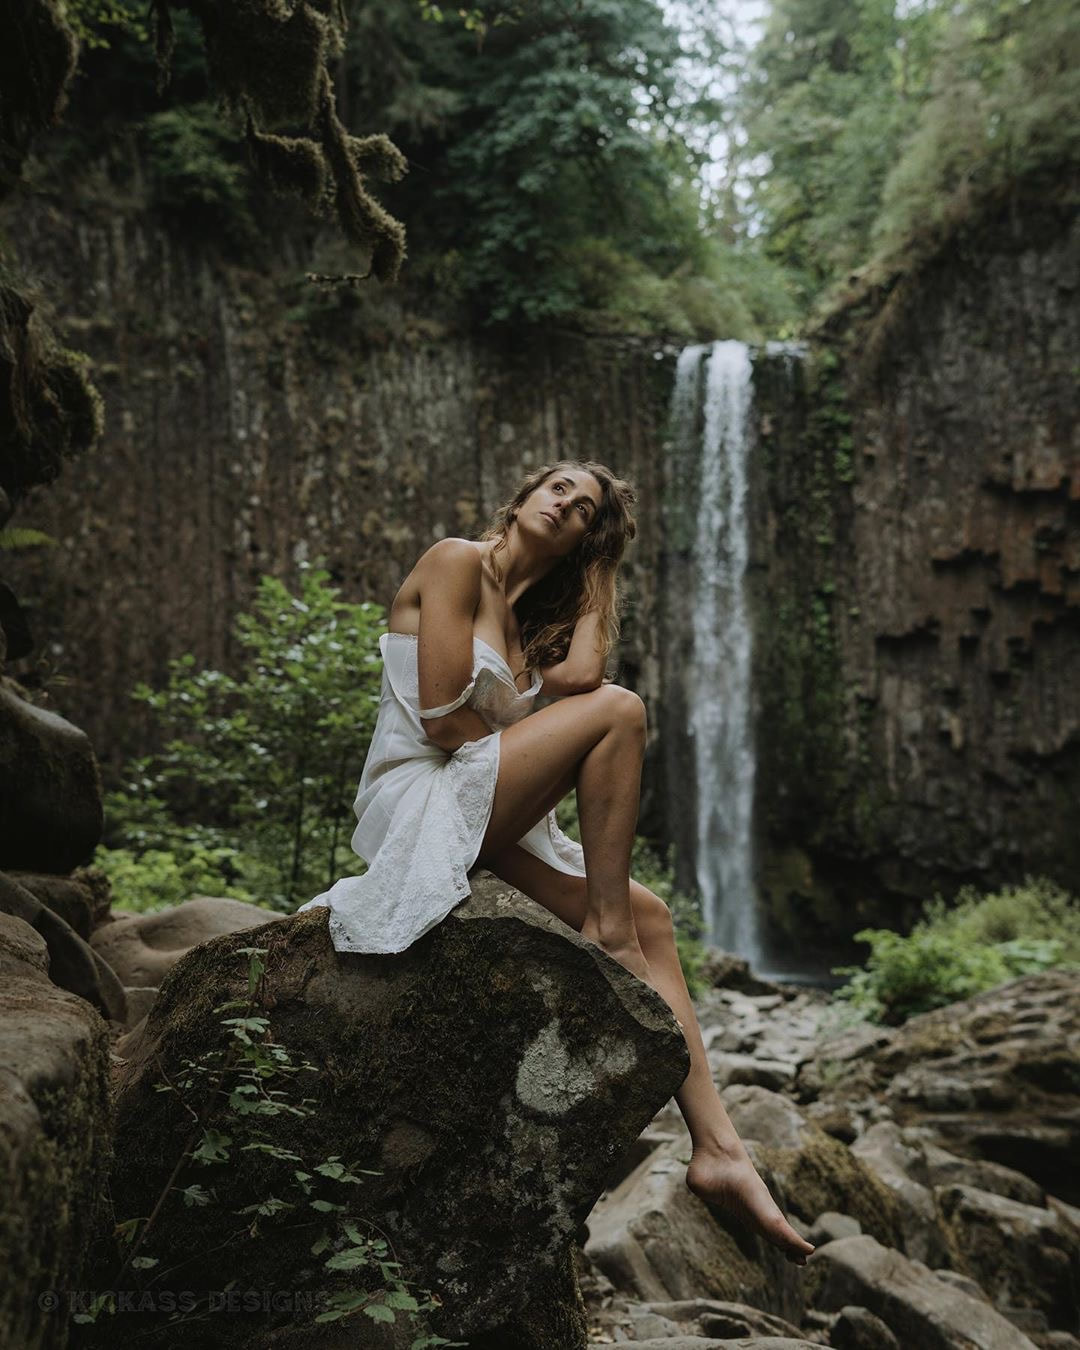
Model: @shawnna.lee on IG
Model: @becka.888 on IG
Model: @danillabean on IG
Now, same scenario except you have shade available to you. Any time you're shooting and the sun is harsh look for shade. This is crucial. You can almost always find some. For the example below we just used some shade from a few trees at the beach.
Model: @becka.888 on IG
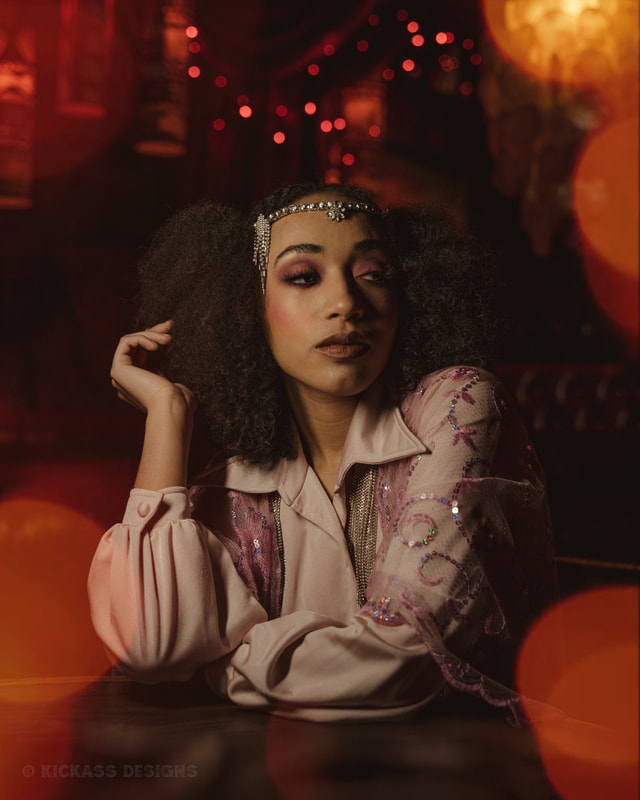
Let's say your shooting inside a bar with no flash. It's sure dark, what do you do? Use whats available. For the shot below we just used the light from above the pool table. Make sure your model is as close the the light as possible. My settings: 1/160 sec /// ISO 320 /// F2.2
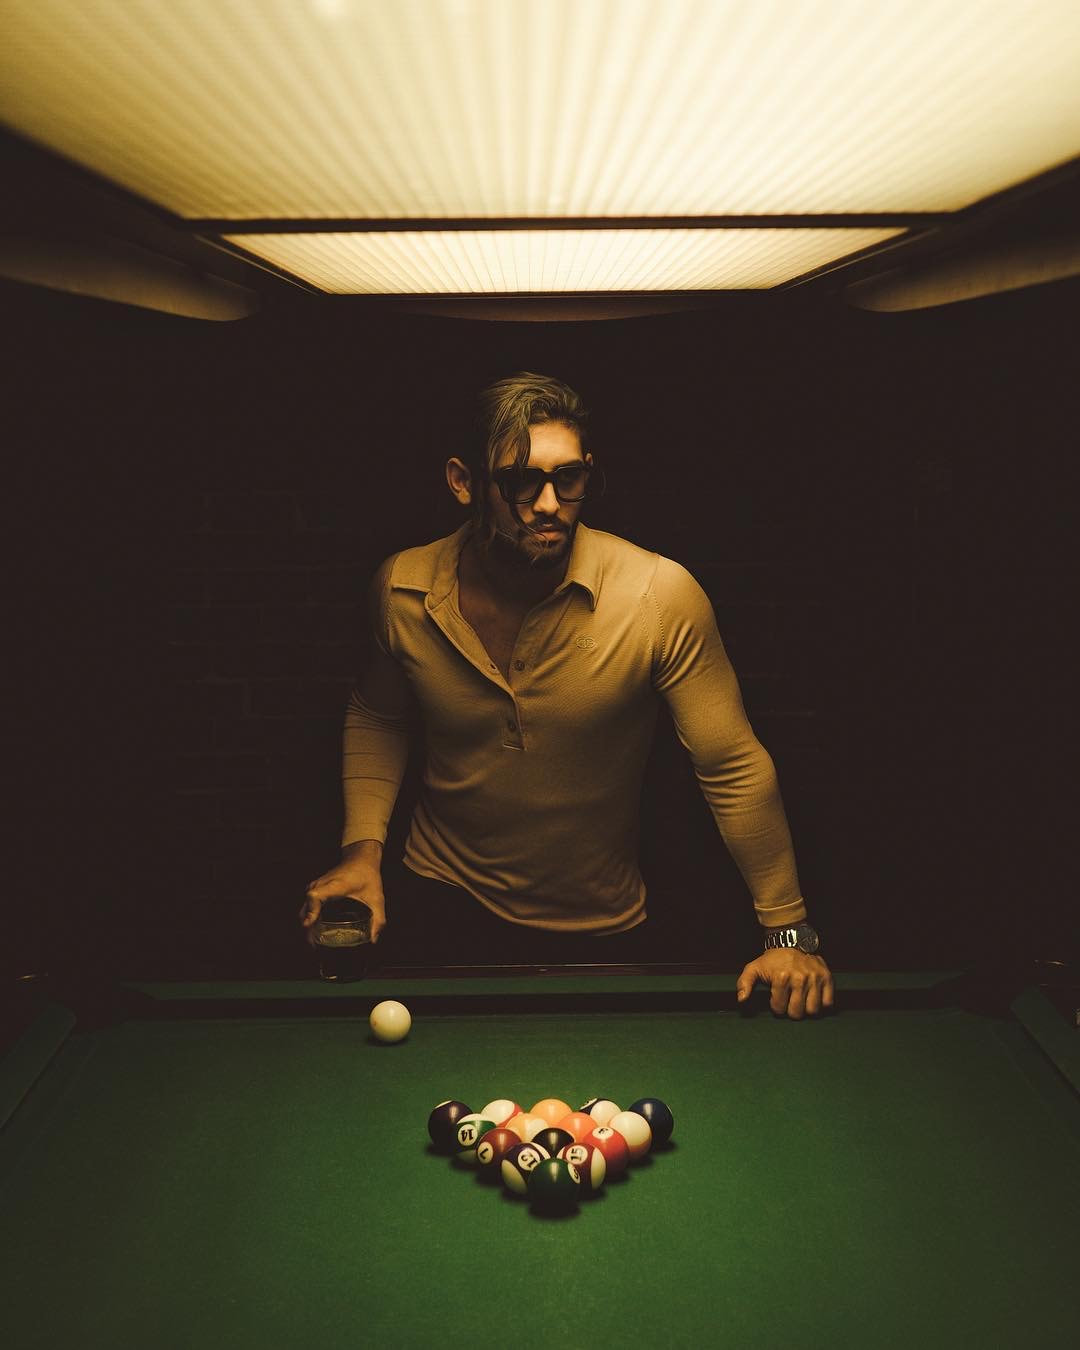
Model: @kamyar_jahan on IG
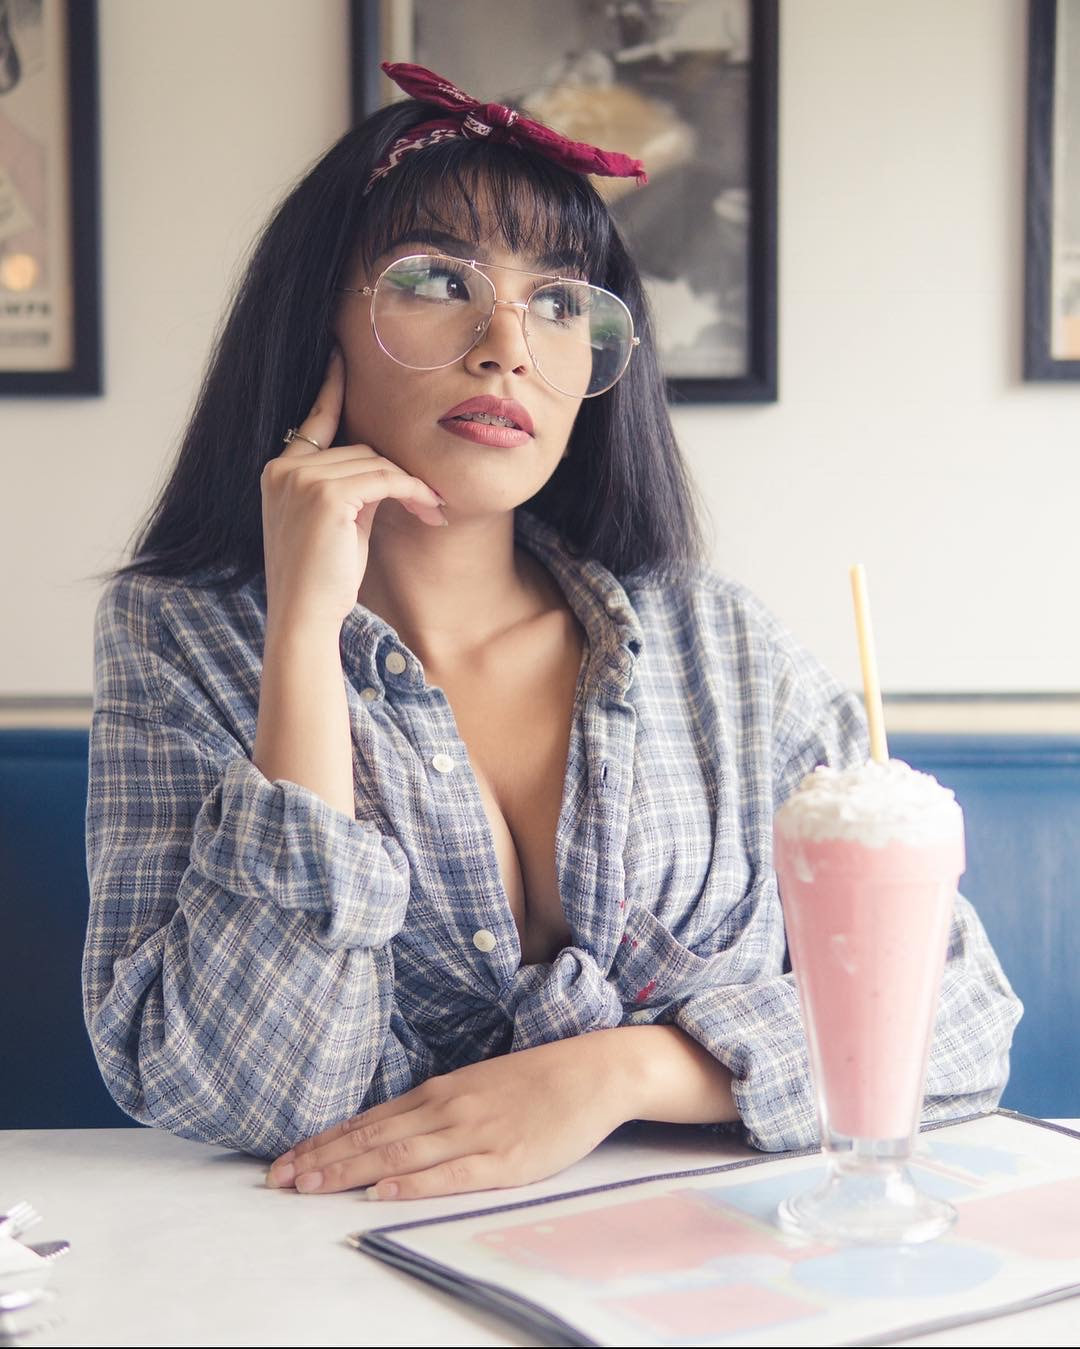
Let's say your shooting in a coffee shop. Take a look at these 4 examples of how to use the light coming in from the window and how the position of your model changes the mood.
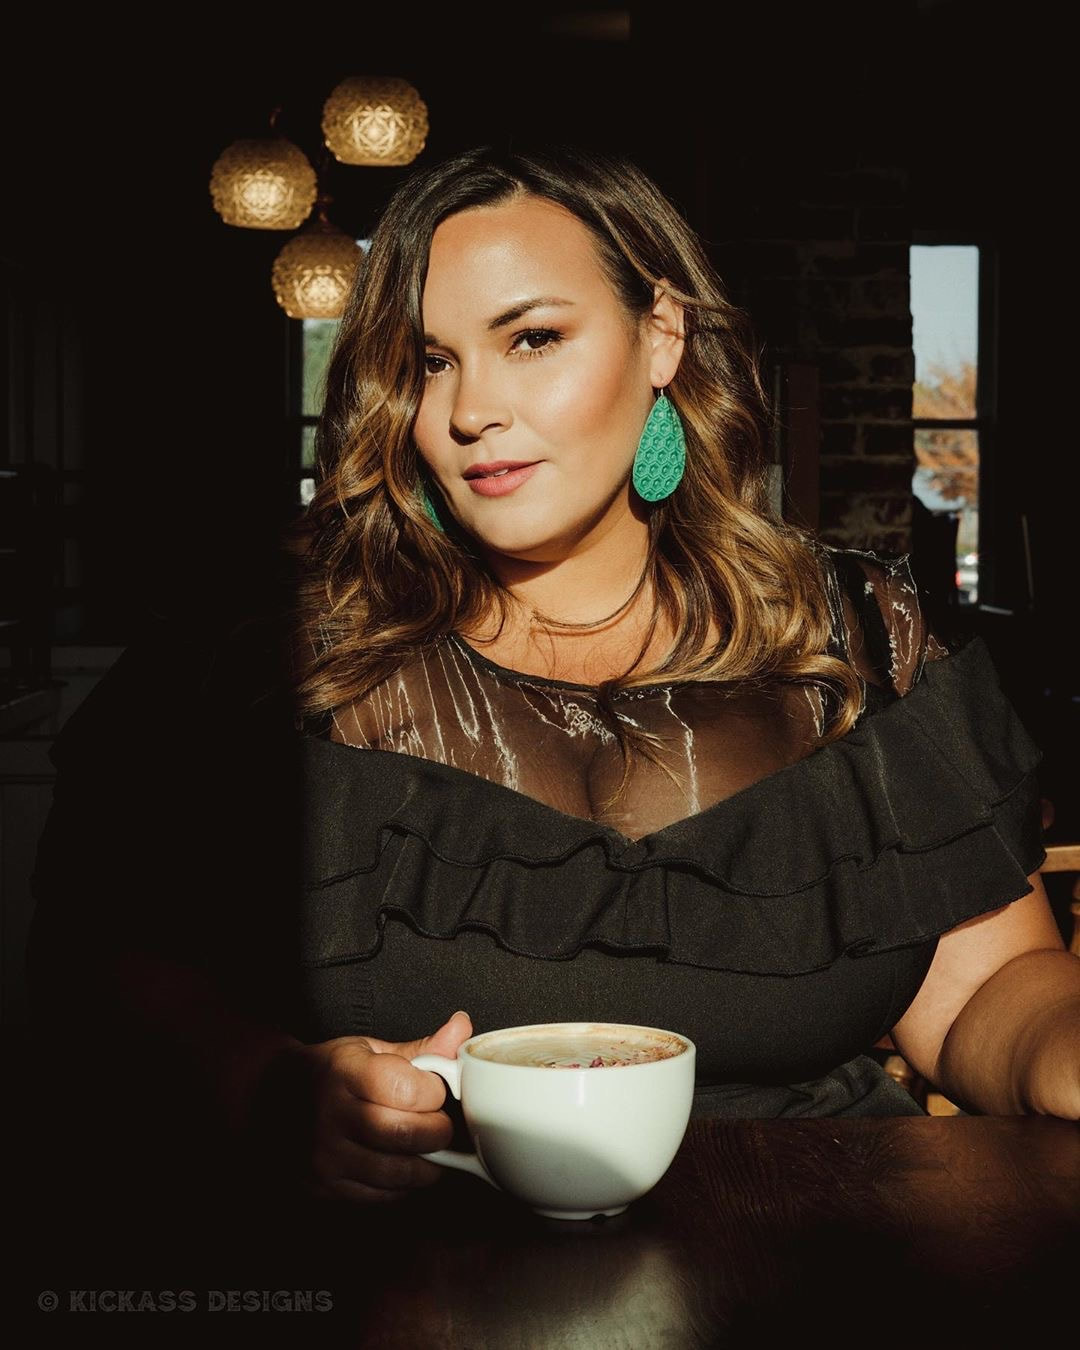
Model: @nicole.denise.johansson on IG
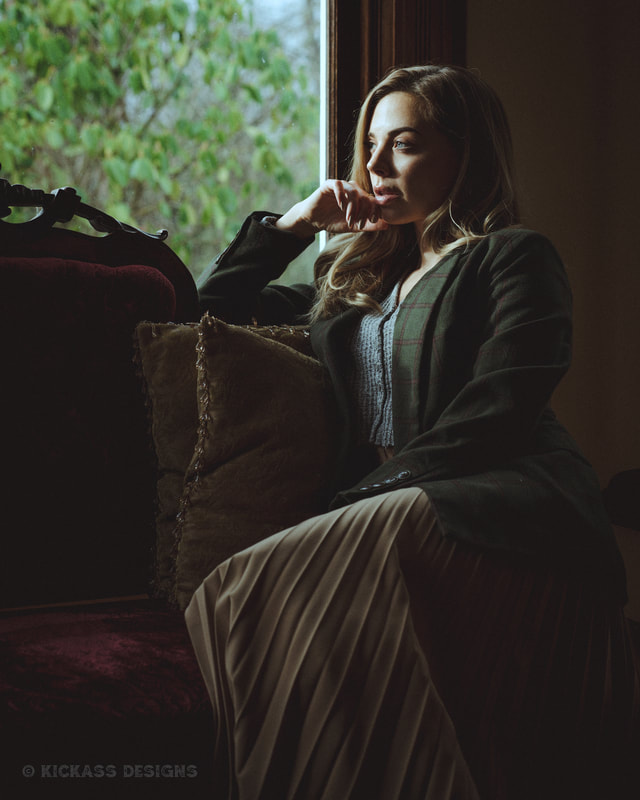
Model: @emmakateroberts on IG
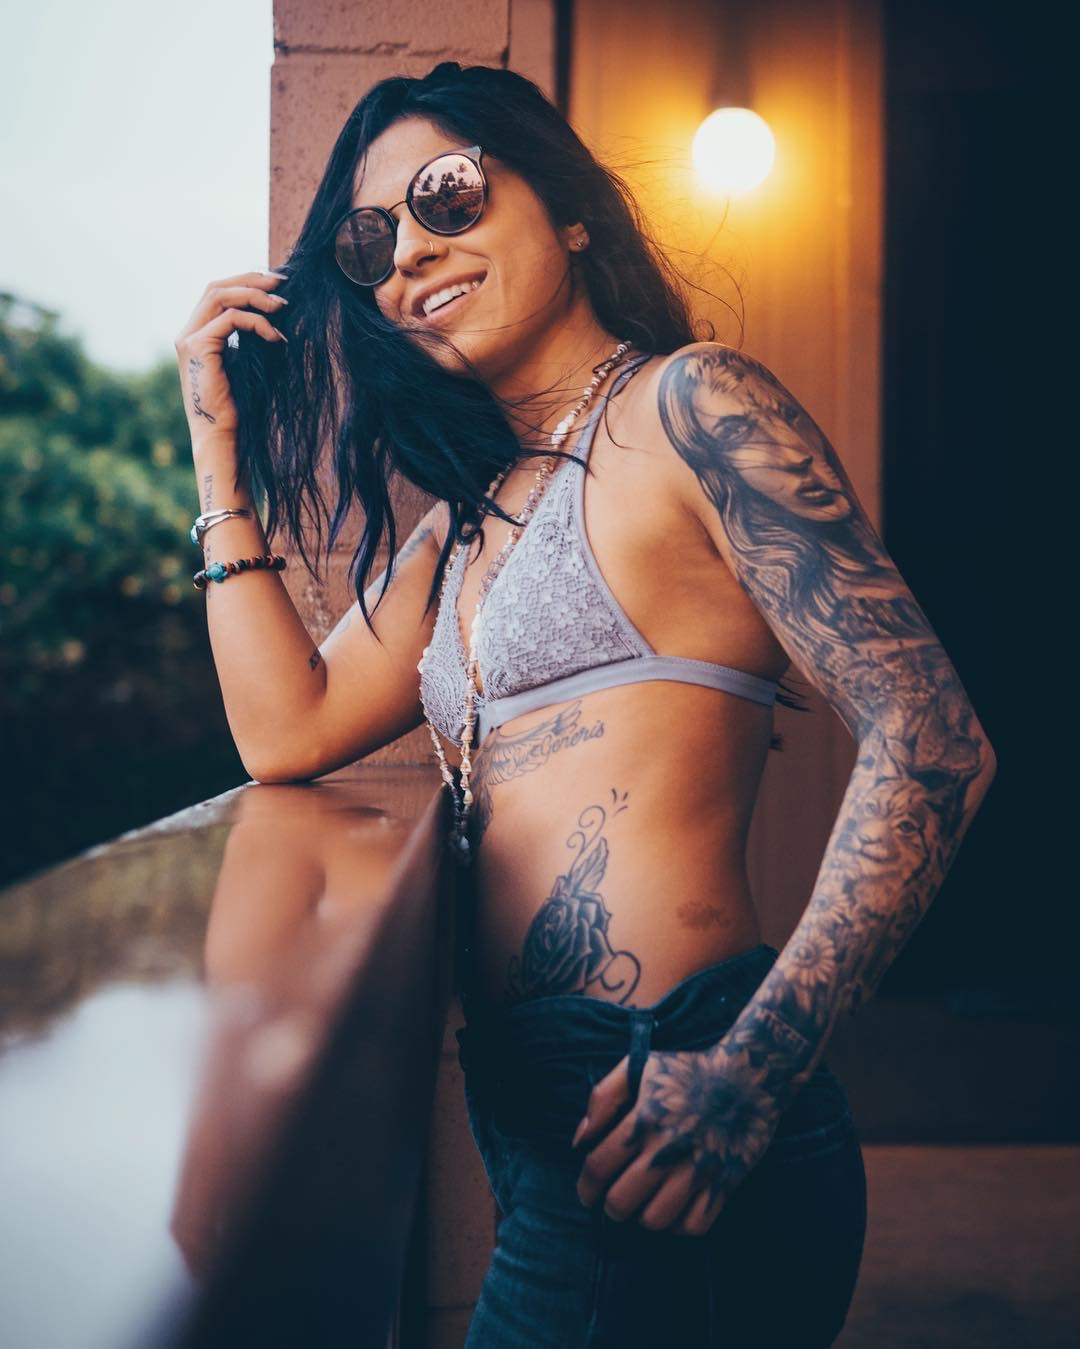
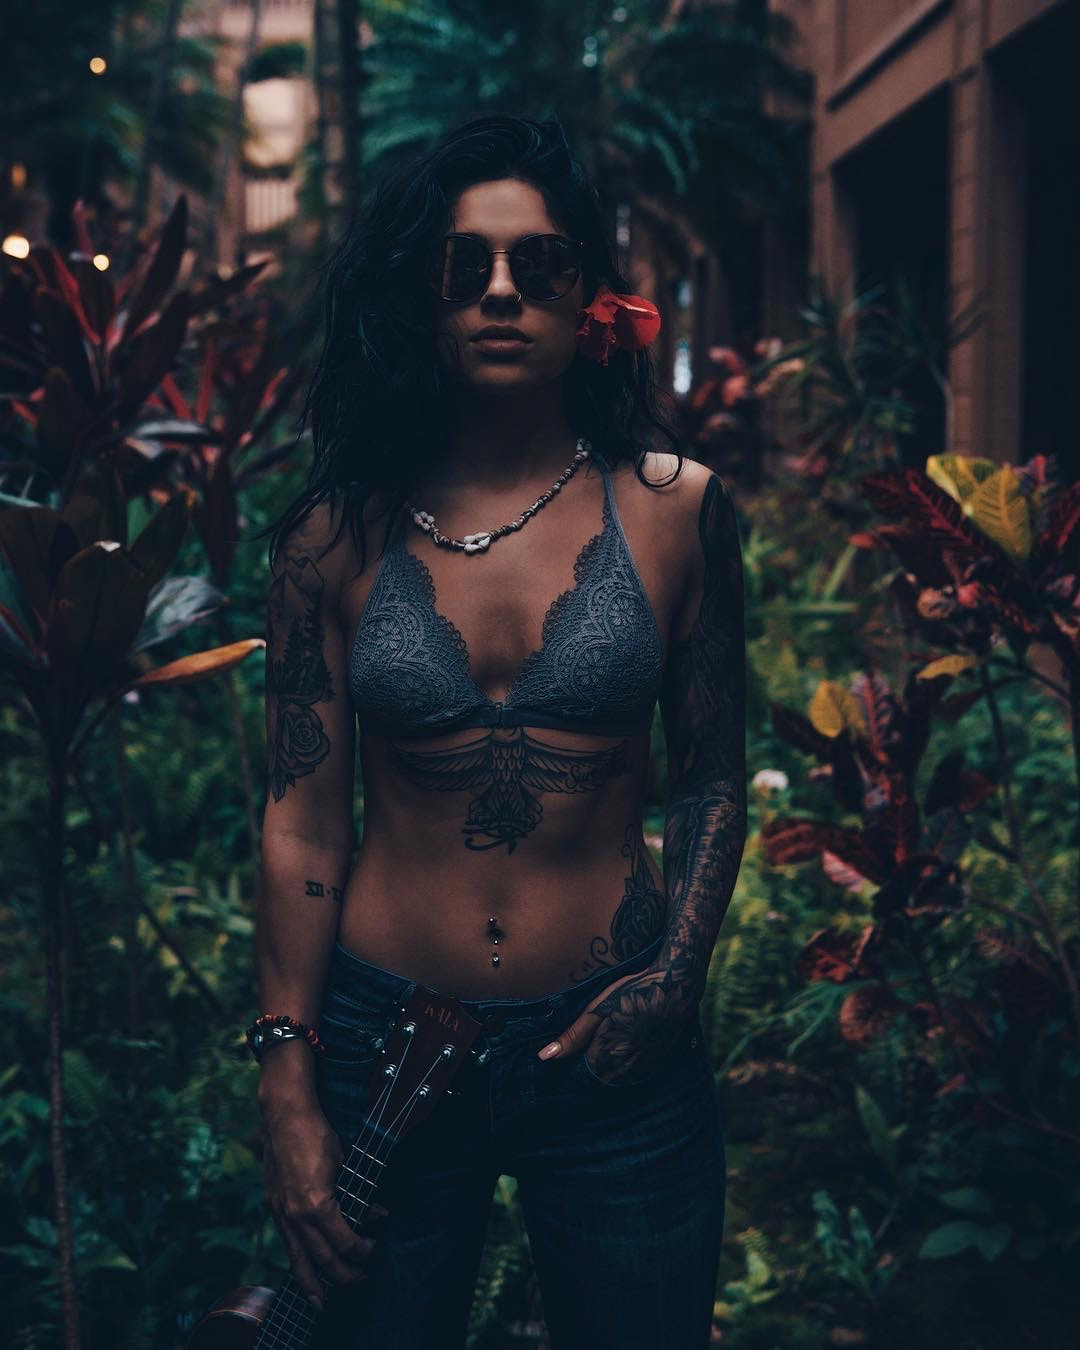
Model: @dyllan.tattoos on IG
Model: @saaphiirre on IG
Now let's say you're shooting in an arcade. They are always dark but the neon makes for really fun photos. The key to shooting with neon is having your model as close to the neon as you can get. If you have the Neon behind them and nothing to light their face it will be too dark. For the example below I had my model stand as close as she could to the arcade screen because it was producing a good amount of light. Settings used were: 1/200Sec /// ISO 640 /// F3.2  Model: @thehannahhawkins on IG Model: @thehannahhawkins on IG
The example below was shot in a hotel room at night using the standing lamp next to the sofa. Just point it towards the model and make sure it's as close as possible.
Model: @shybbyshy on IG
Always keep an eye out for fun shadows when the sun is harsh. Especially if your in an urban area. Below are some example of how I used shadows on a wall to create a dramatic image. The key is to have your exposure correct in camera. Make sure you bring the exposure down so you don't blow out the highlights and crush those darks. We want the detail in the highlights and we want to make those darks pitch black.
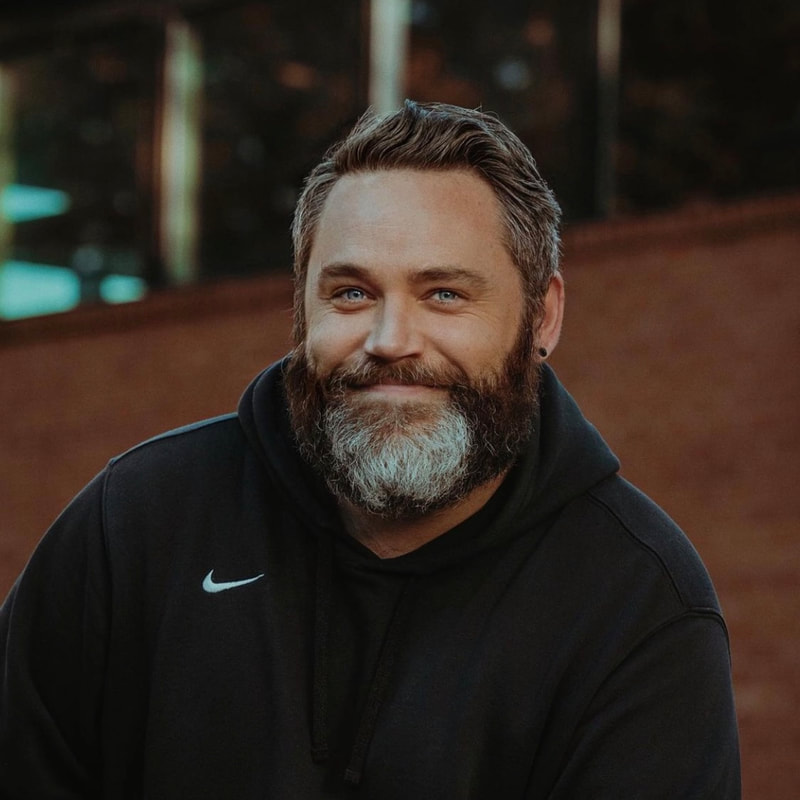
Model: @shawnna.lee on IG
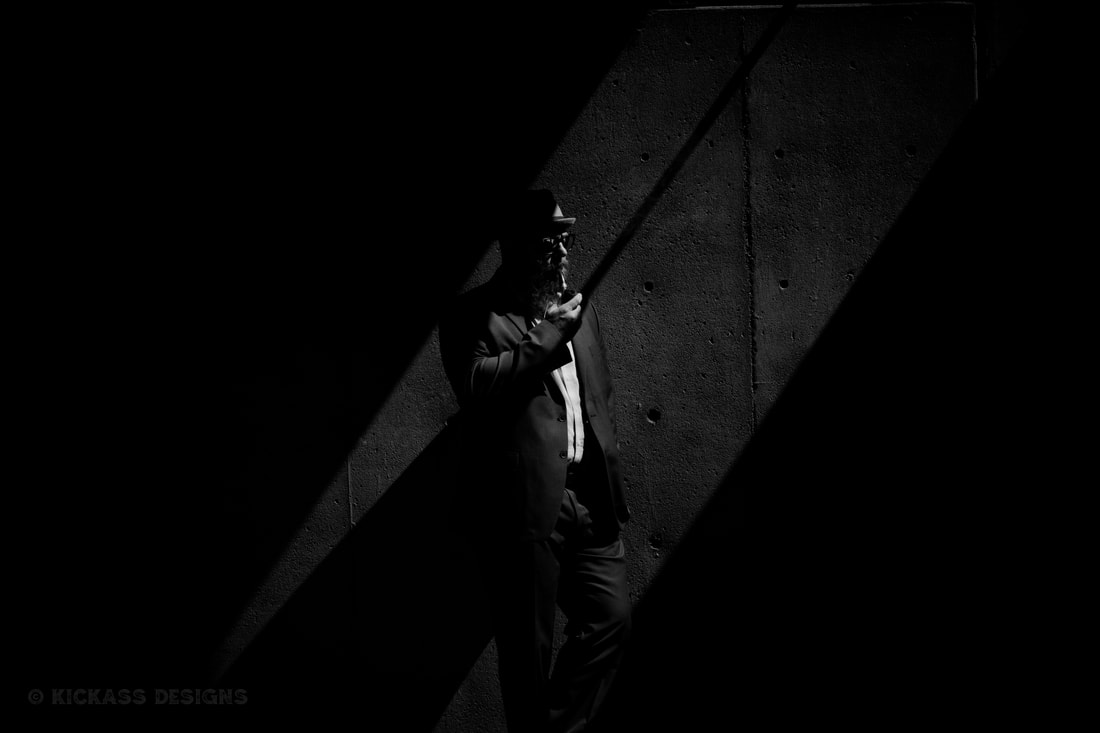
Model: Troy
Use whatever light is available, below is an example of using fire to light your subject.
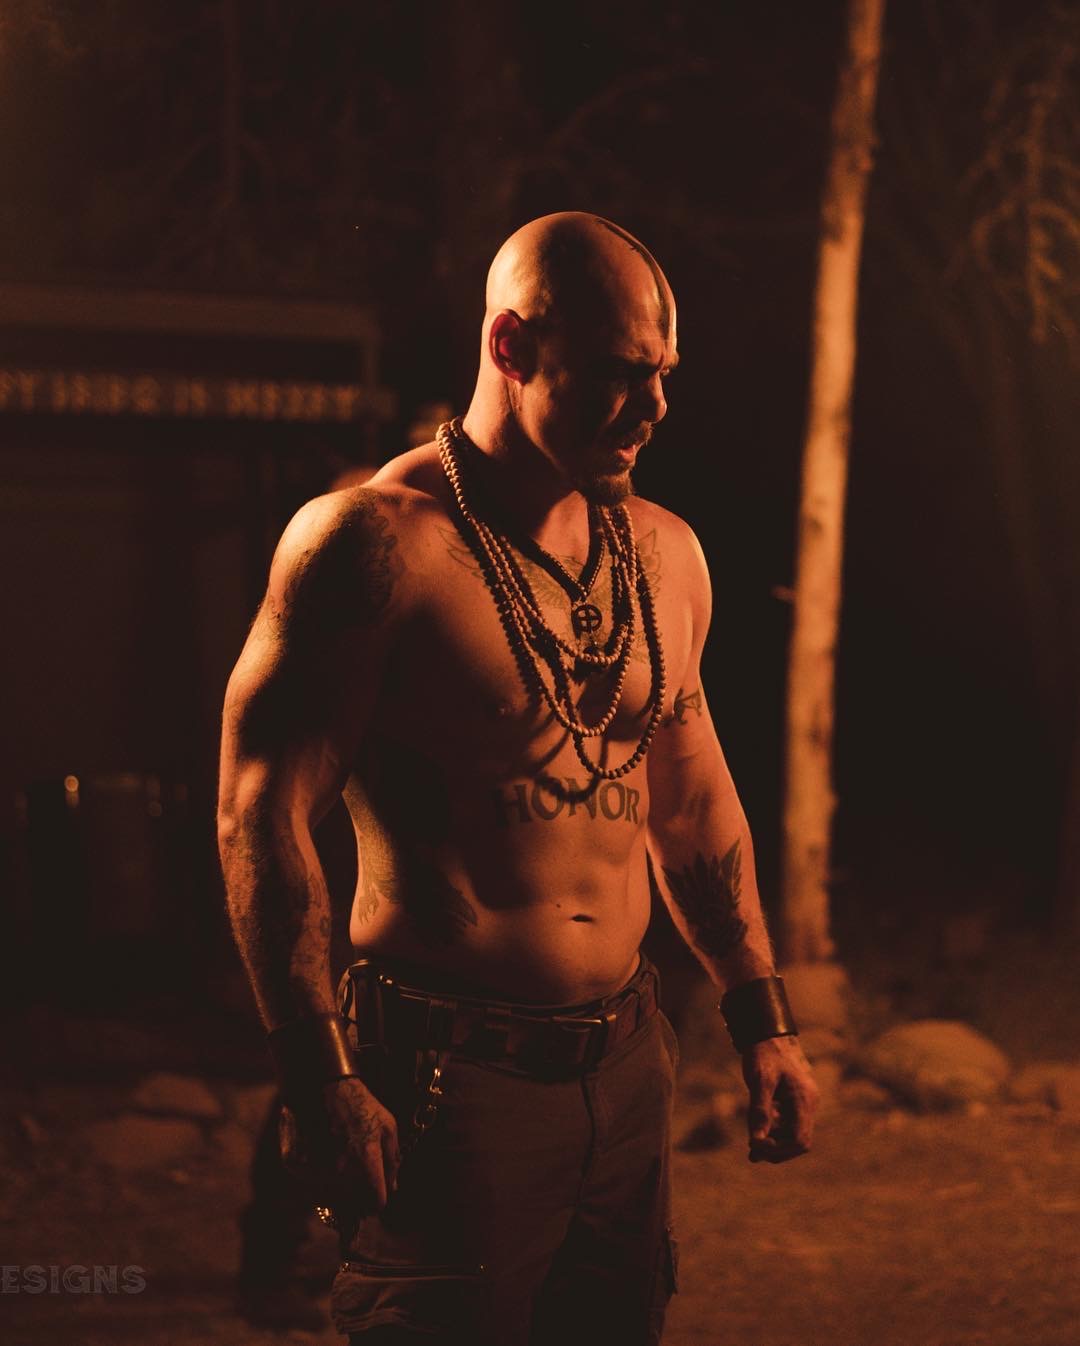
Model: @starttheworld on IG
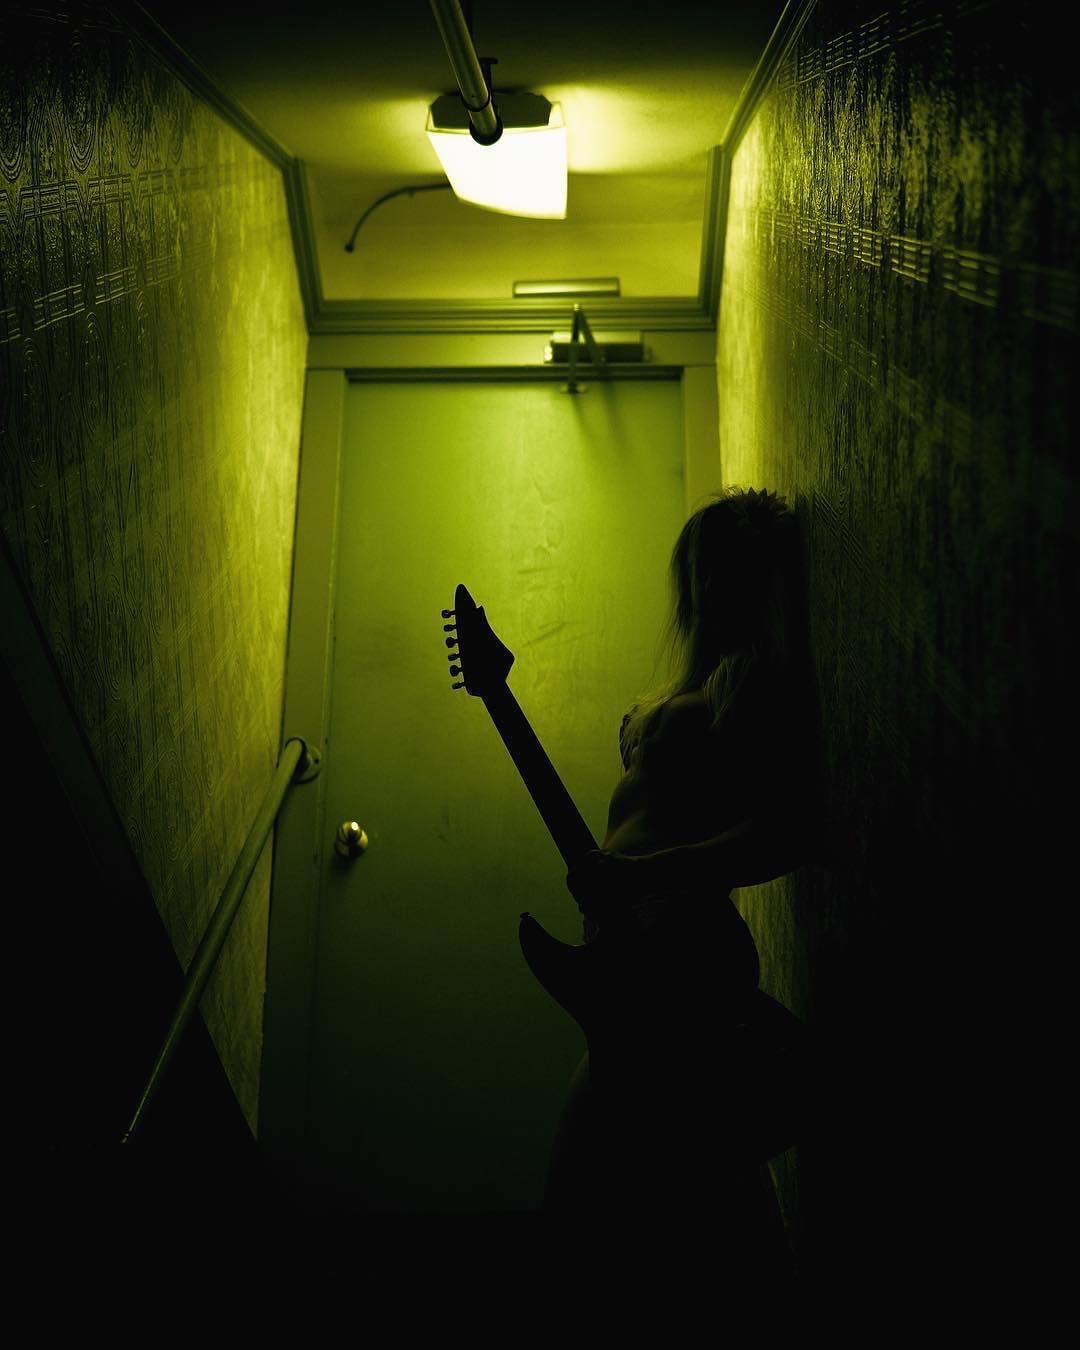
Try having the light source behind your model to create a fun silhouette like we did below.
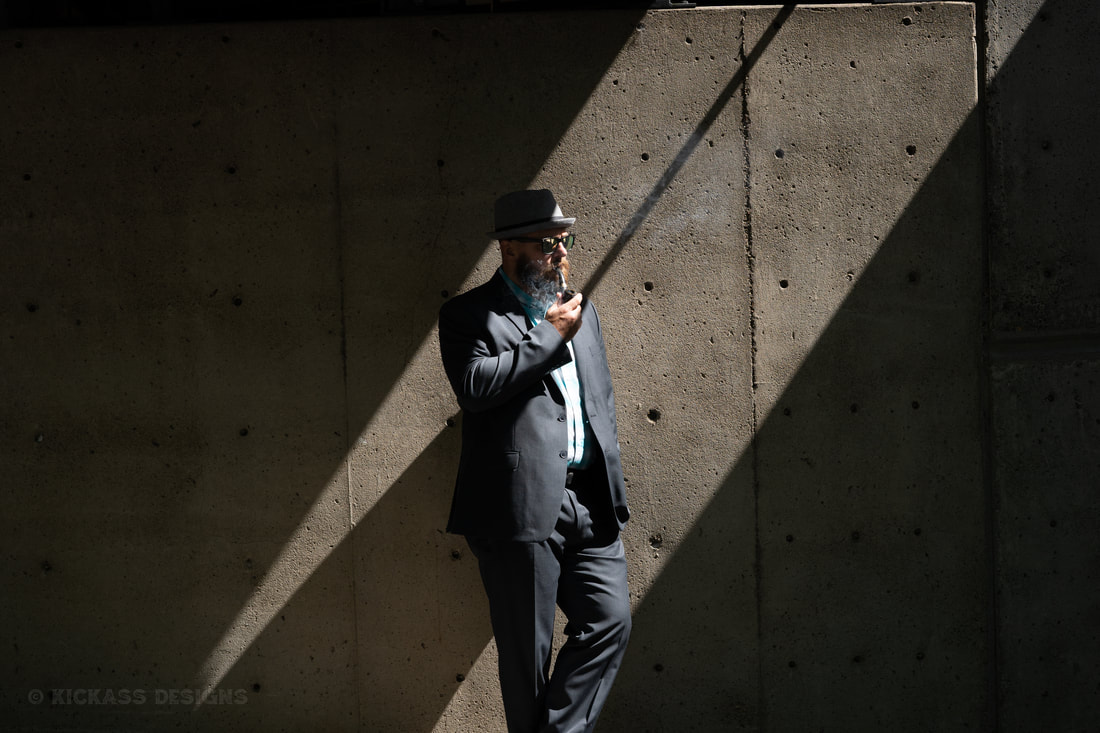
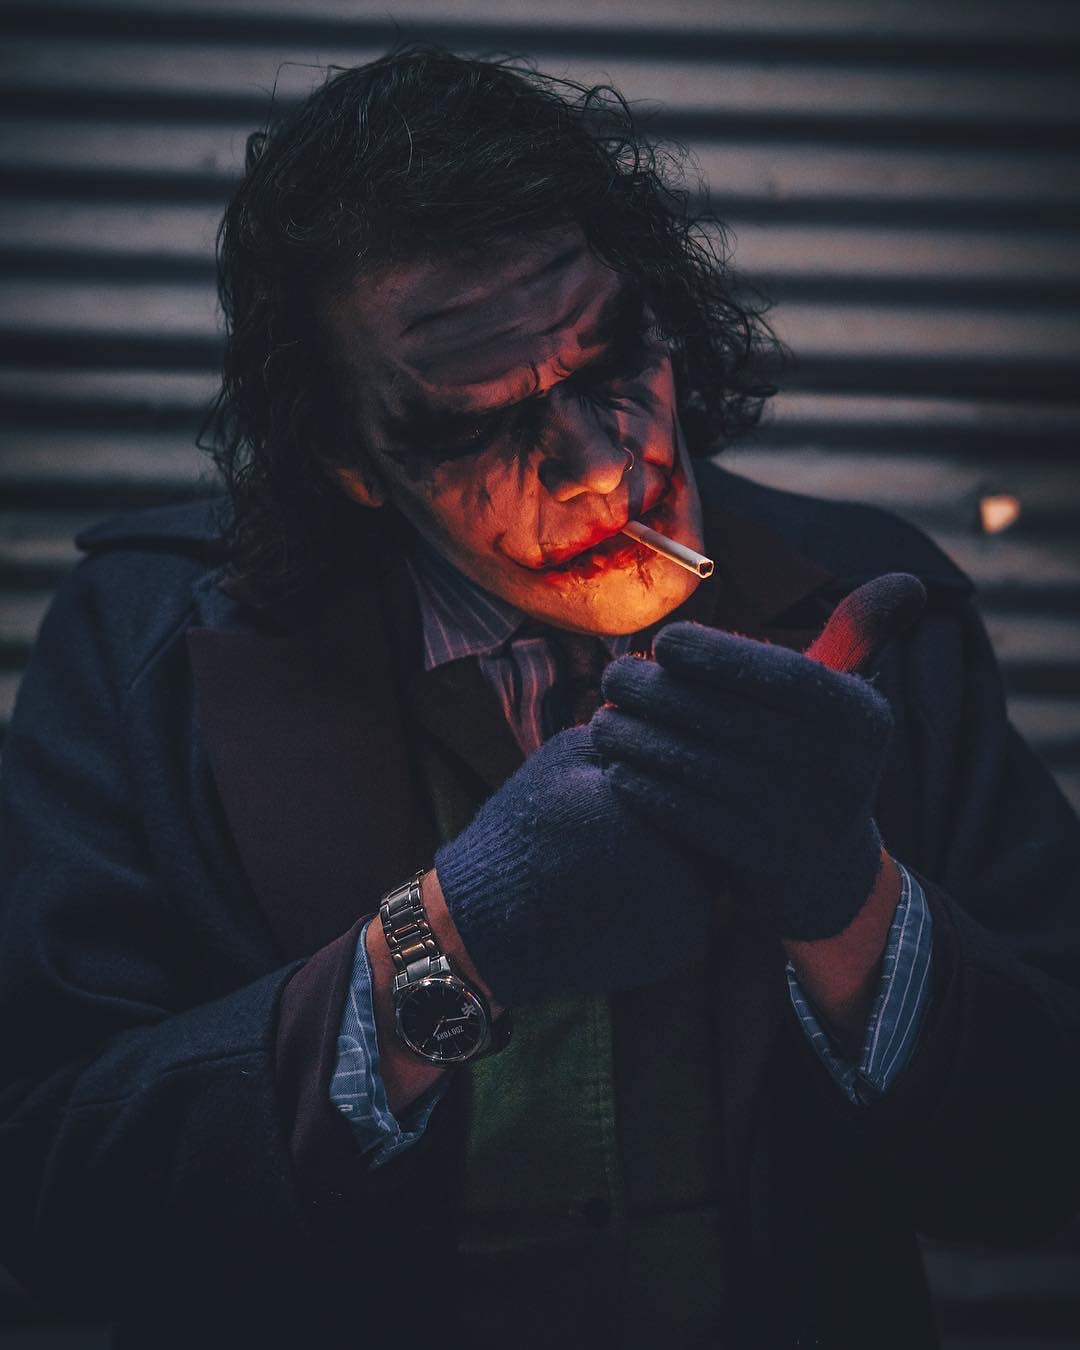
If you're shooting somewhere urban at sunset keep an eye out for street lamps, neon, or lit door ways. The image below was at sunset so we used a lit doorway to add some dramatic lighting.
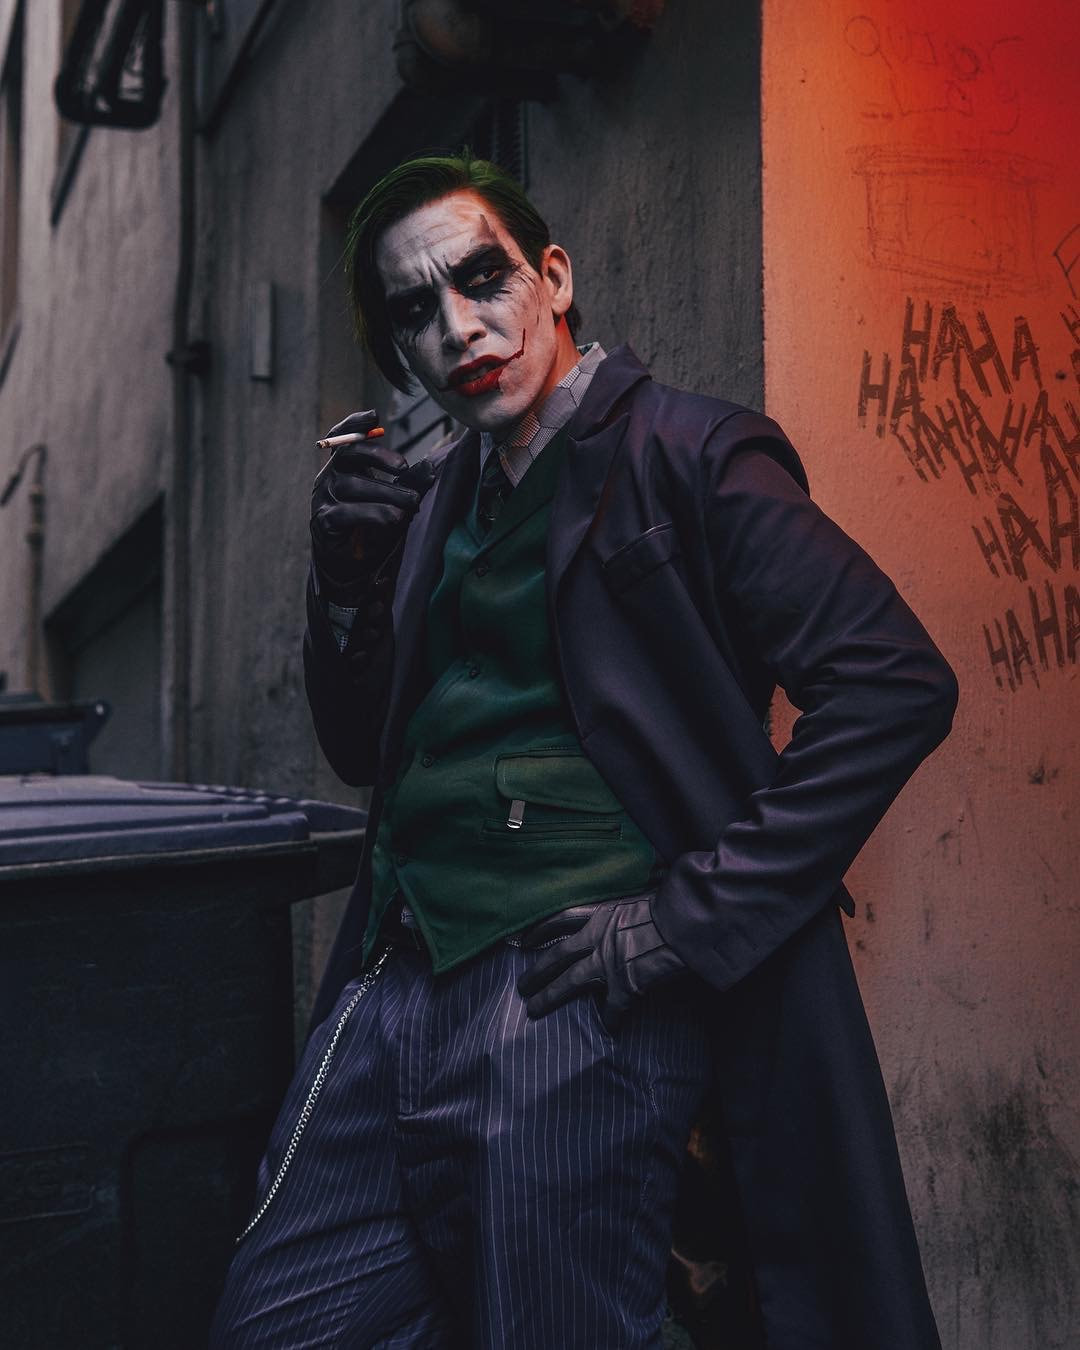
Model: @real_wade_wilson on IG
Maybe the sun has set so you're out of sunlight, use a lighter or street lamp for dramatic lighting as we did below.
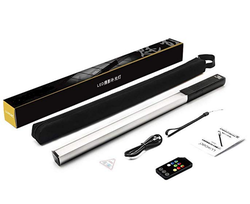
Now that you've seen some examples of using natural light here's an example of using a Portable Wand Handheld LED photography Light.

Models: @jacquelynnefaith & @ambernicotra on IG
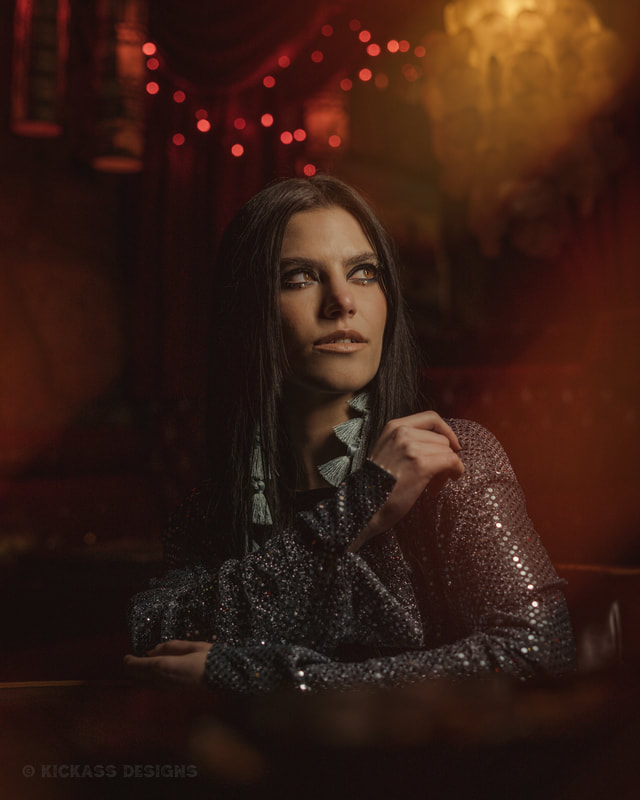
Every now and then you'll be in a situation where you just don't have enough light. For emergency situations like these I like to have a light wand in my car just in case. It's about $80 on amazon, it's light, compact, easy to carry and use. These photos were taken in a bar with zero light to use so I used the wand to light the models.
All that being said. I'll leave you with this. As much as I love using natural light sometimes your clients requests will require a studio and a light setup. So do some research and become familiar with a studio you like best in your area. Some offer lighting some don't. Personally my favorite studio in Portland is Cobalt Studios. For only $75 an hour you get access to everything and that includes lighting! Not only that but the owners are amazing people and they take the time to help with lighting so its exactly how you want it. The staff is very knowledgeable and friendly.
If you found this article helpful I'd love to hear from you in the comments. 
2 Comments
Posing Ideas for Women in 2022
Lets face it, professional models can take a lot of the burden off us as photographers by bringing their posing expertise to the table. But unfortunately we don't always have the benefit of shooting with a professional model. As a high caliber photographer it is important to have the ability to pose normal people with little to no experience in front of the camera.
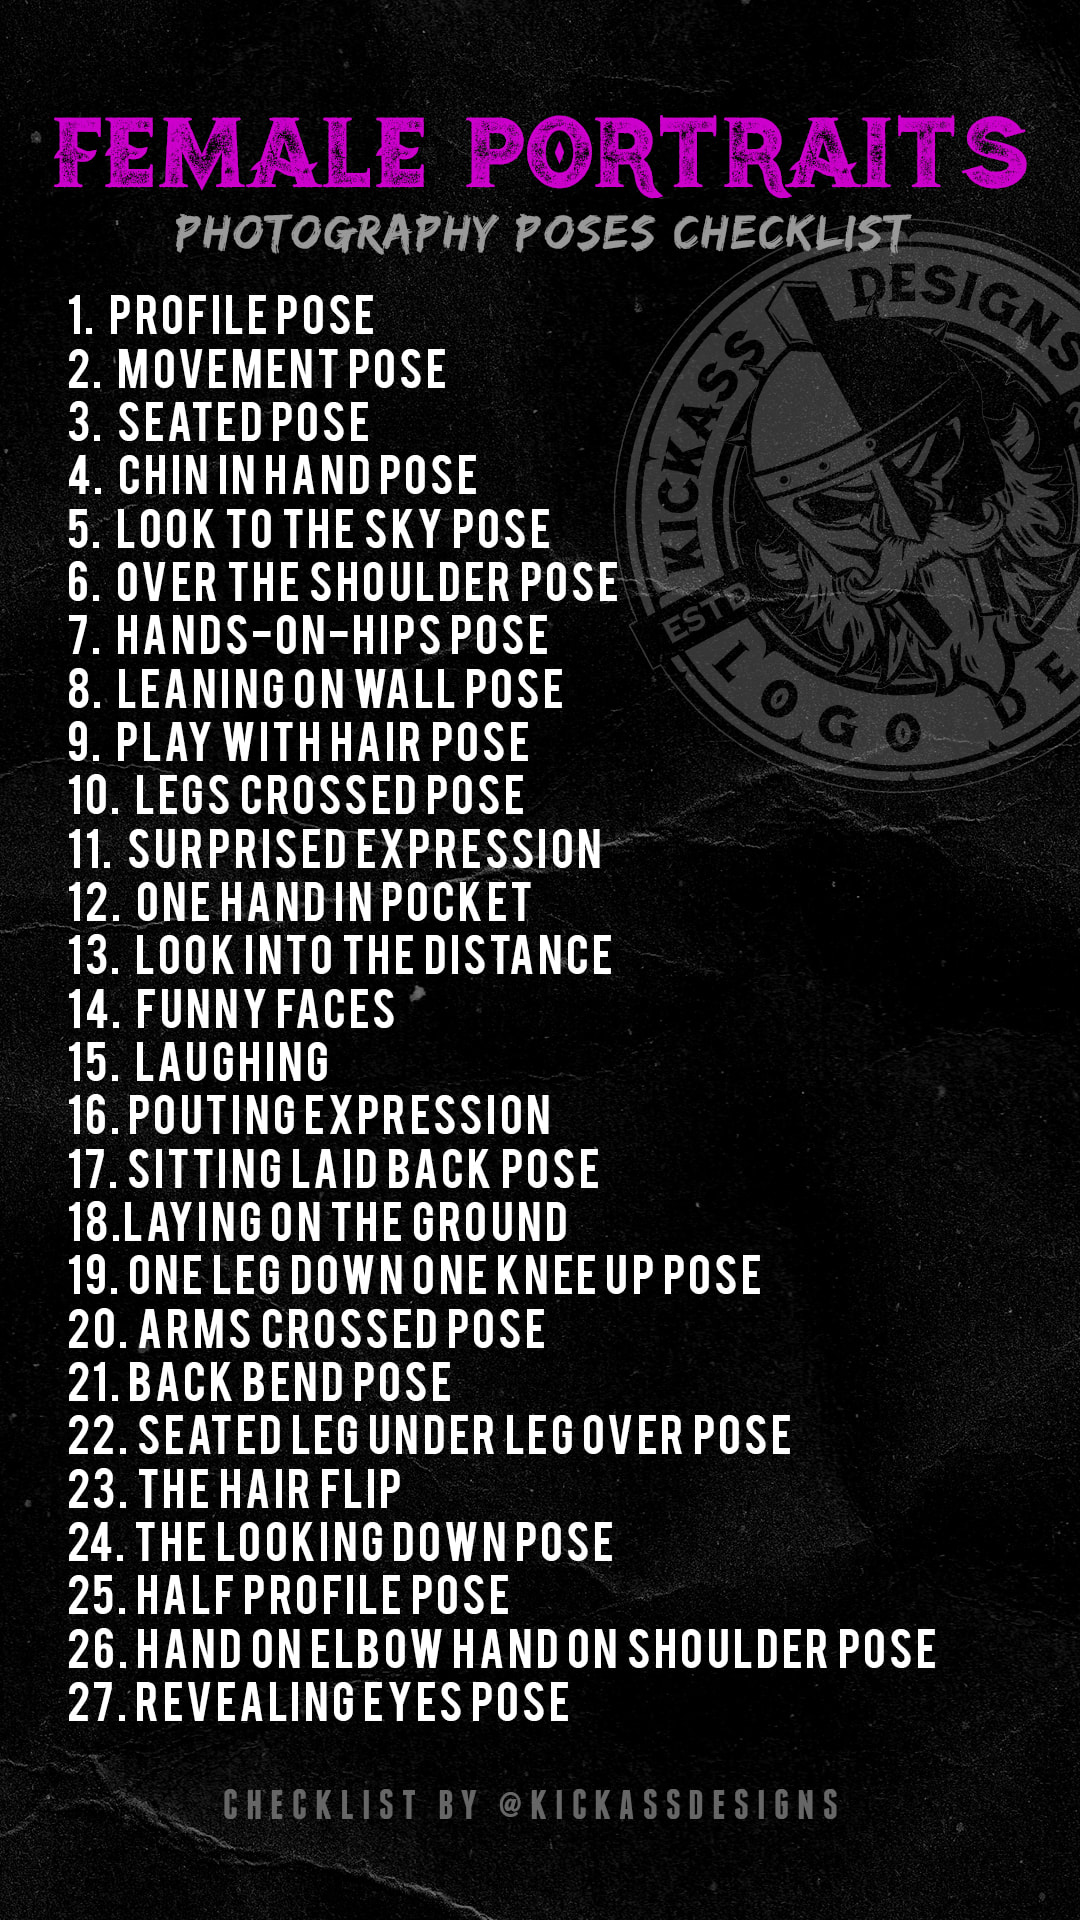
If posing for modeling is a challenge for you this list of 27 posing ideas along with photos for reference should help. Every photo below was taken by me.
| You May Also Like: 10 Safety tips every model should know
While certain genres of photography get to work with models, most genres involve shooting normal people who will have varying degrees of comfort in front of the camera and natural posing ability. Posing was the hardest thing to learn for me personally and it is something I still work on every day.
While I am jealous of photographers who have a natural ability to pose people on the fly, I unfortunately have found that I work best by having a list of go-to poses that I know work well for me and can fall back on if I need to.
| You May Also Like: 27 Posing Ideas for Men
Until now I have kept that list to myself. If you are a model or photographer who struggles with posing I hope this list helps. Make sure to bookmark this page so you can bring it up at any shoot and go down the list and nail every pose. You do that and you will be guaranteed to leave the shoot with tons of variety. Connect with me on Instagram HERE
1. The Profile Pose/Side View
If your model isn't blessed with perfect bone structure try different lighting, angles, chin movements, and hair placement to hide a double chin. Models: Don't worry, we all have one.
Model: @jacquelynnefaith on IG
2. Movement Pose/Action Pose
Have the model do some kind of movement or action. This could be walking, running, jumping, or spinning. For action shots make sure your shutter speed is 1/250 and up so it's not blurry.
| You May Also Like: How to get into Modeling. 11 Tips

Model: @stephaniejadesmith on IG
3. Seated Pose
Seated poses are great just keep an eye on posture and the tummy. Last thing you want is the tummy getting squished. If it's not flattering your model wont like it. Make sure your model engages her core at all times.

Model: @waterfallkristy on IG
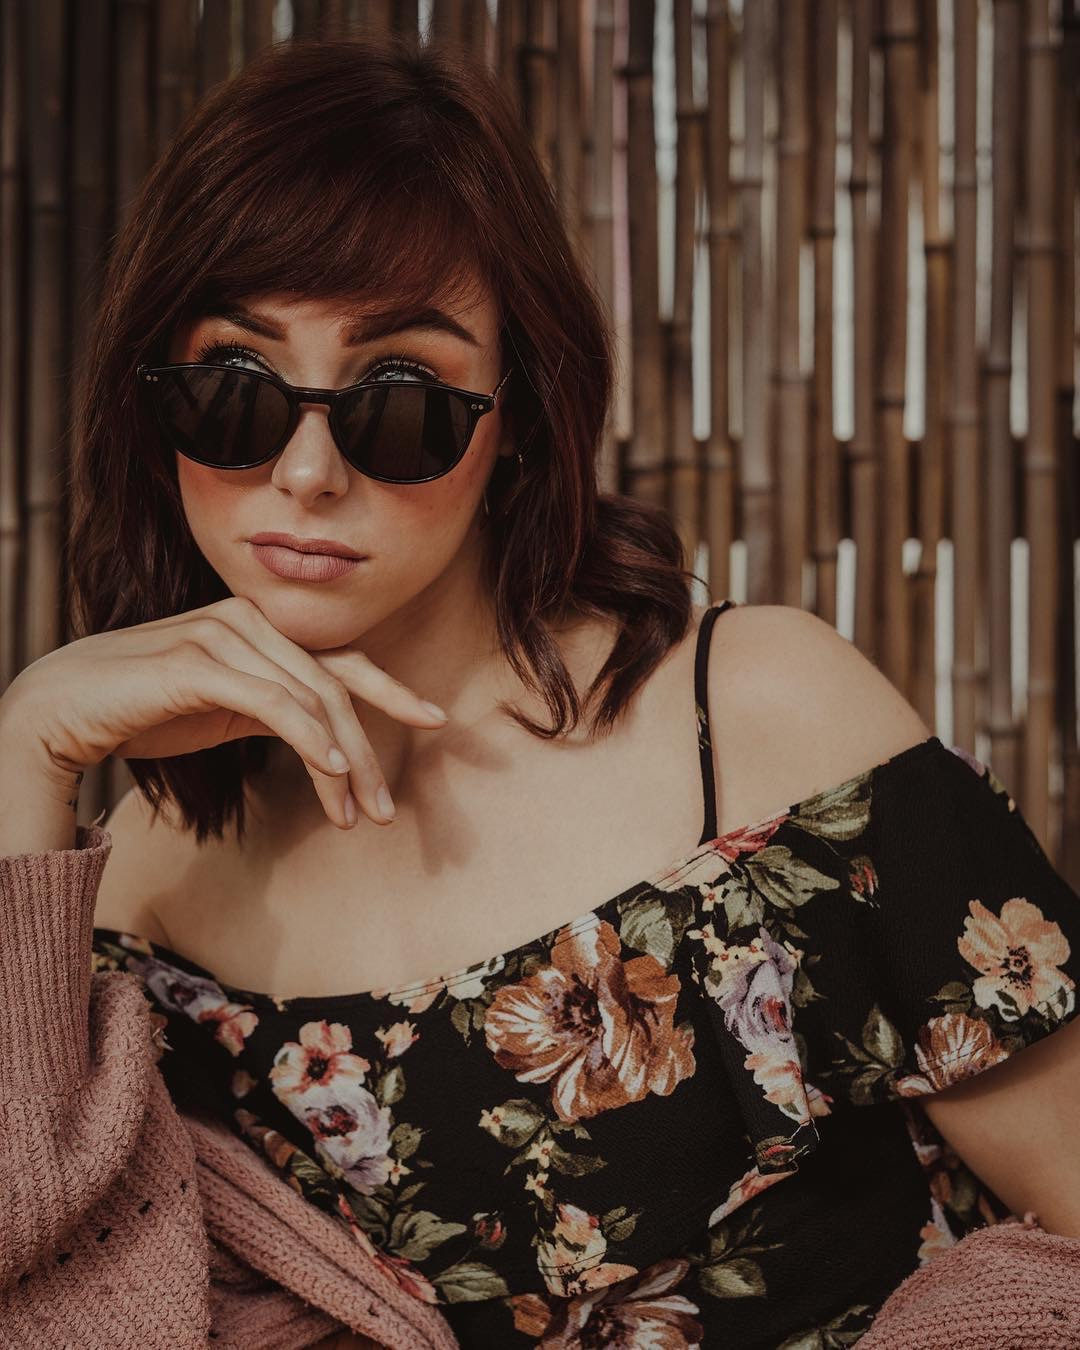
4. Chin in hand pose
If your model is seated this is a great go to. Try a variety of hand placements on the chin. Have your model look into the camera and off into the distance.
Model: @lexylovestruck on IG
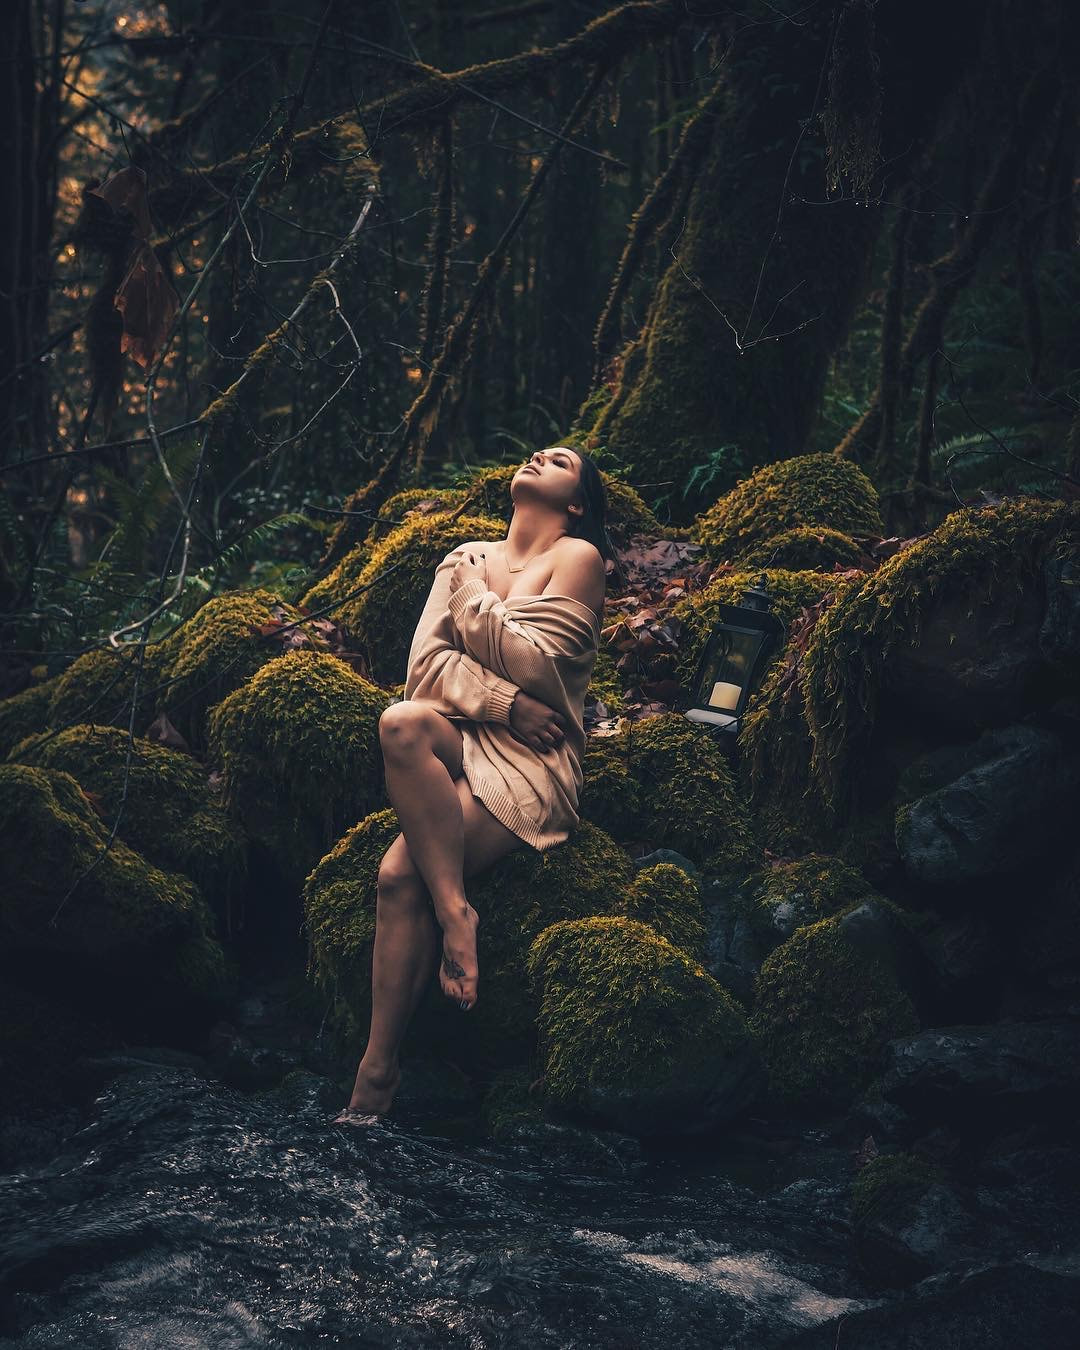
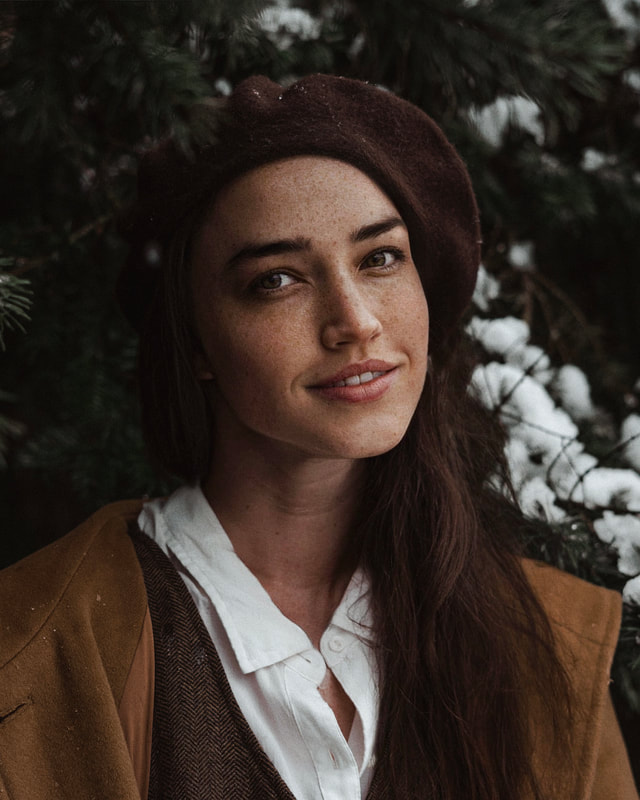
5. Look to the sky pose
Here's a tip to make your models eyes pop and lose those shadows when you're using natural light only. Have her look up. The light from the sky will make those babies pop and eliminate any unflattering shadows! This is very useful when shooting in a dark forest and your models face is super shaded.
| You May Also Like: Best Modeling Agencies in Portland
Model: @dear_miss_tiffany on IG
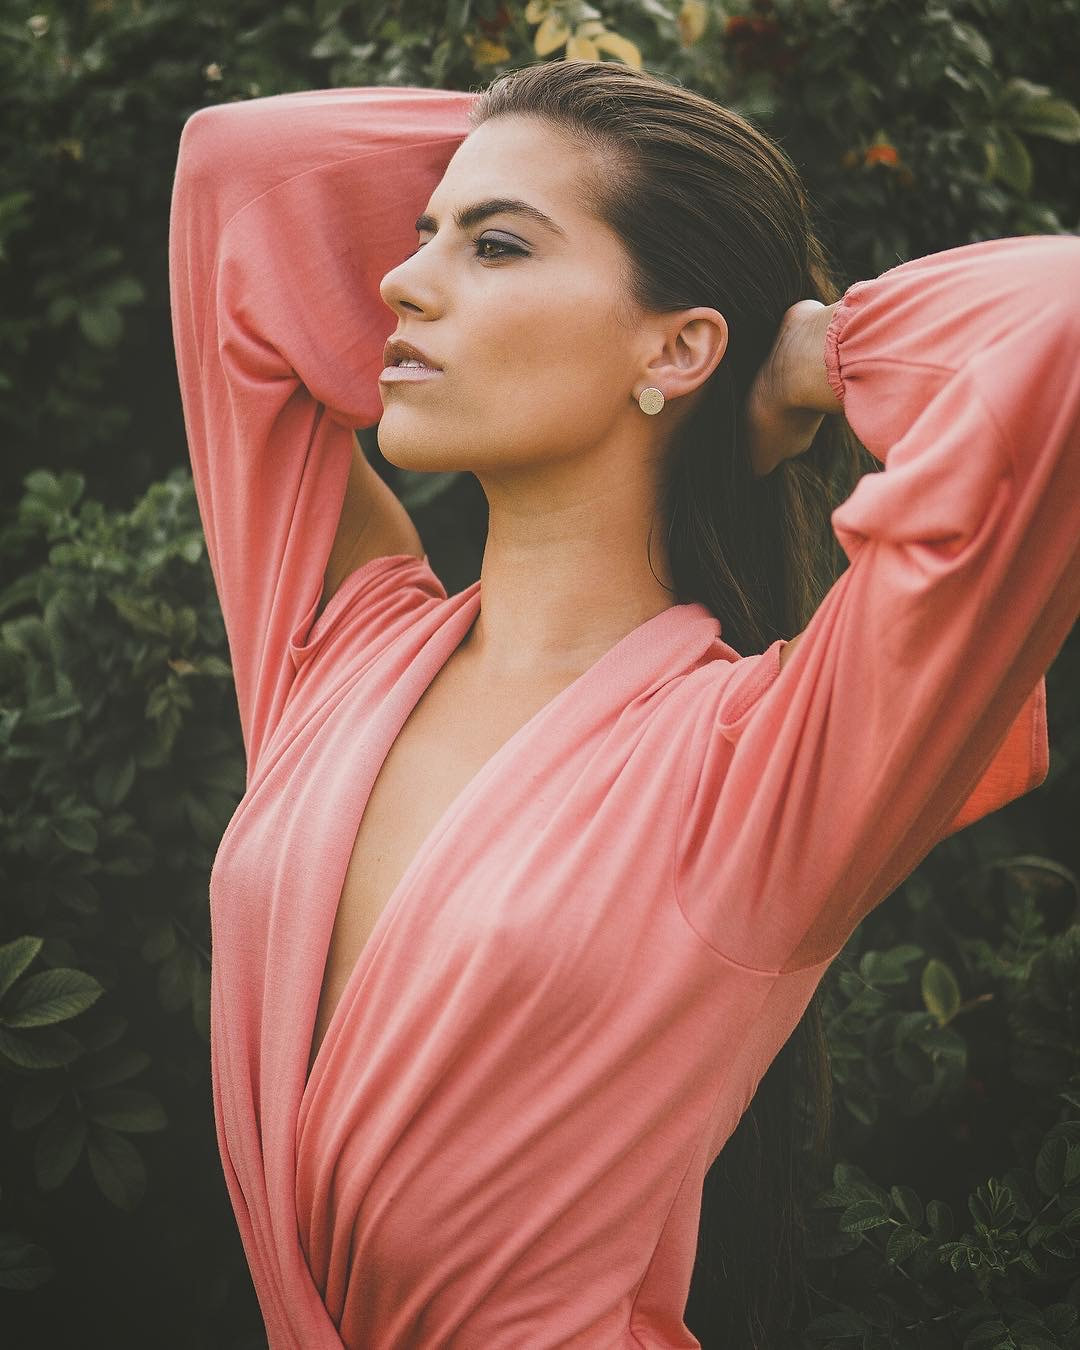
6. Over the shoulder pose
To change things up try an over the shoulder pose where your model plays with her hair with the hand furthest from the camera. Have her open up and get some space between the elbow and her body making a triangle.
Model: @ambermg_ on IG
7. Hands on hips pose.
Play around with hands on both hips or just one hand on one hip. Try having your model slighting turn her body and popping that hip to show some side booty.
Model: @igobytima on IG
8. Lean on wall pose
Try photographing at different angles and have your model lean with her side to the wall and her back to the wall for variety.
Model: @kaylaraecannon on IG
9. Play with hair pose
This is what I meant above when I said have your model play with her hair with the hand furthest from the camera. Have her open up and get some space between the elbow and her body making a triangle. Models will always ask what to do with their hands so letting them play with their hair is natural, fun, and gives them something to do with their hands.
Model: @aliciangates on IG
10. Legs crossed pose
Crossing the legs can give great shape to the body.
Model: @jennawilliamscpt on IG
11. Surprised Expression
I call this the Macaulay Culkin pose. I find adding the hands is just a bit over the top but a surprised expression really open up the eyes and makes for a fun photo every time.
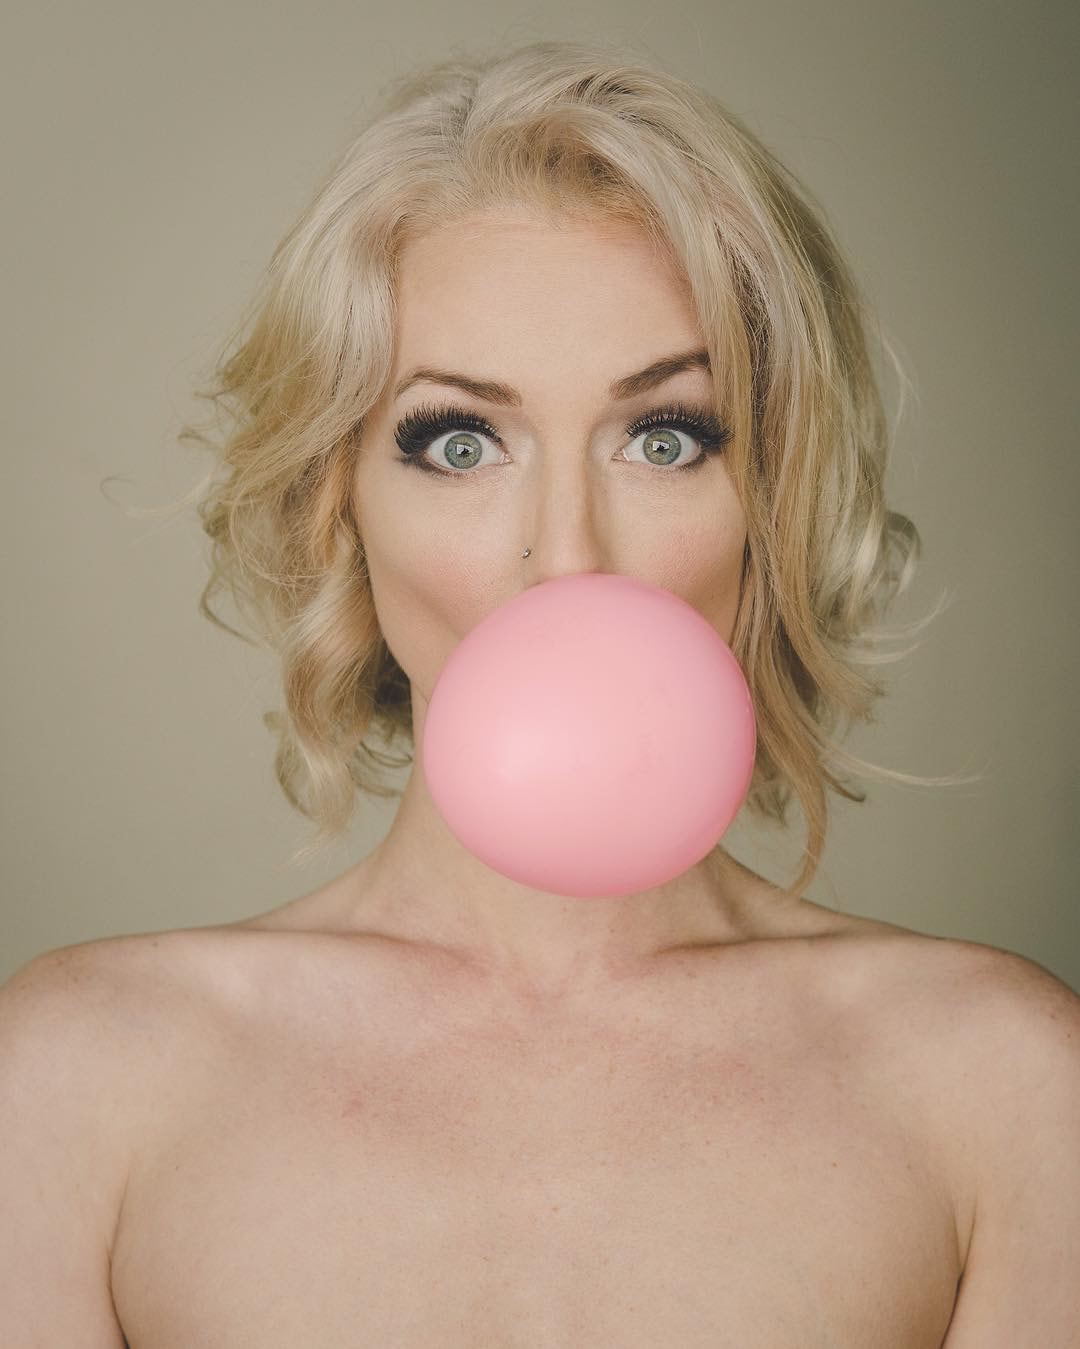
Model: @alyxandriamodel on IG
12. Hand in pocket pose
Try both hands or try just one. The choice is yours. Live a little. Also try a thumb in the belt loop instead of pocket or a thumb in the waist band.
Model: @aliciangates on IG
13. Look into the distance
I call this the day dreaming pose. Have you model look into the distance like she's day dreaming about something she loves or like she's longing for something.
Model: @saaphiirre on IG
14. Funny Faces
Funny faces although not the most flattering are always the most popular in any photo set I post where there is a funny face. Catch those silly moments that happen between shots because people love seeing personality and it shows your model is more than just a pretty face. Have every model you work with give you at least one good ridiculous face.
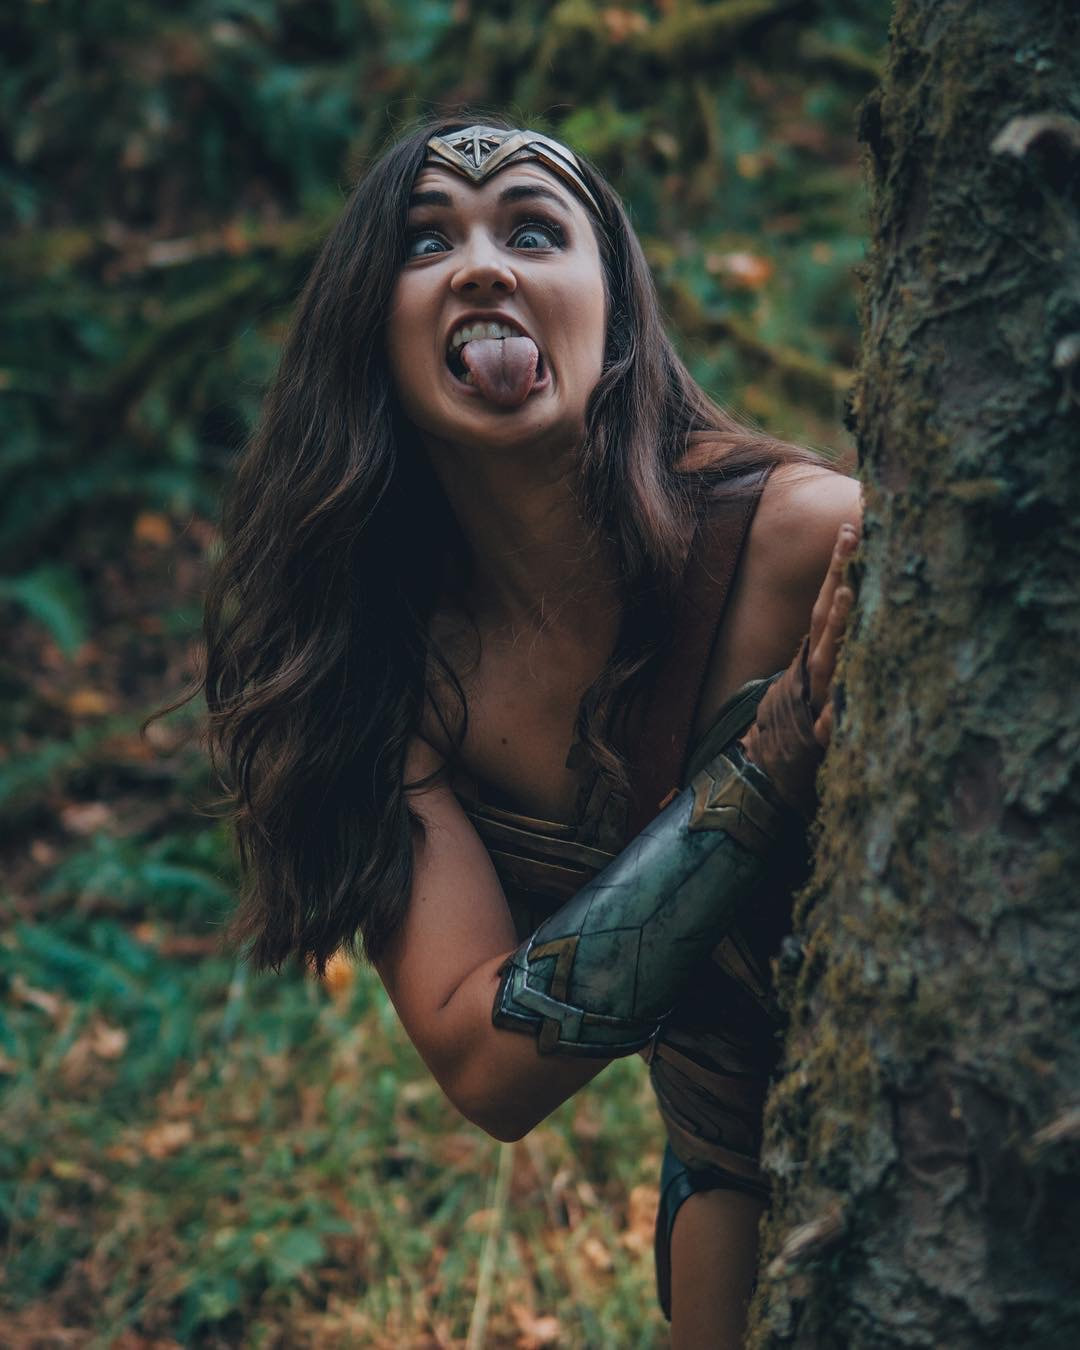
Model: @carmacosplay on IG
15. Laughing
Much like the photo above you should be having fun during a photo shoot so catch those candid moments. Everyone loves a genuine smile and the best smiles happen right before or right after a laugh.
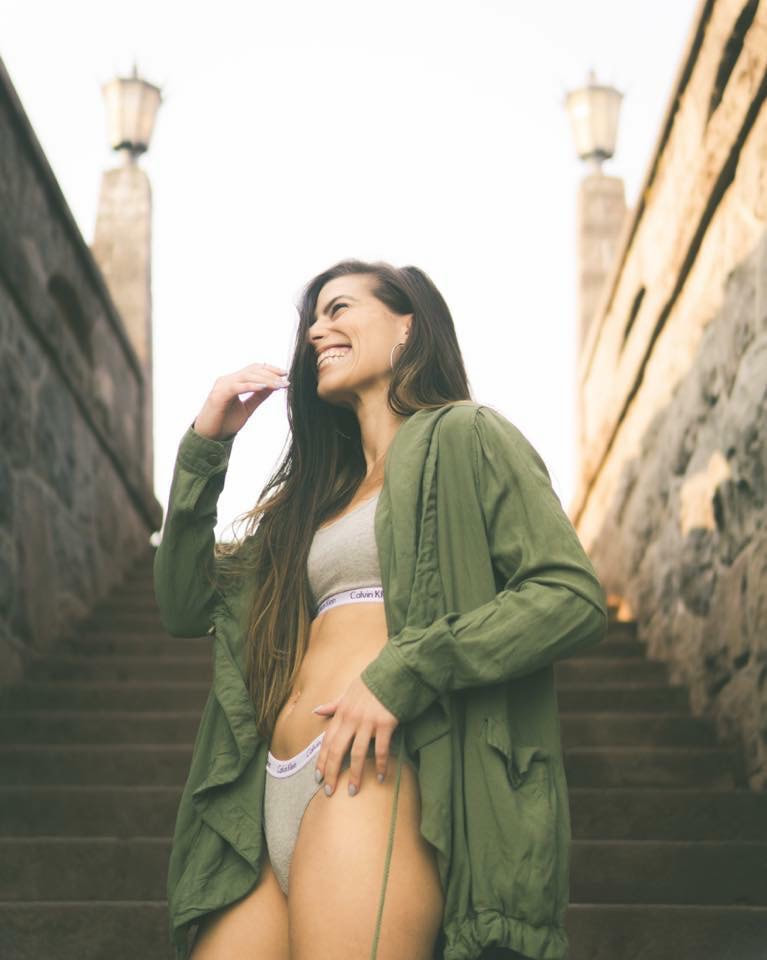
Model: @jacquelynnefaith on IG
16. Pouting Expression
Posing goes beyond just changing up body movements. Make sure to get a variety of expressions from your model as well. A good pout is a great start and almost always leads to a genuine smile.
Model: @littylerouge on IG
17. Sitting laid back pose
Let your model lay back and relax. She's been working hard she deserves it.
Model: @magiifit_ on IG
18. Laying on the ground
Change up perspective. Have your model lay on the ground and shoot from above. Just make sure she leans her head back so we don't get double chins.
Model: @alyxandriamodel on IG
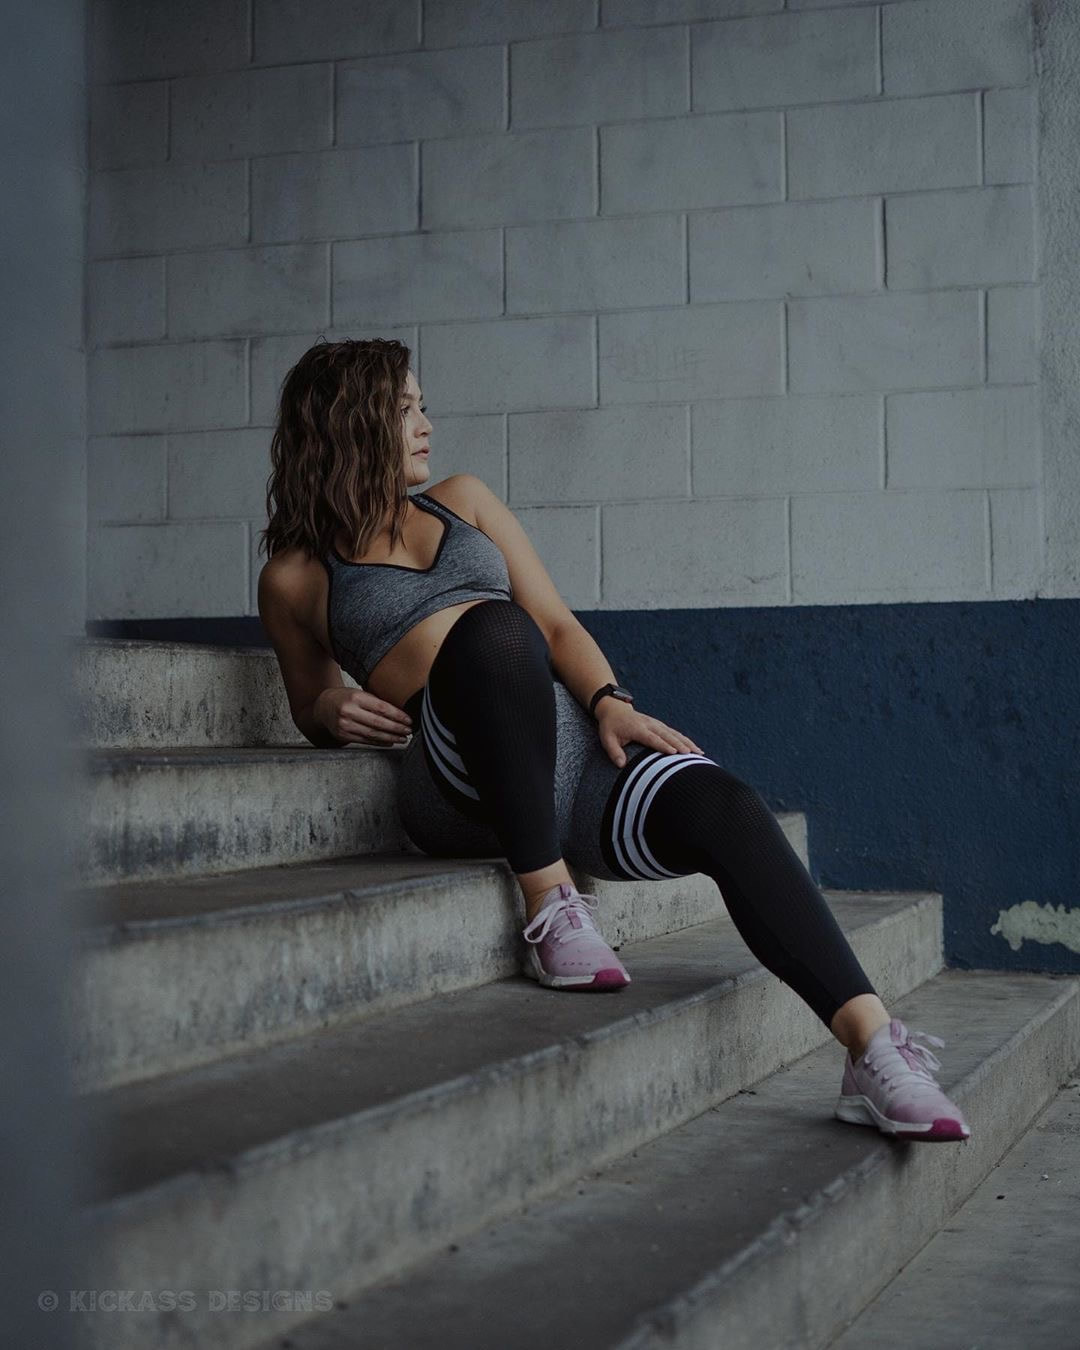
19. One leg down one knee up pose
If you want the booty poppin a great way to achieve this is keeping one leg down and bring a knee up on something like steps or a bench. Have your model pop the booty with the foot that's on the ground.
Model: @ambrefit on IG
20. Arms crossed pose
This can be a great power pose or vulnerable pose depending on expression and posture. Have your model just slightly turn her torso away from the camera.
Model: @thehannahhawkins on IG
21. Back bend Pose
This is more of a high fashion type pose and not the easiest to do so leave this for your experienced models.
Model: @jordynnmontero on IG
22. Seated one leg under one leg over pose
I just love this pose. Feels elegant but sexy to me. This is a great pose for any model with really nice legs. Try pointing the toes and lifting the heel off the ground of the front foot for a good flex.
Model: @aliciangates on IG
23. The hair flip
Have your model stand still and move her head side to side getting some movement in just the hair. Turn your camera to rapid fire hope you get lucky. haha I have done this plenty of times where nothing turned out but when it does it's so fun!
Model: @alyxandriamodel on IG
24. The looking down pose
Remember the model does not have to be looking into the camera for every shot. Too often I'll look at a photographers portfolio and see nothing but photos of the model looking straight into camera. Change it up for a different mood.
Model: @anisamarieyee on IG
25. Half profile pose
So this one isn't a full on profile/side view because you still see both eyes but I absolutely love this pose. Do not forget to get close up shots and shots from far away. Change up perspective.
Model: @alyxandriamodel on IG
26. Hand on elbow hand on shoulder pose
This is a great high fashion pose. Again make sure to have the model turn her body just slightly so you aren't photographing straight on.
Model: @ambernicotra on IG
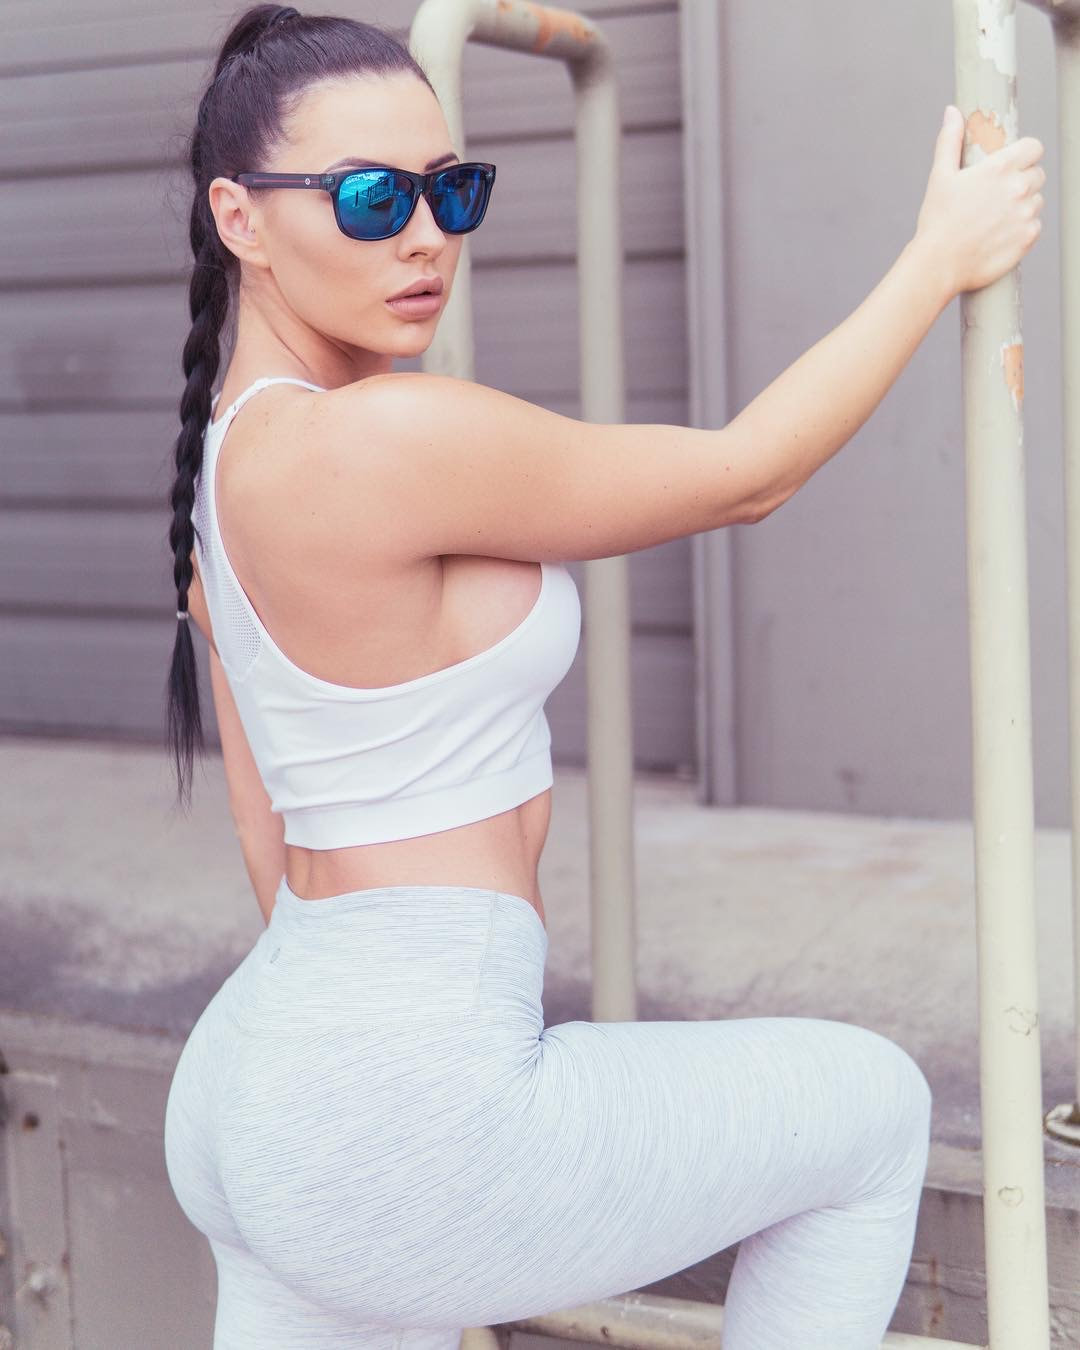
27. Revealing eyes pose
You will see this one a lot in ads. Have your model reveal her eyes behind a nice pair of sunglasses. Pro tip: This is a great opportunity to tag the brand of sunglasses on Instagram and even send them the photo. They just might share it and you'll get free exposure. If you're considering modeling, you can explore the different areas of the fashion industry. Some models experiment with one specialized category, while others try out multiple types of modelling. Here is another great resource to read on types of models.
Model: @littylerouge on IG
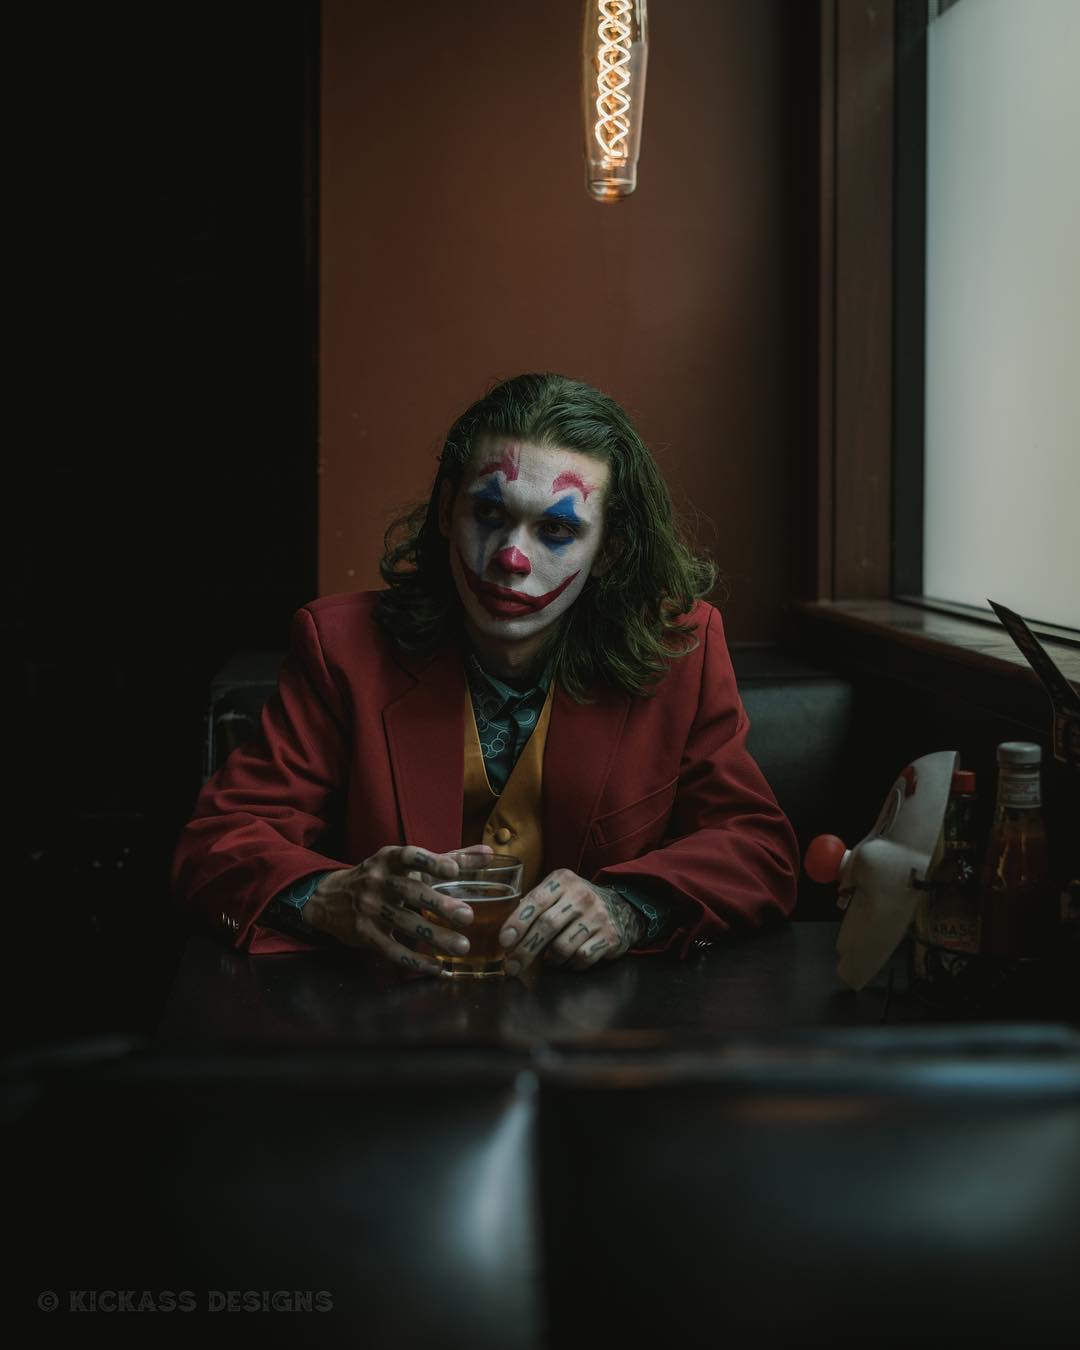
 The 10 best websites for Cosplay Costumes & Props. Hey guys and gals! As you know I photograph many different things but I'm most well known for my cinematic cosplay photography. I'm constantly asked where do I or my clients get their costumes and props. So I thought I would put together this list of the 10 best places to buy cosplay costumes and props for all ages year round. Now selling NFTs of my work! Find a collection of all my latest NFTs for sale on OpenSea HERE I really hate to say this but the most reliable websites for costumes and props are the huge retailers. Without question They have the biggest selections and best prices because of the massive volume they do. Just keep in mind Inexpensive costumes are made cheaply in mass numbers, regardless of whether the site brands itself as a Halloween store, a costume store, or a Cosplay store. Fact is better made costumes cost more money. Customized costumes and props made by costumers who sell their work through sites like Etsy, ebay, and Instagram are the highest quality, the most expensive, and you sure as F aint getting it in three days. The Cosplayers I know understandably want costumes that are more durable because they plan to wear them to multiple events, where Halloween partiers are happy with something they will only wear once, not to say I haven't seen people spend nearly an entire year to create Halloween costumes to compete in Costume contest. Halloween retailers like Spirit Halloween tend to cater to cheaper costumes and Cosplay retailers tend towards more obscure characters and better costumes but that's not to say I haven't seen total crap for premium prices because they do much smaller volume of sales than the giants like Amazon. But the plus side of big retailers is they often offer cheap shipping or free shipping and returns or exchanges are often easy. 7 key elements to a viral Cosplay photo In my opinion Etsy is probably the best place to go as far as getting that hand-crafted look for your cosplay costume. There are a ton of very talented prop makers and costume designers on the site. See: Cosplay Etsy below. You could piece together a very good and convincing cosplay costume just from Etsy vendors but you will pay premium dollars for this and you may have to wait months to receive your final costume or props but in my opinion it's worth it because quality is king in my book. Last thing I want you to keep in mind when shopping online for costumes is not to be shy about buying from over seas. Some of the sites I've listed below are in China and the UK. They are still a great option but just keep in mind most importantly a size 10 in the US may be different than a size 10 in China or the UK. So pay close attention to sizing charts when ordering and be prepared to wait a little longer for shipping. Also don't forget to read reviews! I've listed my top 10 sites for costumes and props below with the most obvious such as Amazon, eBay, and Etsy last. 2 of the 10 are local to Portland Oregon. Just click the image and it will take you to the website. Hope this article helps you on your next adventure into cosplay. Let me know in the comments below and connect with me on Instagram HERE  1. XCOOS  @ezcosplay on Instagram 2. EZCosplay  3. Hello Cosplay  4. Mic Costumes  @buycostumes on Instagram 5. Buy Costumes 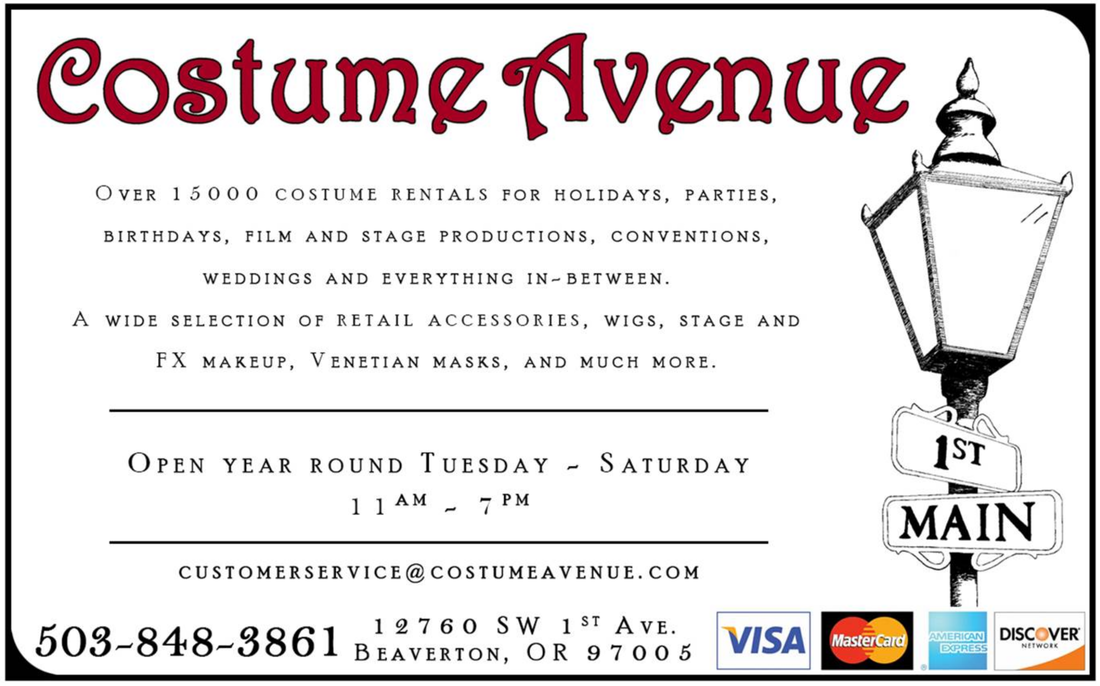 6. Costume Avenue - Beaverton  7. Avant Garden Vintage - Portland  8. Cosplay Etsy  9. eBay  10. Amazon  Bonus! Mill End is the best option for custom fabrics in Portland. DIY  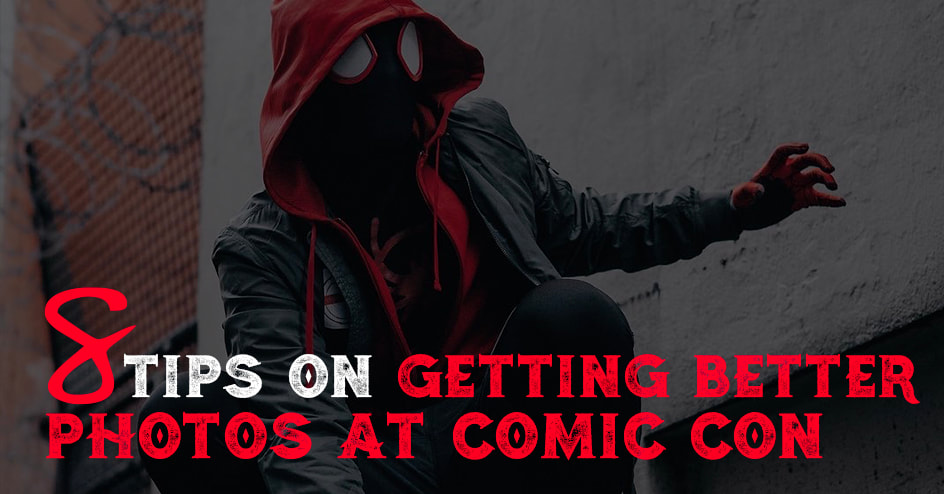 Comic Con is a great place to see and take photos of some of your favorite super heroes and villains. It's chalk full of great photo opportunities. Search Comic Con on google and you will find thousands of photos of the most amazing costumes you've ever seen. You will also find thousands of very poorly executed photos. My goal with this article is to make sure you don't fall into that category. Elevate your game at the next Con with these 8 tips. If you like the photos below make sure and check out more of my work on Instagram HERE 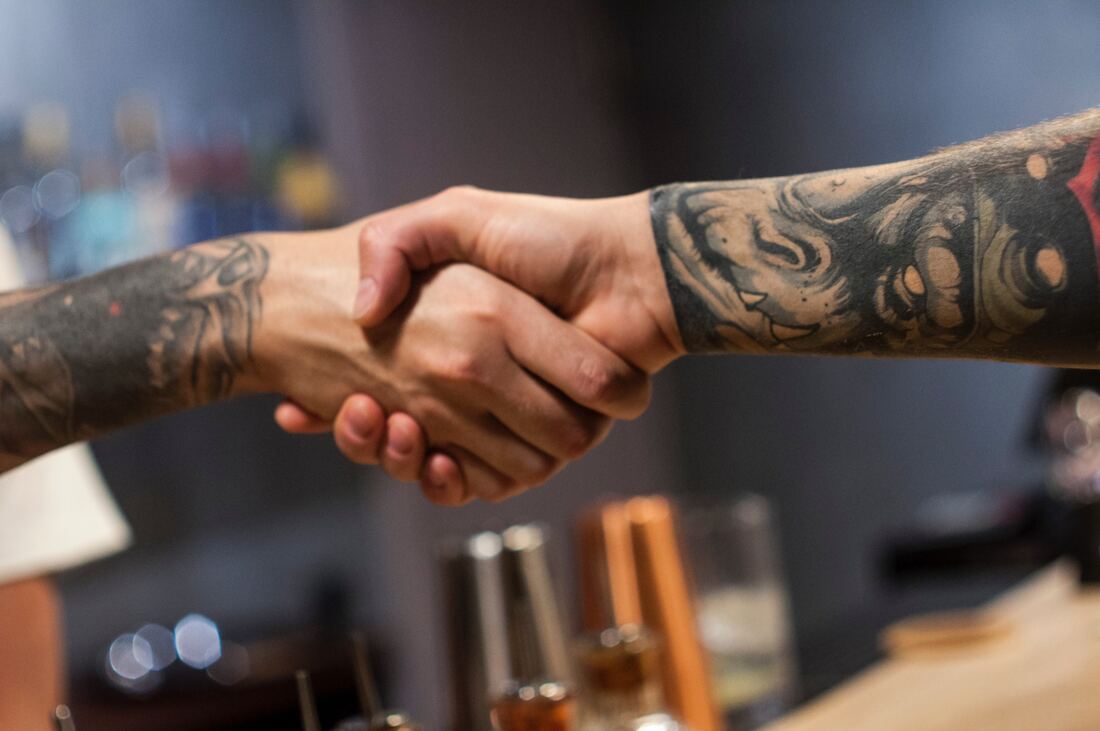 Tip 1. Always Ask for PermissionThis is the biggest mistake photographers make at conventions. If you’re shooting at a convention or any other event where there are cosplayers, it’s always best to ask for the cosplayers permission before taking pictures of them. Your shots are guaranteed to be better if your model is fully aware of your camera pointed at them. They’ll be much more willing to strike different poses and maybe even allow you to direct the shot so you can have more control over the final image. The cosplayers I know hate it when someone gets a candid photo of them when they weren't ready. They don't want photos on the internet shoving food in their face while on a break half dressed and not in character. So do them and yourself a favor and ask for permission before you take their photo. 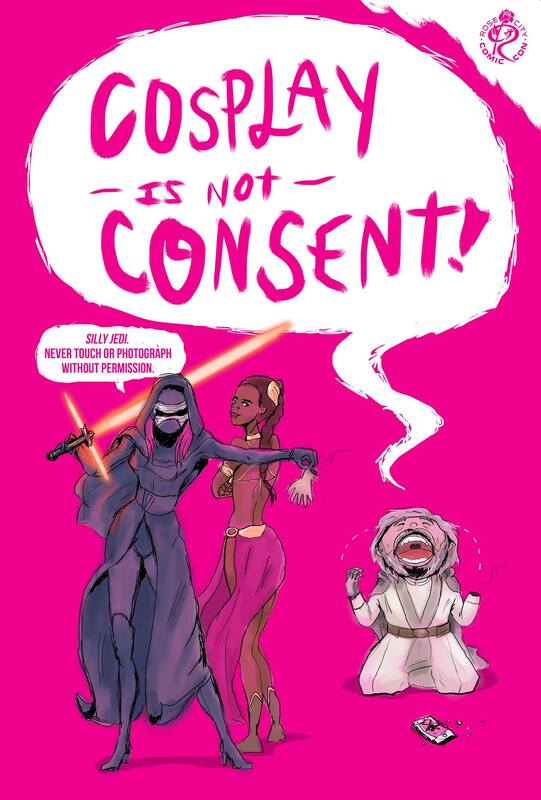 Art by Madeline DeCotes Tip 2. Cosplay is Not Consent Okay this tip wont really help you take better photos but it needs to be said. Let's face it many costumes for female leads in Hollywood are revealing so you are bound to see many ladies of all ages in revealing outfits. This in no way gives you permission to touch them. Maybe just assume every cosplayer you meet doesn't want to be touched in any shape or form. That goes for males and females. If you need to touch the cosplayer to help with posing always ask first but usually this can be done verbally or visually. Having your photo taken with a cosplayer still isn't an excuse to touch them. Odds are you don't know this person so just go the Keanu Reeves route and hover a hand behind them or to the side. 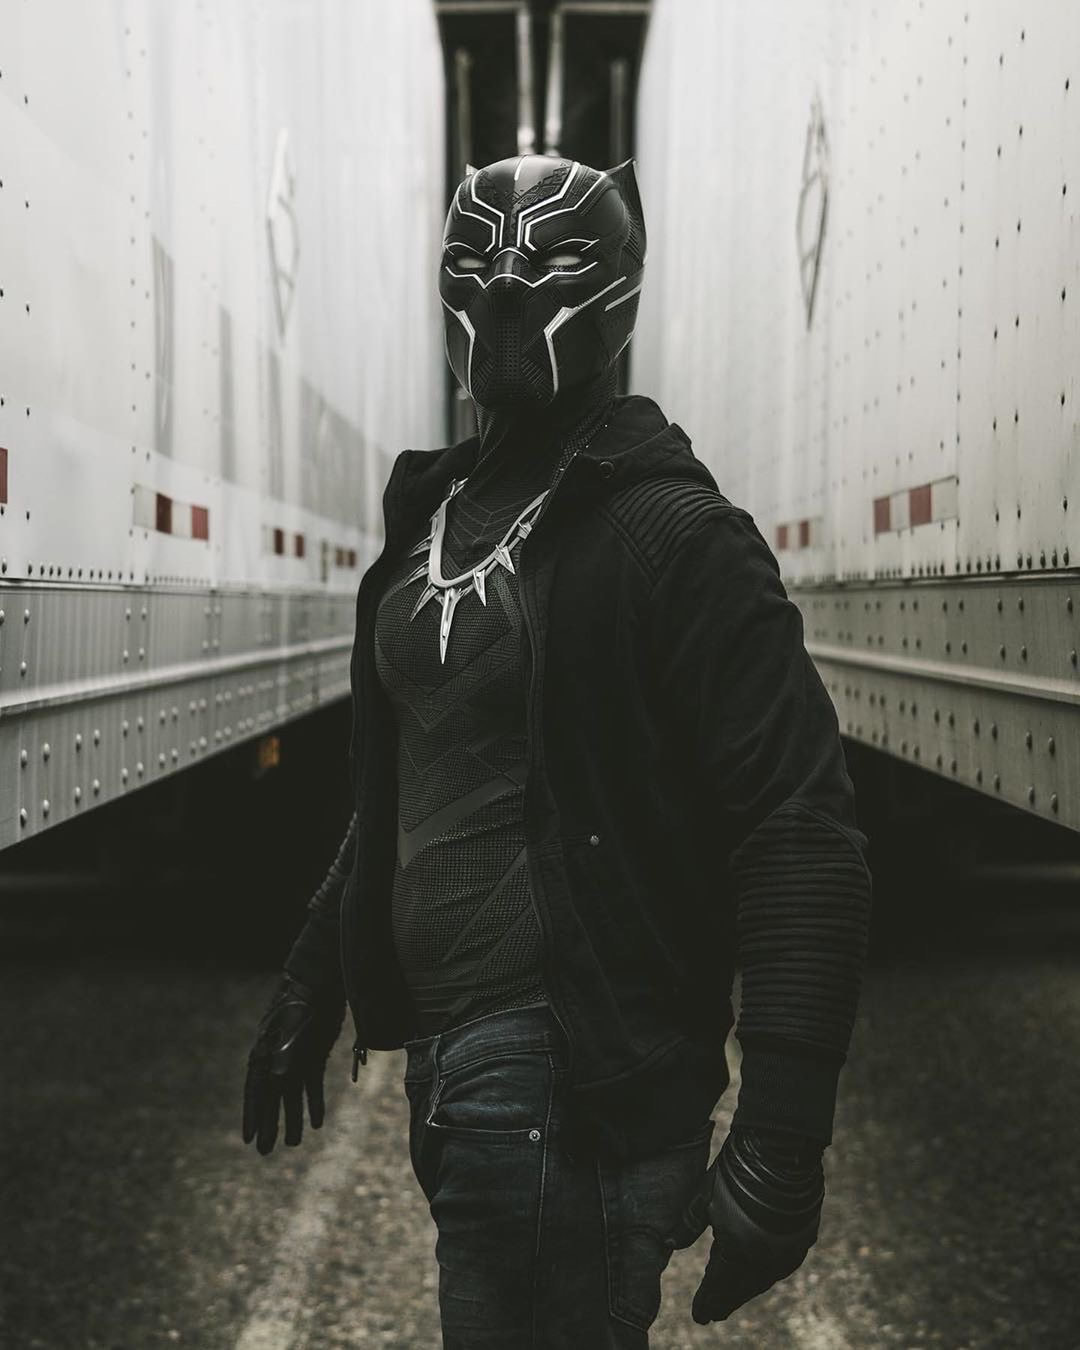 Model: @coolregularguy Tip 3. Allow them to Get Ready before you take the photo. Look, I get it, Comic Con is very exciting. As a photographer you want to take as many photos of your favorite characters as you can. However, just like photography in general, it helps to take the time to compose your shot and wait until your subject is ready before taking the photo. Allow them a few seconds to put on their masks, take off their hoodie, fix their costumes, touch up their makeup, and get into character for your shot. This also shows respect for the craft and for their hard work in putting their costumes together. They will appreciate it. 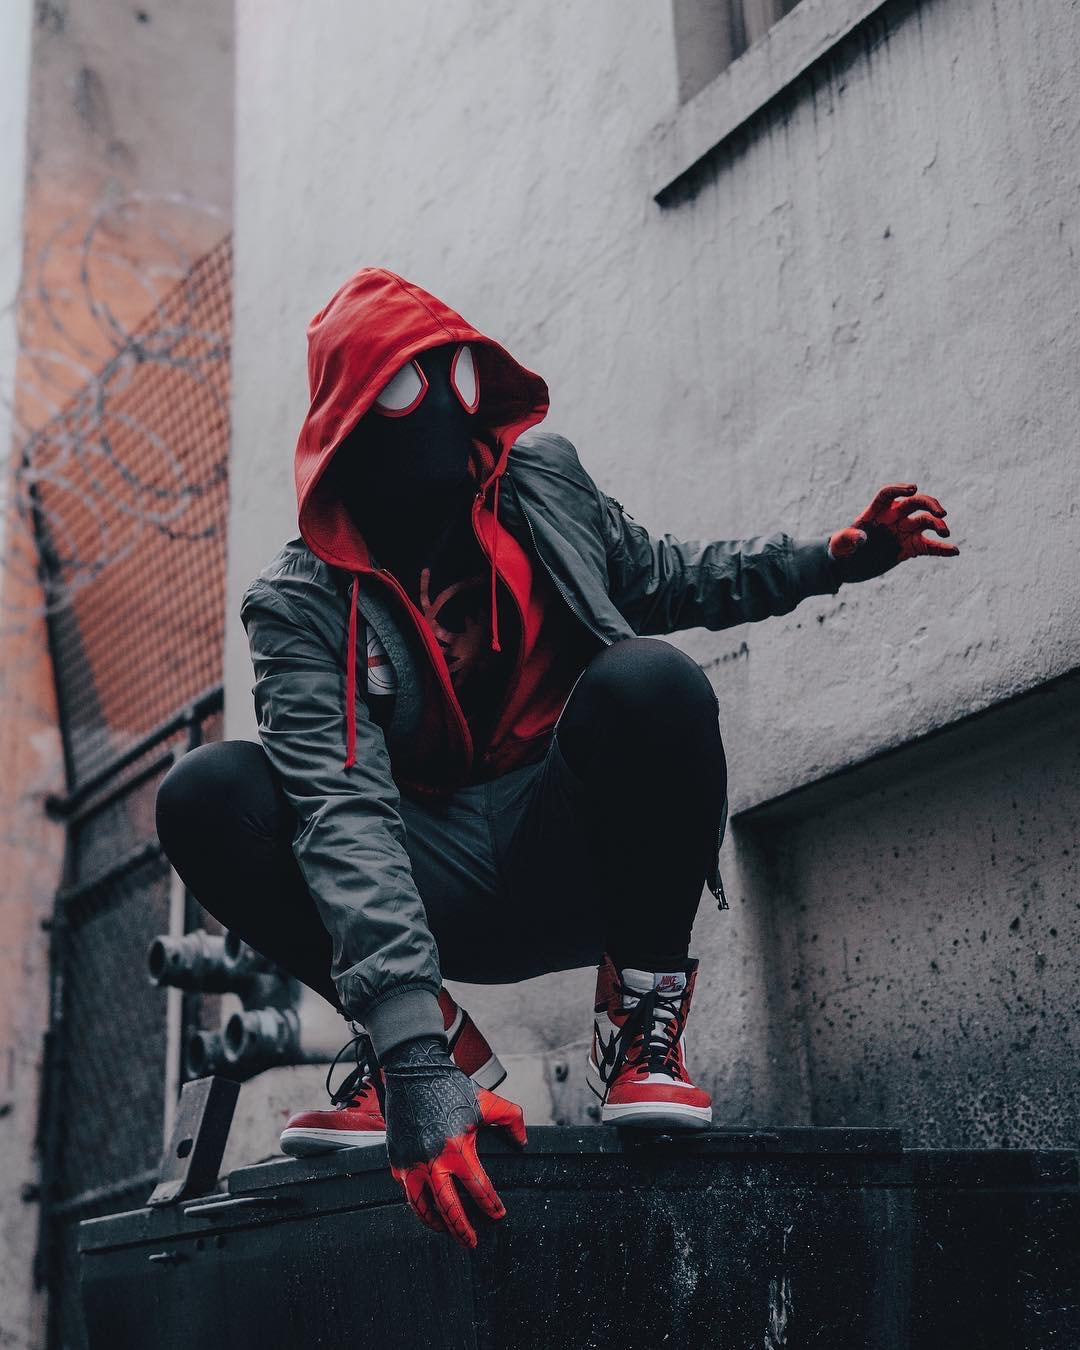 Model: @spidey_ty Tip 4. Create a Scene for the Character. When you can, choose a background that complements your character. You probably wont have much time or freedom to move your subject around, but there are always better options than capturing them exactly where and how you found them. Unless you're really good at composites try to avoid shooting in the convention center at all costs. Your best option will always be to give the cosplayer your card and plan a shoot at a future date at a studio or on location. If that's not an option familiarize yourself with your subject, and then quickly think of how you can make them connect with the available space. You should have done your research before hand and should know the area around the convention center well before you go. For example, if you’re shooting a Spider-Man cosplayer as seen above, you can simply ask them to pose like they are climbing the nearest wall out side or pose like they just landed from a high vantage point. In this case we used a dumpster in the alley behind the convention center. I dig the industrial urban feel of this photo.  Model: @real_wade_wilson Tip 5. Use Natural Lighting when you can. For the love of god Avoid using your camera’s pop-up flash at all costs and stick to natural lighting. If shooting inside during the day shoot near doorways or windows that allow sunlight in to make your subjects look as natural as possible. For the Joker photo above we went outside the Convention center at sunset and shot in the alley. As you can see the natural light from above and the light from the building lit the subject perfectly. If it was dark I would have him stand in the door way and just use the available light from the building above the door for a more dramatic photo. Your subject doesn't always need to be lit perfectly. There is no need to bring anything more than one camera and lens to get banger photos at Con. 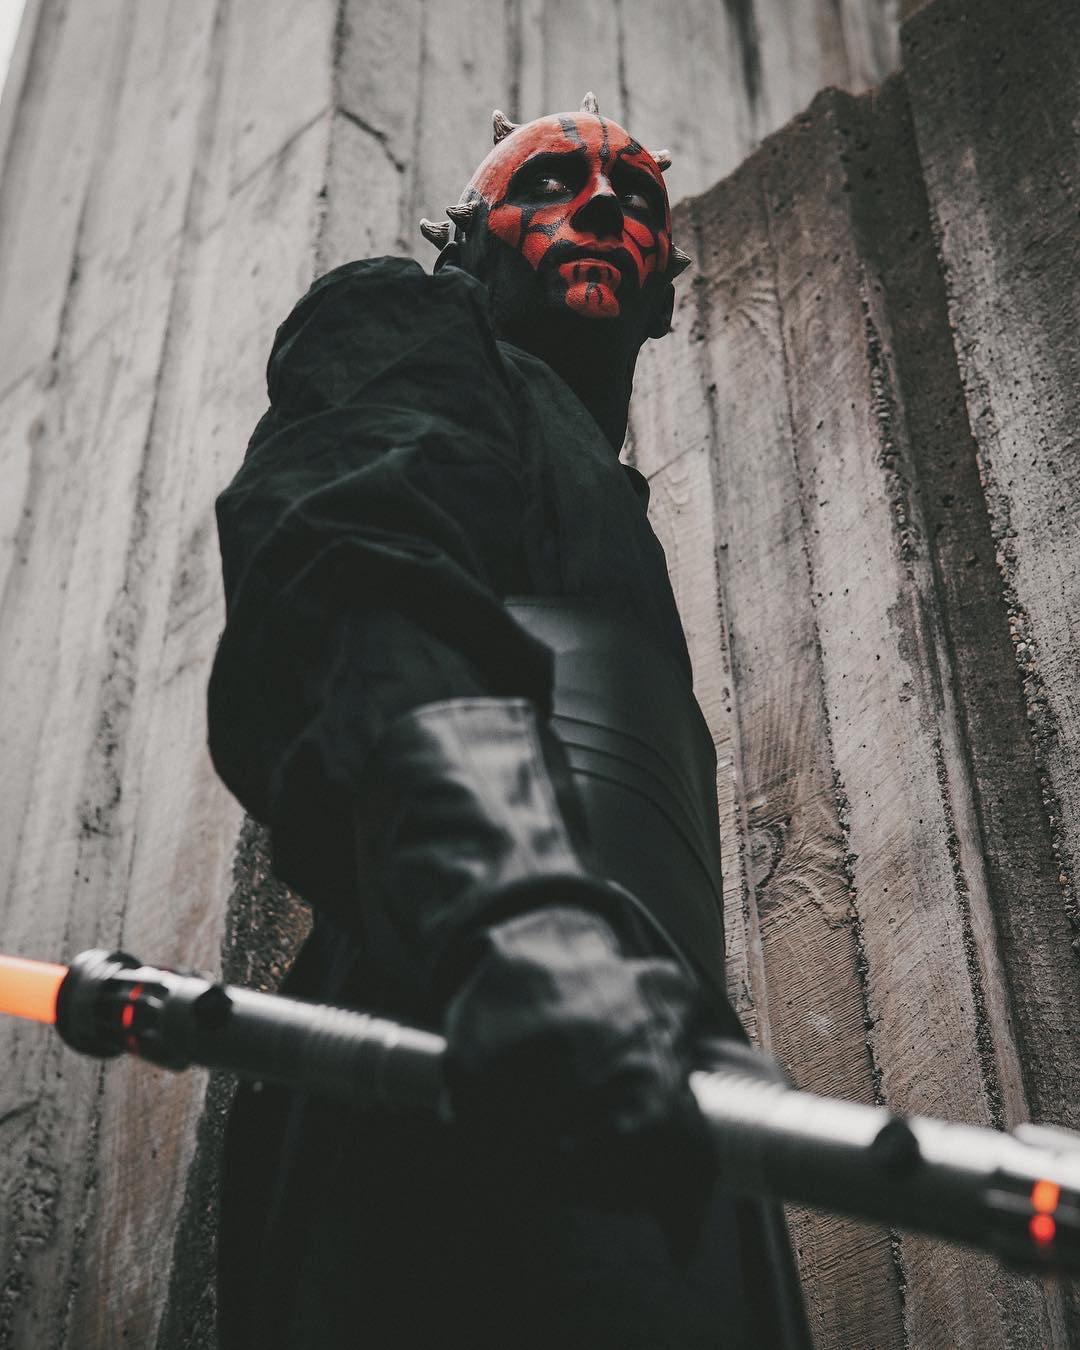 Model: @seattle_spidey_cosplay Tip 6. Shoot from Different Angles Always experiment with different orientations and angles. I hate it when photographers only shoot straight on. Don’t be afraid to shoot up from below, especially for villains and other mysterious characters. This type of shot will work well for a character like the Darth Maul, as this perspective can highlight the makeup and the distorted angle will give viewers an unsettling feeling that matches his presence on screen. Shoot straight on, shoot downward, shoot from below, shoot close up, shoot from far away. Change it up and see what works. 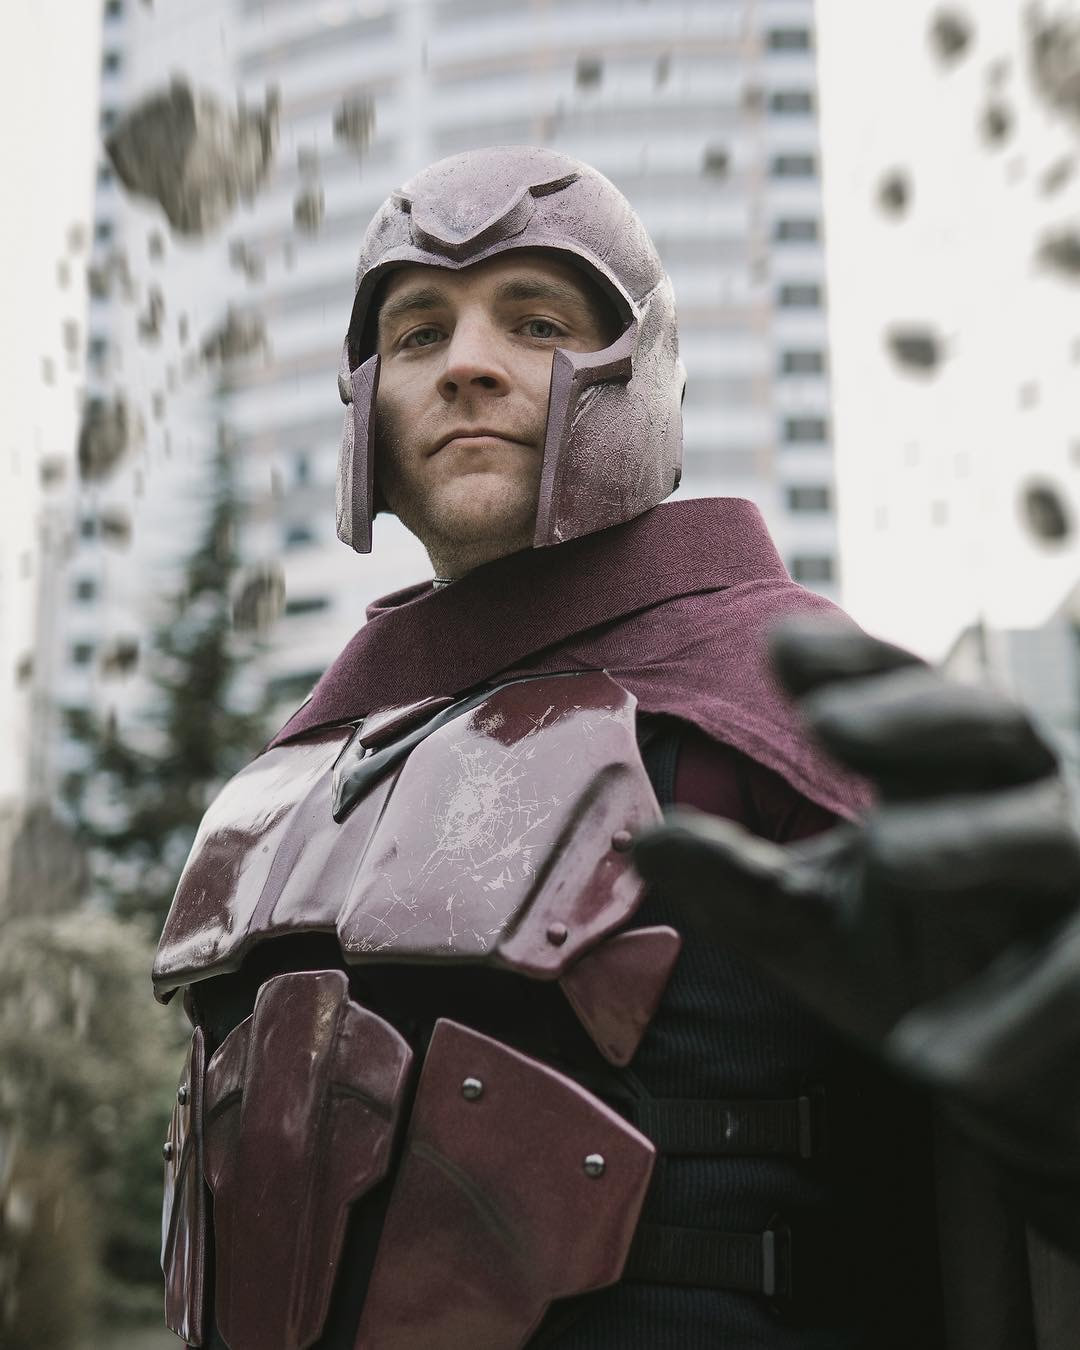 Tip 7. Communication is key. Don’t just snap away. Take time to communicate with your model and ask them about how they want their photos to be interpreted and shot. Depending on your skills and experience, this can open you up to more options that you previously may not have thought of. You can also help the cosplayer achieve their goals and attract their target viewers. Communication goes a long way. If you think a pose could be better with a minor adjustment make sure to speak up. The model can't see themselves.  Models: @carmacosplay Tip 8. Posing, Use Pinterest. Now most of the time the cosplayer will know the popular poses of the character they are portraying but if they don't you should have the pinterest App. on your phone ready to go. Just type in the characters name and Boom! Tons of great ideas for posing. I can't stress this one enough. 7 key elements to a viral Cosplay photo. and Don't forget!! 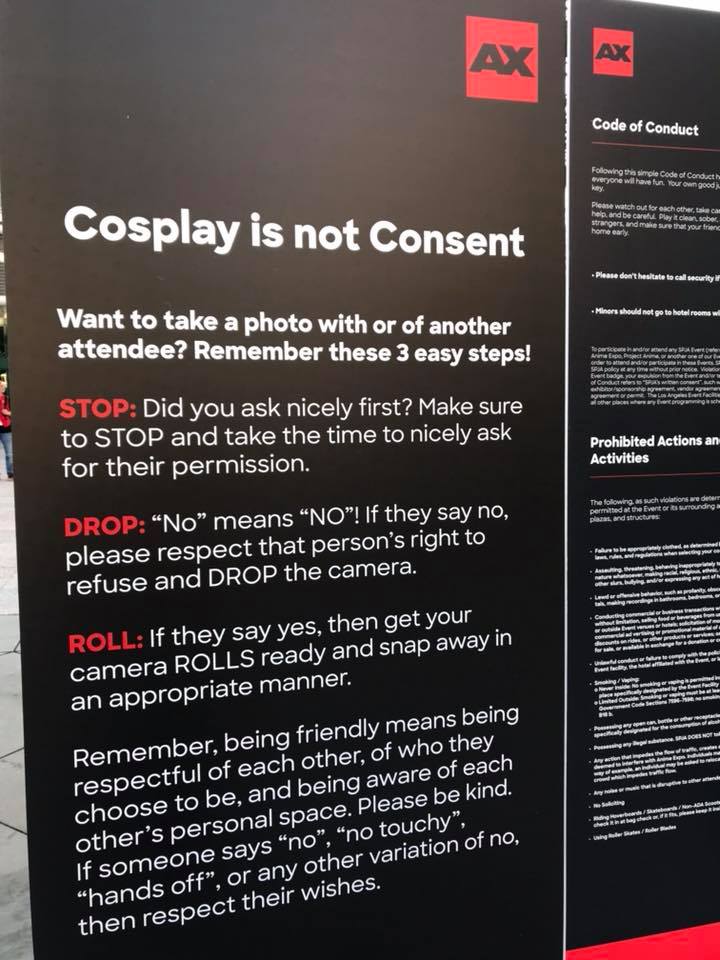 7 Tips for a viral Cosplay photo.

I wanted to put together a short list of what I find to be the most important elements in making a viral photo. This might surprise you but it's not an expensive camera, nor is it bulky expensive lighting equipment. Do you need access to a studio or years of experience with Photoshop? Nope. The 7 elements below are all you need for a viral photo. However going viral is never guaranteed, but if you hit all these points and a little bit of luck your odds will go WAY up. As seen below I've had multiple photo shoots go viral and my work has been featured on both local and international news outlets more than once. If you like what you see below find more of my work on Instagram HERE
1. Location
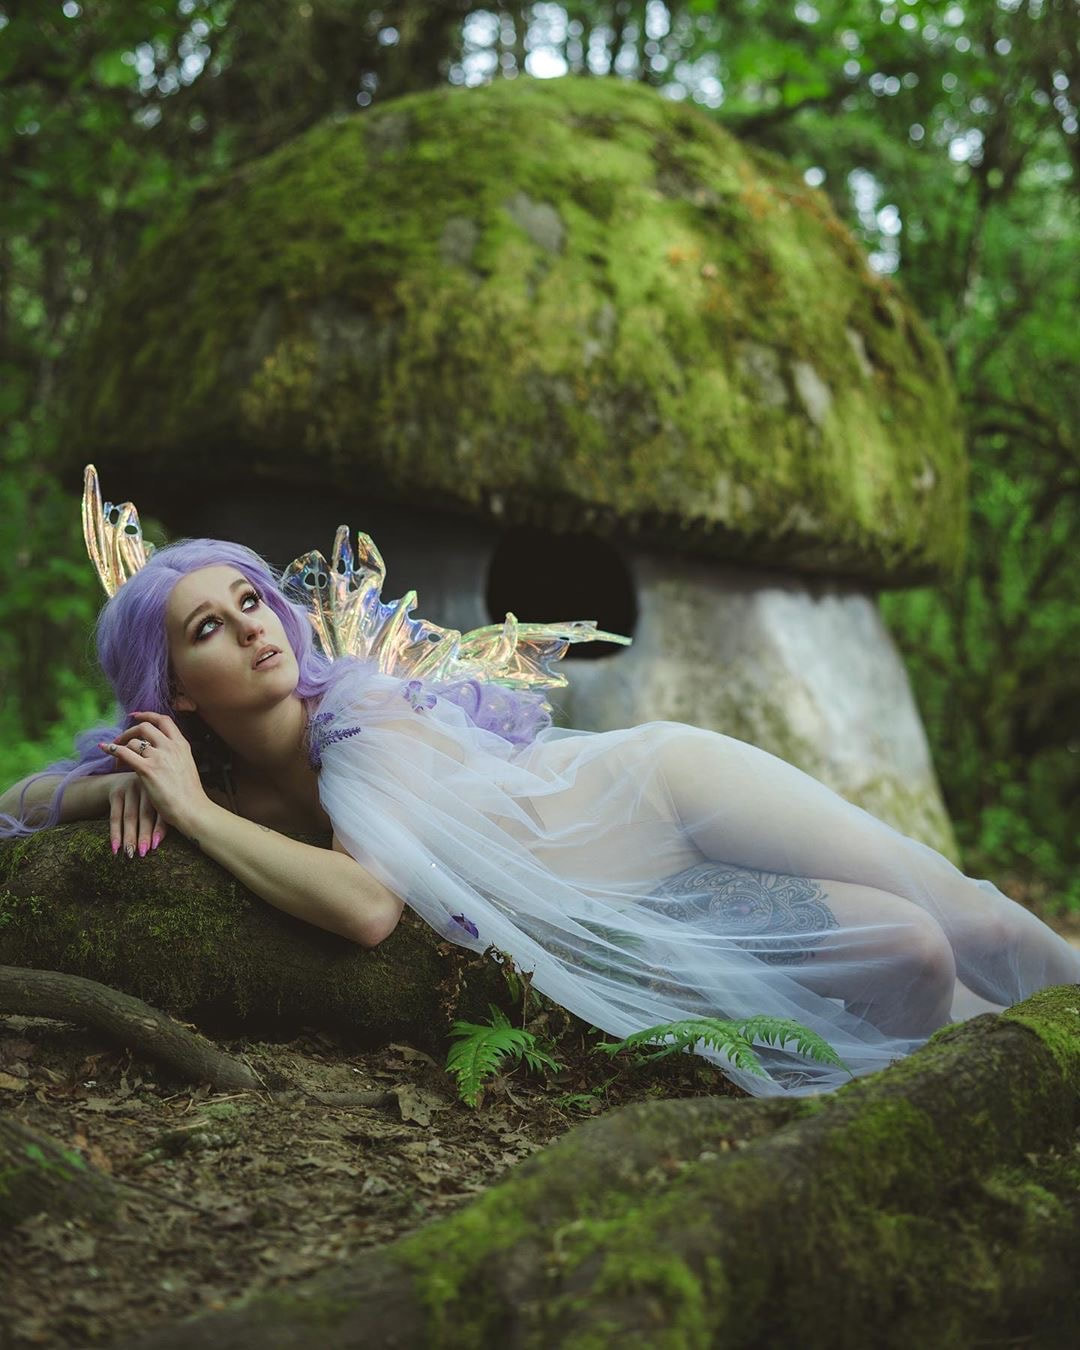
I'm a huge advocate of shooting on location rather than doing composites. (cutting out the background and replacing it with something else in Photoshop) The more you can get in camera the less work you have to do in post. Just my personal preference. This will require location scouting. My favorite tool for this is hashtags on Instagram or searching by location. Choosing a location that fits the theme is crucial. As an example above I knew I'd be shooting a fairy theme so I knew a forest made more traditional sense than urban. So when location scouting for the perfect forest scene I found a park close by that had a huge mushroom big enough to walk inside. I knew this would save me a ton of Photoshop and with the right perspective would make my model seem smaller which is what you want for a fairy theme. Model: @Lexylovestruck
2. Wardrobe
Obviously when shooting Cosplay the outfit will be the biggest factor in making a banger photo. When searching for cosplayers to collaborate with I always look for screen accurate costumes. You probably don't have the money to go buy an outfit for thousands of dollars for the right model to wear. So search Instagram & local cosplay groups on Facebook to find the perfect cosplayers in your area that already have the outfits. They put in a lot of money and time to make beautiful costumes for Comic-con. They just need YOU to help bring that costume to life. Model: @hoptownspidey
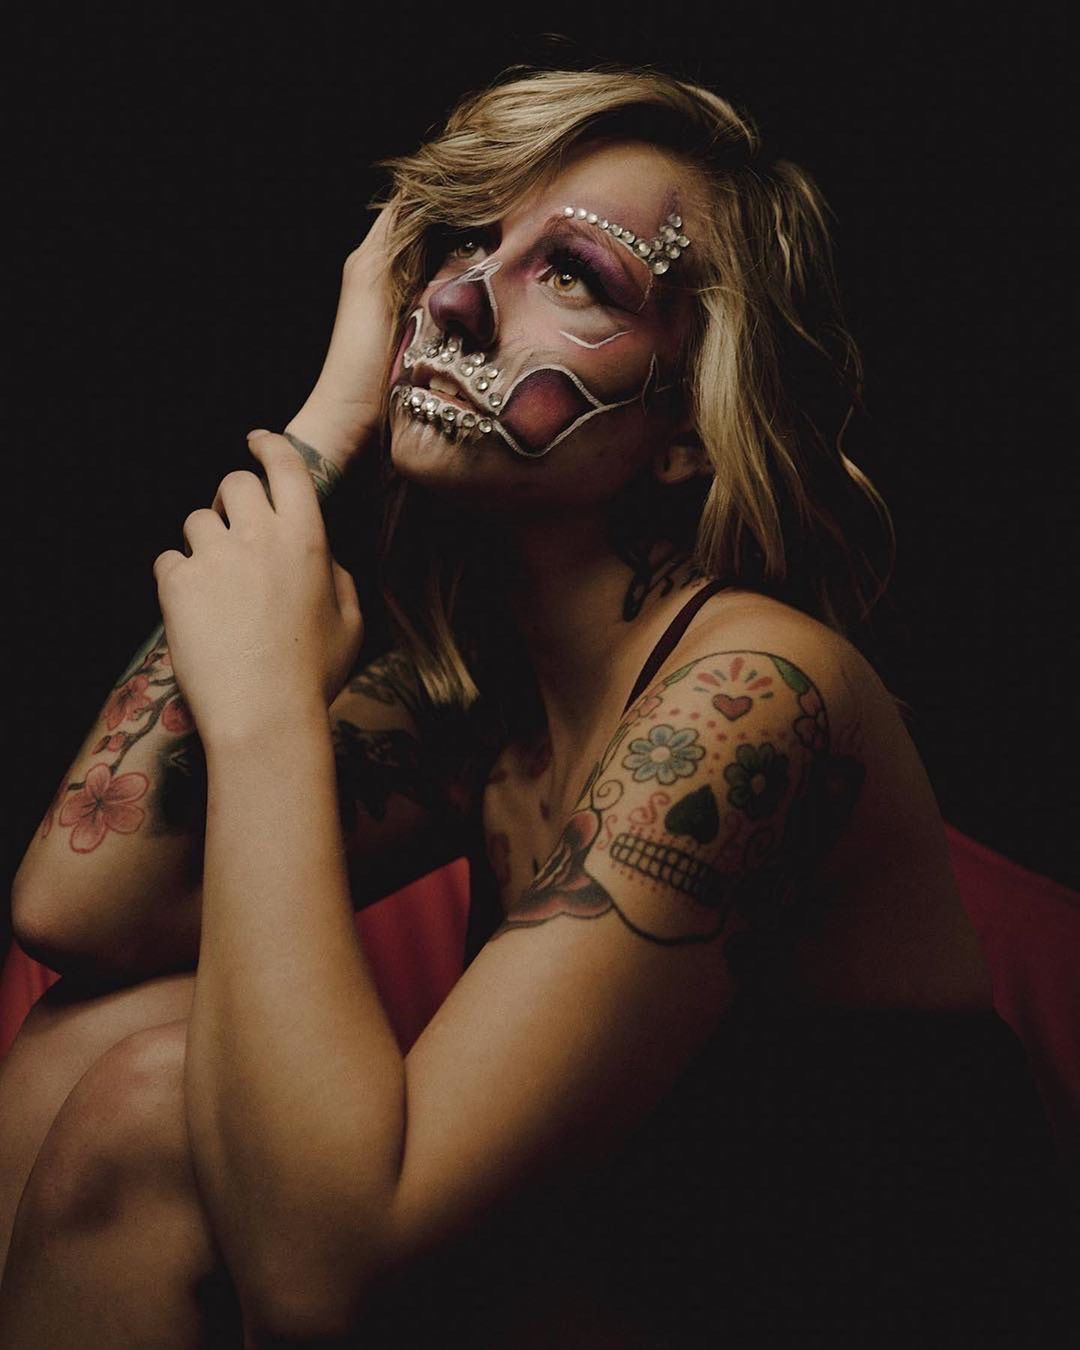
3. Makeup
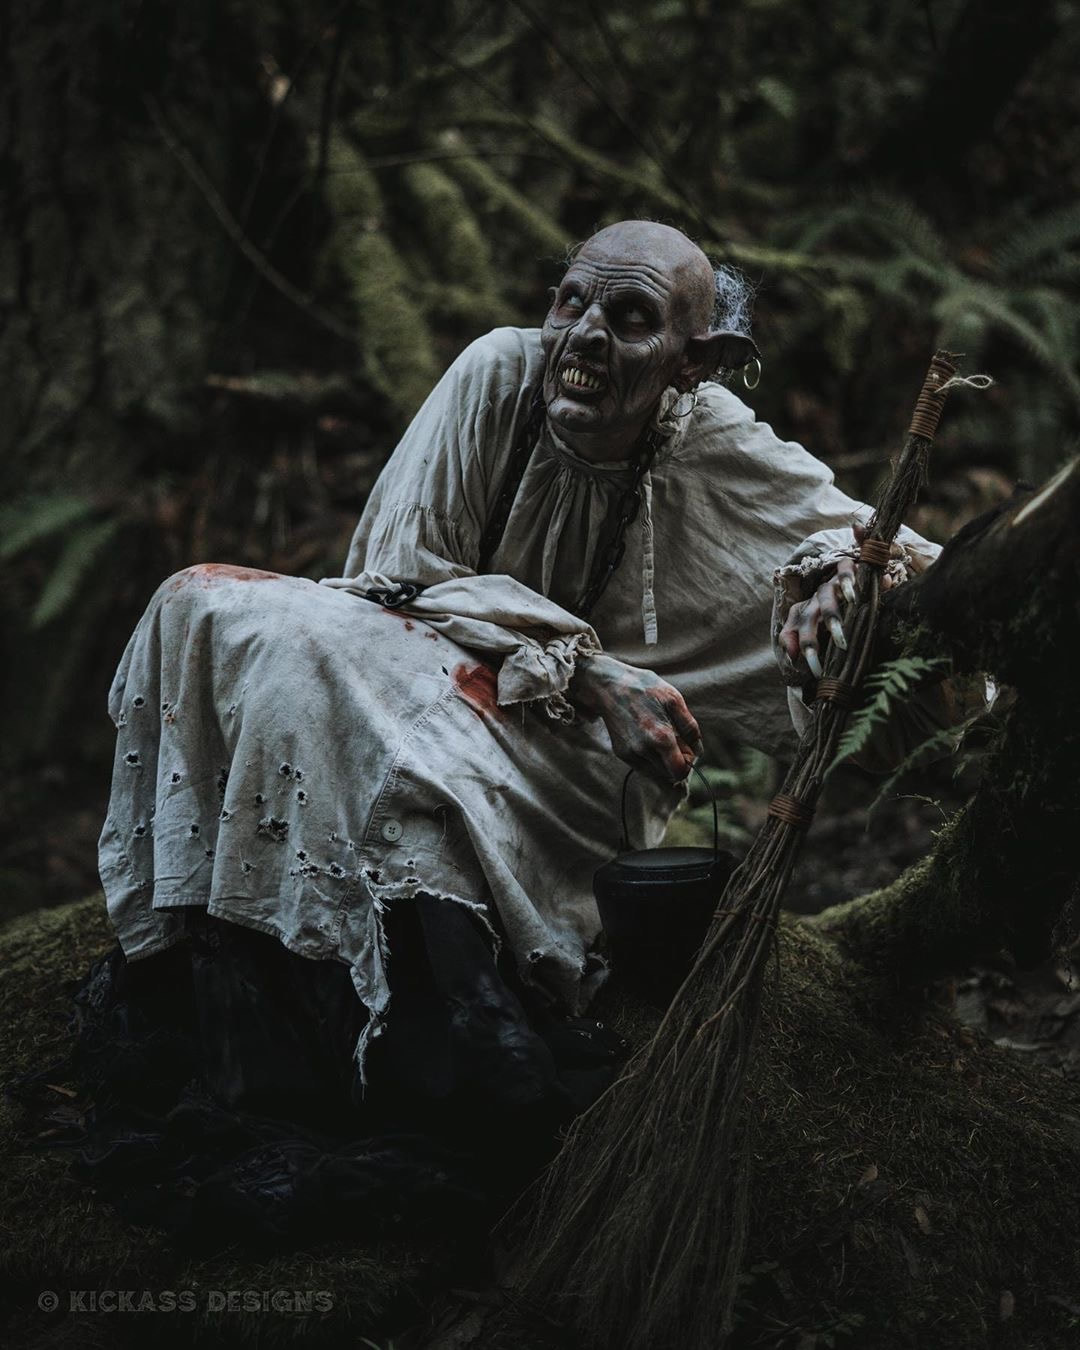
When it comes to cosplay, especially horror cosplay nothing can ruin a good photo faster than bad makeup. If you don't use a professional makeup artist especially when using prosthetics a terrifying horror cosplay can turn cheesy as hell real quick. The difference between Hollywood quality horror and a family friendly haunted house is the makeup so choose a cosplayer who is a skilled MUA or find a local SFX MUA to team up with. My MUA for the photo above is the very talented @taelorfx Model: @starbar_1
4. Props
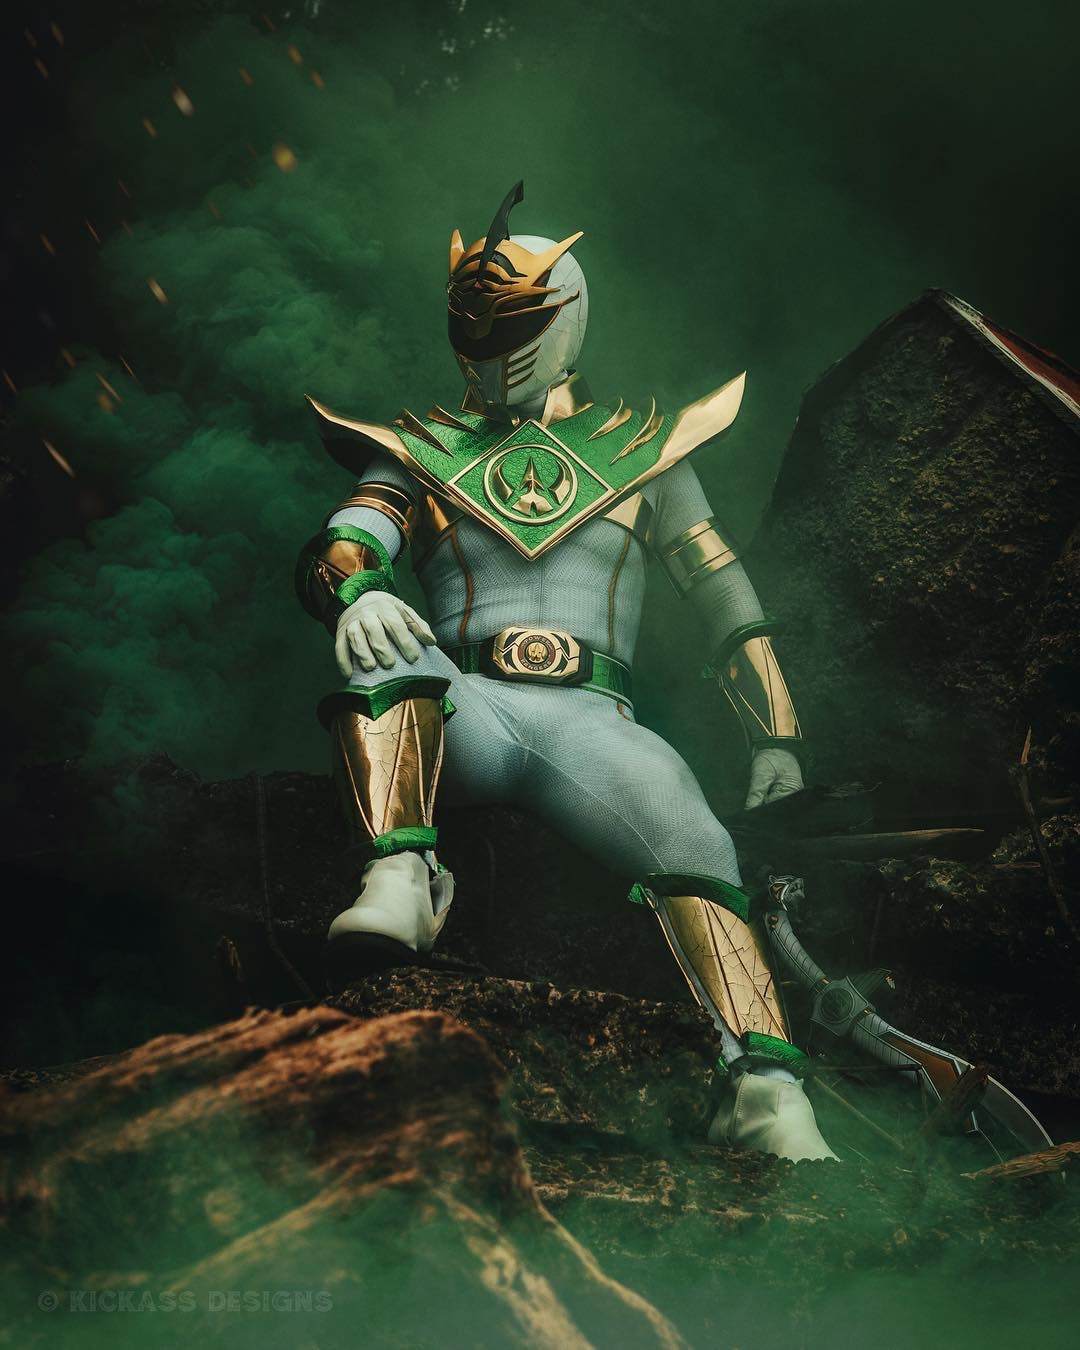
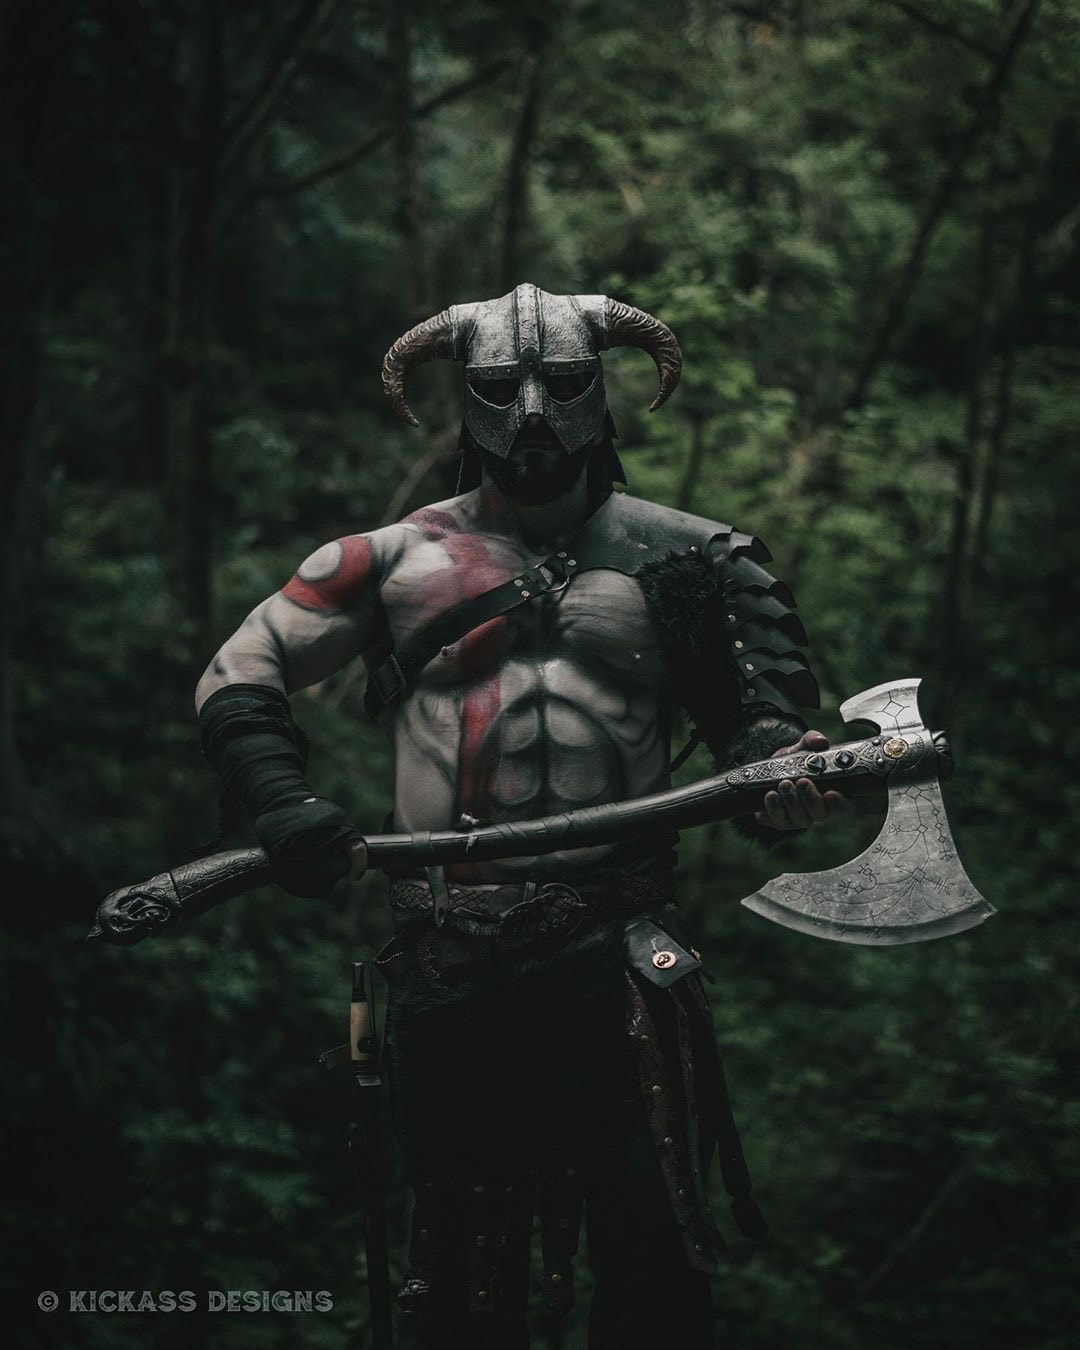
Props are a key element to any great cosplay. Usually the cosplayer will have props they've made to go with their costume but in the case they haven't you can search Instagram for a prop maker and have one made. That's what I did for the axe and helmet seen above. I was lucky enough to find a very talented local prop maker @dragonbornjedi and as you can see above if you took away the axe and helmet the photo wouldn't be as compelling. Makeup by @taelorfx Model: @ThePDXViking
5. Story
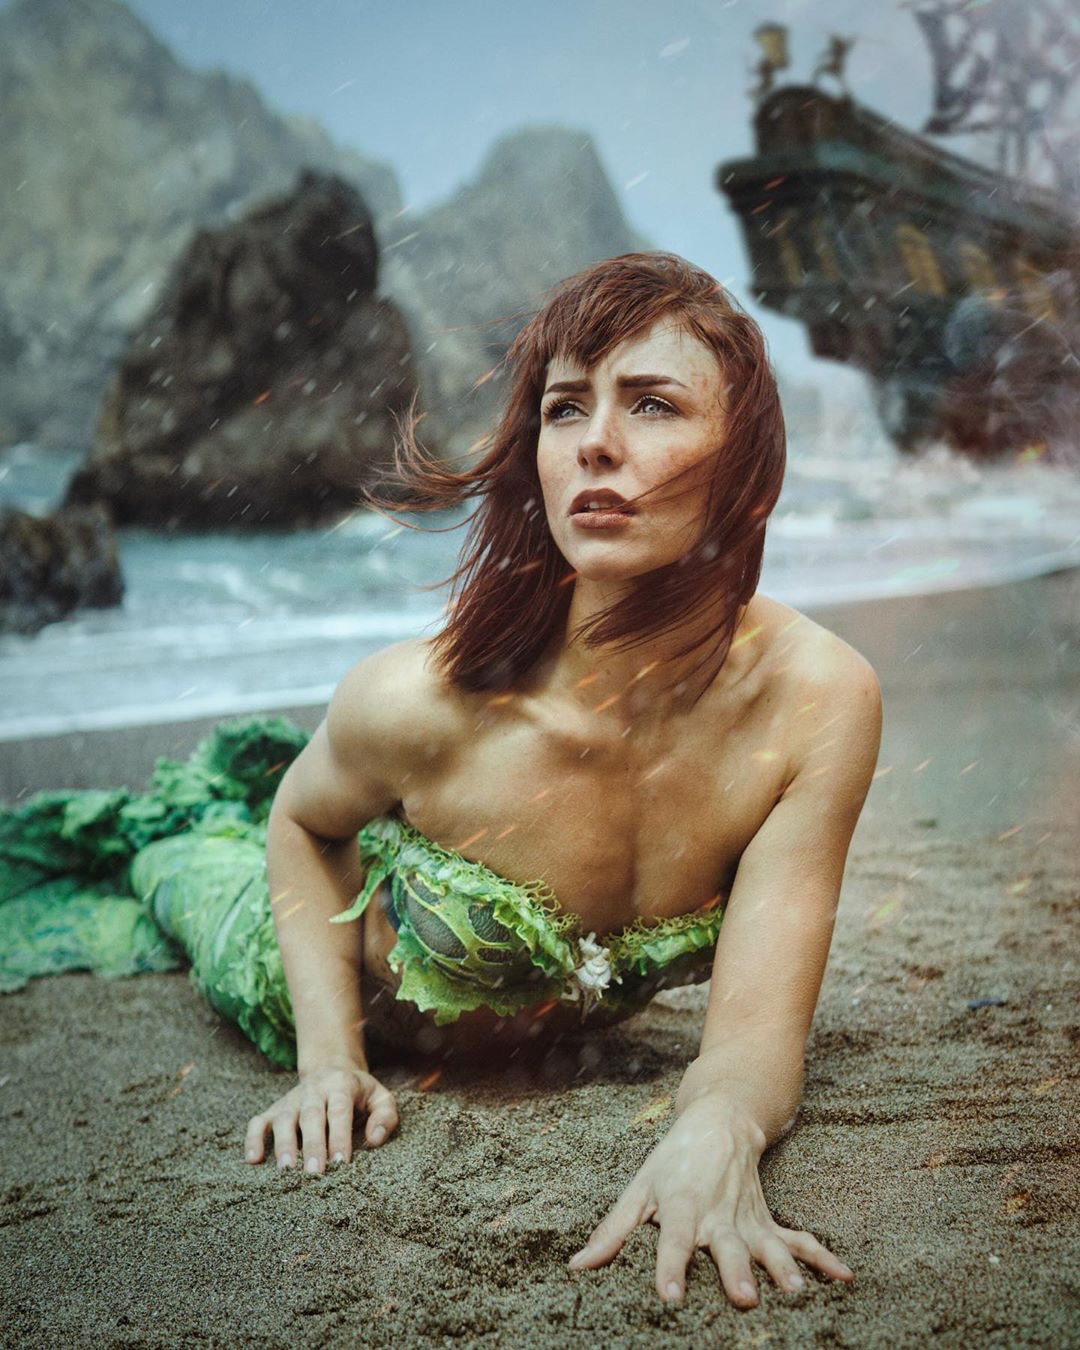
If you want a photo to go viral cosplay or not there needs to be a compelling story. The story doesn't need to be obvious but there needs to be enough emotion and information in the photo for the viewer to make up their own story. In the photo above I have a beautiful mermaid who's conveying so much emotion in her face, that alone makes the viewer ask why. Why is she so sad? Now add some wind, rain, sparks, and a pirate ship in the distance and you've got a story. What's the story? That's up to the viewer. Whether it's sadness, happiness, or straight up horror make sure your viewer feels something. Model: @LittyLeRouge
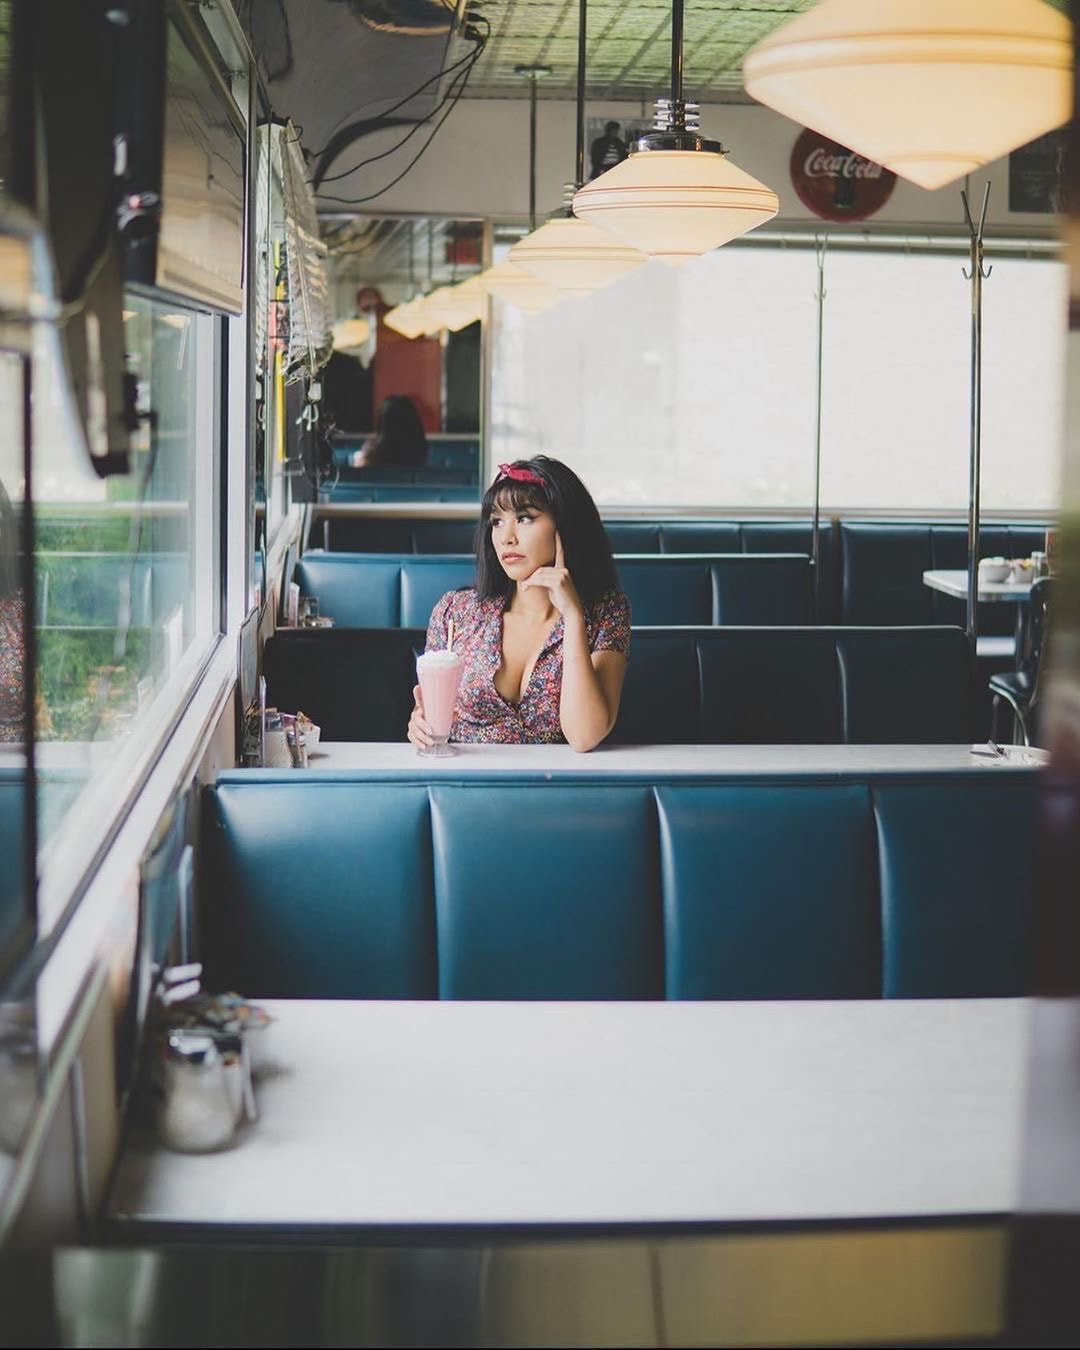
6. Most importantly: Casting!
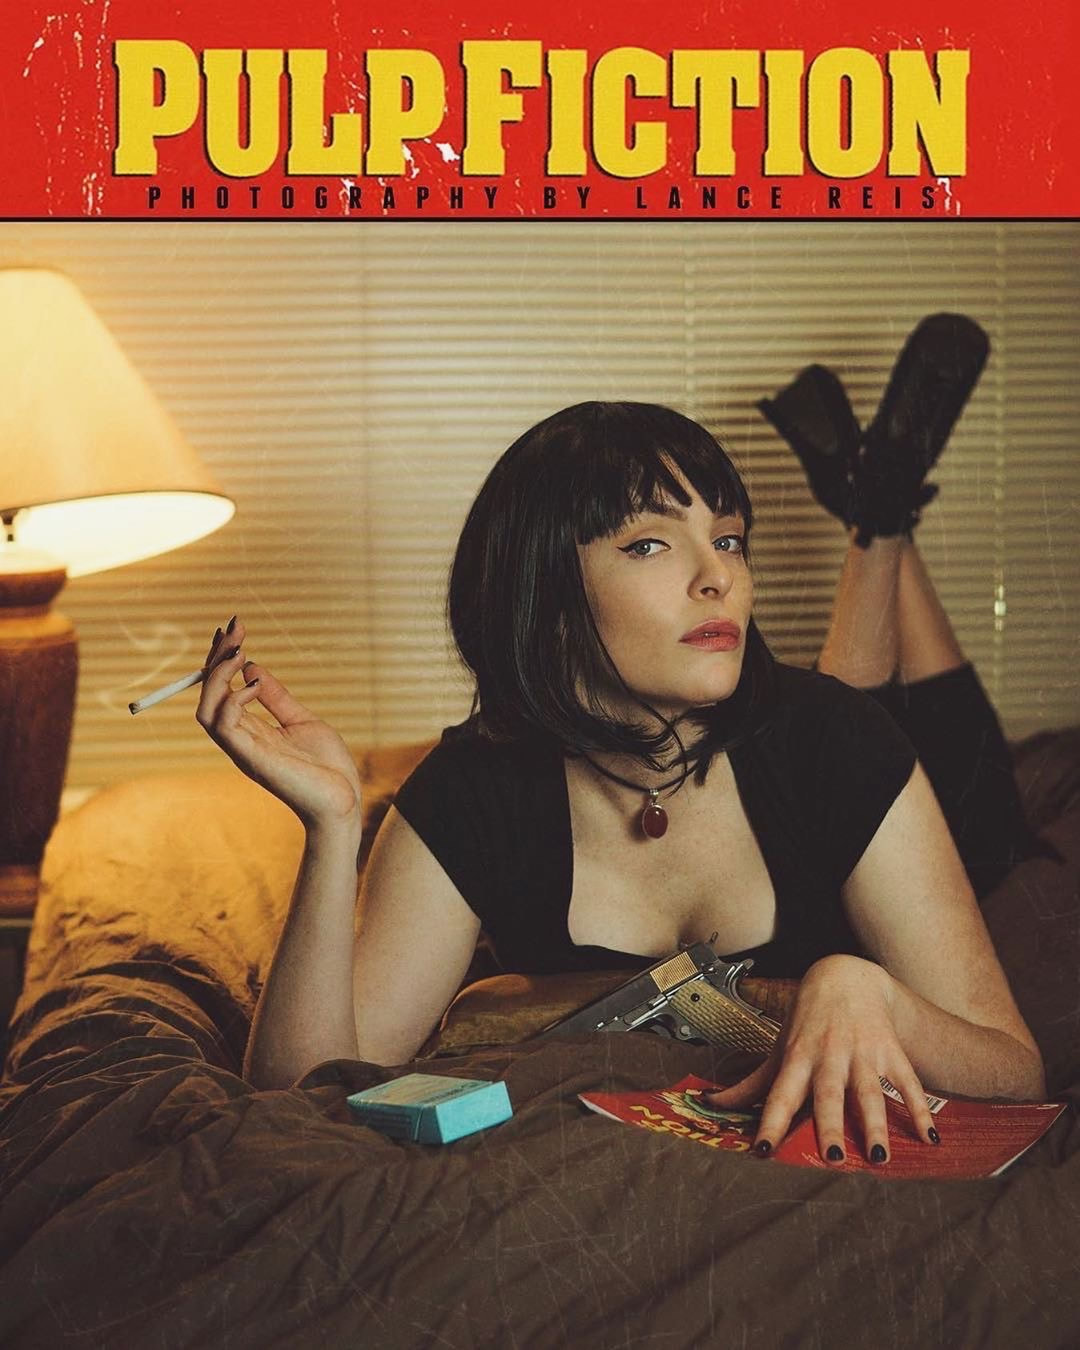
This is the most underrated key to a successful cosplay photo. If I'm searching for a model for a particular character I put out a casting call on social media and try to find a person that looks most like the character. When I wanted to recreate the Pulp Fiction movie poster I knew I wanted someone with the same build and facial structure as Uma Thurman. So look for certain characteristics in the character you'd like to shoot and find someone who matches for the best success. Model: @1wonderbug
7. Engage with your Audience
No matter how good the photo is you can't just post it and hope for the best. You need to actively engage with your audience. It's as simple as thanking everyone who comments and or shares your post. Not only does this show appreciation to your fans but also keeps your post at the top of the feed. I see photographers with smaller followings fail miserably at this and they wonder why they don't see engagement or growth. Not engaging with your fans shows them you only care about yourself. TAKE THE TIME to show them you appreciate them!
|
Author Lance Reis
Most Popular Articles
27 Posing ideas for women
27 Posing Ideas for Men Location Scouting 33 Must See Castles in the US How to grow your Instagram Low Light Photography Tips Photography for Beginners Free Resources Take Better Cosplay Photos Categories
All

|
 RSS Feed